
Summary of Contents for Lanyu Hobby Decathlon TW-747-5
- Page 1 Decathlon TW-747-5 Wingspan: 1400mm(55. 12") Length 1007mm(39. 64 ") Flying Weight 1600g Battery 11.1V 2200mAh 25C Motor 4023/1000KV 40A SB Brushless ESC Radio 2.4Ghz 6-CH Range 600m...
-
Page 2: Safety Precautions
L>11VYV 1./0l1l1Y Safety Precautions Your airplane should not be considered a toy, but rather a sophisticated working model that functions very much like a full - size airplane. Because of its performance capabilities, the plane, if not assembled and operated correctly, could possibly cause injury to yourself or spectators and damage property. - Page 3 1. Install all the control horns using screws (PB2.0*12).
- Page 4 2.Install the servo arms onto the servos using screws (PA2.0*6) 3. Insert the tailwheel assembly into the corresponding holes in the tail section. 4. Install the fin/rudder onto the the tailplane. 5. Put the fin and tailplane assembly onto the fuselage and insert the tailwheel wire into the plastic tailwheel support.
- Page 5 6. Fix the tail using screws (PA3.0*12). 7. Insert the metal wing joiner into the main wing and connect the main wings together. 8. Install the main wings onto the fuselage using 4 x (PM4.0*40) screws. 9. Install the wing struts as shown in the picture.
- Page 6 10. Fix the struts to the main wings using screws (PB2.6*8) 11. Install the wheels to the landing gear as shown in the picture (PWA2.0*8). 12. Place the landing gear in the slot on the underside of the fuselage. Attach the landing gear cover and the landing gear to the fuselage using these screws.
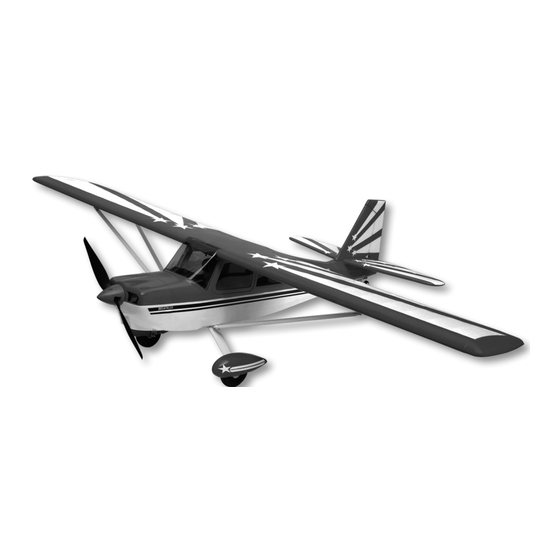
- Page 7 13. Install the spinner as shown in the picture. Use the screws provided to hold the spinner cone in place (PA2.6*8). 14. The full plane assembled as shown in the picture.
- Page 8 Rudder NOT Rudder properly properly centered centered...
- Page 10 64±5...
- Page 13 Radio instruction...
Need help?
Do you have a question about the Decathlon TW-747-5 and is the answer not in the manual?
Questions and answers