Table of Contents
Advertisement
Available languages
Available languages
AC
INSTALLATION.
Stay cool.
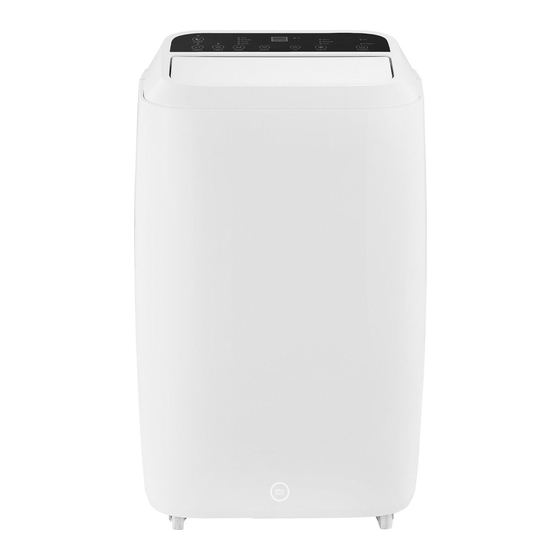
1
2
3
In the box
control panel,
air exhaust,
1
2
3
water drain hose connector,
drain hose exhaust for hot air,
5
6
air supply,
storage for power cord and connector,
7
8
4
5
6
8
9
front panel,
air supply,
4
water drain.
9
7
window beam ,
10
you want to place the hot air drain hose in the outer wall)
air conditioner connector,
14
10 minutes
10
11
13
14
drain hose for hot air,
closure for wall exhaust (only use it if
11
12
remote.
15
1 person
4 beads of sweat
12
15
window beam connector,
13
Advertisement
Chapters
Table of Contents

Summary of Contents for BlueBuilt AC12010
- Page 1 INSTALLATION. Stay cool. 10 minutes 1 person 4 beads of sweat In the box control panel, air exhaust, front panel, air supply, window beam , drain hose for hot air, closure for wall exhaust (only use it if water drain hose connector, drain hose exhaust for hot air, you want to place the hot air drain hose in the outer wall) window beam connector,...
- Page 2 CHECK. PLACE AIR CONDITIONER PLACE WINDOW BEAM CONNECT HOSE 1 You’re 50% there. Always keep the air conditioner in an upright position. Didn’t manage to keep it upright after all? Wait 2 hours before use. Put the air conditioner in an upright position Open the sliding window so there’s enough Extend the drain hose by about 10cm on...
- Page 3 INSTALLER UN CLIMATISEUR. Garde la tête froide. 10 minutes 1 personne 4 gouttes de sueur Dans la boîte panneau de contrôle, évacuation d’air, panneau avant, entrée d’air, kit fenêtre, tuyau d’évacuation d’air chaud, clapet pour adaptateur mural (à connexion pour le tuyau d’évacuation d’eau, ouverture pour le tuyau d’évacuation utiliser uniquement si vous souhaitez faire passer le tuyau d’évacuation d’air chaud à...
- Page 4 CHECK. INSTALLER LE CLIMATISEUR PLACER LE KIT FENÊTRE RACCORDER LE TUYAU 1 Ça, c’est fait. Gardez toujours le climatiseur à la verticale. Vous avez placé le climatiseur en position horizontale ou inclinée ? Attendez 2 heures avant de l’utiliser. Installez le climatiseur à la verticale sur une Ouvrez la fenêtre coulissante afin de créer Étirez le tuyau d’évacuation d’environ...
- Page 5 AIRCO INSTALLEREN. Houd je hoofd koel. 10 minuten 1 persoon 4 zweetdruppels In de doos Bedieningspaneel, luchtuitlaat, voorpaneel, luchttoevoer, Raambalk, afvoerslang warme lucht, afsluiting voor geveldoorvoer (alleen aansluiting waterafvoerslang, aansluiting afvoerslang warme lucht, te gebruiken als je de afvoerslang van warme lucht in de buitenmuur wilt plaatsen) luchttoevoer, opbergplaats elektrokabel en stekker, wateraftappunt.
- Page 6 AIRCO PLAATSEN RAAMBALK PLAATSEN SLANG AANSLUITEN 1 Houd de airco altijd rechtop. Toch schuin gestaan/gelegen? Wacht 2 uur tot gebruik. Trek de afvoerslang aan beide kanten Zet de airco rechtop en op een stevige en Open het schuifraam zodat er voldoende ongeveer 10 cm uit.
- Page 7 CBL1170/CBL1171 BlueBuilt Portable Air Conditioner...
- Page 9 This machine is filled with Propane gas R290. The manufacturer’s instructions for its use and repair must be followed at all times! Carefully read this manual in its entirety before use. Don’t install, use, or store the machine in a room smaller than 10m².
-
Page 10: Table Of Contents
CONTENTS. Table shaped. Technical information Safety instructions How it works Various settings Setting a timer Oscillation Sleep mode Water drainage Cleaning & Maintenance Cleaning the casing Cleaning the filters End-of-season cleaning Troubleshooting... -
Page 11: Technical Information
TECHNICAL INFORMATION. T3(N[CA|_. Model BlueBuilt BlueBuilt AC12010 AC14010 Portable air Portable air conditioner conditioner 12,000BTU/hour - 14,000BTU/hour - Cooling capacity 3500 Watts 4000 Watts Max. power 1345 Watts 1538 Watts Max. air movement 450m³/hour Connection voltage 220–240V/50Hz Noise level 65dB(A) -
Page 12: Safety Instructions
SAFETY INSTRUCTIONS. Don’t run. • Only use the machine indoors. • Make sure the air conditioner is always in an upright position, even when you’re moving it. Did the machine fall over? Put the air conditioner in an upright position and wait at least 2 hours before turning it on again. - Page 13 • Turn off the machine immediately when you hear a strange noise, smell something, or see smoke. • Have you discovered damage to the air conditioner while you were unpacking it? Send it back or have it repaired, but don’t use the machine.
-
Page 14: How It Works
HOW IT WORKS. Start at step 1. The air conditioner has various settings, which you can select on the air conditioner’s display or with the included remote. Various settings The air conditioner is equipped with various settings to cool the room. Use the MODE button to switch between the available settings. - Page 15 Cooling Set the desired temperature, and the cooling mode will do the rest. Press the MODE button until the COOL light lights up. Set the desired temperature with th DOWN and UP buttons. Set the temperature between 16 and 31°C. Note: in this mode, the air conditioner automatically turns off at times to prevent the cooling element from freezing.
-
Page 16: Setting A Timer
Ventilating Press the MODE button until the FAN light lights up. Set the desired fan speed with the SPEED button. Setting a timer A timer allows you to have the air conditioner turn on or off at a different time. Check the display to see for how long the air conditioner stays on or after how many hours it’ll automatically turn on. -
Page 17: Oscillation
Oscillation Oscillation means there’s a regular rhythm in the air flow. The cold air near the ground and the hot air near the ceiling are mixed. The advantage of this is that it reduces the risk of localized damp patches, thereby also reducing the risk of mold. - Page 18 Emptying the water tank If the light is on, it’s time to empty the water tank. Turn off the air conditioner. Remove the connector from the socket. Put a container underneath the machine to collect the water. Empty the water tank by removing the lid. Water drainage when dehumidifying When dehumidifying, it extracts a lot more water from the air.
-
Page 19: Cleaning The Casing
CLEANING & MAINTENANCE. Neatly done. Always turn off the machine and remove the connector from the socket before cleaning or doing maintenance on the machine. Cleaning the casing • Clean the exterior of the air conditioner with a soft, damp cloth. •... -
Page 20: End-Of-Season Cleaning
End-of-season cleaning Is the sun setting earlier again and is the temperature no longer causing you to sweat? If so, you probably no longer need the air conditioner. Time to put it away. To make sure you can use the air conditioner again without any problems next summer, the way you store the air conditioner is very important. -
Page 21: Troubleshooting
TROUBLESHOOTING. Aaaand it’s gone. Problem Check the following The machine stops The machine is equipped with overheating working 1 protection that turns off the machine when it gets too hot. Remove the connector from the socket. Wait for 30 minutes before turning it on again. Find out the cause of overheating: •... - Page 22 Problem Check the following The machine won't • Is the connector plugged in the socket? start when I press • Is the ground fault circuit interrupter on? the ON/OFF button • Is there a power outage in the neighborhood? • Empty the water tank, just to be sure. •...
- Page 23 Problem Check the following Error message The temperature sensor is broken. Have it Code E0 replaced. The machine also works without temperature setting. Error message The water tank is full. Turn off the machine and Code E2 empty it manually. Turn it on again afterwards. Need help? Call 010 798 89 99 or visit Coolblue.nl/en/customerservice...
- Page 24 Disposal In the EU, this symbol indicates that this product may not be disposed of as ordinary household waste. Old equipment contains valuable materials that can and should be recycled to prevent any adverse effects to health and the environment caused by unregulated waste collection.
- Page 25 CE declaration Coolblue BV, Weena 664, 3012 CN Rotterdam hereby declares that the following products: BlueBuilt PORTABLE air conditioner known under the brand BlueBuilt, type AC12010 & AC14010 meet the requirements of the standards below: LVD 2014/35/EU: EMC 2014/30/EU: EN 60335-2-40:2003+A11:2004+A12:2005...
- Page 26 BACKSIDE. Stop staring.
- Page 27 CBL1170/CBL1171 Climatiseur Mobile BlueBuilt...
- Page 29 Cet appareil contient du gaz propane R290. Les consignes du fabricant concernant l’utilisation et la réparation de l’appareil doivent être strictement respectées ! Lisez attentivement ce mode d’emploi dans son intégralité avant utilisation. Ne pas installer, placer ou utiliser cet appareil dans un espace plus petit que 10 m².
- Page 30 CONTENU. Y’a tout ce qu’il faut. Données techniques Consignes de sécurité Comment ça marche Modes Minuteur Ondulation Mode veille Évacuation d’eau Nettoyage & Entretien Nettoyage du boîtier Nettoyage des filtres Nettoyage de fin de saison Dépannage...
-
Page 31: Données Techniques
DONNÉES TECHNIQUES. T3[|-|NiK3. Modèle Climatiseur Climatiseur Mobile Mobile BlueBuilt BlueBuilt AC12010 AC14010 Capacité de 12 000 BTU /heure - 14 000 BTU / heure refroidissement 3500 Watts - 4000 Watts Consommation 1345 Watts 1538 Watts Débit d’air max. 450 m³ / heure Alimentation 220–240 V / 50 Hz... -
Page 32: Consignes De Sécurité
CONSIGNES DE SÉCURITÉ. Restez calme. • Utilisez uniquement l’appareil à l’intérieur de la maison. • Assurez-vous que le climatiseur soit toujours en position verticale, même lorsque vous le déplacez. L’appareil est tombé ? Remettez-le en position verticale et attendez au minimum 2 heures avant de le rallumer. - Page 33 • N’utilisez pas l’appareil dans un environnement humide, comme une salle de bains. Évitez également les éclaboussures sur ou dans l’appareil. • Désactivez immédiatement l’appareil si vous entendez des bruits bizarres, sentez quelque chose ou voyez de la fumée. • Vous constatez des dommages lors du déballage du climatiseur ? Retournez-le nous ou faites-le réparer, mais ne l’utilisez pas.
-
Page 34: Comment Ça Marche
COMMENT ÇA MARCHE. Commencez par l’étape 1. Le climatiseur dispose de différents modes ; vous pouvez les régler sur l’écran ou grâce à la télécommande incluse. Modes Le climatiseur dispose de plusieurs modes pour refroidir un espace. Utilisez le bouton MODE pour basculer entre les modes disponibles. Refroidissement automatique Activez un programme automatique pour refroidir un espace. - Page 35 Refroidir Réglez la température souhaitée, et le mode refroidissement fera le reste. Appuyez sur le bouton MODE jusqu’à ce que le voyant COOL s’allume. Réglez la température souhaitée avec les boutons DOWN et UP. Réglez la température entre 16 et 31 °C. Attention : lorsque ce mode est activé, le climatiseur peut parfois s’éteindre pour éviter que l’élément de refroidissement ne gèle.
-
Page 36: Minuteur
Ventiler Appuyez sur le bouton MODE jusqu’à ce que le voyant FAN s’allume. Réglez la vitesse de ventilation souhaitée avec le bouton SPEED. Minuteur Grâce au minuteur, il est possible de régler l’activation et la désactivation du climatiseur. Consultez l’écran pour savoir combien de temps le climatiseur reste allumé... -
Page 37: Ondulation
Ondulation L’ondulation implique que le climatiseur fasse circuler l’air, de sorte que l’air froid du sol et l’air chaud près du plafond se mélangent mieux. L’avantage de cette technique est qu’elle réduit le risque de voir apparaître des taches d’humidité et donc des moisissures. Appuyez sur le bouton SWING pour faire onduler le clapet. - Page 38 Vider le réservoir d’eau Le voyant s’allume lorsqu’il est temps de vider le réservoir d’eau. Éteignez le climatiseur. Retirez la fiche de la prise. Placez un bac sous l’appareil pour recueillir l’eau. Videz le réservoir d’eau en dévissant le bouchon. Évacuer l’eau pendant la déshumidification Lors de la déshumidification, une plus grande quantité...
-
Page 39: Nettoyage Du Boîtier
NETTOYAGE & ENTRETIEN. C’est du propre. Avant de commencer l’entretien ou le nettoyage, éteignez toujours l’appareil et retirez la fiche de la prise murale. Nettoyage du boîtier • Nettoyez l’extérieur du climatiseur avec un chiffon doux et humide. • Évitez que de l’eau ne pénètre dans l’appareil. •... -
Page 40: Nettoyage De Fin De Saison
Nettoyage de fin de saison Le soleil se couche plus tôt et la température ne vous fait plus suer ? Il est alors temps de ranger votre climatiseur. Afin d’être sûr d’avoir un climatiseur en état de marche l’été prochain, il est important de ranger votre appareil de manière optimale. -
Page 41: Dépannage
DÉPANNAGE. Oui je l’ai éteint et rallumé oui. Problème Contrôlez les choses suivantes L’appareil s’éteint L’appareil dispose d’une sécurité anti-surchauffe tout seul 1 qui désactive l’appareil lorsqu’il surchauffe. Retirez la fiche de la prise. Attendez 30 minutes avant de le rallumer. Cherchez la cause de la surchauffe : •... - Page 42 Problème Contrôlez les choses suivantes L’appareil ne • La fiche est-elle branchée sur une prise ? démarre pas • Le disjoncteur est-il allumé ? lorsque j’appuie sur le bouton • Y a-t-il une panne de courant dans le quartier? ON/OFF •...
- Page 43 Problème Contrôlez les choses suivantes L’appareil fait du La surface sur laquelle est posée la machine est- bruit elle plane et solide ? La circulation du liquide de refroidissement fait un peu de bruit. C’est normal. Message d'erreur Le capteur de température est cassé. Remplacez- Code E0 le.
- Page 44 Élimination Au sein de l’UE, ce symbole indique que ce produit ne peut être jeté avec les déchets ménagers ordinaires. Les anciens appareils peuvent contenir des matériaux précieux, qui doivent être réutilisés pour ne pas porter atteinte à l’environnement et à la santé par une collecte incontrôlée.
- Page 45 Déclare par la présente : Coolblue BV. , Weena 664, 3012 CN Rotterdam que les produits ci-dessous : Climatiseur Mobile BlueBluilt connus sous la marque BlueBuilt, type AC12010 & AC14010 se conforment aux conditions des normes ci-dessous : LVD 2014/35/EU: EMC 2014/30/EU: EN 60335-2-40:2003+A11:2004+A12:2005...
- Page 46 FACE ARRIÈRE. Retourner avant utilisation.
- Page 47 CBL1170/CBL1171 BlueBuilt Mobiele Airconditioner...
- Page 49 Dit apparaat is gevuld met Propaangas R290. De voorschriften van de fabrikant aangaande gebruik en reparatie dienen absoluut opgevolgd te worden! Lees voor gebruik deze gebruiksaanwijzing zorgvuldig en geheel door. Installeer, gebruik of bewaar het apparaat niet in een ruimte, kleiner dan 10m².
- Page 50 INHOUD. Niet in steen. Technische gegevens Veiligheidsinstructies Hoe het werkt Verschillende standen Timer zetten Zwenken Slaapmodus Water afvoeren Onderhoud Reiniging van omkasting Reiniging filters Einde seizoen-reiniging Probleemoplossing...
- Page 51 TECHNISCHE GEGEVENS. T3[|-|nisCh. Model BlueBuilt BlueBuilt AC12010 AC14010 Mobiele Mobiele airconditioner airconditioner 12000 BTU/uur - 14000 BTU/uur - Koelcapaciteit 3500 Watt 4000 Watt Max. stroomverbruik 1345 Watt 1538 Watt Max. luchtverplaatsing 450 m³ / uur Aansluitspanning 220–240V / 50Hz Geluidsniveau...
- Page 52 VEILIGHEIDSINSTRUCTIES. Niet rennen. • Gebruik het apparaat alleen binnenshuis. • Zorg dat de airco altijd rechtop staat, ook als je ‘m verplaatst. Is het apparaat toch omgevallen? Zet de airco dan rechtop en wacht minimaal 2 uur voor je ‘m weer aan zet. •...
- Page 53 • Schakel het apparaat meteen uit wanneer je vreemde geluiden hoort, iets ruikt of rook ziet. • Zie je bij het uitpakken schade aan de airco? Stuur deze dan terug of laat ‘m repareren maar gebruik het apparaat niet. • Maak het koelcircuit nooit kapot. Hier zit namelijk een brandbaar koelmiddel ‘Propaan’...
- Page 54 HOE HET WERKT. Begin bij stap 1. De airco heeft verschillende standen, deze stel je in op het display van de airco óf via de meegeleverde afstandsbediening. Verschillende standen De airco bevat verschillende standen om de ruimte te koelen. Gebruik de MODE knop om te wisselen tussen de beschikbare standen.
- Page 55 Koelen Stel de gewenste temperatuur in, en de koelstand doet de rest. Druk de knop MODE in tot het lampje COOL oplicht. Stel de gewenste temperatuur in met de knoppen DOWN en UP. De temperatuur stel je in tussen de 16 en 31°C. Let op: in deze stand slaat de airco soms af om te voorkomen dat het koelelement bevriest.
- Page 56 Ventileren Druk de knop MODE in tot het lampje FAN oplicht. Stel de gewenste windsnelheid in met de knop SPEED. Timer zetten Via een timer is het mogelijk in te stellen dat de airco op een ander moment aan of juist uit gaat. Kijk op het display hoe lang de airco nog aan staat of over hoeveel uur deze automatisch inschakelt.
- Page 57 Zwenken Zwenken houdt in dat je beweging brengt in de luchtstroom. De koude lucht op de grond en de warme lucht bij het plafond vermengen zich dan beter. Het voordeel hiervan is dat de kans op plaatselijke vochtplekken kleiner wordt en dus ook de kans op schimmels afneemt.
- Page 58 Waterreservoir legen Brandt het lampje, dan is het tijd om het waterreservoir te legen. Schakel de airco uit. Haal de stekker uit het stopcontact. Zet een bakje onder het apparaat om het water op te vangen. Leeg de watertank door het dopje los te draaien. Water afvoeren tijdens ontvochtigen Bij ontvochtigen wordt meer water aan de lucht onttrokken.
- Page 59 ONDERHOUD. Met schoon genoegen. Schakel het apparaat altijd eerst uit en haal de stekker uit het stopcontact, voordat je schoonmaak- of onderhoudswerkzaamheden uit gaat voeren. Reiniging van omkasting • Maak de buitenkant van de airco schoon met een zachte, vochtige doek. •...
- Page 60 Einde seizoen-reiniging Gaat de zon eerder onder en zorgt de temperatuur niet meer standaard voor zweetdruppels op je voorhoofd? Dan heb je de airco waarschijnlijk niet meer nodig. Tijd om ‘m op te bergen dus. Om ervoor te zorgen dat je volgende zomer de airco weer zonder problemen gebruikt, is de manier waarop je de airco opbergt belangrijk.
- Page 61 PROBLEEMOPLOSSING. De stekker zit er in ja. Probleem Controleer het volgende Het apparaat valt Het apparaat is voorzien van een uit 1 oververhittingsbeveiliging die het apparaat uitschakelt wanneer het oververhit raakt. Haal de stekker uit het stopcontact. Wacht 30 minuten voordat je hem weer aanzet. Onderzoek de oorzaak van de oververhitting: •...
- Page 62 Probleem Controleer het volgende • Zit de stekker in het stopcontact? Het apparaat start niet als ik op de • Is de aardlekschakelaar ingeschakeld? AAN/UIT-knop • Is er een stroomstoring in de buurt? druk • Leeg het waterreservoir voor de zekerheid. •...
- Page 63 Probleem Controleer het volgende Foutmelding Code De temperatuursensor is kapot. Laat hem vervangen. Het apparaat werkt ook zonder temperatuurinstelling. Foutmelding Code Het waterreservoir zit vol. Schakel het apparaat uit en leeg hem handmatig. Schakel hem vervolgens opnieuw in. Kom je er niet uit? Bel 010 798 89 99 of kijk op Coolblue.nl/klantenservice...
- Page 64 Verwijdering Binnen de EU betekent dit symbool dat dit product niet met het normale huishoudelijke afval mag worden afgevoerd. Afgedankte apparaten bevatten waardevolle materialen die hergebruikt kunnen en moeten worden, om het milieu en de gezondheid niet te schaden door ongereguleerde afvalinzameling. Breng afgedankte apparatuur daarom naar een daarvoor aangewezen inzamelpunt of neem contact op met het bedrijf waar je het apparaat gekocht hebt.
- Page 65 Hierbij verklaart: Coolblue BV. , Weena 664, 3012 CN Rotterdam dat de onderstaande producten BlueBuilt MOBIELE airconditioner bekend onder het merk BlueBuilt, type AC12010 & AC14010 voldoen aan de eisen van de onderstaande normen: LVD 2014/35/EU: EMC 2014/30/EU: EN 60335-2-40:2003+A11:2004+A12:2005...
- Page 66 ACHTERKANT. Omdraaien voor gebruik.
Need help?
Do you have a question about the AC12010 and is the answer not in the manual?
Questions and answers