
Summary of Contents for RealSimulator TUSBA TQS R2
- Page 1 ELECTRONICA, MECANICA Y CONTROL, S.A. RealSimulator User Guide TUSBA TQS R2 Throttle USB Adapter...
- Page 2 TUSBA TQS R2 - User Guide v1.07.1 EMYCSA - RealSimulator Avda. Manoteras, 22 – nave 42 28050 – Madrid (Spain) Phone: (+34) 91 383 83 25 Email: technic@realsimulator.com...
-
Page 3: Table Of Contents
DX Buttons Revision History I have just received my RealSimulator device and I want to install it, but I do not find the drivers in anyplace. I can’t update the firmware of my device with DCC. I want to install a new version of DCC or RS_HID_DEV_TOOL, but I cannot uninstall the older one. -
Page 4: Overview
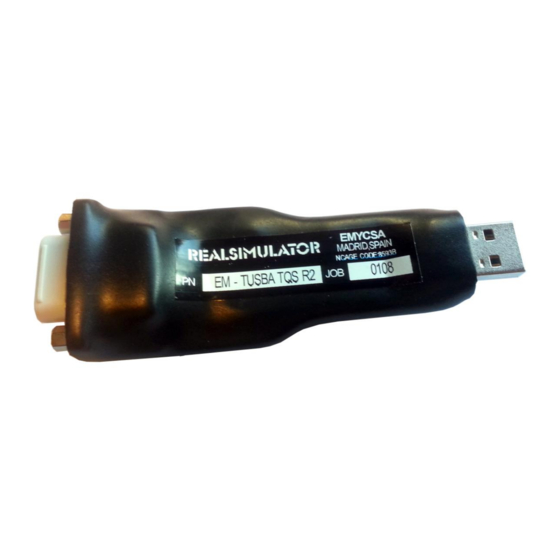
Overview EMYCSA RealSimulator Date: 28/06/2018 Version: 1.07 PICTURE DESCRIPTION T.USB.A is the acronym for Throttle USB Adapter. This special version has been designed for the F16 Cougar TQS and let you connect your loved TQS to any standard USB socket. - Page 5 TUSBA R2. If you are interested in TUSBA R1 you can see its specific information in the product’s website: (http://www.realsimulator.com/html/tusba.html), Beside the above characteristics, the product is supplied with a firmware update tool (DCC) to install new versions of firmware and a GUI application (RS_HID_DEV_TOOL) to configure and calibrate the device.
-
Page 6: Package Content And Technical Data
Package Content and Technical Data EMYCSA RealSimulator Date: 28/06/2018 Version: 1.07 PICTURE DESCRIPTION Package content TUSBA is supplied as a plug and play device with no necessary hardware installation or drivers. The package, showed in the before picture, contains the following components: 1. - Page 7 throttle area. 16 additional DX buttons linked to analog variables. Compliance with Windows XP, W7 or other higher MS operating system, x32 and x64 versions. Firmware upgradeable. Weight: 60 gr. 7 / 48...
-
Page 8: First Connection
First Connection EMYCSA RealSimulator Date: 28/06/2018 Version: 1.07 PICTURE DESCRIPTION The first time that you connect your TUSBA in your computer, you will take notice about really your TUSBA are several devices living in the same hardware. In fact, inside your TUSBA there are: A Boot system, to allow you to update TUSBA with new firmware. - Page 9 input device will be showed in red (have a look to the next picture). And as soon as the Boot goes out a USB Composite Device with 3 USB Input Devices will start looking for drivers. As these HID devices will not go out from your system, after a few second or minutes you will see as your MS OS will found the drivers and install them in your computer and the USB Composite device and the 3 USB Input devices will be tick in green.
-
Page 10: Tools Installation
Both tools can be downloaded from the download’s website inside the same package. The package also includes the RealSimulator device metadata files, latest firmwares and the product User Guide. To download the tools, please, go to the RealSimulator download’s website by clicking the next hyperlink: http://www.realsimulator.com/html/download.html and download the latest version of RS_TOOLS and save it where you prefer. - Page 11 Any case, you should have a window like this one. where setup_RS_Tools_V1_01.exe is the tools installer. To install it, please, run the file with a double click on the file name. After some seconds extracting and decompressing the package the installation wizard will launch, then select Next to continue.
- Page 12 If you want to install all program features (DCC, RS_HID_DEV_TOOL, Metadata files, firmwares and User Guide) select the Complete setup type and click Next to continue. Or select Custom if you want to choose the features to install and click Next to continue.
- Page 13 If the User Account Control window appears click the Yes button to continue. The installation of RS_TOOLS_V1_01 may take several minutes to complete. Wait until the wizard finishes the installation and click Finish. The installation is now finished, if you have connected to the PC your flight controls with the TUSBA kit installed you can see a new device image in the Devices and Printers window.
- Page 14 Finally, if you press the windows START button and look the All App section in the R letter you will find in the Realsimulator folder shortcuts to the DCC and RS_HID_DEV_TOOL programs, RealSimulator devices User Guide and the FSSB R3...
- Page 15 BluePrint. As general information, here it is the default directories where the installer saves programs: C:\Program Files (x86)\RealSimulator Code\DCC C:\Program Files (x86)\RealSimulator Code\RS_HID_DEV_TOOL And, the User Guide, Metadata, Firmware and BluePrint files on: %APPDATA%\Realsimulator Data\ 15 / 48...
-
Page 16: Firmware Update
To start the DCC program, launch by double click the DCC desktop icon or click in the windows START button and select All Program > Realsimulator > DCC > Launch DCC.exe. If the User Account Control window appears click YES to continue. - Page 17 Instructions to update the device. Unplug the device from USB extension cable supplied or computer port. As you can see in the next picture, Status groupbox shows a light device image, it is normal, this image will only be in normal colour when the device is running the bootloader program, in other cases, with the device unplugged or in normal operation the image will be light.
- Page 18 Second, with the previous message in green, the following message Connect your TUSBA R2 will blink in red. To start the updating we must plug in the previously unplugged device, which will launch the bootloader for some seconds and DCC program will start the communications with the device sending the new firmware.
- Page 19 Click Yes to exit. 19 / 48...
-
Page 20: Tusba Set Up
Version: 1.07 PICTURE DESCRIPTION TUSBA, like all devices manufactured by RealSimulator that must be connected with customer’s hardware, is shipped without configuring, it is necessary to do this labour by himself when receives the device. RealSimulator has developed a tool called RS_HID_DEV_TOOL to facilitate this action;... - Page 21 RS_HID_DEV_TOOL desktop icon or click in the Windows START button and select . If All Program > Realsimulator > RS_HID_DEV_TOOL > Launch RS_HID_DEV_TOOL.exe the User Account Control window appears, click YES to continue. Select the tab labelled TUSBA R2 and you should see a window like this, where we have identified with numbers the different information and configuration areas.
-
Page 22: Pairing
actions will be supported. 2. Pairing button. Below you will find a complete explanation about its operation. 3. Area with buttons to calibrate individually the analog axes and the status of the DirectX buttons. Buttons are grouped by functions and are identified by its name and DX number assigned. -
Page 23: Axes Calibration Overview
A new window will appear to inform us about moving all analog axes to maximum and minimum positions as comment above. It is very important to make this phase well for a future correct operation; we suggest maintaining the end positions for some seconds to guarantee TUSBA identifies correctly end positions. - Page 24 Calibration Manual Dead Throttle Positions Minimum, Maximum and buttons Zone buttons icons Dead Zone icons Axes Inversion Axes DX Axes Raw Checkbox measures measures Axes Raw Values groupbox shows the internal measures of each TUSBA analog axis, numerically and graphically through a green progress bar with the numeric value in the centre.
-
Page 25: Calibration Of An Axis With No Central Position
because the dead zone area is not applied to the measure showed. To see the “normally raw” values that TUSBA sends Windows to generate the DX values is necessary to open the Game Controllers properties window of device and enter in the Calibration wizard. -
Page 26: Throttle Calibration
Following the instructions, turn the Range rotary to maximum and minimum positions, and finally click OK. Maximum Position Minimum Position After closing the window, RS_HID_DEV_TOOL will save the new calibration values for Windows and will relocate the red icons of maximum and minimum to the new positions, as we can see here. - Page 27 In this case we do not have a dedicated button to calibrate and get the minimum and maximum values of axis, here we have two dedicated buttons, one for minimum (Min) and another for maximum (Max). So, we will start clicking on the Min button. And a new small window will appear with instructions to set the Min position.
- Page 28 And a new small window will appear with instructions to set the Max position. Following the instructions, move your throttle forward until the extreme position and click OK. And, as we can see in the before images we have set the “Mn icon” for the maximum position.
- Page 29 Now we will see how to calibrate the three auxiliary axes of throttle: Idle, Mil and Afterburner. Before to start, we must to know that there is a button to enable/disable the auxiliary throttle axes; you can change the status by click on it. If the button is in green the auxiliary axes are enables and if it is in red, the axes are disables and the measures are “0”.
- Page 30 Following the instructions, put your throttle in the Idle position, for that, move your throttle backward until the extreme position and next, move the throttle forward until the first hardware detent and click OK. Now, to define the Afterburner position, click the Aft button with the mouse left, as the Idle button, the mouse right has other function assigned.
-
Page 31: Calibration Of An Axis With Central Position
To finish, verify the configuration/calibration of auxiliary axes is well done, as we can see in the next table. Calibration of an axis with central position Now we are going to show you how to calibrate one axis with central position, the Cursor, which has two axes, X and Y. - Page 32 Now move the stick to the right to achieve the minimum value in the raw measure, let the cursor back to centre and release it. Click OK to continue. Now we will repeat the process with the Y axis, moving the cursor forward to achieve the maximum value and backward to the achieve de minimum.
- Page 33 hardware is very used and has much play in the centre, then the dead zones calculated are not enough and we could need to adjust them manually. If when the cursor comes back to the central position their X or Y positions are out the dead zone area, we can be absolutely sure it is our case and we will need to repeat several times the movement and release of cursor, and get visually the new desired dead zone areas to adjust them manually how we explain below.
-
Page 34: Manually Configure Raw Axes
CANCEL to restore the previous adjust. Manually configure Raw Axes From v1.09 of RealSimulator HID Device Tool is possible see and adjust manually each parameter associated to the raw axes progress bars, as Max, Min, Idle, Aft and Dead Zones. - Page 35 To finish the operation, click on the OK button to accept the written value. If the value is correct the window will close and the parameter and icon position in the progress bar will be modified. If the value written is incorrect an ERROR window will be showed to inform about the error and the operation will be cancelled after accept the error.
-
Page 36: Dx Buttons
DX Buttons Normally DX buttons show the status of buttons or switches when they are pressed or released, but TUSBA has been designed to show until 22 DX buttons more, all them can be enabled or disabled to avoid configuration problems in game setup. As you can see below, every button is identified with its name and the DX number assigned;... - Page 37 b) 3 additional DX buttons assigned to the central position of Comms, Dogfight and Speed Brakes switches. These buttons can be enabled and disabled with the left mouse button by clicking in the button. If the switch is released in the center position and the button is enabled, the button lights in green.
- Page 38 ENABLE/DISABLE JOINTLY BUTTONS If you want to enable the three buttons at the same time, click with the left mouse button the SET button to enable them. After pressing the button, it changes to RESET. If you need to disable the three buttons press the RESET button.
- Page 39 Now, if the Range is greater than 2005 the button status is ON. And if it is lower is OFF. If we wanted to invert the button status, that is to say, button active when is lower than the 50%, we would need to change the icon of Active High/Low to active low by clicking it.
-
Page 40: Revision History
Revision History EMYCSA RealSimulator Date: 28/06/2018 Version: 1.07 PICTURE DESCRIPTION Changes from v1.07 (01/03/2016) to v1.07.1 Revision Page ● Added Tools Installation chapter and removed DCC Installation and RS_HID_DEV_TOOL Installation chapters. ..…….………………………………….. ● Expanded information about new functionalities in the Axes Raw Values groupbox. -
Page 41: Faq
FAQ Links: I have just received my RealSimulator device and I want to install it, but I do not find the drivers in anyplace. I can’t update the firmware of my device with DCC. -
Page 42: I Have Just Received My Realsimulator Device And I Want To Install It, But I Do Not Find The Drivers In Anyplace
I have just received my RealSimulator device and I want to install it, but I do not find the drivers in anyplace. Don’t worry, no drivers are necessary, FUSBA uses standard HID drivers included in your installed operating system. No matter if x32 or x64, XP, W7 or other higher MS operating system. -
Page 43: How To Integrate Tusba Dx Buttons In Falcon Bms
To facilitate the work, we give you an example code ready to “cut & paste” in your .key file, although it is possible you need to modify it as you will see below. #=================================================================== #============= RealSimulator TUSBA DX buttons =============== #=================================================================== SimDoNothing 0 -1 -2 0 0x0 -1 "COMMS Switch OFF"... -
Page 44: My Cursor Is In The Central Position But Their Associated Dx Measures Are Not Centred
Game Controllers window. As you can see, in this example TUSBA is the 4 device, so you will need to add to each number “96”, and the definitive code to paste will be: #=================================================================== #============= RealSimulator TUSBA DX buttons =============== #=================================================================== SimDoNothing 96 -1 -2 0 0x0 -1 "COMMS Switch OFF"... -
Page 45: When I Move An Analog Axis, I Have Spikes In The Measure
When I move an analog axis, I have spikes in the measure. Analog measures in all RealSimulator devices are digitally filtered, so if you have spikes in measures of one analog axis of your device, the problem is the potentiometer and you will need to change it, so you must look for a spare part. -
Page 46: My Device Has Suddenly Stopped Working After Connecting It Or Turning On The Computer
RS_HID_DEV_TOOL lights in green, TUSBA is well and the problem is in the hardware, if not the problem is in TUSBA and you need to send it to RealSimulator technical service to repair. COMMON... - Page 47 Click the RS_RUSBA_RandB text controller once to highlight it as shown in the previous image next, click Properties button open RS_RUSBA_RandB properties window; you must have a window as this where you can see the four axes and the four buttons status. You should have a window as next left image with the axes bar graph, but if the system is wrong, you will see an image as right one.
- Page 48 When the device is removed, unplug the device and after some seconds plug again the device and verify if the problem is solved. Usually the problem will be fixed, if not, repeat the procedure. 48 / 48...
Need help?
Do you have a question about the TUSBA TQS R2 and is the answer not in the manual?
Questions and answers