Table of Contents
Advertisement
Quick Links
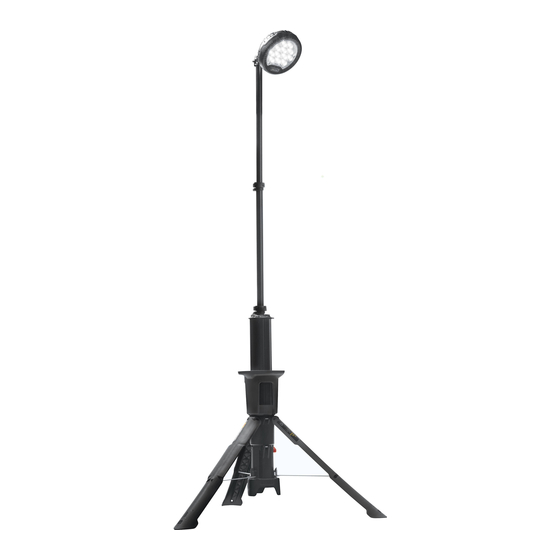
9440
USER MANUAL
CAUTION: PLEASE READ BEFORE USE.
WARNING:
Keep fingers clear of moving parts at all times - failure to comply could result in injury.
Deployment operation
1. To deploy, release the red latch then lift the outer collar of the light head upwards
until all three legs release. (A)
2. Once all three legs are released, push the outer collar downwards until all three legs touch the ground.
3. Once all three legs have touched the ground, while supporting the outer collar, lift the switch
housing upwards until the red latch clicks into place. (B)
Mast operation
1. Release each of the cam clamps and raise the light head until the desired
height is reached. Then re-clamp to hold in place.
2. Rotate the light head to the desired position.
Note: If the product is used in wet conditions, water may be captured at the base of the mast pole.
Turn upside down in order to drain.
Light operation
CAUTION: DO NOT DIRECT LIGHT INTO EYES.
1. Press switch once for full power
2. Press again for medium power
The 9440 RALS features the ability to be used continuously while connected to the charger.
The 9440 will default to the medium power level.
The full power level is not available while connected to the charger.
To select low power, press the switch once more. Press again to switch off.
Bluetooth
Operation
®
The 9440 RALS is equipped with Bluetooth
To download the RALS app, visit the app store/play store and search for 'Pelican RALS'.
Once installed the app icon should appear on your screen.
The Bluetooth
®
is active by default so once you open the app your 9440 RALS should appear under the
'Found' heading as per the following example: 9440B_000001 (the last six digits are your unique
identification number). By clicking on this identification number the app should connect to the
Bluetooth
®
9440 RALS and the identification number should now appear under the 'Connected' heading in the app
screen. You can connect to multiple Bluetooth
TO SWITCH ON EITHER PRESS THE 'ON/OFF' TOGGLE ON THE APP SCREEN OR SLIDE
THE INTENSITY SLIDER TOWARDS THE RIGHT UNTIL YOU REACH YOUR DESIRED LIGHT INTENSITY.
THE APP WILL REMAIN CONNECTED UNTIL YOU EITHER CLOSE THE APP OR GO OUT OF RANGE*.
YOU CAN OVERRIDE THE APP CONTROL BY OPERATING THE 9440 RALS SWITCH IF DESIRED.
*Range varies depending upon the environment in which the RALS is being used.
Storage operation
1. Collapse the mast by releasing the cam clamps one at a time while supporting the weight of the light head.
2. Position the light head upwards then pull the red latch until the base of the product slides down to the floor.
3. Lift the outer collar upwards until level with the light head. Then pull all three legs in using both hands and lift
them over their locking fork at the base while holding the latch in the release position (as per diagram on main body).
Note: Please look closely at the bottom of the legs to understand how they are locked in place - the legs must lift
upwards before they can locate. The latch must be released for the legs to move upwards.
Battery status indication
Green
=
100 - 65% capacity
Yellow
=
65 - 30% capacity
Red
=
30 - 0% capacity
Charging
CAUTION: PLEASE READ BEFORE USE.
USE APPROVED CHARGER ONLY.
1. The charging socket is located at the base of the light.
2. Plug the charger into the electrical outlet.
3. The battery charge level is identified at the battery level indicator next to the power switch.
While charging, the indicator will flash red, yellow, green (depending on the battery level) and will change
to solid green once the charge is complete.
4. To remove, press the latch on the charger plug and pull.
Product care
To ensure maximum product life please observe the following points:
1. Keep moving parts free of foreign objects.
2. Do not stand on product.
3. Avoid use on extreme gradients.
4. Ensure charging dust cap is replaced after charging.
5. Do not use if damaged - contact dealer.
Battery conditioning
It is important that the new battery in this product is given an initial conditioning. The charger should be left connected to the
1.800.561.8187
product after the Green indicator on the charger is permanently on. In this state the battery receives a trickle charge and should be
left connected for 18-24 hours. There will be improvement to the light duration if this is repeated for the first 8-10 charge cycles.
REMOTE AREA LIGHTING SYSTEM
3. Press again for low power
4. Press again to switch off
®
capability and you are able to operate it via the Pelican RALS app.
compatible RALS but only operate one at a time.
®
ONLY USE CHARGER IN DRY ENVIRONMENT.
Remove the dust cap and plug the charger in until it clicks.
www.
PELICAN
information@itm.com
.com
™
A
B
Advertisement
Table of Contents

Related Manuals for Pelican 9440


Summary of Contents for Pelican 9440
- Page 1 The Bluetooth ® is active by default so once you open the app your 9440 RALS should appear under the ‘Found’ heading as per the following example: 9440B_000001 (the last six digits are your unique identification number). By clicking on this identification number the app should connect to the Bluetooth ®...
- Page 2 1.800.561.8187 information@itm.com www. .com...
Need help?
Do you have a question about the 9440 and is the answer not in the manual?
Questions and answers