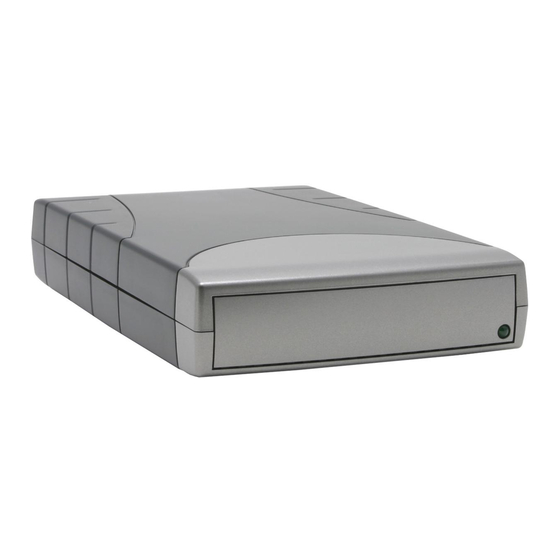
Summary of Contents for ADS Technologies USBX-835
- Page 1 USB 2.0 Hard Drive Kit Manual Convert Your Hard Disk Drive to USB 2.0 User's Guide English, French, German, Spanish North America Support Hours: M-F : 8 am - 5 pm, PST Email : support@adstech.com website : www.adstech.com Tech...
- Page 2 USB 2.0 Hard Drive Kit...
- Page 3 IBM is a registered trademark of the International Business Machines, Inc. ADS is a registered trademark of ADS Technologies Inc. ADS Technologies (ADS) makes no warranty of any kind with regard to this material, including but not limited to, the implied warranties of merchantability and fitness for a particular purpose. The information furnished within this written document is for information purposes only and is subject to change without notice.
-
Page 4: Drive Installation
Drive Installation: STEP 1: Open the USB 2.0 Hard Drive Kit enclosure by removing the top from the kit. Next, set the hard drive’s jumper setting to “MASTER” or single drive setting (Western Digital). For more information about jumper settings, please refer to your hard drive’s documentation. -
Page 5: Software Installation
STEP 4: Reassemble all the pieces of the Hard Drive Kit by replacing the metal support brace into the bottom of the enclosure as well as the top of the enclosure. Now use the other supplied screws to secure your Hard Drive Kit. The physical assembly of your Kit is now complete. - Page 6 Turn the Drive Kit on: Once the software has been properly installed, turn on your drive kit (switch on the back), plug one end of the USB 2.0 cable into the Drive case. With the computer already turned on, plug the remaining end of the cable into your computer’s available USB port.
- Page 7 • If prompted to initialize your drive, go ahead and do so if it is a brand new Hard Drive. For older hard disk drives that already have data in them, initializing erases the data on that drive. The USB 2.0 drive that you just initialized will now be listed in the drives section of the lower right side of the window.
- Page 8 • Check the REMOVABLE box • Assign a DRIVE LETTER. Make sure you assign a drive letter that is not in use. The START and ENDING DRIVE LETTERS should be the same letter also. If the drive letter M was selected for example as the starting drive letter, letter M should also be the ending drive letter.
- Page 9 • Click on “DISK DRIVES” • Double click on the drive that you just plugged in (for example: if you plugged in a MAXTOR, you should click on the MAXTOR) • Click on the “SETTINGS” tab USB 2.0 Hard Drive Kit...
- Page 10 Installation du materiel pour le Hard Drive Kit - FRENCH ETAPE 1: Ouvrez le boîtier de la caisse du Hard Drive Kit et retirez le boîtier hors de la caisse. Ensuite, configurez les cava- liers du Hard Drive Kit pour «...
- Page 11 ETAPE 4: Rassemblez toutes les pièces du Hard Drive Kit replaçant le soutien métal dans le fond du boitier aussi bien que le dessus. Utilisez les autre vis fournis pour fixer de manière sûre votre Hard Drive Kit. L’ensemblement physique de votre kit est maintenant complet.
- Page 12 Hardware installation für das Hard Drive Kit - GERMAN SCHRITT 1: Öffnen Sie das Gehäuse des Hard Drive Kits und entfernen Sie den Deckel. Danach stellen Sie die Jumper auf „MASTER“ oder single drive (Western Digital). Für mehr infor- mation in bezug auf der Konfigu- ration finden Sie in Ihrer Festplat- ten Dokumentation.
- Page 13 SCHRITT Bauen Sie alle Stücke von Hard Drive Kit ,die Metallunterstützung im Grund des Gehäuses genauso wie die Oberfläche wieder zusam- men. Benutzen Sie andere mitge- lieferten Schrauben, um Ihr Hard Drive Kit sichern. Das practische Zusammensetzen Ihres Kit ist jetzt vollständig USB 2.0 Hard Drive Kit...
- Page 14 Instalación del Driver-SPANISH PASO 1: Abra el gabinete USB 2.0 Hard Drive Kit quitando la tapa del kit. A seguir, fije la configuración del jumper del Disco Duro para "MASTER" o si tienes un Disco Duro del Western Digital selec- cione "Single".
- Page 15 PASO 4: Vuelva a montar todos las partes del USB 2.0 Hard Drive Kit substi- tuyendo el soporte del metal en el fondo del gabinete así como la tapa del gabinete. Ahora utilice los otros tornillos provistos para asegurar su USB 2.0 Hard Drive Kit.
-
Page 16: Service And Warranty Information
ADS Technologies, Inc. product or inability to use the product, even if the dealer or ADS Technologies, Inc. has been advised of such liability or other claims. This includes damage to property and, to the extent permitted by law, damages for personal injury. - Page 17 USB 2.0 Hard Drive Kit...
-
Page 18: Technical Support
Technical Support 562.926.4338 North America Support Hours: M-F : 8 am - 5 pm, PST Email : support@adstech.com website : www.adstech.com European Technical Support: +353.61.702042 ADS Technologies North America Office 12627 Hidden Creek Way Cerritos, CA, 90703 Phone: 562.926.1928 Technical Support: 562.926.4338 Technical Support Hours: M-F 8am-5pm PST Fax: 562.926.0518... - Page 19 USB 2.0 Hard Drive Kit...


Need help?
Do you have a question about the USBX-835 and is the answer not in the manual?
Questions and answers