Table of Contents
Advertisement
Quick Links
Franklin Electric Co., Inc.
P. O. Box 12010
Oklahoma City, OK 73157-2010
405.947.2511 • Fax: 405.947.8720
www.LittleGiantPump.com
CustomerService-WTS@fele.com
INTRODUCTION
This instruction sheet provides you with the information required to safely own
and operate your product. Retain these instructions for future reference.
The product you have purchased is of the highest quality workmanship and
material, and has been engineered to give you long and reliable service. This
product has been carefully tested, inspected, and packaged to ensure safe
delivery and operation. Please examine your item(s) carefully to ensure that no
damage occurred during shipment. If damage has occurred, please contact the
place of purchase. They will assist you in replacement or repair, if required.
READ THESE INSTRUCTIONS CAREFULLY BEFORE ATTEMPTING TO
INSTALL, OPERATE, OR SERVICE YOUR PRODUCT. KNOW THE PRODUCT'S
APPLICATION, LIMITATIONS, AND POTENTIAL HAZARDS. PROTECT
YOURSELF AND OTHERS BY OBSERVING ALL SAFETY INFORMATION.
FAILURE TO COMPLY WITH THESE INSTRUCTIONS COULD RESULT IN
PERSONAL INJURY AND/OR PROPERTY DAMAGE!
SAFETY GUIDELINES
1. CAUTION: To reduce risk of electric shock, pull plug before servicing this
pump.
2. This pump is designed to pump water. DO NOT PUMP strong chemicals,
solvents, brines, or thick liquids such as oils or grease.
3. Do not pump flammable liquids such as gasoline or fuel oil.
4. During operation the area around the pump may be covered with water. Take
care when handling the pump. Do not pull pump out of water when running
by the power cord.
5. Do not stand in water when changing fuse.
6. Make sure outlet is grounded.
7. The National Electric Code requires a Ground Fault Circuit Interrupter (GFCI)
be installed in the branch circuit supplying fountain equipment, ponds, etc.
See your local electrical supply dealer for various brands of GFCI devices.
8. This pump's motor housing is filled with a dielectric lubricant at the factory for
optimum motor heat transfer and lifetime lubrication of the bearings. Use of
any other lubricant could cause damage and void the warranty. This lubricant
is non-toxic; however, if it escapes the motor housing, it should be removed
from the surface quickly by placing newspapers or other absorbent material
on the water surface to soak it up, so aquatic life is undisturbed.
ELECTRICAL CONNECTIONS
Your pump is supplied with a 3-prong electrical plug. The third prong is to ground
the pump to prevent possible electrical shock hazard. Do not remove the third
prong from the plug.
A separate branch circuit is recommended. Do not use an extension cord.
1. Clean any debris from the sump pit and set the pump in the center of the pit.
A solid bottom will prevent sand and dirt from clogging the pump.
2. Connect the discharge piping and run it to the nearest sewer or surface outlet.
Use pipe joint compound at all connections. Sump pumps can be piped to
discharge into the house drainage system, to a dry well, splash block, or to a a
storm drain, depending on local plumbing codes. The discharge pipe should
be as short as possible and contain as few elbows as possible. The discharge
pipe should be the same diameter as the discharge size to reduce pipe friction
losses. Smaller pipe will restrict capacity and reduce pump performance. The
sump pump comes with 1" female pipe thread discharge.
3. Always install a union in the discharge line, just above the sump pit, to allow
for easy removal of the pump for cleaning or repair.
4. In situations where the piping is long, the vertical discharge is above 7 or 8
feet, or a small pit has been provided, use of a check valve is recommended
to prevent backflow of water into the sump. When a check valve is used, drill
a relief hole (1/8" or 3/16" diameter) in the discharge pipe. This hole should
be located below the floor line between the pump discharge and the check
valve. Unless such a relief hole is provided, the pump could air lock and will
not pump water even though it will run.
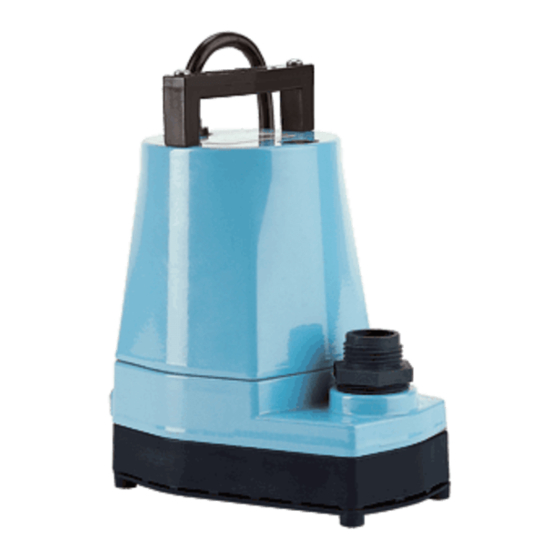
WATER WIZARD
AUTOMATIC
SUMP PUMP
5-ASP-FS
INSTALLATION
5. Tape the switch cord and pump cord to the discharge line with electrician's
tape. This will protect the cords from damage and will prevent them from
interfering with the float.
6. TEST THE PUMP AFTER ALL CONNECTIONS HAVE BEEN MADE. Run
water into sump. Do not attempt to operate the pump without water; this will
damage the seals and bearings and could result in permanent damage to the
pump. Fill sump to normal "on" level and allow pump to remove water to the
normal "off" level (Figure 1).
7. Place the cover over the sump. This cover will prevent solid debris from filling
the pit, reduce odors, and guard against accidental injury.
The motor housing of the pump is completely sealed and requires no service.
Disassembly of the motor housing or alteration of the power cord voids all
warranty.
The motor is continuous duty type sealed in oil with an automatic thermal
overload protector device.
The pump can run against a restricted discharge (such as a fountain) without
damage to the pump.
1. If the pump becomes clogged, snap the screen off and clean out the area.
2. If necessary, remove the six screws holding the volute base to the motor
housing and clean the volute.
3. If the impeller is removed, make sure that a spacing of .050" with shaft
pushed toward housing is maintained when reassembling (Figure 2).
4. When reassembling, ensure that you install the seal ring between the volute
base and the motor housing.
PERFORMANCE DATA
Maximum pumping height = 26.3'
Maximum PSI = 11.4 PSIG
Discharge height above
pumping level
Gallons per minute (water)
NOTE: Ratings based on 1" pipe with friction loss neglected. Using 3/4" garden
hose adaptor performance will be reduced approximately 15%. This pump does
not deliver enough pressure to operate lawn sprinklers properly.
TYPICAL INSTALLATION
MAINTENANCE
1'
3'
5'
10'
20.4
20
19
16
FIGURE 1
15'
20
13
8
1
Advertisement
Table of Contents

Subscribe to Our Youtube Channel
Related Manuals for Little Giant 5-ASP-FS


Summary of Contents for Little Giant 5-ASP-FS
- Page 1 WATER WIZARD AUTOMATIC Franklin Electric Co., Inc. SUMP PUMP P. O. Box 12010 Oklahoma City, OK 73157-2010 5-ASP-FS 405.947.2511 • Fax: 405.947.8720 www.LittleGiantPump.com CustomerService-WTS@fele.com 5. Tape the switch cord and pump cord to the discharge line with electrician’s INTRODUCTION tape. This will protect the cords from damage and will prevent them from interfering with the float.
- Page 2 Any product that should fail for either of the above two reasons and is still within SELLER NOR THE MANUFACTURER SHALL BE LIABLE FOR ANY INJURY, LOSS the warranty period will be repaired or replaced at the option of Little Giant Pump OR DAMAGE, DIRECT, INCIDENTAL OR CONSEQUENTIAL (INCLUDING, BUT NOT Company, Inc.
Need help?
Do you have a question about the 5-ASP-FS and is the answer not in the manual?
Questions and answers