Table of Contents
Advertisement
Quick Links
Published on Dynamic Perception (http://dynamicperception.com)
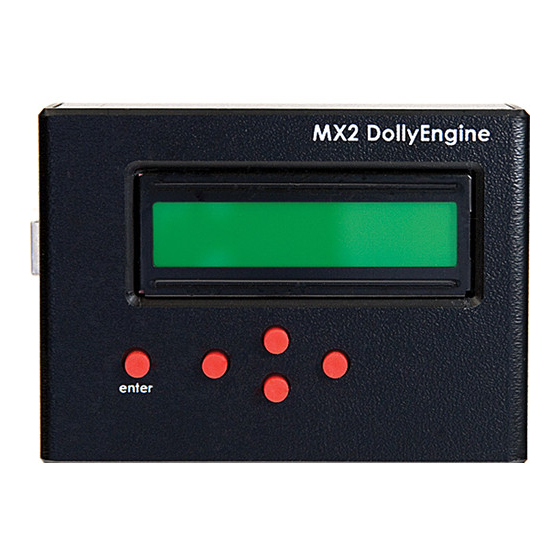
MX2 Motion Controller User Guide
The MX2 Motion Controller is designed to control up to two DC motor axes, while synchronizing
motion with direct camera control. This user guide covers all usage of the MX2, from basic to
advanced.
Choose one of the sections below to begin reading about the MX2. If you wish to print a copy of this
user guide, choosing the print page option here will provide a printable version of the entire guide.
FCC Compliance
FCC Compliance
This device complies with part 15 of the FCC Rules. Operation is subject to the following two
conditions: (1) This device may not cause harmful interference, and (2) this device must accept any
interference received, including interference that may cause undesired operation.
Note: This equipment has been tested and found to comply with the limits for a Class B digital
device, pursuant to part 15 of the FCC Rules. These limits are designed to provide reasonable
protection against harmful interference in a residential installation. This equipment generates, uses
and can radiate radio frequency energy and, if not installed and used in accordance with the
instructions, may cause harmful interference to radio communications. However, there is no
guarantee that interference will not occur in a particular installation. If this equipment does cause
harmful interference to radio or television reception, which can be determined by turning the
equipment off and on, the user is encouraged to try to correct the interference by one or more of the
following measures:
—Reorient or relocate the receiving antenna.
—Increase the separation between the equipment and receiver.
—Connect the equipment into an outlet on a circuit different from that to which the receiver is
connected.
—Consult the dealer or an experienced radio/TV technician for help.
Getting Started with the MX2
In this section of the guide, we will introduce the basic concepts and familiarize ourselves with the
MX2 controls.
Interacting with the Controller
The MX2 is designed to be extremely simple to use, and to let you quickly input the most important
parameters during a shoot. This document describes the means of interacting with the controller
through the user interface, and how to use the main control screen.
payment, shipping, and returns
|
privacy policy
|
terms of use
|
distributors
|
contact us
Page 1 of 35
Copyright © 2012 Dynamic Perception LLC, All Rights Reserved.
Advertisement
Table of Contents

Subscribe to Our Youtube Channel
Summary of Contents for Dynamic Perception MX2
- Page 1 This user guide covers all usage of the MX2, from basic to advanced. Choose one of the sections below to begin reading about the MX2. If you wish to print a copy of this user guide, choosing the print page option here will provide a printable version of the entire guide.
- Page 2 The longer the button is held, the faster it increases or decreases a value. In this manner, you may easily enter large numbers. payment, shipping, and returns privacy policy terms of use distributors contact us Page 2 of 35 Copyright © 2012 Dynamic Perception LLC, All Rights Reserved.
-
Page 3: The Main Screen
Choosing the Speed Display With the MX2 controller, you can either display and input speeds in percentages of maximum (relative) or inches per minute (absolute). The speed display setting is global, and impacts all axes. You may not configure one for relative and one for absolute speed display. -
Page 4: Controlling The Lcd Display
Displaying in Metric Values The MX2 can shows absolute distances and speeds in centimeters. When you enable the metric mode parameter, all distance values stored in permanent memory are converted from inches to centimeters, and the display will show a ‘c’ on the main screen instead of ‘i’ for absolute speeds. -
Page 5: Adjusting The Backlight Brightness
The MX2 controller comes with the ability to control the LCD display to reduce power consumption or light pollution onto your shots at night. The standard LCD for the MX2 is a 16×2 character black on green LCD display. This LCD can easily be read during bright daylight without the backlight on and at night with very little backlight. - Page 6 The MX2 controller provides direct control of a camera through a cable connected to the remote release port of your camera. On most cameras, there are two primary functions provided: Control Shutter and Control Auto Focus. Here we’ll describe how to set up the MX2 to handle different shooting requirements.
- Page 7 Under certain conditions it will be important to tell the MX2 the actual exposure time you’ve dialed in on the camera, so that it does not attempt to trigger an exposure at the wrong time. The amount of time to wait after triggering an exposure is configured via the exposure delay value.
- Page 8 To disable the focus tap functionality, set the time to zero (0) milliseconds. Like most values in the MX2 controller, the Focus Tap Time value is retained after power-off. Actions: payment, shipping, and returns...
-
Page 9: Basic Use
[Right] to abort Basic Use In this section of the user guide, we cover common topics for using the MX2 Motion Controller in the studio and in the field. Choosing Your Motion Mode The two basic motion control modes for the MX2 controller are Continuous Motion and Interleaved. - Page 10 Using Continuous Motion The default behavior of the MX2 controller is to operate in continuous motion mode. For the highest end of the speed range, the control acts as a basic Pulse Width Modulation driver, varying the speed of the motor by changing the frequency at which voltage is applied to it.
-
Page 11: Manual Motor Control
80% to 100% of full speed, at lower speeds the cart may not move. payment, shipping, and returns privacy policy terms of use distributors contact us Page 11 of 35 Copyright © 2012 Dynamic Perception LLC, All Rights Reserved. - Page 12 Ramping or Feathering Into Moves The MX2 controller can “feather” or ramp into and out of moves causing moves to start slowly and get faster within the video, providing a nice accelerating or decelerating effect. It does this by altering the distance moved between shots, or the speed moved, starting with no speed and ramping up to your desired speed over a configurable number of frames.
- Page 13 For seconds seconds, the motion will run at full speed (1 IPM) For one second, the motor will decelerate to no speed payment, shipping, and returns privacy policy terms of use distributors contact us Page 13 of 35 Copyright © 2012 Dynamic Perception LLC, All Rights Reserved.
-
Page 14: Calibrating The Controller
Calibration of the motor is saved when the MX2 is powered off, so you only need to re-calibrate when your payload (camera/lens/head/etc.) changes in weight significantly. If you swap out motors or pulleys, it is important to perform a calibration as well, after adjusting the motor parameters to match your new combination. -
Page 15: Adjusting Calibration
After a new calibration, you will need to adjust the Calibration Constant Value, which is documented below to finely tune in the calibration If you are using your own motor/gear chain with the MX2, and the calibration does not appear to move at all, adjust the low and high speed targets as indicated below Adjusting Calibration The MX2′s calibration routine attempts to determine how much to adjust the on time of the motor... - Page 16 Adjusting for Very Heavy Weights or Weak Motors If you’re using the Stage Zero with a large camera/motion control payload, or are using the MX2 with a DIY rig with a smaller motor, you may need to adjust the minimum pulse time to give the motor enough time to get the cart moving at the lowest speeds.
- Page 17 If we set the maximum shot count to 1 for the camera, when the MX2 is told to to turn motion on, it will expose one frame make its required move and stop until it is turned on again.
-
Page 18: Reset To Defaults
Setting Output Drive Distance To allow you to enter speeds and distances in actual distance, versus percentages, the MX2 must be aware of the actual distance moved per revolution of the motor. For most linear axes, the actual distance traveled will be based on the pitch circumference of the final output gear —... -
Page 19: Advanced Use
The MX2 can be controlled remotely, much like it controls the camera, by using Ext 1 inputs. On the left side of the MX2 controller there are two 2.5mm TRS plugs labeled Ext 0 and Ext 1. Each of these plugs breaks out into two I/O lines and one ground line, which is essential for establishing communication between two electronic components. - Page 20 MX2 firmware, it is immediately “pulled high” at 20K of resistance. This means that the MX2 will read a 5V signal off that input as long as the input is left unconnected. Thus, to trigger the input, you will need to connect the GND signal to the input you wish to trigger.
- Page 21 You can use the same input for both switches to save yourself an input on the MX2, just splice in some extra wires. The best place to locate your switches are on the cart its self, either glued or fastened to the edges such that the belt clamps trip the switches.
- Page 22 Published on Dynamic Perception (http://dynamicperception.com) Remember that the Ring is Input 1 in the MX2 firmware and the Tip is Input 2 in the MX2 firmware. NOTE: The limit switch function will only work when the program is ‘on’, do NOT rely on...
- Page 23 It is used in place of the original hand controller. A special connector cable is made (instructions below), and is used to connect the EXT 0 port on the MX2 to the HC port on the Merlin. Once the telescope functions have been enabled in the MX2 firmware, you will now have a new manual control option labeled ‘Scope’, and a second home screen will be available allowing you to...
- Page 24 After you have created the cable, use it to connect EXT0 with the HC port on the Merlin. Enabling Scope Control To be able to control the Merlin via the MX2, you must enable the scope control in the firmware. This setting is found under the global settings menu.
- Page 25 1: Cut the RJ-12 cable to the desired length, and the same for the TRS cable. A good length is about 14″ if you mount the MX2 on the Stage Zero cart, or 6′ if you intend to use the Merlin as a stand-alone device with the MX2.
- Page 26 – strip off the protective coating of each conductor back to an inch or so. payment, shipping, and returns privacy policy terms of use distributors contact us Page 26 of 35 Copyright © 2012 Dynamic Perception LLC, All Rights Reserved.
- Page 27 You do not need to worry about the other lead from the resistor. Repeat this step with the second resistor and the other lead from the TRS cable. payment, shipping, and returns privacy policy terms of use distributors contact us Page 27 of 35 Copyright © 2012 Dynamic Perception LLC, All Rights Reserved.
- Page 28 Published on Dynamic Perception (http://dynamicperception.com) [17] [18] payment, shipping, and returns privacy policy terms of use distributors contact us Page 28 of 35 Copyright © 2012 Dynamic Perception LLC, All Rights Reserved.
- Page 29 7: Solder together the Black conductor from the RJ-12 jack and the Sleeve conductor from the TRS cable. payment, shipping, and returns privacy policy terms of use distributors contact us Page 29 of 35 Copyright © 2012 Dynamic Perception LLC, All Rights Reserved.
- Page 30 Upgrading the MX2 Firmware The MX2 is designed to be updated with new firmware. You can create your own, or use any newer version put out by us (or someone else!). If you’re creating your own firmware or want to modify the existing firmware, you’ll need to be comfortable with the Arduino IDE, and then just compile and...
- Page 31 (such as ‘My Documents’, etc.). Please place it in a directory that does not include spaces, e.g.: c:\mx2hex. Always make sure that you connect the MX2 to your computer via the USB cable before running the update utility.
- Page 32 Published on Dynamic Perception (http://dynamicperception.com) It may take up to a few minutes to upload the new firmware. Your MX2 may display strange information on the LCD during this process. After the upload is successfully completed, the utility will display an upload complete indicator:...
- Page 33 Published on Dynamic Perception (http://dynamicperception.com) You are now ready to run your new firmware! Known Problems The MX2 Uploader does not currently support the Arduino Uno boards If you choose the wrong COM port, you will get the following error: payment, shipping, and returns...
- Page 34 Olark live chat software Source URL (retrieved on 2013-03-26 15:22): http://dynamicperception.com/docs/mx2 Links: [1] http://dynamicperception.com/content/configuring-camera-control payment, shipping, and returns privacy policy terms of use distributors contact us Page 34 of 35 Copyright © 2012 Dynamic Perception LLC, All Rights Reserved.
- Page 35 [20] http://dynamicperception.com/images/tutorials/merlincable/merlin8.png [21] http://dynamicperception.com/images/tutorials/merlincable/merlin9.png [22] http://openmoco.org/node/213 [23] http://dynamicperception.com/software/mx2-firmware-update-utility [24] http://processing.org/ [25] http://dynamicperception.com/software/mx2-firmware-update-utility?quicktabs_softinfotab=2#q uicktabs-softinfotab [26] http://java.com/en/download/manual.jsp payment, shipping, and returns privacy policy terms of use distributors contact us Page 35 of 35 Copyright © 2012 Dynamic Perception LLC, All Rights Reserved.
Need help?
Do you have a question about the MX2 and is the answer not in the manual?
Questions and answers