Table of Contents
Advertisement
Quick Links
Advertisement
Table of Contents

Subscribe to Our Youtube Channel
Related Manuals for Titanium Strength Acqua Rower


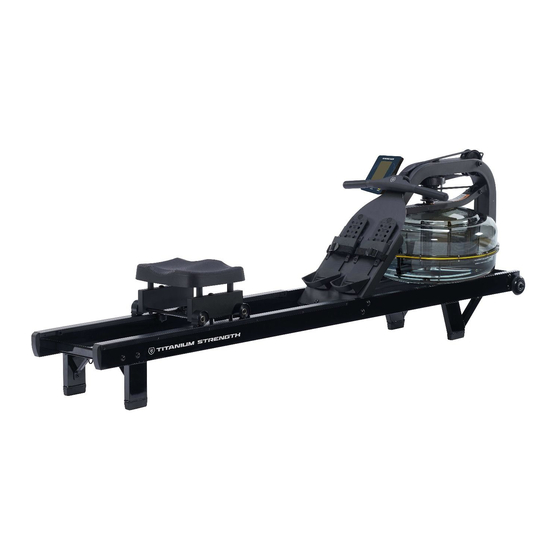
Summary of Contents for Titanium Strength Acqua Rower
- Page 1 USER GUIDE Titanium Strength Acqua Rower...
- Page 3 Introduction Congratulations on your purchase of the Rower. GYMCOMPANY SPAIN is proud to present the Rower as a home use product featuring patented Adjustable Fluid Resistance. Follow all instructions carefully for correct assembly, tank filling, water treatment, service and safety. Check contents of Box 1 and 2 to ensure all parts are present and correct prior to assembly.
-
Page 4: Table Of Contents
Contents Safety ................... 5 Assembly ................7 Rower Box 1 & 2 Contents ............8 Assembly Instructions ............. 9 Operation Instructions ............... 12 Monitor Operation ..............15 Detaching the Rower Belt ............18 Reattaching the Rower Belt ............19 Maintenance ................20 Troubleshooting ................ -
Page 5: Safety
Safety Safety Information • Before using this product, it is essential to read this ENTIRE operation manual and ALL instructions. The Rower is intended for use solely in the manner described in this manual. • UNDERSTANDING EACH AND EVERY WARNING TO THE FULLEST IS IMPORTANT •... - Page 6 Safety Proper Usage • Do not use any equipment in any way other than designed or intended by the manufacturer. It is imperative that GYMCOMPANY SPAIN equipment is used properly to avoid injury. • Injuries may result if exercising improperly or excessively. It is recommended that all individuals consult a physician prior to commencing an exercise program.
-
Page 7: Assembly
Assembly Specifications Product Class: HC Braking System: Speed Independent Product Net Weight: 35.16kg (77.51lb) Product Gross Weight: 44.35kg (97.78lb) Minimum Safe Operating Surface Area: 333cm (131.09”) x 172cm (67.71”) Dimensions: 2160mm (85.04”) Length x 520mm (20.47”) Width x 570mm (22.44”) Height Maximum User Weight: 150kg (330lb) Compact Footprint: 2,160mm x 520mm or upright 520mm x 570mm Product Highlights... -
Page 8: Rower Box 1 & 2 Contents
Rower Box 1 & 2 Contents Box 1 Contents Box 2 Contents Item Qty. Description Item Qty. Description Main Frame M6x15mm Bolt Rear Brace M8x35mm Bolt Left / Right Side Rail M8x45mm Bolt 13mm Spanner M10x29.5mm Bolt Rower Seat 4mm Allen Key Bungee Hook Mount 5mm Allen Key Transport Wheel Assembly... -
Page 9: Assembly Instructions
Assembly Instructions Installing the Rear Brace to Side Rails STEP 1 REQUIRED Start with the Rear Brace and on the underside you will find a Pre-installed Bolt. From the hardware kit, take the Bungee Side Rail Left / Right [2] Hook Mount[6] and install it onto the Rear Brace as shown. - Page 10 Assembly Instructions STEP 3 Mounting Rower Seat and Upper Main Frame REQUIRED Install the Main Frame[1] onto the Side Rail Assembly[2] as shown. Main Frame [1] a) Install all M10x29.5mm Bolts[15] and M10 Washer[10] first from the outside to hold the Main Frame in position, secure Side Rails Assembly [2] the Main Frame from the inside with the M6x15mm Bolts[12] 4x M6 Washer [8]...
- Page 11 Assembly Instructions Completing the Rower Assembly STEP 5 Pull Bungee Cord and Hook Bungee End onto the Bungee Hook Mount[6] as shown. Do not cut Bungee tie wrap before Bungee Cord is attached to rear of the Rower as shown here. Once the Bungee Cord is attached to the Rear Brace, tighten the Bolts holding the Footboard, the Main Frame to Side Rail Bolts...
-
Page 12: Operation Instructions
Operation Instructions Tank Filling and Water Treatment Procedures REQUIRED a) Remove rubber fill plug from the top of the Tank. Siphon [22] b) Place a large bucket of water next to the Rower. Position the Siphon[22] with rigid hose in the bucket, and flexible hose in the Tank. - Page 13 Operation Instructions Removing/Changing Tank Water Siphon Remove Tank Plug. Insert rigid end of siphon into the Tank, and flexible hose into a large bucket. Note: Tank Plug ◎ The valve on top of the proper drainage. ◎ Water treatment will preclude the need to change Tank water if the treatment schedule is maintained.
- Page 14 Operation Instructions Start Rowing There are six phases to completing a rowing stroke 1. Sit with straight legs and back, leaning forward slightly at the hips with arms out straight and hands level with the lower ribs. Swing back. 2. Legs and back straight, leaning slightly forward from the hips, arms out in front. Lean and slide forward.
-
Page 15: Detaching The Rower Belt
Detaching the Rower Belt 1. To detach Belt, simply pull beyond the range of the Inner Clip normal rowing stroke until the Belt detaches from the Belt Bungee Pulley. Tip: You’ll hear the Velcro separating just before the belt detaches. Bungee Hook 2. -
Page 16: Reattaching The Rower Belt
Reattaching the Rower Belt STEP 1 Begin reattaching the Rower Belt by threading Velcro Facing Upward around the Rower Belt Pulley with the Velcro side facing upward as illustrated. STEP 2 Next, thread the Belt around the Idle Wheel as shown. -
Page 17: Maintenance
Maintenance All preventive maintenance activities must be performed on a regular basis. Performing routine preventive maintenance actions can aid in providing safe, trouble-free operation of all GYMCOMPANY SPAIN equipment. GYMCOMPANY SPAIN is not responsible for performing regular inspection and maintenance actions for your machines. Instruct all personnel in equipment inspection and maintenance actions and also in accident reporting and recording. -
Page 18: Troubleshooting
Troubleshooting Fault Probable Cause Solution Water changes color Rower is in direct Change Rower location to reduce or becomes cloudy. sunlight or has not direct exposure to sunlight. Add had water treatment. water treatment or change tank water as directed in the Water Local tap water is of Treatment section of this manual. -
Page 19: International Warranty
International Warranty HOME USE GYMCOMPANY SPAIN Limited warrants that the Titanium Strength Acqua Rower purchased from an authorized agent and in its undamaged original packaging, is free from defects in materials and workmanship. GYMCOMPANY SPAIN Limited or its agent will, at their discretion, repair or replace parts that become defective within the warranty period, subject to the specific inclusions and exclusions below.
Need help?
Do you have a question about the Acqua Rower and is the answer not in the manual?
Questions and answers