Table of Contents
Advertisement
Quick Links
BIGFOOT
user guide
Índex
Printer Specifications ................................... 2
Main parts of the printer ................................ 3
Elements included in the printer .................... 3
Installation and set up ................................... 4
Quick guide ................................................... 6
Semi-Automatic Calibration............................7
Nozzle change ............................................... 8
Simplify 3D Printing Software ........................ 9
Simplify 3D loading profiles............................9
Security .......................................................10
Basic recomendations .................................10
Warranty.......................................................11
Advertisement
Table of Contents

Summary of Contents for INDART 3D Tumaker BIGFOOT Series
-
Page 1: Table Of Contents
BIGFOOT user guide Índex Printer Specifications ........2 Main parts of the printer ........ 3 Elements included in the printer ....3 Installation and set up ........4 Quick guide ........... 6 Semi-Automatic Calibration......7 Nozzle change ..........8 Simplify 3D Printing Software ......9 Simplify 3D loading profiles......9 Security ............10 Basic recomendations .........10... -
Page 2: Printer Specifications
printer specifications Printing Volume: 500x500x500 mm 500x500x350 mm 500x500x200 mm Printer Size: 750x760x810 mm 750x760x660 mm 750x760x510 mm Package Size: 870x890x1040 mm 870x890x990 mm 870x890x840 mm Printer Weight: 82 kg 75 kg 68 kg Package Weight: 140 kg 120 kg 100 kg Materials: ABS, ASA, nYLOn, PeT-G, PLA, PP, Nozzle diameter: 0.2 - 0.4 - 0.6 - 0.8 - 1.2 mm... -
Page 3: Main Parts Of The Printer
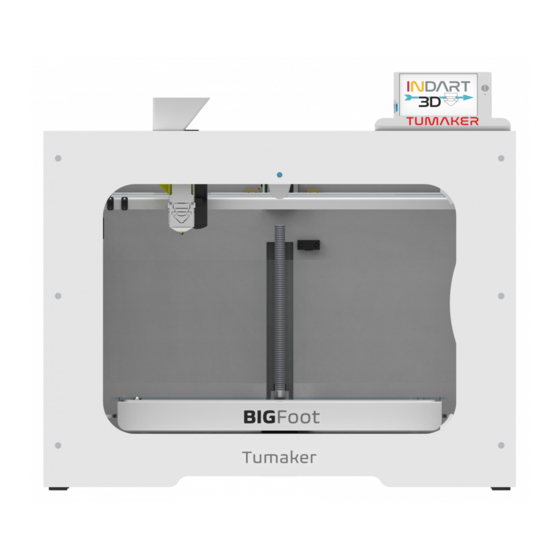
Main parts of the printer Main parts of the printer Display Filament input Nozzle Drive Connector Bowden tube Layer fan Frontal fan Filament sensor HOTEND It moves in the X and Y axes by melting the filament of material and depositing it on the platform or heated bed. It has a nozzle that heats up to the required temperature according to the corresponding printing material. -
Page 4: Installation And Set Up
Installation and set up DISPLAY WIRING To start with the installation and set up, connect the The light indicator will stay on while the printer is on. power cable to the slot on the back of the printer and plug it into the power socket. Switch on the printer by pressing the button. - Page 5 Access the Macros / Others / Connect to the NET section and run it. Next, on the printer screen you will see the assigned IP. If you already have your IP, access from it, go to System and open the config.g file ATENTION changing parameters not indicated in this file may imply the malfunction of the machine In the Network section replace: M552 S2 for M552 S1.
-
Page 6: Quick Guide
Quick guide Level the Build Plate • Heat the base to the temperature you want to print at • Make sure you have a clean tip • Execute the calibration process found in the Macros “Calibration” section and follow the steps •... -
Page 7: Semi-Automatic Calibration
semi-automatic calibration Level the Build Plate • Make sure you have a clean tip • Execute the calibration process found in the Macros “Calibration” section and follow the steps • Use the knurled nuts on the base to fit the Nozzle to the Build Base •... -
Page 8: Nozzle Change
Print Bed Setting • During printing, fine-tune using Z Babysteping until proper adhesion is achieved Load Compression Map • If you have restarted the printer, you must load the Height Map again, to do this, execute Load Height Compensation Map saved in the SD card (G29 S1) Advanced •... -
Page 9: Simplify 3D Printing Software
Simplify 3D printing sOFTWARE Indart 3D’ s 3D printing stations include the Simplify3D™ You will be able to repair the imported designs in Simplify3D professional manufacturing suite, a software with all the itself and you will love the intelligent support option. -
Page 10: Security
It will show a message like this Select the .fff file you want to import In the Process select the imported profile Make sure that the imported .frm appears in the G-Code tab Security RISK OF ENTRAPMENT ATTENTION, HOT SURFACE The platform and nozzle of the head can be Do not handle any mechanical parts of the printer heated up to 120ºC and 300ºC depending... -
Page 11: Warranty
INDART 3D S. SMALL . COOP., (“Indart3D”) provides this Limited Warranty to purchasers of the Tumaker product(s) included in the sales package (“Product”). Tumaker warrants to you that, during the warranty period, Indart3D or a service company authorized by Indart3D... - Page 12 9. It does not cover if Tumaker products have been repaired or altered by personnel other than Indart3D or personnel not authorized by Indart3D. 10. It does not cover if the documentation and information requested by Indart3D is not submitted. 11.
Need help?
Do you have a question about the Tumaker BIGFOOT Series and is the answer not in the manual?
Questions and answers