
Related Manuals for Rigel PatSim200

Summary of Contents for Rigel PatSim200
- Page 1 Innovating Together RIGEL PatSim200 Patient Simulator Copyright © 2016 SEAWARD GROUP Instruction Manual Last Update: 20th December 2016 404A920 Revision 1.1...
- Page 2 Calibration Statement The PatSim200 Patient Simulator is fully calibrated and found to be within the specified performance and accuracy at the time of production. The Seaward Group provides its products through a variety of channels; therefore it may be possible that the calibration date on the provided certificate may not represent the actual date of first use.
- Page 3 This symbol indicates that the operating instructions must be adhered to in order to avoid danger. If the PatSim200 is used in a manner not specified by the manufacturer, the protection provided by the equipment may be impaired. This product contains a lithium ion battery:...
-
Page 4: Table Of Contents
Index Introduction ......................4 1.1 Getting to know your PatSim200 ................4 1.2 In the box ....................... 5 1.3 Additional & Optional Accessories ................. 5 1.4 Charging ......................... 5 1.5 Battery Status ......................6 1.6 Powering On/Off ....................6 1.7 Screen Brightness ....................7 Getting Started ....................8 2.1 Setup ........................8 2.2 About ........................9 2.3 Favourite Simulations ..................10 Simulation Settings ................... 13 3.1 ECG Settings ......................14 3.2... -
Page 5: Introduction
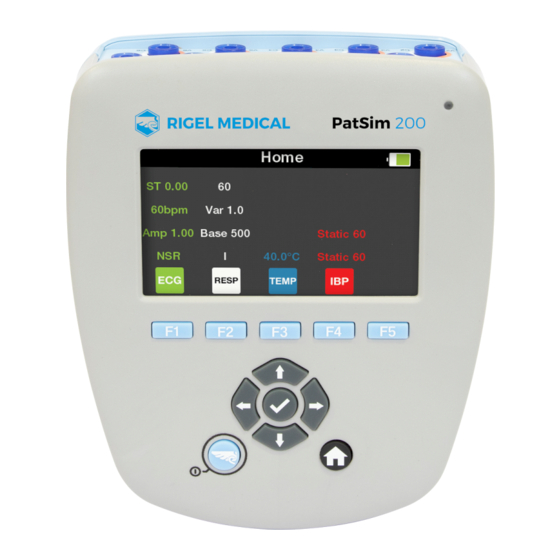
1 Introduction The PatSim200 from Rigel was designed to make every patient simulation quicker. Unlike other Patient Simulators, the PatSim200 uses a home and recall function to easily move between tests and store your most used sequences, no more clicking and scrolling through 'tree style' hierarchy to perform each test. -
Page 6: In The Box
Universal USB Power Supply 404A952 1.4 Charging The PatSim200 is supplied with a universal USB charger. You should only use the supplied charger with your PatSim200. Whilst the charger is connected to the unit and energised, the LED light on the top right of the top fascia will be illuminated. -
Page 7: Battery Status
Whilst the PatSim200 is powered on you will also see the below symbols on the display. Bulk Charging Trickle charging The PatSim200 may be used whilst charging however displayed signal quality may be reduced on some monitor types. 1.5 Battery Status During normal use, the PatSim200 automatically checks the battery status and shows the closest representation using the symbols below. -
Page 8: Screen Brightness
1.7 Screen Brightness You can change the screen brightness on the PatSim200 to make it suitable for different environments. To change the screen brightness press the left or right arrow keys in the home screen. -
Page 9: Getting Started
2 Getting Started 2.1 Setup In the PatSim200 you have the option to change the language, temperature units and auto off time of the unit. Pressing the Rigel key in any menu will take you to the Settings screen. Here you can use the up & down arrow keys to highlight Local Settings and press the select (tick) button. -
Page 10: About
Available Settings Language English German French Spanish Polish Simplified Chinese Temperature °C °F Auto Off 2 min 5 min 10 min 30 min 60 min 2.2 About From the Settings screen you can view information about the tester. Highlight About using the up and down arrow keys and press the select (tick) button. -
Page 11: Favourite Simulations
2.3 Favourite Simulations You can save up to 5 of your most used simulation settings for recall at any time. 2.3.1 Default settings The unit will be delivered with 5 default settings as detailed below. - Page 12 2.3.2 Adding a new favourite setting Pressing the Rigel key in any menu will take you to the Settings screen. Here you can hold down one of the function keys for 3 seconds to save the current settings to that memory location. You will see a messaging asking if you are sure.
- Page 13 2.3.3 Recalling a favourite setting Pressing the Rigel key in any menu will take you to the Settings screen. Here you can press one of the 5 function keys to access the corresponding settings. You will see a messaging asking if you are sure.
-
Page 14: Simulation Settings
3 Simulation Settings The PatSim200 is capable of the below simulations: • ECG wave forms Arrhythmia’s Performance Waveform Pacer Waveforms Fetal Maternal • Respiration • Temperature • Invasive blood pressure (2 channel) A list of the full settings available for each simulation is available at the end of each section. -
Page 15: Ecg Settings
3.1 ECG Settings Pressing F1 from the home screen takes you to the ECG menu. The screen shows the current settings. Note: All ECG waveform images are representations specifically for Lead II 3.1.1 Normal Sinus Rhythm Pressing F1 in the ECG menu takes you to the Normal Sinus Rhythm screen. The screen will show the current settings. - Page 16 You can see which is currently selected by which figure is in green on the right hand of the screen. Pressing F5 shows a visual representation of the waveform you should expect to see on the monitor with the current settings. To leave any of these screens you can press the back button to go back to the previous menu or the Home button to go back to the Home screen.
- Page 17 3.1.2 Arrhythmias Pressing F2 in the ECG menu takes you to the Arrhythmias screen. You can then use the up & down arrow keys to highlight the type of arrythmia you wish to simulate and the select (tick) key to select. Alternatively you can use the function keys as fast keys to select the corrosponding arrythmia type.
- Page 18 Pressing F5 shows a visual representation of the waveform you should expect to see on the monitor with the current settings. To leave any of these screens you can press the back button to go back to the previous menu or the Home button to go back to the Home screen. Available Arrhythmia Settings VENTRICULAR Asystole...
- Page 19 Premature Right Ventricle Contraction - R on T Premature Ventricular Contraction - 6 / min Premature Ventricular Contraction – 12 / min Premature Ventricular Contraction - 24 / min Premature Ventricular Contraction – frequent multifocal Amplitude (lead II) 0.05 mV to 0.45 mV (0.05 mV steps) 0.5 mV to 5.5 mV (0.5 mV steps) 3.1.3 Performance Waveform...
- Page 20 Available Performance Waveforms Sine Waves 0.05, 0.5, 1, 10, 25, 30, 40, 50, 60, and 100 Hz Square Waves 0.125, 2 Hz Pulse 60bpm or 240bpm Triangle Wave 2 Hz Performance amplitude 0.5 to 5.0 mV in 0.5 mV steps 3.1.4 Pacer Waveforms Pressing F4 in the ECG menu takes you to the Pacer Waveforms screen.
- Page 21 Pressing F5 in either screen shows a visual representation of the waveform you should expect to see on the monitor with the current settings. To leave any of these screens you can press the back button to go back to the previous menu or the Home button to go back to the Home screen.
- Page 22 3.1.5 Fetal Maternal Pressing F5 in the ECG menu takes you to the Fetal Maternal screen. The screen will show the current settings. You can then use the up & down arrow keys to highlight the parameter you wish to change and then use the left & right arrow keys to select your preferred setting.
-
Page 23: Respiration Settings
Available Fetal Simulation Settings Maternal heart rate (fixed) 80 BPM Fetal heart rate (selectable) 60, 90, 120, 140, 150, 210 and 240 BPM Fetal heart rate (IUP) 140 BPM at beginning, then varying with pressure Intrauterine-pressure waveforms (IBP1) Early deceleration, late deceleration, and uniform acceleration Simulation period Manual or 2, 3, or 5 minutes... -
Page 24: Temperature Settings
3.3 Temperature Settings Pressing F3 from the home screen takes you to the Temperature menu. The screen shows the settings on memory location 1. You can then use the left & right arrow keys to select your preferred setting. Alternatively you can use the function keys as fast keys to select the corresponding temperature. -
Page 25: Invasive Blood Pressure Settings
3.4 Invasive blood pressure settings Pressing F4 from the home screen takes you to the Invasive Blood Pressure menu. The screen shows the settings. Press F1 or F2 to select the required channel. You can then use the up & down arrow keys to highlight the parameter you wish to change and then use the left &... - Page 26 There is a fast key on F5 to switch between 5µV and 40µV available in all of these screens. To leave this screen you can press the Home button to go back to the Home screen. Available IBP Settings Channels Static Pressure -10,-5,0,20,40,50,60,80,100,150,160,200,240,320,400mmHg Dynamic Simulation...
-
Page 27: Maintaining The Patsim200
Failure to treat the product with care will reduce both the life of the instrument and its reliability. If the PatSim200 is subject to condensation, allow the tester to completely dry before use. -
Page 29: Technical Specifications
5 Technical Specifications General ECG Simulation Full 12 lead ECG with independent outputs for each signal lead Lead I Lead II 100% Lead III Lead V1 Lead V2 Lead V3 100% Lead V4 120% Lead V5 112% Lead V6 ECG Normal Sinus Rhythm Simulation Full 12 lead ECG with independent outputs for each signal lead... - Page 30 Supraventricular Tachycardia Atrial Conduction Waveforms First Degree AV Block Left Bundle Branch Block Right Bundle Branch Block Second Degree AV Block - Mobitz I Second Degree AV Block - Mobitz II Third Degree AV Block Premature Waveforms Premature Atrial Contraction Premature Nodal Contraction Premature Left Ventricle Contraction Premature Left Ventricle Contraction - early...
- Page 31 Rates 0, 5, 10, 15, 30, 40, 60, 80, 120, 180 BRPM Resistance Variations 0.2, 0.5, 1.0, 3.0 Ω Accuracy ±10% Base resistances 500, 1000, 1500 and 2000 Ω Accuracy ±5% Lead selection 1 (LA), 2(LL) user selectable Apnoea Simulation Manual on/off Temperature Simulation Simulation...
- Page 32 Weight 0.70 Kg / 1.5 lbs Dimensions 180 x 150 x 55 mm, 7.1 x 5.9 x 2.2 inch Serviceability Warranty: 5 years [terms and conditions apply] Calibration: 1 year Environmental Operating conditions 10 - 40°C (50 - 104°F) 0-90% RH - NC Storage environment -15 - 60°C (5 - 140°F) 0-90% RH –...
-
Page 33: Appendix A - Ibp Cable Wiring Diagram
Appendix A - IBP cable wiring diagram... -
Page 34: Appendix B - Temperature Cable Wiring Diagram
Appendix B - Temperature cable wiring diagram...
Need help?
Do you have a question about the PatSim200 and is the answer not in the manual?
Questions and answers