Advertisement
GPT.01.462.15000/B
Revision: 02
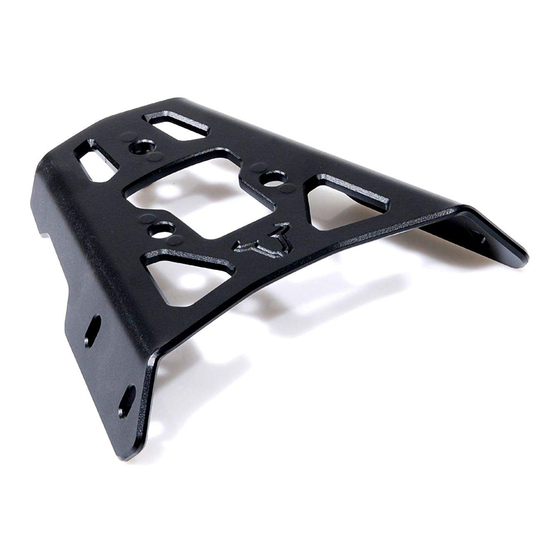
ALU-RACK
Die Modellzuweisungen von diesem Artikel finden Sie auf unserer Website.
The application list for this product can be found on our website.
Montagehinweise
Mounting Instruction
ACHTUNG: Die Montage dieses
ATTENTION: The assembly of this
product can be complicated and
Produktes kann kompliziert sein und
erfordert ein gutes technisches
requires a good technical
Verständnis. Wenn Sie unsicher sind,
understanding. If you are not sure of
how to do this, have a specialty garage
lassen Sie Montage und Wartung durch
eine Fachwerkstatt durchführen. SW-
perform the mounting and service.
SW-MOTECH accepts no liability for
MOTECH übernimmt keine Haftung für
Schäden, die durch eine unsachgemäße
damages caused by improper
Montage verursacht wurden.
installation.
Alle vom Motorrad gelösten Schrauben
All screws, bolts and nuts, including
all replacement hardware provided by
sind gemäß Herstellerangaben wieder
zu montieren, oder mit von SW-MOTECH
SW-MOTECH, should be tightened to
gelieferten Schrauben zu ersetzen. Falls
the torque specified in the OEM
maintenance manual for your
nicht anderweitig definiert, diese
Schrauben nach Tabelle anziehen:
motorcycle. If no torque specifications
are provided in the OEM maintenance
manual, the following torques may be
M5
5,5 Nm
used:
M6
9,6 Nm
M8
23 Nm
Gegebenenfalls Schrauben mit flüssiger
Schraubensicherung einkleben.
Prüfen Sie nach 50 km alle
All screws, bolts and nuts should be
checked after driving the first 50 km
Verbindungen auf festen Sitz.
to ensure that all are tightened to the
proper torque.
Max. Zuladung 5 Kg inklusive Koffer
und Adapter.
Ist das Zuladungsgewicht des
Medium strength liquid thread-locker
(i.e., "Locktite") should be used to
Fahrzeuges durch den Hersteller
limitiert, gelten diese Grenzwerte.
secure all screws, bolts and nuts.
Technische Änderungen vorbehalten.
Max. Load On Rear Carrier: 5 Kg (11
Irrtümer ausgenommen.
lbs) inclusive case and adapter or the
motorcycle manufacturer's weight limit,
whichever is less.
SW-MOTECH GmbH & Co. KG
Subject to change. Not responsible for
Ernteweg 8/10
typos.
35282 Rauschenberg
Germany
Tel. +49 (0) 64 25/8 16 8-00
Fax +49 (0) 64 25/8 16 8-10
info@sw-motech.com
www.sw-motech.com
M5
5,5 Nm
M6
9,6 Nm
M8
23 Nm
Advertisement
Table of Contents

Subscribe to Our Youtube Channel
Related Manuals for SW-Motech ALU-RACK


Summary of Contents for SW-Motech ALU-RACK
- Page 1 Alle vom Motorrad gelösten Schrauben All screws, bolts and nuts, including all replacement hardware provided by sind gemäß Herstellerangaben wieder zu montieren, oder mit von SW-MOTECH SW-MOTECH, should be tightened to gelieferten Schrauben zu ersetzen. Falls the torque specified in the OEM...
- Page 2 Sechskantschraube Quertraverse Klemmblech Ausleger Sechskantschraube ALU-RACK Hexagon Screw Cross Bracket Clamp Bracket Base Frame Hexagon Screw M6 x 25 DIN 933 GPT.01.462.002 GPT.01.462.005 GPT.01.462.921/922 M8 x 20 DIN 933 GPT.00.462.030 Anzahl/Pcs. Anzahl/Pcs. Anzahl/Pcs. Anzahl/Pcs. 2 (L/R) Anzahl/Pcs. Anzahl/Pcs. Unterlegscheibe Sechskantschraube...
- Page 3 Montage / Mounting Schritt Step Fahrtrichtung Driving Direction Entfernen Sie die Sitzbank. Lösen Sie anschließend die originalen Schrauben der Radverkleidung an den in der Zeichnung gezeigten Montagepunkten (gezeigt in der linken Zeichnung). Öffnen Sie die untere Abdeckung der Radverkleidung (gezeigt in der rechten Zeichnung) und lösen Sie alle elektrischen Verbindungen.
- Page 4 Montage / Mounting Schritt Schritt Step Step Setzen Sie die Distanzbuchsen (3) auf die in Schritt 1 montierten Schrauben (1). Verschrauben Sie die Radabdeckung mit den originalen Einlegemuttern. Stellen Sie nach Verschrauben Sie anschließend das Klemmblech (5) mit den Schrauben (6) und der Montage alle Steckverbindungen wieder her und schließen die Abdeckung der Unterlegscheiben (7) an der Quertraverse (4).
- Page 5 Montage / Mounting Schritt Step Verschrauben Sie die Auslegern (8) wie gezeigt. Sichern Sie alle Schrauben mit flüssiger Schraubensicherung. Attach the base frames (8) as shown. Secure all screws with liquid thread locker.
- Page 6 Falls die Montage einer Adapterplatte vorgesehen ist, MÜSSEN die Haltenocken am ALU-RACK vor dessen Anbau am Motorrad verschraubt werden. Attach the ALU-RACK (15) on the base frames (8) as shown. Secure the screws with liquid thread locker. Tightening torque for screws (16): 20 Nm.
Need help?
Do you have a question about the ALU-RACK and is the answer not in the manual?
Questions and answers