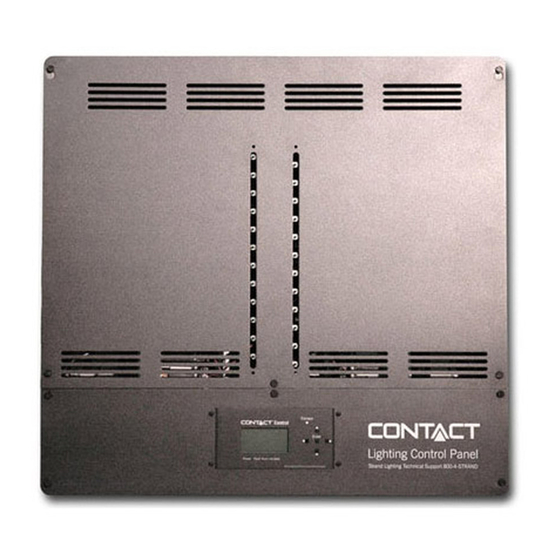

Summary of Contents for Strand 76910
- Page 1 CONTACT LIGHTING CONTROL PANEL USER MANUAL 12-CIRCUIT / 24-CIRCUIT / 36-CIRCUIT / 48-CIRCUIT...
-
Page 2: About This Guide
Please read all instructions before installing or using this product. Retain this guide for future reference. ADDITIONAL RESOURCES Other Manuals Strand Lighting’s Dimmer.net software provides an advanced interface for confi guring Contact Lighting Control System options. Where applicable, refer to the Dimmer.net manual for full explanations of each confi guration option. - Page 3 CONTACT LIGHTING CONTROL PANEL USER MANUAL OVERVIEW ABOUT CONTACT LIGHTING CONTROL PANELS Contact Low-Voltage Lighting Control Panels provide advanced control of various lighting load types (Incandes- cent, Tungsten, Halogen, Magnetic Low-Voltage, Electronic Low-Voltage, Neon, Non-Dim Fluorescent, and HID) and allow any combination of control, including scheduling via an astronomical time clock or occupant control through the use of Vision.Net control stations.
-
Page 4: Installation Overview
Review this document completely before starting the installation. Step 2. Unpack and inspect equipment. Compare the equipment you received with your packing list. If these do not match, contact Strand Lighting Customer Service at 1-214-647-7880. Step 3. Gather tools. Refer to Tools List below. -
Page 5: Tools List
• Dry Locations Only: The unit can only be installed in an “offi ce clean” area that is never exposed to moisture of any kind. Strand Lighting is not responsible for damage to equipment caused by moisture, paint, dust, solvents or cleaning supplies. -
Page 6: Installation
CONTACT LIGHTING CONTROL PANEL USER MANUAL INSTALLATION MOUNTING THE PANEL To mount panel: Step 1. Locate a suitable location for mounting the panel. (Refer to “Location and Clearances”.) Step 2. Mount panel utilizing pre-punched mounting holes, as indicated in Figure 3, as follows: Remove front cover (if installed). -
Page 7: Control Wiring
CONTACT LIGHTING CONTROL PANEL USER MANUAL To connect line/load wiring: Step 1. Install load and line wiring through knockouts. Refer to below. FIGURE 1 on page 3 FIGURE 4 Step 2. Connect proper grounding (FIGURE 4 Step 3. Install low-voltage wiring through knockouts. TERMINAL TIGHTENING TORQUE Load/Line Circuit Wiring... - Page 8 CONTACT LIGHTING CONTROL PANEL USER MANUAL Panic Wiring NOTE: For UL924 applications, Panic Wiring RS232 Port (for Config) (2) #18 AWG Wire must be set to Normally Open (NO). Pin No. Function CR2032 Battery for Real Time Clock Not Used RJ-9 connection for LCD Display Controller Board External Cabinet Wiring...
-
Page 9: Menu Operation
RCM.) Upon power up, the LCD Menu will display the Strand Lighting logo followed by the current RCM software ver- sion and RCM name. After briefl y displaying this information, the MAIN MENU will appear. -
Page 10: Menu System
CONTACT LIGHTING CONTROL PANEL USER MANUAL MENU SYSTEM To navigate the menus, press the four navigation buttons as required. When the desired menu is reached, press [Enter] to display the menu options. Use navigation and [Enter] buttons to view status and confi gure RCM pro- cessor. -
Page 11: System Config
CONTACT LIGHTING CONTROL PANEL USER MANUAL RELAY INPUTS CONFIG SUB MENU OPTIONS COMMENTS Relay Displays selected relay number if assigned. DMX A User defi ned DMX address for DMX A port. DMX B (Ethernet) User defi ned DMX address for DMX B port. Room Displays Relay’s assigned room number. - Page 12 CONTACT LIGHTING CONTROL PANEL USER MANUAL WALK AROUND PROGRAMMING SUB MENU OPTIONS COMMENTS Assign One Keypad Addr Room # / Start Assigns a single keypad to a single address. Multiple with Same Addr Room # / Start Assigns multiple keypads to a specifi c room. In this mode, the relay panel will fl...
-
Page 13: Menu Config
CONTACT LIGHTING CONTROL PANEL USER MANUAL LOCAL PRESETS CONFIG SUB MENU OPTIONS COMMENTS Relay Displays current relay number . Preset 1 / 2 / 3 / 4 / 5 / 6 / 7 / 8 Selects the preset to be programmed/ assigned to None / 0:01 / 0:05 / 0:10 / Selects the fade rate for a preset. - Page 14 CONTACT LIGHTING CONTROL PANEL USER MANUAL Step 6. The keypad is now ready to be assigned a room by using Walk Around Programming Menus on the relay panel. IMPORTANT! Once Vision.Net Designer has confi gured a keypad, it will not respond to Walk Around Program- ming commands.
- Page 15 CONTACT LIGHTING CONTROL PANEL USER MANUAL ASSIGN RELAYS TO ROOM This feature allows panel relays to be assigned to a Room. To assign a relay (or relays) to a room: Step 1. At WALK AROUND menu, navigate to “Assign Relays to Rooms” and press [Enter] button. Step 2.
- Page 16 CONTACT LIGHTING CONTROL PANEL USER MANUAL DEFINITIONS Event An Event is a programmed / scheduled occurrence with starting and ending times to execute one or more Actions (Example, turn on Preset 1 at 8:00 am and turn them off at 5:00 pm, every Monday through Friday).
-
Page 17: Set Location
CONTACT LIGHTING CONTROL PANEL USER MANUAL Step 3. Use UP and DOWN arrows to change parameters. Use LEFT and RIGHT arrow button to navigate be- tween parameters (hours / minutes / seconds). Step 4. When all edits to Set Time are complete, press [Enter] button to save confi guration. NOTE: Pressing [Escape] button will go to previous menu and changes will not be saved. - Page 18 IMPORTANT! UL924 operation applies only to Contact Panels which have been confi gured at the factory for Emergency Lighting Operation. If a previously installed Contact Panel is required to operate emergency lighting and needs to be updated in the fi eld by a certifi ed Strand Lighting Technician, please contact Strand Lighting Technical Support at 1-214-647-7880.
-
Page 19: Standard Wiring
CONTACT LIGHTING CONTROL PANEL USER MANUAL APPENDIX A STANDARD WIRING DMX512 COLOR CODE DMX512 WE (E.G., BELDEN TERMINAL IECA BELDEN STANDARD CATEGORY 5E #8132) Brown Drain Wire (Shield) Drain (Shield) Drain (Shield) White/Brown DMX - White w/ Blue Black Black (of Red pair) Orange DMX + Blue w/ White... -
Page 20: Termination Of Shielded Cable
CONTACT LIGHTING CONTROL PANEL USER MANUAL DO NOT convert these cables to home runs. 4. Maximum station quantity subject to power supply and system requirements. Please consult factory for specifi c information. TERMINATION OF SHIELDED CABLE MAXIMUM FOR MAXIMUM FOR LXR DIMENSION NAME MINIMUM... -
Page 21: Panic Input
CONTACT LIGHTING CONTROL PANEL USER MANUAL from outer jacket. Step 3. Terminate approximately 1/2” (12.2mm) from end of conductors on Type 110 punch down block or con- nector per schedule (T568B) • Maximum untwist of conductors to terminations is 1/2” (12.2mm) •... -
Page 22: Specifications
CONTACT LIGHTING CONTROL PANEL USER MANUAL APPENDIX B SPECIFICATIONS 12-CIRCUIT RELAY PANEL (76910) Number of Circuits: 12 (Individually replaceable 20A 14.38 in latching relays) Relay Types & Ratings: Type 1- 20A High-Performance Single Pole Latching 120, 230, 277, 15.88 in 347VAC, 50-60Hz, 1.5HP @ 277VAC. - Page 23 CONTACT LIGHTING CONTROL PANEL USER MANUAL 24-CIRCUIT RELAY PANEL (76911) Number of Circuits: 24 (Individually replaceable 20A 22.00 in 0.175 in latching relays) 4.1 in Relay Types & Ratings: Type 1- 20A High-Performance Single Pole Latching 120, 230, 277, 3.75 in 16.00 in 23.50 in 347VAC, 50-60Hz, 1.5HP @ 277VAC.
- Page 24 CONTACT LIGHTING CONTROL PANEL USER MANUAL 36-CIRCUIT RELAY PANEL (76912) Number of Circuits: 36 (Individually replaceable 20A 22.00 in 0.18 in latching relays) 4.1 in Relay Types & Ratings: Type 1- 20A High-Performance 3.75 in 16.00 in Single Pole Latching 120, 230, 277, 23.50 in 0.18 in 347VAC, 50-60Hz, 1.5HP @ 277VAC.
- Page 25 CONTACT LIGHTING CONTROL PANEL USER MANUAL 48-CIRCUIT RELAY PANEL (76913) Number of Circuits: 48 (Individually replaceable 20A 22.00 in 0.18 in latching relays) 4.1 in Relay Types & Ratings: Type 1- 20A High-Performance 3.75 in 16.00 in Single Pole Latching 120, 230, 277, 23.50 in 0.18 in 347VAC, 50-60Hz, 1.5HP @ 277VAC.
- Page 26 CONTACT LIGHTING CONTROL PANEL USER MANUAL 24-WAY RELAY INSERT PANEL W/ BREAKERS (76921C/76931C) Number of Circuits: 24 (Individually replaceable 20A latching relays) 22.0 in Relay Types & Ratings: Type 1- 20A High-Performance 4.095 in Single Pole Latching 120, 230, 277, 3.75 in 347VAC, 50-60Hz, 1.5HP @ 277VAC.
- Page 27 CONTACT LIGHTING CONTROL PANEL USER MANUAL 36-WAY RELAY INSERT PANEL W/ BREAKERS (76922C/76932C) Number of Circuits: 36 (Individually replaceable 20A latching relays) 16.0 in 23.50 in 0.18 in 3.75 in Relay Types & Ratings: Type 1- 20A High-Performance Single Pole Latching 120, 230, 277, 347VAC, 50-60Hz, 1.5HP @ 277VAC.
- Page 28 CONTACT LIGHTING CONTROL PANEL USER MANUAL 48-WAY RELAY INSERT PANEL W/ BREAKERS (76923C) Number of Circuits: 48 (Individually replaceable 20A latching relays) .75” 16.0” 23.50” 0.18” Relay Types & Ratings: Type 1- 20A High-Performance Single Pole Latching 120, 230, 277, 347VAC, 50-60Hz, 1.5HP @ 120VAC.
- Page 29 CONTACT LIGHTING CONTROL PANEL USER MANUAL 42-WAY RELAY INSERT PANEL W/ BREAKERS (76933C) Number of Circuits: 48 (Individually replaceable 20A latching relays) .75” 16.0” 23.50” 0.18” Relay Types & Ratings: Type 1- 20A High-Performance Single Pole Latching 120, 230, 277, 347VAC, 50-60Hz, 1.5HP @ 277VAC.
- Page 30 Relay Insert Panel w/ Breakers, 42-way CONTACT RELAY PANEL ENCLOSURES Catalog# Description CONBOX-1 Enclosure for use with 76910 insert CONBOX-2 Enclosure for use with 76911 insert CONBOX-3 Enclosure for use with 76912 / 76913 / 76921C / 76931C inserts CONBOX-4...
- Page 31 CONTACT LIGHTING CONTROL PANEL USER MANUAL CONTACT OPTIONS AND ACCESSORIES CONTROL OPTIONS Catalog# Description 76960 Master Control Option 76961 Auxiliary Control Option (operates with a master panel) 74161 Ethernet Control Module 76924 UL 924 Kit 76990 Barrier Kit RELAY OPTIONS Catalog# Description 76991...
- Page 32 AMERICAS EUROPE 10911 Petal Street Rondweg Zuid 85 Dallas, TX 75235 Winterswijk 7102 JD Tel: +1 214-647-7880 Netherlands Fax: +1 214-647-8039 Tel: +31 543-542516 Fax: +31 543-542513 ASIA 24 Sovereign Park Room 1201, Freetown Tower D Coronation Road E 3rd Ring Rd S, 58 Park Royal, London Chaoyang Qu NW10 7QP...
Need help?
Do you have a question about the 76910 and is the answer not in the manual?
Questions and answers