Table of Contents
Advertisement
Quick Links
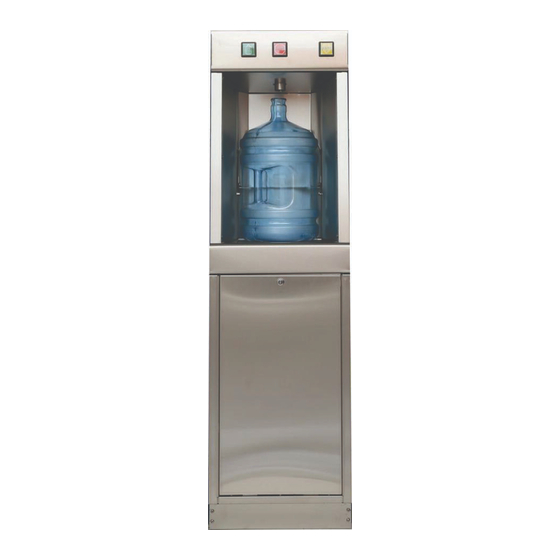
Purely Natural Self-Serve
Models:
Manufactured By:
Precision Design & Manufacturing Inc.
9024-100 Street
Westlock, AB, Canada
T7P 2L4
http://www.precisioncanada.com
e-mail: info@precisioncanada.com
Phone:
(780) 349 4933
Fax:
(780) 349 4957
Water Dispenser
Owners' Guide
PN BFDSA-1
Part No: 330016
& 330017
Owners Guide Part No. 330016/17
Series 0002
Series: 0002
Please read this Owners' Guide
completely before installing or
Printed in Canada
Nov / 2014
BFDSA-2
operating your
Precision Water Systems
Water Dispenser.
Specifications are subject to
change without notice.
Advertisement
Table of Contents

Summary of Contents for Precision 0002 Series
- Page 1 BFDSA-2 Part No: 330016 Series 0002 & 330017 Series: 0002 Manufactured By: Please read this Owners’ Guide Precision Design & Manufacturing Inc. completely before installing or 9024-100 Street operating your Westlock, AB, Canada Precision Water Systems T7P 2L4 Water Dispenser.
-
Page 3: Table Of Contents
Table of Contents Page TABLE OF CONTENTS………………………………………………………………………… 3 INTRODUCTION………………………………………………………………………………… 4 RECORDS………………………………………………………………………………………...4 WARRANTY & IMPORTANT SAFETY PRECAUTIONS ……………………………………5 FEATURES………………………………………………………………………………………..6 Water Dispenser & Ozone Rinse Station Bottle Washer and Fill Station Rear Bottom View Features Diagram FINDING A GOOD INSTALLATION LOCATION……………………………………………..7 UNPACKING YOUR WATER DISPENSER & RINSE STATION…………………………...8 Bottle Washer and Fill Station Unpacking Diagram INSTALLATION…………………………………………………………………………………..9 Pre-Installation Preparation……………………………………………………………………...9... -
Page 4: Introduction
Introduction Congratulations on the purchase of your new Purely Natural (PN) Water Dispenser. When installed and maintained properly, your water dispenser will provide years of safe, trouble free service. It is important to observe and follow the safety and maintenance instructions carefully. -
Page 5: Warranty & Important Safety Precautions
Warranty The warranty for your water dispenser covers defects to all components and electrical parts for one (1) year to the original purchaser. Stainless Steel parts are warranted for one (1) year. With this warranty it is the responsibility of the water dispenser owner to properly maintain the water dispenser. If there is any misuse or abuse the one (1) year warranty will be void. -
Page 6: Features
Features The water dispensers have the following features shown in the diagrams below: Water Dispenser Front View Features Diagram REMOVABLE TOP COVER DISPENSER HEAD CONTROL SWITCHES REMOVABLE GRATE DISPENSER TOP STAND DISPENSER LOWER CABINET DOOR DISPENSER LOWER CABINET Water Dispenser Rear View Features Diagram REMOVABLE TOP COVER DISPENSER HEAD CONTROL BOX CONNECTION (inside) -
Page 7: Finding A Good Installation Location
Finding a Good Installation Location Before installing your water dispenser it is important to find a good location. Following the points listed below will provide the best location for your water dispenser. There needs to be adequate room for a customer to place a bottle in the water dispenser for rinsing and filling. -
Page 8: Unpacking Your Water Dispenser & Rinse Station
Unpacking Your Water Dispenser REMOVE TIE STRAPS Water Dispenser Unpacking Diagram Your water dispenser has been shipped in a strapped, 2-sleeve, box. Unpack the water dispenser by: Remove the straps off the cardboard box. Lift the top cardboard sleeve off of the dispenser. Tip the dispenser slightly and pull out the half flaps. -
Page 9: Installation
Assembly Your water dispenser comes fully assembled. If you purchased the optional bottle shelving unit they will need to be installed. Installation Pre-Installation Preparation Introduction To ensure that installation of your water dispenser can be completed as quickly as possible, it is best to have all of the electrical supplies and plumbing fittings installed before your station arrives. -
Page 10: Electrical Connections
Electrical Connections A qualified electrician must be used to complete the electrical connections for the water dispenser. A 120 Volt, 10 Amp, power supply with 2 outlets will be required to provide adequate electrical service for the water dispenser. Water dispenser Electrical Connections Diagram... -
Page 11: Bottle & Shelf Attachments
Optional Bottle Shelf Attachment & Set-Up If you purchase the optional bottle and accessory shelf, please refer to picture below for setup. Note: Bottles and other accessory not included. -
Page 12: Operation
Operation NOTE: Read all parts of the Owners Guide before operating the Water Dispenser. Introduction Your new dispenser has a rinse & semi automatic fill feature. To rinse a new clean bottle, you simply turn the bottle upside down & press the rinse button (ozone rinse). Push and hold button, now the bottle is rinsed and ready for a fill. -
Page 13: Adjusting Fill Capacity
filling your bottle and have removed it from the fill chamber, return the shelf to the storage position. Activation Controls Once the bottle is full, re-apply the cap. New caps for crown neck bottles should be available to the customer at no extra charge. Remove the bottle. For double dispensers, two bottles may be filled at the same time. -
Page 14: Adjusting Timer
Semi Automatic Dispenser Timer Instructions Initial Setting: Range T1 & T2: Rotate small slotted screw (located beside T1 & T2) either direction until window about shows ‘1M’ AND large dial shows ‘0-3’ Mode: Rotate small slotted screw either direction until ‘E’ shows in window above. -
Page 15: Maintenance And Cleaning
Maintenance and Cleaning Regular Maintenance Keeping your water dispenser clean on a daily basis is the best maintenance that you can provide. Wash your overfill tray with a scotchbrite type pad to keep your dispenser sparkling clean. Note: Never use steel wool type scrubbers as they will contaminate the stainless steel and promote rust. -
Page 16: Troubleshooting
Remove blockage and/or flush valve with clean water. Contact any Precision Water Systems Service Centre to correct any problems with your Water Dispenser that is not covered in this guide. To locate a Service Centre in your area contact the manufacturer at: Precision Design &... -
Page 17: Specifications And Technical Information
Wiring List, BFDSA-1 Wiring List - PURELY NATURAL DOUBLE DISPENSER, BFDSA-1 PART # 330443A SERIES 1 No. Part# Color Ga Length From Conn. ToConn. From Location To Location 1 330286 BLK/WHT 18 FULL 72" PLUG F250 #18-#22 TRANSFORMER TERMINAL BLOCK (LH TAB) 2 330296 BLK 18 FULL 72"... -
Page 19: Wiring List Bfdsa-2
Wiring List, BFDSA-2 Wiring List - PURELY NATURAL DOUBLE DISPENSER, BFDSA-2 PART # 330447A SERIES 1 No. Part# Color Ga Length From Conn. ToConn. From Location To Location 1 330286 BLK/WHT 18 FULL 72" F250 #18-#22 TRANSFORMER TERMINAL BLOCK (RH TAB) 2 330296 BLK 18 FULL 72"... -
Page 21: Wiring List Pumps
Wiring List, Pump(s) Wiring List (7 Pin Circular Plug Pump) No. Part# Length From Location To Location Color From Conn. ToConn. XXXXXX GRN 16 FULL MPIN PUMP CORD 7 PIN PLUG #6 PUMP CORD XXXXXX 16 FULL MPIN PUMP CORD 7 PIN PLUG #4 PUMP CORD XXXXXX... - Page 22 This Page Left Intentionally Blank.
-
Page 23: Warranty Registration
Precision Design & Mfg Inc. IMPORTANT! IMPORTANT! Thank you for purchasing this fine Precision Water Systems Water Dispenser. Please complete the information below and return it within the next ten days so we may register your purchase. Store Name Contact Name...
Need help?
Do you have a question about the 0002 Series and is the answer not in the manual?
Questions and answers