
Summary of Contents for POCKETALK S
- Page 1 POCKETALK S VOICE TRANSLATOR User Manual Version: 1.0 Date: March 2020 Copyright (C) SOURCENEXT CORPORATION All Rights Reserved.
-
Page 2: Before Use
Before use Precautions are categorized as “Warning” or “Caution”. Follow the precautions during use. This indicates a description that, if not followed and not properly handled, may result in death or severe injury. This indicates a description that, if not followed and not properly handled, may result in minor injury. - Page 3 Handling Do not operate while walking or driving a car, motorbike, or bicycle. Never disassemble, repair, or modify the product. Do not apply excessive force. • Do not step on or place heavy objects on the product. • Do not drop or throw the product. Keep the product away from liquids such as water (or drinking water, sweat, seawater, pet urine, etc.).
-
Page 4: Built-In Battery
Built-in battery Do not leave or store in places of high temperature such as near fire. Do not prod with sharp objects (such as nails) or strike with hard objects (such as a hammer). If the built-in battery leaks or emits a strange odor, discontinue use immediately and keep it away from fire. -
Page 5: Electromagnetic Interference
Electromagnetic interference Use the product properly in aircraft according to the instructions of the airline. In hospitals and places with electronic devices that require high-precision control and weak signals, use the product properly according to the instructions of the administrator. If you wear electronic medical devices, or use electronic medical devices other than implantable medical devices for home treatment, confirm the effects of electromagnetic waves with the electronic medical device manufacturer or... -
Page 6: When Charging
When charging Use the included USB cable and charge using the specified procedure. Charging with an unspecified procedure may cause battery leakage, heating, or rupture. Also, when charging overseas, use a USB charger that is compatible overseas. Using damaged cables or chargers, or charging when moisture is present, can cause fire, electric shock, injury, or damage to the unit or other property. -
Page 7: When Cleaning
When cleaning Do not use benzene, thinner, or alcohol. Doing so may deteriorate the exterior or dissolve the parts. If the product is dirty, wipe it with a soft, dry cloth (such as a cloth for glasses). - Page 8 When disposing Do not throw away the product with normal trash. This product uses lithium-ion battery, and throwing it away with normal trash may cause a fire. Dispose products that are no longer used according to the ordinances or regulations related to waste disposal of your local authority.
- Page 9 Confirming the packaged items In addition to the unit, confirm that the following items are included. Unit USB charger USB charging cable (Unit connector: USB Type-C Charger connector: USB Type-A) • Startup Guide • Safety Precautions & FCC Statement...
-
Page 10: Names Of The Parts
Names of the parts Speaker Microphone SIM card slot Touch display... - Page 11 Talk button Power button Volume button Camera Flash Strap hole USB port...
- Page 12 Charging Charge using the included USB charger and USB cable.
-
Page 13: Turning The Unit On Or Off
Turning the unit on or off If you press and hold the power button at the side of the unit, the unit and display will turn on. To turn off the unit, press and hold the power button again, and tap [Power off]. To restart the unit, tap [Restart]. - Page 14 Touching the screen with your fingertip is called a “tap”, which is a commonly used operation. Touching the screen and keeping your finger in place is called “tap and hold”.
- Page 15 Scroll Swiping repeatedly to view other parts in the screen such as lists is called “scroll”.
- Page 16 Swipe Dragging your fingertip on the screen in one direction is called a “swipe”.
- Page 17 Translating You can translate simply by pressing the button and speaking to the unit. While pressing and holding , speak to the unit when you hear a beep sound (release your finger from the button when you are finished speaking). Check the translation result.
- Page 18 Changing the translation direction The translation languages are displayed as a pair at the top and bottom of the screen. The language with the blue background is translated to the language with the black background (in the direction of the arrow). You can change the direction of translation by tapping...
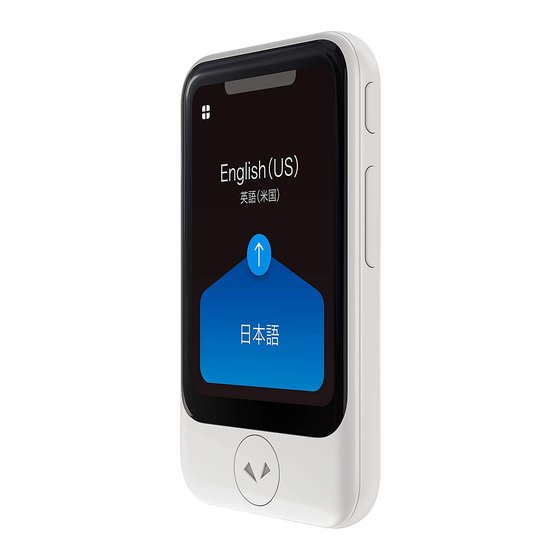
- Page 19 Changing the translation language If you tap a language you want to change, a list of languages is displayed. Scroll through the list of languages, select the language you want to use, and tap < at the upper left. You can easily search for the language you want with the following methods. Select from languages you have used previously.
- Page 20 Using the translation history You can reuse previous translations. If you swipe the top part of the screen downward, previous translations will be displayed in callout boxes. You can view older translations as you scroll upward. The history saves up to 10,000 translations. Adding translations to Favorites Swipe the callout of the translation you want to add to the right.
- Page 21 Deleting previous translations Swipe the callout of the translation you want to delete to the left.
-
Page 22: Basic Screens
Basic screens This section describes the Home screen used for translation, the Launcher used for other features, and the lock screen. Home screen and Launcher Displays the Launcher. Displays the translation history when swiped downward. Using the translation history Frequently used features can be placed here. Placing frequently used features on the Home screen Changes the language to be translated (blue background indicates the source language). -
Page 23: Lock Screen
Lock screen If the lock screen setting is on, the lock screen will be displayed when the unit is not used for a certain period of time. To unlock the screen, swipe the slider. About the lock screen The upper row displays the current location and time. The lower row displays the previously visited location and time. - Page 24 Features available from the Launcher You can use the following useful features. Translates captured text. You can easily translate languages you Camera do not understand, such as city signs and restaurant menus. Translating text (image translation) Converts currency, length, weight, and temperature to local units. Convert Using the Convert Units feature Units...
- Page 25 Translating text (image translation) You can easily translate text such as city signs and restaurant menus. [Camera]. Face the camera toward the text you want to translate. ◦ If your surroundings are dark, tap (flash). To change the target language, tap the language name on the right side. Take a photo of the text.
- Page 26 Specify the area to translate. Touch one of the four corners of the frame with your finger and move it to change the size of the frame. Touch the center of the frame with your finger to move the translation area. ◦...
- Page 27 If you tap , the source text will be played back. ◦ To close the pop-up, tap ◦ When you are finished translating, tap to close the translation result, and tap the upper left to return to the Home screen.
- Page 28 Using the image translation history You can reuse previous image translations. If you tap the thumbnail at the top of the screen, the image translation history will be displayed as a list. • The image translation history saves up to 100 translations. Tap the image you want to reuse to recall the translation data.
- Page 29 Using the Convert Units feature You can convert units such as currency and weight. This feature can be useful in occasions such as shopping overseas. [Convert Units]. The [Exchange] screen is displayed. Select the currency to convert. Tap the currency selection button and select a currency. Upper row: Source currency Lower row: Target currency...
- Page 30 ◦ If you tap , the upper row automatically changes to the currency of the current location. Input the amount in the input field. When you input an amount in the upper row, the converted amount is displayed in the lower row.
- Page 31 Using the Role Play feature You can practice typical conversations by setting. [Role Play]. Common settings are displayed such as the airport or hotel. Select a lesson. Tap a setting and a list of lessons will be displayed. Tap the lesson you want to practice. Practice conversation.
- Page 32 A character will appear and talk to you. While pressing , reply to the character with an appropriate response. When the lesson is finished, tap the button and select another lesson.
- Page 33 Using Favorite translations You can easily recall the phrases that you added to Favorites from the translation history. NOTE When you purchase the unit, [Favorites] is not available in the Launcher at first. It will be displayed when you add phrases displayed in the translation history to Favorites. To add a translation to Favorites [Favorites].
-
Page 34: Deleting Favorites
The phrase is played back. Deleting Favorites Swipe the phrase to the left to delete it from Favorites. - Page 35 The Medal feature You can earn medals by meeting certain conditions, such as the number of times translated, or the number of countries visited. [Medals]. You can earn medals by meeting conditions such as “Translated 10 times” or “Visited 2 countries”.
- Page 36 Connect the unit to a mobile network. Mobile network settings Wi-Fi Connect the unit to Wi-Fi. Connecting to Wi-Fi Bluetooth Connect the unit to a Bluetooth device. Pairing with a Bluetooth device Volume Set volumes such as the unit’s system sound. Adjusting the volume...
- Page 37 Brightness level Adjust the display brightness with the slider. Changing the display brightness Text Size Select from five types. Changing the size of the text displayed on the unit Software Update Keep the unit up-to-date with the latest version. Updating the software of the unit Shortcut Place frequently used features on the Home screen.
- Page 38 Reset Delete history or Favorites, or restore the unit to factory default settings. Using the Reset feature...
-
Page 39: Mobile Network Settings
Mobile network settings This section describes how to turn mobile communication on/off and how to switch SIMs. [Menu] - [Mobile Data]. Turning mobile communication on/off Tap the slide switch to switch between [ON] and [OFF]. Switching SIMs Tap the [SIM card to use] to select the SIM you want to use. To use a SIM card from a different carrier, refer to “Inserting a SIM”... - Page 40 Connecting to Wi-Fi This section describes how to turn Wi-Fi communication on/off and how to set an access point. [Menu] - [Wi-Fi]. Turning Wi-Fi communication on/off Tap the slide switch to switch between [ON] and [OFF]. Connecting to an access point Tap the access point you want to connect to and input the password.
-
Page 41: Pairing With A Bluetooth Device
Pairing with a Bluetooth device You can connect Bluetooth devices such as headphones or speakers. [Menu] - [Bluetooth]. Turning Bluetooth on/off Tap the slide switch to switch between [ON] and [OFF]. Pairing with a Bluetooth device If you put the Bluetooth device you want to pair with into pairing mode, it will be displayed in the [List of available devices]. -
Page 42: Adjusting The Volume
Adjusting the volume Set the volume for the source language voice or operation sound effects. [Menu] and move the handle. Move to the right to increase the volume, or move to the left to decrease it. You can also adjust the volume with the volume button on the right side of the unit. A. -
Page 43: Changing The Display Brightness
Changing the display brightness [Menu] - [Brightness level]. Move the slider to adjust the display brightness. Move to the right to increase the brightness, or move to the left to decrease it. - Page 44 Changing the size of the text displayed on the unit [Menu] - [Text Size]. Select from five types.
- Page 45 Updating the software of the unit NOTE To download software, the battery level must be at least 30% and the unit must be connected to the internet through Wi-Fi. [Menu] - [Software Update]. The unit will be updated if there is newer software available. Tap [Update].
- Page 46 Placing frequently used features on the Home screen You can place a shortcut for a frequently used feature at the upper right of the Home screen. [Menu] - [Shortcut]. A list of features that can be set as a shortcut is displayed. Tap the name of the feature you want to place.
-
Page 47: Using The Lock Screen
Using the Lock Screen This feature locks the screen after the time set in [Sleep Settings] has elapsed. [Menu] - [Lock Screen Settings]. Turning the lock feature on/off Tap the slide switch to switch between [ON] and [OFF]. Displaying the previously visited location and time The previously visited location and time can be displayed while the screen is locked. - Page 48 Using the Notification feature [Menu] - [Notifications Settings]. By setting the notifications on, you can receive the following types of notifications. ◦ When software update is available ◦ When a medal is earned...
- Page 49 Setting the time until the unit sleeps The display turns off and saves battery power when the unit is not used for the amount of time set. [Menu] - [Sleep Settings]. You can select from five options. NOTE If [Lock screen] is [ON], the lock screen will be displayed when the unit wakes up from sleep.
- Page 50 Setting the display language of the unit [Menu] - [Language]. Select from the list of languages that will be displayed on the unit and tap [OK]. Scroll the list upward to check all of the languages.
- Page 51 Setting when using the unit in China [Menu] - [Region of use]. If you are using Wi-Fi in China, select [China] and tap [OK]. When you go to other countries, revert to [Global]. A fewer number of supported languages may be displayed while [China] is selected.
- Page 52 Confirming your Communication Plan [Menu] - [Communication Plan]. Confirm the contract period of your data transmission plan.
- Page 53 Checking various information about the unit You can check information such as the software version and MAC address of the unit. [Menu] - [Information]. Aside from [Device Info], you can check information such as the [EULA].
- Page 54 Using the Reset feature You can use the unit’s reset feature to do the following. • Delete all Favorites • Delete all translation history • Restore the unit to factory default settings [Menu] - [Reset]. Tap the displayed items as needed.
-
Page 55: Inserting A Sim
Inserting a SIM NOTE • For global communication models, the SIM is built into the unit and the card slot is empty. • The unit supports nano SIM cards. • SIM cards other than those specified by Sourcenext are not supported. Carefully insert a thinly tipped object to remove the SIM card slot. -
Page 56: Troubleshooting
Troubleshooting Issue Solution The unit is not 1. Restart the unit. operating properly. Turning the unit on or off 2. Return the unit to factory default settings. Using the Reset feature If the issue persists, supported signals may be out of range. Try connecting through Wi-Fi with a functional device. -
Page 57: Frequently Asked Questions
Frequently asked questions This section summarizes frequently asked questions about the unit in a Q&A format. Issue Solution The unit does not Wait about 15 minutes while it is charging. If there is absolutely no charge. battery level remaining, it may take some time to start charging. If charging does not start even after about 15 minutes, please contact the support center. - Page 58 Changes or modifications not expressly approved by the party responsible for compliance could void the user's authority to operate the equipment. This equipment has been tested and found to comply with the limits for a Class B digital device, pursuant to part 15 of the FCC Rules. These limits are designed to provide reasonable protection against harmful interference in a residential installation.
-
Page 59: Radio Wave Exposure And Specific Absorption Rate (Sar) Information
Radio Wave Exposure and Specific Absorption Rate (SAR) Information The available scientific evidence does not show that any health problems are associated with using low power wireless devices. There is no proof, however, that these low power wireless devices are absolutely safe.
Need help?
Do you have a question about the S and is the answer not in the manual?
Questions and answers