
Summary of Contents for Analogic bk ultrasound 2300 Series
- Page 1 Service Manual 2300 Ultrasound System (bk3000/bk3500/bk5000) SM34584-10 August 2018 For Qualified Service Technicians Only...
- Page 2 LEGAL MANUFACTURER BK Medical ApS Mileparken 34 2730 Herlev Denmark Tel.: +45 44528100 / Fax: +45 44528199 www.bkultrasound.com Email: info@bkultrasound.com The serial number label on a BK Medical product contains information about the year of manufacture. Trademarks DICOM is the registered trademark of the National Electrical Manufacturers Association for its standards publications relating to digital communications of medical information.
- Page 3 General Information Service Notes Checking Procedure 4 Troubleshooting 5 Adjustment Procedure 6 Mechanical Parts 7 Preventative Maintenance 8 Theory of Operation 9 System Connections...
-
Page 5: Table Of Contents
bk3000 – bk3500 – bk5000 General Information Section 1 GENERAL INFORMATION CONTENTS PAGE Safety Aspects ..............................2 1.1.1 Terms and Symbols ..........................2 1.1.2 Warnings and Cautions ......................... 3 System Overview ............................... 4 1.2.1 System Configuration ..........................4 1.2.2 Exploded Views and Part Lists....................... 5 1.2.2.1 Engine ................................ -
Page 6: Safety Aspects
General Information bk3000 – bk3500 – bk5000 Safety Aspects The System complies with: • EN/IEC 60601-1 (2006) • EN 60601–2–37 (2007) • ANSI/AAMI ES60601-1 (2005) • CAN/CSA C22.2 No.601.1 (2008) It fulfils the requirements for dust protection (IP20) for ordinary equipment specified in EN 60529. The System is classified as follows: •... -
Page 7: Warnings And Cautions
bk3000 – bk3500 – bk5000 General Information Warnings and Cautions 1.1.2 For your own and others safety carefully read the following: Warnings: • Opening the instrument can expose live parts. • Any work done on the open instrument with power on must only be done by BK Medical or their authorized representatives, who are aware of the hazards involved. -
Page 8: System Overview
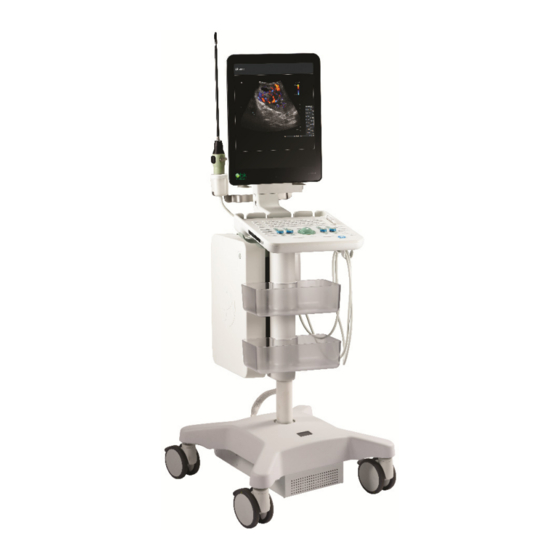
General Information bk3000 – bk3500 – bk5000 System Overview The 2300 product family of systems is comprised of 4 models: • bk3000 • bk3500 • bk5000 • EB2300 (for OEM) Except where otherwise noted, this manual refers to the generic (base) system. bk3000/bk5000 System bk3500 System Note:... -
Page 9: Exploded Views And Part Lists
bk3000 – bk3500 – bk5000 General Information Exploded Views and Part Lists 1.2.2 1.2.2.1 Engine SM34584-10... - Page 10 General Information bk3000 – bk3500 – bk5000 SM34584-10...
- Page 11 bk3000 – bk3500 – bk5000 General Information Item Model Reference Description Spare Part Order Image bk3000/bk5000 Engine bk3000 / 10-73380-01 10-73380S-01 bk5000 bk3000/bk5000 Engine Battery Model bk3000 / 10-77659-01 10-77659S-01 bk5000 bk3500 10-77659-11 bk3500 Engine 10-77659-11S 6-74830-01 Holder for Engine Top 10-78413S-01 6-74829-01 Holder for Engine Bottom...
- Page 12 General Information bk3000 – bk3500 – bk5000 bk3000 / 101420 Video Grabber 10-78035S-01 bk5000 21-05593-01 GPU Board 10-78034S-01 108113 SATA Cable for HDD 10-79304S-01 USB Cable (Frontend Beamformer 155-001197 10-79305S-01 Board to Carrier Board) High Voltage Cable (Frontend Power 10-73800-01 10-73800S-01 Supply to Frontend Beamformer Board) Extender cable (ATX Power Supply to...
-
Page 13: Bk3000/Bk5000 (No Battery Module)
bk3000 – bk3500 – bk5000 General Information 1.2.2.2 bk3000/bk5000 (No Battery Module) SM34584-10... - Page 14 General Information bk3000 – bk3500 – bk5000 standard model battery model 1-10 SM34584-10...
- Page 15 bk3000 – bk3500 – bk5000 General Information Item Reference Description Spare Part Order Image 10-73392-01 Monitor Assembly 10-73392S-01 10-73816-01 Loud Speaker cable 10-73816S-01 10-73382-01 Monitor Arm Assembly (incl cables) 10-73382S-01 10-73806-01 Monitor Power & Monitor HDMI 10-79303S-01 cables in shielded harness 21-77016-01 NP0182 Keyboard...
- Page 16 General Information bk3000 – bk3500 – bk5000 6-74836-01 Engine Enclosure with XD Holes 10-78421S-01 6-75005-01 Top L-Frame for Engine 10-78424S-01 6-75912-01 Rear Door (metallic version) 10-75912S-01 6-82923-01 Rear Door (new improved plastic 6-82923-01 version) 6-75914-01 Bracket for Rear Door 10-78425S-01 10-73379-01 Wheelbase (Wheel and Keyboard 10-73383S-01...
-
Page 17: Bk3500
bk3000 – bk3500 – bk5000 General Information 1.2.2.3 bk3500 321 - 323 PCAP 10.4" Display Touch Controller & Encoder Board PCAP Stackup Board Track Keyboard Main Board Ball USB to LVDS Display Board USB t o/from Ultrasound Engine Module Keyboard Interface Board DC Power from Ultrasound Engine Module USB t o/from... - Page 18 General Information bk3000 – bk3500 – bk5000 Item Reference Description Spare Part Order Image 10-73392-01 Monitor Assembly 10-73392S-01 10-78112-01 Control Panel 10-78112S-01 10-78014-01 Gel holder 10-78014S-01 6-80994-01 Cup, Gel Holder 10-80994S-01 6-80995-01 Elastomer Insert Gel Holder 10-80995S-01 10-78013-01 Transducer Holder, Right 10-78013S-01 10-78013-02 Transducer Holder, Left...
-
Page 19: Battery Module
bk3000 – bk3500 – bk5000 General Information 1.2.2.4 Battery Module Note: Applicable only to systems configured with a Battery Module. 401 (x8) Item Reference Description Spare Part Image Order 10-77638-01 Battery Module Assembly 10-77638-01S Battery (the Battery Module UA1225 UA1225 requires 8 batteries.) 106339 Battery Module Power Supply... - Page 20 General Information bk3000 – bk3500 – bk5000 10-74423-01 Battery Connector Board 10-74425-01 Battery Controler board 21-054563-01 Battery Display Assy with Cables 10-74695-02S 1-16 SM34584-10...
-
Page 21: System Connectors
bk3000 – bk3500 – bk5000 General Information System Connectors The available connectors depend on the system model. Rear System Connectors 1.3.1 Basic Systems (bk3000/bk5000) Systems with battery (bk3000/bk3500/bk5000) Note: The bk3000/bk5000 with battery shares the same rear connector configuration as the bk3500. However, the USB 3.0 ports are available for use on the bk3000/bk5000. -
Page 22: Gooseneck System Connector
General Information bk3000 – bk3500 – bk5000 Gooseneck System Connector 1.3.2 Caution: bk3500: Do not use the gooseneck port if it is USB 3.0 (blue). Ground Protection bk3000/bk5000 bk3500 Item # Symbol Description Potential Equalization Protective Earth 1-18 SM34584-10... -
Page 23: Special Tools And Equipment
bk3000 – bk3500 – bk5000 General Information 1.5 Special Tools and Equipment The tools and equipment listed below do not include industry-standard tools and commonly used equipment. Final Reassembly 1.5.1 Depending on what was disassembled/changed during service, tie wraps (or cable ties) will be needed to securely re-bundle cables. - Page 24 General Information bk3000 – bk3500 – bk5000 This page is intentionally left blank 1-20 SM34584-10...
- Page 25 bk3000 – bk3500 – bk5000 Service Notes Section 2 SERVICE NOTES CONTENTS PAGE Service Notes ..............................2 Edition Number ..............................2 SM34584-10...
- Page 26 bk3000 – bk3500 – bk5000 Service Notes Service Notes To improve system performance, small changes may occasionally be made to the system hardware and software. Information about these and other changes, as well as corrections to this Service Manual will be released as Service Hotlines and posted to the BK Ultrasound Support Zone Edition Number If major changes are made to any models, a revised Service Manual will be released.
- Page 27 bk3000 – bk3500 – bk5000 Checking Procedure Section 3 CHECKING PROCEDURE CONTENTS PAGE Checking the system after repair ......................... 3-2 Getting Started Guides ..........................3-2 3.2.1 Guides .............................. 3-2 3.2.2 Required Equipment .......................... 3-2 3.2.3 Before Power Up ..........................3-2 SM34584-10...
- Page 28 Checking Procedure bk3000 – bk3500 – bk5000 3.1 Checking the system after repair To verify proper operation of the main system functions, the scanner must be checked after repair. The following situations mandate this check: during installation, incoming inspection, preventive maintenance, before and after repair. When performing a system check, all functions and controls must pass the tests described in the relevant Getting Started Guide.
- Page 29 bk3000 – bk5000 – bk5000 Troubleshooting Section 4 TROUBLESHOOTING CONTENTS PAGE Introduction ................................ 4 Tips for Troubleshooting Specific Problems ....................4 4.2.1 Transducer or Scanner Problem? ......................4 4.2.2 Radial or Vertical Lines ......................... 4 4.2.3 Noise Pattern in the B-Image ......................... 4 4.2.4 License-Based Function Does Not Work ....................
- Page 30 Troubleshooting bk3000 – bk5000 – bk5000 4.9.2 Worklist Setup ............................ 30 4.9.3 MPPS (Modality Performed Procedure Steps) Setup ................31 4.9.4 PACS Setup ............................32 4.9.5 Printers Setup ............................ 34 4.9.6 DICOM Troubleshooting........................35 4.9.6.1 Testing Errors .............................. 35 4.9.6.2 Status ................................
- Page 31 bk3000 – bk5000 – bk5000 Troubleshooting 4.22.1.4 Try & Buy License Codes ..........................76 4.23 Video Output ..............................78 4.23.1 bk3000/bk5000: Accessing Video Out Setup Options ................80 4.23.2 bk3500: Accessing Video Out Setup Options ..................80 4.23.3 Enabling Video Out ..........................81 SM34584-10...
-
Page 32: Introduction
Troubleshooting bk3000 – bk5000 – bk5000 4.1 Introduction This section is divided into subsections, covering: specific troubleshooting issues. • model-specific general functions used in servicing the system. • overall test facilities in the system. • Before jumping to any particular subsection, first consult section as it may supply, if not the solution, then some idea of how to troubleshoot a specific problem. -
Page 33: License-Based Function Does Not Work
bk3000 – bk5000 – bk5000 Troubleshooting Note: Before contacting the BK Ultrasound support group for help with noise problems, try the suggestions listed above. If the noise issue cannot be resolved, use the image storage facility of the scanner to save a few images that demonstrate the problem(s). -
Page 34: Bk3500: Finding The Scanner Id
Troubleshooting bk3000 – bk5000 – bk5000 4.2.4.2 bk3500: Finding the Scanner ID To Find the Scanner ID on a bk3500: 1. In Console Mode, tap the touch screen button. 2. Tap System to access Setup Options. 3. Tap Customize. 4. Select License. 5. -
Page 35: Model-Specific Details And Actions
bk3000 – bk5000 – bk5000 Troubleshooting 4.3 Model-Specific Details and Actions Console Mode is the standard operating mode of the system. Many service-related tasks can be performed in either Console Mode or Service Mode. When necessary, this manual will specify the required mode for a given section and/or task. 4.3.1 bk3000/bk5000: Model-Specific Details and Actions There are no buttons for “right click”... -
Page 36: Bk3000/Bk5000: Setup Option Details
Troubleshooting bk3000 – bk5000 – bk5000 4.3.1.2 bk3000/bk5000: Setup Option Details Setup Options are not identical on all models. Option Sub-Options Purpose Presets Preset overview and preset settings. Split/Size Image and size settings for specific pro packages. Keys/Menus Customize keys, mouse settings, and backlight. System General Basic scanner settings such as time, date, and name. -
Page 37: Bk3500: Model-Specific Details And Actions
bk3000 – bk5000 – bk5000 Troubleshooting 4.3.2 bk3500: Model-Specific Details and Actions The bk3500 uses a control panel with a trackball, 6 buttons, 5 touch screen dials, and a touch screen. Item # Icon System Control Functionality Trackball Positions the mouse cursor, measurement cursor, and label. Opens the quick exam start-up workflow. -
Page 38: Bk3500: Accessing Setup Options
Troubleshooting bk3000 – bk5000 – bk5000 4.3.2.1 bk3500: Accessing Setup Options To Access Customized Setup Options: This action is available in Console Mode and when Console application is running inside Service Mode. 1. Tap the touch screen button. 2. Tap System. 3. -
Page 39: Bk3500: Setup Option Details
bk3000 – bk5000 – bk5000 Troubleshooting 2. Tap System. 3. Tap Advanced. 4. Using the touch screen keyboard, enter canucks then tap OK. 5. The password protected Setup Options window will be presented. Note: All setup options are available here. 4.3.2.2 bk3500: Setup Option Details Setup Options are not identical on all models. - Page 40 Troubleshooting bk3000 – bk5000 – bk5000 Advanced (Password-Protected) (1) Customized (2) Options Sub-Options Options Sub-Options Presets Split/Size/Capture Split/Size/Capture Keys/Menus General General Clip Storage/Cine Clip Storage/Cine Printers Printers Password Network Drive Network Drive System System Version Version Video I/O Video I/O Battery Support Battery Support Miscellaneous...
-
Page 41: Service Mode
bk3000 – bk5000 – bk5000 Troubleshooting 4.4 Service Mode The system uses the Windows 8 Embedded operating system. This is a componentized version of Windows 8 that contains all the features, functionality, and familiarity of Windows XP Professional. In the case of the system, all unnecessary software, device drivers, and other miscellaneous files have been removed. -
Page 42: Using Alt + X In Service Mode
Troubleshooting bk3000 – bk5000 – bk5000 4.4.1.1 Using Alt + x in Service Mode If the Console application is running in the Service Mode exit the application by ALT + X. Ensure the Console software has finished loading before using Alt + x. Failure to do so will result in a fatal error. -
Page 43: Bk3500: Entering Service Mode
bk3000 – bk5000 – bk5000 Troubleshooting 4.4.1.3 bk3500: Entering Service Mode To Enter Service Mode on a bk3500: 1. Turn on the scanner and wait until the boot cycle is complete. 2. Tap the touch screen button. 3. Tap System. 4. -
Page 44: Setting The Scanner To Console Mode (Exiting Service Mode)
Troubleshooting bk3000 – bk5000 – bk5000 4.4.2 Setting the Scanner to Console Mode (Exiting Service Mode) To Exit Service Mode and Return to Console Mode: 1. On the Service Desktop, double-click on the desktop icon Console Mode. 2. Type and press Enter. 3. -
Page 45: Essential Operations
bk3000 – bk5000 – bk5000 Troubleshooting To Switch Between Windows Applications: 1. Press ALT + TAB. 4.4.4 Essential Operations Several operations are required to complete almost any service task involving system software. 4.4.4.1 Opening Windows Explorer Windows Explorer is a powerful tool. Because it enables access to almost everything in Windows, do not: •... -
Page 46: Restarting The Scanner
Troubleshooting bk3000 – bk5000 – bk5000 4. Write and the search facility will be enabled. 4.4.4.4 Restarting the Scanner To Restart the Scanner: 1. On the Service Desktop, double-click the Restart Scanner icon. 4-18 SM34584-10... -
Page 47: Replacement Parts With Follow-Up Tasks
bk3000 – bk5000 – bk5000 Troubleshooting 4.5 Replacement Parts with Follow-up Tasks With a few exceptions (listed below), all boards and modules can be replaced with no additional tasks. Before replacing a subassembly, verify that item number and revision of the new part are compatible with the item number of the defective part. -
Page 48: Tasks To Complete After Part Replacement
Troubleshooting bk3000 – bk5000 – bk5000 4.6 Tasks to Complete after Part Replacement Replacing certain parts trigger follow-up tasks. Refer to for details on affected parts. 4.6.1 Changing the COM Express Carrier Board 1. The scanner serial number is programmed into the COM Express Carrier board. If the part is replaced, it may be necessary to reprogram it with the appropriate serial number. - Page 49 bk3000 – bk5000 – bk5000 Troubleshooting 7. When the following warning message is presented, select OK to continue. 8. Adjust the Date and Time and Time Zone as/if required. Note: As stated in the warning message (step 7, above), if the Time Zone field is edited the system must be restarted.
- Page 50 Troubleshooting bk3000 – bk5000 – bk5000 15. Type and press Enter. 16. From the Board Selection drop-down menu, select Com-Express BaseBoard. 17. If the Additional Data field already contains a number, write it down in the event a rollback is necessary. 4-22 SM34584-10...
-
Page 51: Changing Front End Beam Former (Febf) Or Scan Converter Processor (Scp)
bk3000 – bk5000 – bk5000 Troubleshooting 18. In the Additional Data field, enter the code obtained from BK Ultrasound and select Write. 19. Select the X in the top right corner and close the Hardware Monitor and Keyboard dialog. 20. Select the X in the top right corner and close the Janus Toolbox. 21. -
Page 52: If The Icm File Is Not Being Transferred
Troubleshooting bk3000 – bk5000 – bk5000 Note: If the ICM file is not successfully updated follow 4.6.4. 3. Select OK and restart the scanner. 4. Once the scanner is running, adjust the brightness setting to its default: 5. bk3000/bk5000: press CTRL + D 6. -
Page 53: Exchange The Pip Hardware
bk3000 – bk5000 – bk5000 Troubleshooting 4.6.7 Exchange the PiP Hardware Procedure to be added. Contact Technical support department for more information. 4.7 HIPAA (Health Insurance Portability and Accountability Act) The American Health Insurance Portability and Accountability Act of 1996 (HIPAA) requires security and privacy of health information. -
Page 54: Access Control User Profiles
Troubleshooting bk3000 – bk5000 – bk5000 4.7.2 Access Control User Profiles After enabling password protection, create at least one Administrative user. Only Administrators are allowed to: • Add new users. • Remove existing users. • Reset passwords for existing users. •... -
Page 55: Passwords
bk3000 – bk5000 – bk5000 Troubleshooting 4.8 Passwords Purpose Username Password Reference/Note Service Mode – viking 4.4.1 Entering Service Mode BIOS – US2300 4.21 Accessing the BIOS BIOS – BK2300 4.21 Accessing the BIOS (on older bk3000/bk5000 systems) 4.12.4 Configuring the Network on the Network Configuration –... -
Page 56: Dicom
Troubleshooting bk3000 – bk5000 – bk5000 4.9 DICOM Before attempting to configure DICOM, ask the institution’s Network Administrator to complete DICOM Network Description questionnaire. With the completed questionnaire in hand, use the details to configure DICOM on the 2300. Note: To access DICOM, the DICOM license must be present. - Page 57 bk3000 – bk5000 – bk5000 Troubleshooting 7. Select Internet Protocol Version 4 (TCP/IPv4). 8. Select Properties. 9. To use a fixed IP address, select Use the following IP address and fill out the required fields with the data provided by the institution: •...
-
Page 58: Worklist Setup
Troubleshooting bk3000 – bk5000 – bk5000 4.9.2 Worklist Setup Note: Scanner AE Title must be present before testing can be done. Search Filter Values Definition This system only The AE Title of the scanner will then be used to differentiate. Ultrasound systems only (0008,0060)-tag must be ultrasound (US) in the record in the worklist. -
Page 59: Mpps (Modality Performed Procedure Steps) Setup
bk3000 – bk5000 – bk5000 Troubleshooting 7. Is the connection not a success make sure the information from the DICOM Network Description questionnaire has been added correctly. 4.9.3 MPPS (Modality Performed Procedure Steps) Setup Note: Scanner AE Title must be present before testing can be done. To Configure MPPS: 1. -
Page 60: Pacs Setup
Troubleshooting bk3000 – bk5000 – bk5000 4.9.4 PACS Setup Note: Scanner AE Title must be present before testing can be done. Model Method Definition bk3000 bk5000 Manual Images sent manually. bk3500 Press and hold the End Exam button for a couple of seconds. The current bk3000 Auto examination will end and all images and clips (except 3D) will be sent. - Page 61 bk3000 – bk5000 – bk5000 Troubleshooting 3. Enter Name, AE Title, IP Address and Port Number. Note: Once accepted, Name cannot be edited. 4. From the Default PACS drop-down menu, select the desired setting. Note: Each time a new PACS server is added, it will automatically become the default. Select from the following options: •...
-
Page 62: Printers Setup
Troubleshooting bk3000 – bk5000 – bk5000 9. Select OK twice. 4.9.5 Printers Setup Note: Scanner AE Title must be present before testing can be done. To Configure Printers: 1. From Setup Options select DICOM. Note: Refer to 4.3.1.1 4.3.2.1 for model-specific details on accessing Setup Options. 2. -
Page 63: Dicom Troubleshooting
bk3000 – bk5000 – bk5000 Troubleshooting Note: Each time a new printer is added, it will automatically become the default. Select from the following options: • No to ensure the new Printer is not the default • Yes to ensure the new Printer is the default. 5. -
Page 64: Status
Troubleshooting bk3000 – bk5000 – bk5000 Note: It’s important to reboot the scanner. If AE Title is set and the DICOM echo still fails, you may get a message like this Check the following items to ensure they are correctly configured and/or connected: •... - Page 65 bk3000 – bk5000 – bk5000 Troubleshooting 3. The DICOM Status dialog will be presented. To Delete Documents in the DICOM Queue: 1. From Setup Options select DICOM. Note: Refer to 4.3.1.1 4.3.2.1 for model-specific details on accessing Setup Options. 2. Select Status. 3.
- Page 66 Troubleshooting bk3000 – bk5000 – bk5000 4. To stop any additional send attempts, select a document from the Document List and select Cancel to delete it. Note: Selecting Cancel All will clear the entire list. 5. Select Yes to confirm the deletion or No to cancel it. To Test (Failed) DICOM Server/Printer: 1.
-
Page 67: Ping
bk3000 – bk5000 – bk5000 Troubleshooting To View Failed Document Details: 1. From Setup Options select DICOM. Note: Refer to 4.3.1.1 4.3.2.1 for model-specific details on accessing Setup Options. 2. Select Status. 3. The DICOM Status dialog will be presented. 4. -
Page 68: Crash Recoveries
Troubleshooting bk3000 – bk5000 – bk5000 4.10 Crash Recoveries Console software saves different kinds of information in different databases Databases can crash independently, so it is possible that the patient database is still working while the main database is corrupted. Because of this it is recommended to start with one database at a time. -
Page 69: Log Files
bk3000 – bk5000 – bk5000 Troubleshooting 4.11 Log files Log files comprise a collection of saved Windows and BK-specific files. They can be viewed – and exported – from Setup Options (4.11.1) or through File Explorer (4.11.2). 4.11.1 Accessing Log Files via Setup Options To Access/Copy Log Files via Setup Options: 1. -
Page 70: Bk3500: Manually Accessing Log Files
2. Connect a USB flash key to the system. 3. Double-click File Explorer. 4. Search out and copy the folder C:\Users\User\Appdata\Roaming\Analogic to an USB flash key. 5. Once the log files have been copied, follow the recovery instructions in section 4.10... -
Page 71: How To Read The Log Files
bk3000 – bk5000 – bk5000 Troubleshooting 4.11.4 How to Read the Log Files The log file folder contains many files. An overview of the most important files can be found in the table below. Some of the files are further described below. File Name Purpose/Content Version.txt... - Page 72 Troubleshooting bk3000 – bk5000 – bk5000 Event Type Definition Error A significant issue. Warning An event that might not be significant. Scanner can still be used. Information An event that describes the successful operation of an application, driver, or service. Normal operation. An error is not necessary a problem and the log files will change with software versions.
-
Page 73: Configuring A Scanner To Archive To A Network Drive
bk3000 – bk5000 – bk5000 Troubleshooting 4.12 Configuring a Scanner to Archive to a Network Drive The 2300 platform uses Windows 8 Embedded. All actions in this section are predicated on that. Follow these steps to configure the scanner to archive exams on a network drive: 1. - Page 74 4. In the System Properties dialog ensure the tab Computer Name is selected. 5. Note the Full computer name and Domain (in this example, b1016.bkmed.dk and analogic.com, respectively). Note: If the computer was a member of a Workgroup (rather than a Domain), then Domain would be replaced with Workgroup.
-
Page 75: Configuring A Ms Windows-Based Pc
bk3000 – bk5000 – bk5000 Troubleshooting 4.12.2 Configuring a MS Windows-Based PC NOTE: This is not to be done on the scanner. The scanner requires a shared folder on the hard disk to which files will be saved. To Configure the PC: 1. - Page 76 Troubleshooting bk3000 – bk5000 – bk5000 6. Check Share this folder. 7. Type in a Share name (in this example, 3500). 8. Select Permissions. 9. Select the Allow checkbox next to Change. 10. Select OK twice. 11. Select Close to exit. 4-48 SM34584-10...
-
Page 77: Configuring The Network For An Ms Windows 7-Based Pc
bk3000 – bk5000 – bk5000 Troubleshooting 4.12.3 Configuring the Network for an MS Windows 7-Based PC NOTE: This is not to be done on the scanner. The scope of this document does not include network configuration. It’s important to note, however, that the network should be configured for a MS Windows 7- based PC before configuring the scanner’s network settings (4.12.4). -
Page 78: Connecting To A Hidden Wifi Network
Troubleshooting bk3000 – bk5000 – bk5000 4.13 Connecting to a Hidden WiFi Network Using a hidden WiFi network requires special consideration as it is easy to overwrite this WiFi setup if: • An ethernet cable is connected to the system. •... - Page 79 bk3000 – bk5000 – bk5000 Troubleshooting 8. Select Network and Internet. 9. Select Network and Sharing Center. 10. Select Set up a new connection or network. 11. Select Manually connect to a wireless network. 12. Select Next. 13. Complete the form with all relevant details. 14.
-
Page 80: Bk3500: Barcode Reader
Troubleshooting bk3000 – bk5000 – bk5000 16. On the Service Desktop, double-click on the desktop icon Console Mode. 17. Type and press Enter to exit Service Mode. 4.14 bk3500: Barcode Reader The barcode reader (UA2366) may occasionally need to be reconfigured in the field 4.14.1 Resetting the Barcode Reader to Factory Defaults To Reset the Barcode Reader to Factory Defaults: 1. -
Page 81: Testing The Barcode Reader
bk3000 – bk5000 – bk5000 Troubleshooting 4.14.3 Testing the Barcode Reader To Test the Barcode Reader: With the bk3500 powered on, navigate to a data entry screen and select a data entry field (ie, ensure the cursor is in a data entry field). 1. -
Page 82: Bk3500: Touch Screen Calibration
Troubleshooting bk3000 – bk5000 – bk5000 4.14.4 bk3500: Touch Screen Calibration If the touch screen responds inaccurately or to erratic taps (ie, taps that are not properly centered on the touch screen buttons) then it must be recalibrated. If touch screen taps are registered on the monitor instead of the touch screen, see 4.15. Touch Screen calibration is controlled through the Windows operating system. - Page 83 bk3000 – bk5000 – bk5000 Troubleshooting 9. Reopen Tablet PC Settings. 10. From the Display drop-down, select Display device on VGA (1). 11. Select Calibrate (2). 12. Tap the touch screen as and where directed. 13. Select Yes to accept the recalibration. 14.
-
Page 84: Bk3500: Touch Screen Taps Register On Monitor - Not Touch Screen
Troubleshooting bk3000 – bk5000 – bk5000 4.15 bk3500: Touch Screen Taps Register on Monitor – Not Touch Screen If touch screen taps are registered on the monitor instead of the touch screen then Tablet PC Settings are not configured correctly. If the touch screen responds inaccurately or to erratic taps (ie, taps that are not properly centered on the touch screen buttons), see 4.14.4. - Page 85 bk3000 – bk5000 – bk5000 Troubleshooting Press the Windows Start key + x and select Control Panel. 8. From the Control Panel, select Tablet PC Settings. 9. Select Setup… to launch the touch screen configuration process. 10. Press Enter twice and the text “Touch this screen to identify it as the touch screen” is presented on the touch screen.
-
Page 86: Disk Structure / Software
Troubleshooting bk3000 – bk5000 – bk5000 4.16 Disk Structure / Software This section covers directory structure and some of the more important system files. The system contains two hard disks: • SSD SATA HDD: Windows and system files • SATA HDD: patient data. The SSD SATA HDD has three partitions. -
Page 87: C:\ Drive (Ssd Sata Hard Disk)
bk3000 – bk5000 – bk5000 Troubleshooting 4.16.1 C:\ Drive (SSD SATA Hard Disk) Directories and files standard to Microsoft Windows will not be addressed here. Some of the important files stored at the root of C:\ are: hiberfile.sys: Windows hibernation file used for system Fast Boot •... -
Page 88: 2300 Console Directory
Troubleshooting bk3000 – bk5000 – bk5000 4.16.2 2300 Console Directory 2300 Console is the main software directory. Of the various subdirectories, five are covered below (4.16.2.1 to 4.16.2.5). The 2300 console directory also contains console.ini, the software configuration file. Note: The bk3000 and bk5000 have two more directories than the bk3500: Accessible and Queue. -
Page 89: Dicom
bk3000 – bk5000 – bk5000 Troubleshooting 4.16.2.3 DICOM This directory stores both the DICOM program files as well as links to documents that are being sent to a DICOM device. 4.16.2.4 Database The main database is named after the system model. For the bk3000, it is also build dependent. Model Build Database Name... -
Page 90: Bk3000/Bk5000: Archiving To Cd/Dvd From Stagingarea
Troubleshooting bk3000 – bk5000 – bk5000 4.16.2.5 bk3000/bk5000: Archiving to CD/DVD from StagingArea The StagingArea directory contains a copy of all exams currently being burned to CD/DVD. Once the current burn session is complete, the contents of the directory are deleted. If there are any files in this directory, a message will be presented each time the console application starts. -
Page 91: Hard Disk Maintenance
bk3000 – bk5000 – bk5000 Troubleshooting S:\ Drive (Documentation) 4.17 Hard Disk Maintenance There are several tasks that should be performed to test and optimize hard disk performance. 4.17.1 Error Checking a Hard Disk The Checkdisk program verifies the logical integrity of the Windows file system. When the program encounters inconsistencies, it reports them but does not take automatic action to repair them. -
Page 92: Optimizing Hard Disk Performance
Troubleshooting bk3000 – bk5000 – bk5000 4. Generally, the system will present the following message. 5. Select Scan drive to continue or Cancel to close the message without completing the scan. 6. If Scan Drive was selected in the previous step, a successful scan will result in the following messages. - Page 93 bk3000 – bk5000 – bk5000 Troubleshooting To Manually Defragment Hard Disks: 1. Open Disk Defragmenter. 2. Select the relevant drive and select Analyze. 3. Once the analysis is complete, select Optimize to begin defragmenting the hard disks. SM34584-10 4-65...
-
Page 94: Installing Software Updates
Troubleshooting bk3000 – bk5000 – bk5000 4.18 Installing Software Updates Whenever a new software update is released, a corresponding installation procedure will be made available on the BK Ultrasound Support Zone 4.18.1 bk3500: Checking the OS Status The About Box includes data regarding the OS (operating system) status, ie, whether or not the OS installation passed or failed during a system update. -
Page 95: Bk3500: Updating Software From A Usb 2.0 Port
bk3000 – bk5000 – bk5000 Troubleshooting 4.18.2 bk3500: Updating Software from a USB 2.0 Port Note: For stability reasons, during a bk3500 software update: • Ensure that the only USB drive connected to the system is the one containing the software update •... -
Page 96: Bk3500: Accessing Remote Support
Troubleshooting bk3000 – bk5000 – bk5000 Note: Due to individual customer network setup options, Internet access may require a User Name and Password. This information must be provided by the customer’s IT Department. 6. Select Run when prompted. 7. When the TeamViewer window is presented, give the technical supporter the ID and Password. - Page 97 bk3000 – bk5000 – bk5000 Troubleshooting 3. Tap System > Remote Support. 4. When prompted, contact BK Ultrasound technical support for a session Pass Code. Note: The Pass Code will change each time Remote Support is accessed. 5. Enter the pass code per the technical supporter’s instructions and select OK. Note: Ensure the cursor is blinking in the Pass Code data entry box before typing in the Pass Code.
- Page 98 Troubleshooting bk3000 – bk5000 – bk5000 7. Select Run when prompted. 8. When the TeamViewer window is presented, give the technical supporter the ID and Password. Note: The customer’s ID will always be the same but their Password will change with each Remote Support session.
-
Page 99: Bk3500: Accessing Service Mode After A Red Screen
bk3000 – bk5000 – bk5000 Troubleshooting 4.20 bk3500: Accessing Service Mode after a Red Screen 9. If a red screen occurs when running in Console Mode, do not select the monitor Service button. 10. Selecting this button will cause the Console and Touch UI processes to close, resulting in a live system with a blank monitor and touch screen. -
Page 100: License Keys
Troubleshooting bk3000 – bk5000 – bk5000 4.22 License Keys Software licenses in combination with the unique Scanner ID control the options available on each system. This ensures that any given license will only work on a specific scanner. License details and the Scanner ID are stored on the hard disk and can be accessed via Customize >... -
Page 101: Reinstalling Licenses
bk3000 – bk5000 – bk5000 Troubleshooting 4.22.1 Reinstalling Licenses Licenses can be (re)installed manually or from a file. 4.22.1.1 Access the Licenses for a Specific Scanner. The licenses bought for the scanner are available on the service web. Contact technical support for further information. - Page 102 Troubleshooting bk3000 – bk5000 – bk5000 4.22.1.3 Reinstalling Licenses from a File To Reinstall System Licenses from a File: 1. Access Setup Options. Note: Refer to 4.3.1.1 4.3.2.1 for model-specific details on accessing Setup Options. 2. Insert the USB flash key containing the Licenses (as a .lic file) into a USB port on the system.
- Page 103 bk3000 – bk5000 – bk5000 Troubleshooting 6. Once the file has been successfully imported, select OK when the system prompts for a restart. 7. Once the system restarts, double-click Start Console. 8. Access Setup Options. Note: Refer to 4.3.1.1 4.3.2.1 for model-specific details on accessing Setup Options.
-
Page 104: Try & Buy License Codes
Troubleshooting bk3000 – bk5000 – bk5000 4.22.1.4 Try & Buy License Codes All license licenses have a try and buy license which is valid for 30 days after the license has been submitted. Table 4.22-1: bk3000 and bk5000 Application Packages Try &... - Page 105 bk3000 – bk5000 – bk5000 Troubleshooting Table 4.22-3: bk3500 Application Packages App Pkg/ Try & Buy Pro Package Transducers Part # License 5C1e, 6C2, 6C2s,9C2, N13C5, 8L2, 10L2w, 13L4w, 14L3, 18L5, 18L5s, X18L5s UGRA Anes 5C1e, 9C2, l12C5b, N13C5, 5P1, 8L2, 10L2w, 13L4w, 14L3, 18L5, 18L5s, X18L5s UGRA Vascular Anesthesia 0000 0000...
-
Page 106: Video Output
Troubleshooting bk3000 – bk5000 – bk5000 4.23 Video Output By default the analog and digital Video out ports are disabled. Before using them, they must be enabled and configured. The various connections must also be prepared: Determine connector types on external hardware. •... - Page 107 bk3000 – bk5000 – bk5000 Troubleshooting Video Output Options Option Definition Default. Video Outputs are disabled. Select ON to enable them. Enables Analog outputs (passive display format) and set 2 Analog options: Analog Monitor • Font Size • Color Mode (select Black White or Color Mode). Digital: DVI output (1024 x 768) Enables a large image on the external monitor, but the output is not identical to the scanner monitor (although the ultrasound image is identical).
-
Page 108: Bk3000/Bk5000: Accessing Video Out Setup Options
Troubleshooting bk3000 – bk5000 – bk5000 4.23.1 bk3000/bk5000: Accessing Video Out Setup Options 1. Access Setup Options. Note: Refer to 4.3.1.1 for bk3000/bk5000 model-specific details on accessing Setup Options. 2. Select Image tab (bottom left). 3. Select Advanced > Customize…. 4. - Page 109 bk3000 – bk5000 – bk5000 Troubleshooting 4.23.3 Enabling Video Out To Enable Video Out: Select Video Output Mode: OFF, Analog Monitor, Passive Display or Cloned Display and set the configuration options. Analog Monitor Passive Display Cloned Display 1. Select Apply to continue. The following message will be presented. 2.
- Page 110 Troubleshooting bk3000 – bk5000 – bk5000 THIS PAGE IS LEFT BLANK INTENTIONALLY 4-82 SM34584-10...
- Page 111 bk3000 – bk3500 – bk5000 Adjustment Procedure Section 5 ADJUSTMENT PROCEDURE CONTENTS PAGE Introduction ..............................5-2 bk3000/bk5000 Monitor Brightness ......................5-2 bk3500 Touch Screen and Monitor Brightness ..................5-2 SM34584-10...
- Page 112 Adjustment Procedure bk3000 – bk3500 – bk5000 5.1 Introduction All adjustable components are managed in the factory and need no further handling in the field. With the exception of the items detailed below, do not attempt any other adjustments. 5.2 bk3000/bk5000 Monitor Brightness Before adjusting the brightness, make sure you match the environment used by the operator.
- Page 113 bk3000 – bk3500 – bk5000 Mechanical Parts Section 6 MECHANICAL PARTS CONTENTS PAGE Disassembly/Reassembly Procedures ....................... 6-2 6.1.21 Endo Transducer Holder ........................6-2 6.1.21 Monitor ............................. 6-3 6.1..1 To Remove the Monitor: ..........................6-3 6.1..2 To Mount the Monitor: ..........................6-4 6.1.21 bk3000/bk5000: Disassembling/Reassembling Keyboard and Associated Parts ........
-
Page 114: Disassembly/Reassembly Procedures
Mechanical Parts bk3000 – bk3500 – bk5000 6.1 Disassembly/Reassembly Procedures The following sections demonstrate repair and replacement of field serviceable parts for the bk3000, bk3500 and bk5000 systems Unless otherwise stated, all instructions pertain to all models. Note: Refer to section 1.5.4 for a list of required tools. All fasteners and their part numbers used in this section can be seen in the table below. -
Page 115: To Remove The Monitor
bk3000 – bk3500 – bk5000 Mechanical Parts 6.1.21 Monitor 6.1..1 To Remove the Monitor: 1. Tilt down the monitor. bk3000/bk5000 bk3500 2. Remove the cover on the back of the monitor by unfastening the two screws holding the cover, tilting down the monitor, then lifting off the cover. Fasteners and Tools •... -
Page 116: To Mount The Monitor
Mechanical Parts bk3000 – bk3500 – bk5000 4. Disconnect the HDMI and Power Cable. 5. Tilt the monitor to upright position and remove the 3 remaining screws. Fasteners and Tools • 3 pcs, M5x10, T25 6. Slide the monitor up to remove it. 6.1..2 To Mount the Monitor: 1. -
Page 117: Bk3000/Bk5000: Disassembling/Reassembling Keyboard And Associated Parts
bk3000 – bk3500 – bk5000 Mechanical Parts 6.1.21 bk3000/bk5000: Disassembling/Reassembling Keyboard and Associated Parts The following sections demonstrate how to disassemble all the parts connected to (or in the way of) the bk3000/bk5000 Keyboard. To reassemble the parts, simply follow these directions in reverse order. 6.1..1 Keyboard (bk3000/bk5000) To Remove the Keyboard:... - Page 118 Mechanical Parts bk3000 – bk3500 – bk5000 3. Remove the 7 screws under the keyboard dock. Fasteners and Tools • 7 pcs, M4x8, T20 4. Lift up the keyboard and slide it out from beneath the Transducer Holder. 5. Tilt the keyboard to access the 2 cables that must be disconnected. SM34584-10...
-
Page 119: Dvd Drive (Bk3000/Bk5000)
bk3000 – bk3500 – bk5000 Mechanical Parts 6. Carefully tilt the lock at each connector and remove the cables. 6.1..2 DVD Drive (bk3000/bk5000) Remove the following item before removing the DVD player: 6.1..1 Keyboard (bk3000/bk5000). • 1. Loosen the two screws holding the DVD Drive. Fasteners and Tools •... -
Page 120: Keyboard Controller (Bk3000/Bk5000)
Mechanical Parts bk3000 – bk3500 – bk5000 3. Slide out the DVD Drive. 6.1..3 Keyboard Controller (bk3000/bk5000) Remove the following item before removing the Keyboard Controller: 6.1..1 Keyboard (bk3000/bk5000). • Item # Part Number Connector 10-79306S-01 USB cable to Engine 10-73811S-01 Power AO0477 USB and Power to DVD... -
Page 121: Bk3500: Disassembling/Reassembling Control Panel And Associated Parts
bk3000 – bk3500 – bk5000 Mechanical Parts 6.1.21 bk3500: Disassembling/Reassembling Control Panel and Associated Parts The following sections demonstrate how to disassemble all the parts connected to (or in the way of) the bk3500 Control Panel. To reassemble the parts, simply follow these directions in reverse order. Note: While it isn’t necessary to remove the parts listed in the following sections simply to open the Control Panel, it may be easier if some or all of these parts have been disconnected from the system. -
Page 122: Disassembling Transducer/Gel Holders (Bk3500)
Mechanical Parts bk3000 – bk3500 – bk5000 6.1..2 Disassembling Transducer/Gel Holders (bk3500) Disassembling the Gel or Transducer Holders may be required if the bracket connecting them to the system breaks. Note: After reassembly, the Gel and/or Transducer Holder must be fitted to the correct side of the system. 1. -
Page 123: Printer (Bk3500)
bk3000 – bk3500 – bk5000 Mechanical Parts 6.1..3 Printer (bk3500) No tools are required to remove the Printer. 1. Disconnect the USB and power cables from the printer. 2. Grasp the printer tray and slide it up until the arms are free of the mounting points. 6.1..4 Barcode Reader (bk3500) The USB connection is protected by a plate which must be removed before the barcode reader... -
Page 124: Control Panel (Bk3500)
Mechanical Parts bk3000 – bk3500 – bk5000 6.1..5 Control Panel (bk3500) Remove the following items before removing the Control Panel: • 6.1..1 Removing Transducer/Gel Holders (bk3500) • 6.1..3 Printer (bk3500) 6.1..4 Barcode Reader (bk3500). • Note: While it isn’t necessary to remove these parts simply to open the Control Panel, it may be easier if some or all of these parts have been disconnected from the system. - Page 125 bk3000 – bk3500 – bk5000 Mechanical Parts 3. Lift up the Control Panel. 4. Tilt the Control Panel to one side and unfasten the grounding wires. Fasteners and Tools • 2 sets/2 pcs, M3x6 and washers, T10 5. Disconnect the USB 2.0 Barcode Reader cable. SM34584-10 6-13...
- Page 126 Mechanical Parts bk3000 – bk3500 – bk5000 6. Disconnect the Control Panel power (1) and USB 2.0 (2) cables. 7. Disconnect the USB 2.0 Printer cable. 8. The top of the Control Panel can now be removed. 6-14 SM34584-10...
-
Page 127: Uninstalling The Power Cord And Bracket
bk3000 – bk3500 – bk5000 Mechanical Parts 6.1.21 Uninstalling the Power Cord and Bracket 1. Ensure the system is unplugged from the wall. 2. Adjust the system height to its highest setting. 3. Unfasten the 2 screws securing the power cord bracket. Fasteners and Tools •... -
Page 128: Left Side Enclosure
Mechanical Parts bk3000 – bk3500 – bk5000 6.1.21 Left Side Enclosure 1. Open the back screen from the bottom and unfasten the screw. Fasteners and Tools • 1 pc, M3x10, T10 2. Gently pull apart the top of left and right sides and remove the screen. 3. - Page 129 bk3000 – bk3500 – bk5000 Mechanical Parts 4. Remove the two screws at the bottom of the cover. Fasteners and Tools • 2 pcs, M3x10 (washer), T10 5. Carefully slide off the cover and turn it to remove the screws securing the power switch. Fasteners and Tools •...
-
Page 130: Left Side Enclosure
Mechanical Parts bk3000 – bk3500 – bk5000 6.1.21 Right Side Enclosure Remove the following item before removing the Right-Side Enclosure: • 0.06.1.21 Left Side Enclosure. 1. Remove the four screws at the top of the engine. Fasteners and Tools • 4 pcs, M3x10 (w/ washer), T10 2. - Page 131 bk3000 – bk3500 – bk5000 Mechanical Parts 6.1.21 Engine Remove the following items before removing the Engine: • 0.06.1.21 Uninstalling the Power Cord and Bracket • 0.06.1.21 Left Side Enclosure 0.06.1.21 Right Side Enclosure. • 1. Remove the two screws at the top of the engine and remove the bracket. Fasteners and Tools •...
- Page 132 Mechanical Parts bk3000 – bk3500 – bk5000 3. Remove the screw securing the metal boot. 4. Disconnect the cable from the Goose Neck USB 3.0 . 5. Disconnect the cables for the internal Printer 6. Disconnect the cables for the keyboard 6-20 SM34584-10...
- Page 133 bk3000 – bk3500 – bk5000 Mechanical Parts 7. Disconnect the cables for the monitor. Be careful with the plastic locks on the power cable. 8. Remove the two screws holding the engine (the bracket will still hold the engine after the screws have been removed) Fasteners and Tools •...
-
Page 134: Accessing Boards Inside The Cassette
Mechanical Parts bk3000 – bk3500 – bk5000 6.1.21 Accessing Boards inside the Cassette Remove the following items before accessing anything inside the Cassette: • 0.06.1.21 Uninstalling the Power Cord and Bracket • 0.06.1.21 Left Side Enclosure 0.06.1.21 Right Side Enclosure. •... -
Page 135: Gpu Card
bk3000 – bk3500 – bk5000 Mechanical Parts 0.06.1.21 Engine • 6.1.9 Accessing Boards inside the Cassette0.06.1.21. • 1. Remove two screws. Fasteners and Tools 2 pcs, M3x58 (washer) 2. Slide out the Video Grabber card from the connector on the COM Express Carrier Board. 6.1.21 GPU Card Remove the following items before accessing the GPU Card: •... -
Page 136: Scp Card
Mechanical Parts bk3000 – bk3500 – bk5000 6.1.21 SCP Card Remove the following items before accessing the SCP Card: • 0.06.1.21 Uninstalling the Power Cord and Bracket • 0.06.1.21 Left Side Enclosure 0.06.1.21 Right Side Enclosure • 0.06.1.21 Engine • 6.1.9 Accessing Boards inside the Cassette0.06.1.21. - Page 137 bk3000 – bk3500 – bk5000 Mechanical Parts 4. Remove the two screws at the back of the board. Fasteners and Tools • 2 pcs, M3x58 (washer), T10 5. Slide out the SCP Card from the Riser Board connector. 6. Carefully rotate the board and disconnect the cables. SM34584-10 6-25...
-
Page 138: Riser Card
Mechanical Parts bk3000 – bk3500 – bk5000 6.1.21 Riser Card Remove the following items before accessing the Riser Card: • 0.06.1.21 Uninstalling the Power Cord and Bracket • 0.06.1.21 Left Side Enclosure 0.06.1.21 Right Side Enclosure. • • 0.06.1.21 Engine 0.06.1.21 Accessing Boards inside the Cassette •... - Page 139 bk3000 – bk3500 – bk5000 Mechanical Parts 2. Disconnect the cables: • (1) Power from ATX (x2) • (2) USB from FEBF • (3) Power from ATX • (4) SATA cables (Disk 1 = SSD, Disk 2 = Patient disk). 3.
-
Page 140: Hard Disks
Mechanical Parts bk3000 – bk3500 – bk5000 6.1.21 Hard Disks Remove the following items before accessing the Hard Disks: • 0.06.1.21 Uninstalling the Power Cord and Bracket • 0.06.1.21 Left Side Enclosure 0.06.1.21 Right Side Enclosure. • 1. Remove the 4 screws securing the Hard Disk Bay. Fasteners and Tools •... - Page 141 bk3000 – bk3500 – bk5000 Mechanical Parts 6.1.21 FEBF Assembly (Front End Beam Former) Remove the following items before accessing the GPU Card: • 0.06.1.21 Uninstalling the Power Cord and Bracket • 0.06.1.21 Left Side Enclosure 0.06.1.21 Right Side Enclosure. •...
- Page 142 Mechanical Parts bk3000 – bk3500 – bk5000 4. Remove the metal plate. 5. Disconnect the Micro-USB and Power connectors. 6. Disconnect the two FEPS connectors. 7. Remove the first 6 screws securing the FEBF Assembly. Fasteners and Tools • 6 pcs, M3x20 T10 6-30 SM34584-10...
- Page 143 bk3000 – bk3500 – bk5000 Mechanical Parts 8. Remove the last 4 screws securing the FEBF Assembly. Fasteners and Tools • 4 pc, M3x255 T10 9. Gently lift the FEBF Assembly, then tilt it and disconnect the High Speed Cable. 10.
-
Page 144: Febf Assembly (Front End Beam Former)
Mechanical Parts bk3000 – bk3500 – bk5000 6.1.21 FEPS (Front End Power Supply) Remove the following items before accessing the FEPS: • 0.06.1.21 Uninstalling the Power Cord and Bracket • 0.06.1.21 Left Side Enclosure 0.06.1.21 Right Side Enclosure • 0.06.1.21 Engine •... - Page 145 bk3000 – bk3500 – bk5000 Mechanical Parts 4. Unplug the 2 connectors. 5. Lift the top to separate it from the bottom. Gently lift the ribbon cable plug through the slot. 6. Remove the last 5 screws. Fasteners and Tools •...
- Page 146 Mechanical Parts bk3000 – bk3500 – bk5000 6.1.21 ATX Power Supply Remove the following items before accessing the ATX Power Supply (PS): • 0.06.1.21 Uninstalling the Power Cord and Bracket • 0.06.1.21 Left Side Enclosure 0.06.1.21 Right Side Enclosure • •...
-
Page 147: Feps (Front End Power Supply)
bk3000 – bk3500 – bk5000 Mechanical Parts FEPS (Front End Power Supply). • 1. Cut the tie wraps as indicated and unfasten the screw from the cable clamp. Fasteners and Tools • 7pcs, Tie Wraps, Wire Cutters • 1 set/3 pcs, Cable Clamp/M3.5 Washer/M3x8, T10 2. - Page 148 Mechanical Parts bk3000 – bk3500 – bk5000 4. Remove the 2 plastic pins mounted on the outer cover using flat-nose pliers. Fasteners and Tools • Flat-Nose Pliers 5. Remove the ATX PS. Note: To ensure none of the cables touch the fans, be sure to rebundle all cables with new tie wraps when remounting the ATX PS.
-
Page 149: Bk3500/Bk5000 Battery Module
bk3000 – bk3500 – bk5000 Mechanical Parts 6.1.21 bk3500/bk5000 Battery Module If the Battery Module is not functioning, the entire module will need to be replaced. Caution: When reassembling the Battery Module, be sure to plug in the system before inserting the batteries. - Page 150 Mechanical Parts bk3000 – bk3500 – bk5000 5. Remove the 8 batteries. Caution: When reassembling the Battery Module, be sure to plug in the system before inserting the batteries. 6. Unfasten the battery cable. 7. Slide the plastic cover off the battery connections. 6-38 SM34584-10...
- Page 151 bk3000 – bk3500 – bk5000 Mechanical Parts 8. Unfasten item 1. Fasteners and Tools • 2 pcs, M5 serrated washers with M5 Nut, 8 mm wrench 9. Unfasten items 2 and 3. Fasteners and Tools • 2 pcs, Power connectors, PH1 10.
- Page 152 Mechanical Parts bk3000 – bk3500 – bk5000 13. Unplug the battery cable. 14. Remove the 4 fasteners securing the Battery Module to the cart. Fasteners and Tools • 4 pcs, M8x12, T45 socket driver (for reassembly, Torque: 14Nm) Note: When reassembling the Battery Module, be careful not to pinch the LCD cables. 15.
-
Page 153: Disassemble The Battery Module
bk3000 – bk3500 – bk5000 Mechanical Parts 6.1.21 Disassemble the Battery Module Remove the following items before accessing the Battery Module: 0.06.1.21 bk3500/bk5000 Battery Module • 1. Remove the 15 fasteners securing the outer shell. (3 on each side, 7 on the top and 2 on the bottom) Fasteners and Tools 15 pcs, M3x6, T10... - Page 154 Mechanical Parts bk3000 – bk3500 – bk5000 3. Remove the fasteners securing the chassis front plate and remove the plate. Fasteners and Tools 1 pc, M3x58, T10 • 1 pc, black rivet • 4. Remove the plastic lid and filler sheet from the front power-cable connectors. 5.
- Page 155 bk3000 – bk3500 – bk5000 Mechanical Parts 6. Remove the fasteners securing the cable bracket. Fasteners and Tools 2 pcs, M3x10 w/washer, T10 • 7. Disconnect Ethernet- and black power-cable connector. 8. Remove fasteners securing the enclosure top and lift it off. Fasteners and Tools 4 pcs, M3x6, T10 •...
- Page 156 Mechanical Parts bk3000 – bk3500 – bk5000 9. Remove fasteners securing the isolation sheet on the fan Fasteners and Tools 3 pcs, black rivets • 10. Disconnect the fan cable from the PCB. 11. Remove the fasteners securing the chassis fan plate and remove the plate with the fan. Fasteners and Tools 3 pcs, M3x58 w/washer, T10 6-44...
- Page 157 bk3000 – bk3500 – bk5000 Mechanical Parts 12. Remove the fasteners securing the chassis cable plate and lift it out. Fasteners and Tools 1 pc, M3x58, T10 • 13. Loosen the fasteners securing the connector of the red and black power cables, and disconnect the connector from the PCB.
- Page 158 Mechanical Parts bk3000 – bk3500 – bk5000 15. Remove the remaining fasteners securing the PCB. Fasteners and Tools 9 pcs, M3x5, T10 • 16. Carefully disconnect the board from the four connectors on the PCB. Note: Use caution when re-connecting the boards in order to avoid damage to the connector pins.
-
Page 159: Disassembling/Reassembling The Goose Neck
bk3000 – bk3500 – bk5000 Mechanical Parts 19. Slide out the power supply from the battery module chassis. 6.1.21 Disassembling/Reassembling the goose neck Remove all the accessories before following items to get access to the gooseneck. 6.1.4.1 to remove transducer/gel holders •... - Page 160 Mechanical Parts bk3000 – bk3500 – bk5000 3. Remove the 6 screws under the probe holder Fastners and Tools 4 pcs, M4x8, T20 – red arrows • 2 pcs, M4x8, T20 – blue arrows • Probe holder 4. Remove the USB from the gooseneck by removing 2 screws Fastners and Tools 2 pcs, M2.5x16, T8 •...
- Page 161 bk3000 – bk3500 – bk5000 Mechanical Parts 8. Loosen the set screw until it is flushed with the gas cartridge lever. Important! When reassembling the gooseneck, fasten the set screw until it touches the gas release slider, then tighten half of a complete turn. Gas release slider 9.
- Page 162 Mechanical Parts bk3000 – bk3500 – bk5000 14. Remove the 4 screws marked with red and blue, followed by the bottom plate. Fastners and Tools 2 pcs, M6X30, red arrows, T30 • 3 pcs, M3x30 with only 2 washers, T20 •...
- Page 163 bk3000 – bk35000 – bk5000 Preventative Maintenance PREVENTATIVE MAINTENANCE CONTENTS PAGE Introduction ................................ 2 Required Equipment ............................2 7.2.1 Parts Required to Ensure System Performance and Stability ..............2 7.2.2 Parts Required to Respond to Customer Requests and/or Complaints ............2 7.2.3 Standard Tools and Equipment Required to Perform the PM ..............
- Page 164 Preventative Maintenance bk3000 – bk35000 – bk5000 7.1 Introduction The purpose of Preventative Maintenance (PM) is to ensure performance and stability over a system’s lifetime. Note: A PM should be performed once a year. Preparing for a PM visit is essential as it in most cases, it is completed as part of an institution’s Continuity Agreement.
- Page 165 bk3000 – bk35000 – bk5000 Preventative Maintenance 7.3.2 Modifications In accordance with the relevant Service Information bulletins posted on the BK Ultrasound Support Zone, perform the necessary hardware/software modifications/updates to ensure outstanding system performance and stability. 7.3.3 Visual Inspection Check the overall condition of the system. Notice if there is any damage to the system including all attachments to the system such as power cable, transducers, ethernet cable etc.
- Page 166 Preventative Maintenance bk3000 – bk35000 – bk5000 7.3.9 Software Maintenance Check available system hard disk space and if necessary, clean-up the system. Run check disk and defragmentation if relevant. When necessary, inform the customer that their patient data must be backed up and archived in order to free up hard disk space.
- Page 167 bk3000 – bk3500 – bk5000 Theory of Operation Section 8 THEORY OF OPERATION CONTENTS PAGE 8.1 Introduction ................................8-2 General Description ............................8-2 8.2.1 Block Diagram ........................... 8-3 Board Descriptions ............................8-4 8.3.1 Engine Module ..........................8-4 8.3.2 Display Module..........................8-6 8.3.3 FEBF Board ............................
-
Page 168: Introduction
Theory of Operation bk3000 – bk3500 – bk5000 8.1 Introduction This section describes the theory of operation of the scanner. The description is divided into two separate sub-sections, each: General Description: Supported by a block diagram, this section aims to give you an understanding of the interaction between modules, boards and major function blocks in the system. -
Page 169: Display Module
bk3000 – bk3500 – bk5000 Theory of Operation 8.2.1 Block Diagram Display Controller Board Keyboard Controller Board Control Panel bk3000/bk5000 bk3500 Display Keyboard Module Control Panel Module Front End Power Supply Front End Beam Former Board (FEPS) (FEBF) Scan Converter Processor (SCP) COM Express... - Page 170 Theory of Operation bk3000 – bk3500 – bk5000 8.3 Board Descriptions The following sections describe specific board operations. 8.3.1 Engine Module The Engine holds: • FEBF Board – Front End Beam former Board • SCP Card – Scan Converter Processor Card •...
- Page 171 bk3000 – bk3500 – bk5000 Theory of Operation COM Express Carrier Card Hosting the COM Express and providing slots for GPU Card Raiser Card, as well as connectors for Keyboard Module, Video Out ATX Power Supply COM Express Implementing the x86 PC architecture, including CPU, Integrated GPU, System Controller Hub, and System Memory.
- Page 172 Theory of Operation bk3000 – bk3500 – bk5000 8.3.2 Display Module Light Sensor (Not in use!) 12 V DC Power LVDS HDMI Display Controller 19" LCD Panel Board With Back LED Backlight Light Analog Audio Ctrl Displaying the Graphical User Interface, including the ultrasound image, to the user. The Display Module also includes a set of Speakers for audible feedback •...
- Page 173 bk3000 – bk3500 – bk5000 Theory of Operation 8.3.3 FEBF Board FEBF Board is providing the physical interface to the ultrasound transducers, generating high- voltage pulses to excite the transducer ceramics, and amplifying and acquiring the low-voltage echoes from the transducers. The FEBF Board consists of: Transmit Beamformer Function: Supplying the...
- Page 174 Theory of Operation bk3000 – bk3500 – bk5000 The Probe Mux and SPP Function further provide power switches to apply power to any active probe. Probe power is used for control logic, for motor drivers, and for built-in HV multiplexers. It also provides monitoring circuits to detect high-voltage leakage to the connector pins.
- Page 175 bk3000 – bk3500 – bk5000 Theory of Operation I2C Function: Providing board identification (IDPROM), temperature information, cooling fan control, and feedback to the HWM Function on the SCP Card about the actual level of the transmit high voltage rails. This is to make sure that the transmit voltage is actually what it is programmed to be and that the acoustic energy emitted into the tissue is under control.
- Page 176 Theory of Operation bk3000 – bk3500 – bk5000 8.3.4 SCP Card To/From FEBF Board From Beam 3x LMP Real-Time PWRBTN Monitor Function PCIe Link Signals To/From RS232 PCIe Switch PCIe RTP Function VPP Function Function DDR3 Acquisition Buffer PCIe x4 Function DC Power To/From Riser Card...
- Page 177 bk3000 – bk3500 – bk5000 Theory of Operation PCIe Switch Function: 1 Responsible for switching the data traffic between the CPU (upstream) and the RTP Function and FEBF Board (downstream). 2 Providing an efficient multi-channel DMA controller to the system that enables data to be transferred between System Memory and local memories on the SCP Card and the FEBF...
- Page 178 Theory of Operation bk3000 – bk3500 – bk5000 8.3.5 bk3000/bk5000 Keyboard Module Track Button Matrix Board Ball USB t o/from Ultrasound Engine Module Keyboard Controller Board DC Power from Ultrasound Engine Module DC Power from Ultrasound Engine Module USB Conn DVD Drive USB t o/from Ultrasound Engine Module...
- Page 179 bk3000 – bk3500 – bk5000 Theory of Operation 8.3.6 bk3500 Control Panel PCAP 10.4" Display Touch Controller & Encoder Board PCAP Stackup Board Track Keyboard Main Board Ball USB to LVDS Display Board USB t o/from Ultrasound Engine Module Keyboard Interface Board DC Power from Ultrasound Engine Module USB t o/from...
-
Page 180: Internal Power Distribution
Theory of Operation bk3000 – bk3500 – bk5000 8.4 Internal Power Distribution Figure 8-1: Internal Power Distribution FEPA FEBF Board bk3000/bk5000 Module 19" LCD Button Matrix Board Displ ay bk3500 Key board Main Board ip11 SCP Card ip10 ip15 Module bk3000/bk5000 Keyboard Control ler Board Displ ay... - Page 181 bk3000 – bk3500 – bk5000 Theory of Operation ATX PSU/FEBF (Digital) (ip3) • 12/ 5V for POL to the digital circuits FEPS/FEBF (Analog) (ip4) • +/- HVM • +/- HV1 for TX • +/- HV2 for TX or +/-LV1 for low level TX •...
- Page 182 Theory of Operation bk3000 – bk3500 – bk5000 This page is left blank intentionally 8-16 SM34584-10...
- Page 183 bk3000 – bk3500 – bk5000 System Connections Section 9 SYSTEM CONNECTIONS CONTENTS PAGE Introduction ..............................9-2 9.1.1 USB 3.0 ............................9-2 9.1.2 USB 2.0 ............................9-2 9.1.3 LAN ..............................9-2 9.1.4 DVI Out ............................9-3 9.1.5 Super Video Out ..........................9-3 9.1.6 Composite Video Out (RCA/Phono) ....................
- Page 184 System Connections bk3000 – bk3500 – bk5000 9.1 Introduction This section discusses the available external equipment connections on the 2300. 9.1.1 USB 3.0 Full duplex with 5 Gbps bandwidth using a standard USB Type A socket (blue) – two at the back of the scanner (item 2 in Figure 9-2) and one at the side of the gooseneck...
- Page 185 bk3000 – bk3500 – bk5000 System Connections 9.1.4 DVI Out The DVI Out is a DVI-I type that contains both digital and analog signals, combined (item 1 in Figure 9-3). Thus both digital and analog monitors can be connected to this. The resolution in “Cloned Display”...
- Page 186 System Connections bk3000 – bk3500 – bk5000 9.2 Useful Video Adaptors Here is a suggested list of adapters to connect additional cables. Cable Connector Adapter Image Description Image Description BNC: (composite) Phono (male) to BNC (female) adapter 4-pins: (S-Video) Not required. Phono RCA: Not required.
Need help?
Do you have a question about the bk ultrasound 2300 Series and is the answer not in the manual?
Questions and answers