Advertisement
Quick Links
Reverse-osmosis
INSTALLATION
OPERATION
WATER TREATMENT
SYSTEM
MAINTENANCE
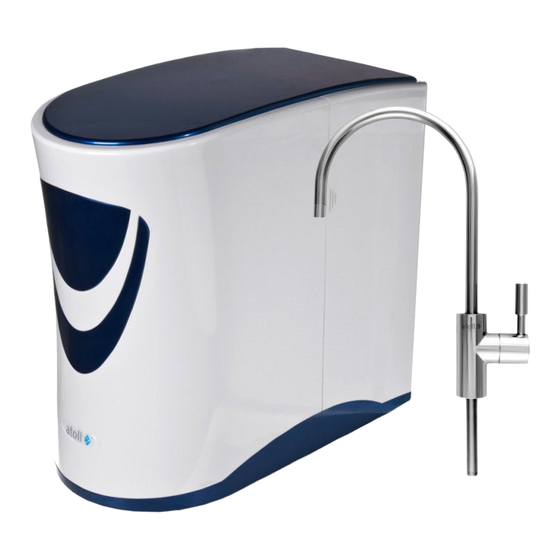
MODEL
-550 box STD
This system is assembled according to Specification (TU) 3697-009-58968054-2012, serial manufacturing.
It is tested by Main Center on Potable Water Control and Testing
RU.0001.21
06,
and certified by Tekhnoneftegas Ltd,
RU.0001.11HO03
Advertisement

Summary of Contents for Atoll A-550 box STD
- Page 1 Reverse-osmosis INSTALLATION OPERATION WATER TREATMENT SYSTEM MAINTENANCE MODEL -550 box STD This system is assembled according to Specification (TU) 3697-009-58968054-2012, serial manufacturing. It is tested by Main Center on Potable Water Control and Testing RU.0001.21 and certified by Tekhnoneftegas Ltd, RU.0001.11HO03...
- Page 2 Copyright This manual is copyright managed by Rusfilter Scientific and Production Association Ltd. According to the copyright law, it is prohibited to reproduce this manual in any mode, in full or in part, without the prior written consent of Rusfilter Scientific and Production Association Ltd. Although all the necessary steps have been taking to verify the text of this manual, the manufacturer does not guarantee its completeness or correctness.
- Page 3 DEAR CLIENT! Thank you very much for your choice of our Atoll water treatment system. When properly used it, you will get clean and tasty water for many years. For attaining the best results, we recommend you to get acquainted with this manual in details and keep it for future reference. To avoid problems and mistakes, it is necessary to read the safety rules and observe the installation instruction.
- Page 4 REVERSE OSMOSIS AS COMPARED with other water treatment methods Water Disinfection Filtration Membrane filtration treatment method Distillation Ceramic Carbon Cation- Anion- Micro Reverse Chemical filter filter exchange exchange filtration osmosis lamp Impurities filter filter Solids (>1 µm) Water hardness (cal- cium and magnesium) Iron and manganese Copper, lead and...
-
Page 5: Standard Set
STANDARD SET Your new Atoll reverse-osmotic filter was thoroughly checked by the manufacturers for leaks, treated water quality and functionality of all its components. During filter designing, it was assumed to install it under a kitchen sink. It is a recommended place for installation. -
Page 6: Safety Rules
SAFETY RULES Atoll reverse-osmotic filter completely corresponds to all safety provisions as confirmed by Russian conformity certificate. Nevertheless, all users have to know its operating mode and safe operation features. To avoid problems and mistakes, we kindly ask you to get acquainted with this chapter and strictly follow installation and maintenance instructions. - Page 7 • Do not put any item on the filter top. Check the system for leaks at regular intervals. To limit the damage caused by water leaks, it is recommended to install atoll Leak Stop® preventive valve at the tube used to supply water to the filter.
- Page 8 Requirements to water supplied to the filter Pressure (min…max), atm. 2.8…8.4 3-11 Temperature, 4-38 Salinity level, mg/L <1000 Chlorides, sulfates, mg/L <900 Free chlorine, mg/L <0.5 Turbidity, mg/L <1 Hardness, mg×eq/L <7 Iron, mg/L <0.3 Manganese, mg/L <0.1 Permanganate demand, mg <5 Total bacterial count, U/mL <50...
- Page 9 Pull tubes to check the connection. Fig. 3 To prevent accidental disconnection, fasten the ring by a clamp (Fig. 3). DISCONNECTION IS JUST AS SIMPLE 1. Ensure no pressure in the tube. 2. Remove a clamp preventing an accidental disconnection. 3.
- Page 10 II. BORE DRILLING FOR THE PURE WATER FAUCET AND ITS CONNECTING TO THE FILTER ATTENTION: despite the fact that the drilling of a bore in a sink is not very complex, however, it requires appropriate skills, attention and care. Wear protective goggles and gloves. If necessary, consult a specialist.
- Page 11 III. CONNECTION TO COLD WATER LINE ATTENTION: ensure that the filter is connected to a cold water line (t is 38 C). Connection to a hot water line will damage the filter. 1. Close the valve that shuts cold water off. Open the cold water tap on a basin mixer to depressurize the line.
- Page 12 IV. INSTALLATION OF THE DRAIN CLAMP Drain clamp is compatible with sink water traps DN 40. It should be installed at the vertical part of a pipe upstream the first bend (Fig. 10). Pipe section, in which enters the drain tube, should be not filled with water.
- Page 13 Fig. 12 VI. FILTER FLUSH AND OPERATION START 1. Disconnect the tube from the inlet into the third preliminary filter (Atoll MK-5633C (1 µm)) and put it into any vessel (bucket, sink, etc.). 2. To wash cartridges, open the inlet tap at the filtration unit for 2-3 minutes.
- Page 14 Recommended expendable elements: 1 purification step: atoll: -5633 (5 µm), Omnipure: K5605JJ 2 purification step: atoll: C -5633 , Omnipure: K5633JJ 3 purification step: atoll: -5633 (1 or 5 µm), 4 purification step: atoll, Filmtec: TW30-1812-50 5 purification step: atoll: -2586C;...
-
Page 15: Troubleshooting
TROUBLESHOOTING Problem Cause Repair Leaks Threaded connections are not Check threaded connections and, if tightened. necessary, tighten them. Tubes are not sealed. Remove and once more connect the tube (ref. page 8) after its lubrication by silicone grease. Contact your dealer. Not enough O-rings Excessive Drainage clogging... - Page 16 Sufficient The system just starts operating. Reservoir is filled within 1.5-2 hours. Low water volume temperature and pressure of inlet water does not enter decreases membrane output. Possibly, you the storage just have to wait. reservoir. Preliminary filters are clogged. Replace preliminary filters.
- Page 17 Dichlrethane Lead Tetrachloroethylene Filter specification Model A-550 box STD Treated water output (at water salinity level 250 mg/L temperature 15° , pressure 3.5 atm., efficiency factor 15 %), liters per day Number of purification steps Volume of pure water vs. water pressure at the filter inlet (water temperature is 15°...
- Page 18 Microorganisms cause fouling of preliminary filters, pressure drop, and, finally, a filter stops its operation. To prevent this situation, it is recommended to install Viqua SC1/2 UV lamp upstream the filter (Fig. 14) in combination with Atoll I-11S main preliminary filter. Fig. 14...
- Page 19 Protection of the storage reservoir against microbial penetration. If the filter is not used during the long period (2- 3 weeks), there is a probability on microbial penetration into the storage reservoir via the pure water faucet. Reservoir could be cleaned from microorganisms only by its washing by...
Need help?
Do you have a question about the A-550 box STD and is the answer not in the manual?
Questions and answers