Table of Contents
Advertisement
Advertisement
Table of Contents

Related Manuals for Raco Verbatim

Summary of Contents for Raco Verbatim
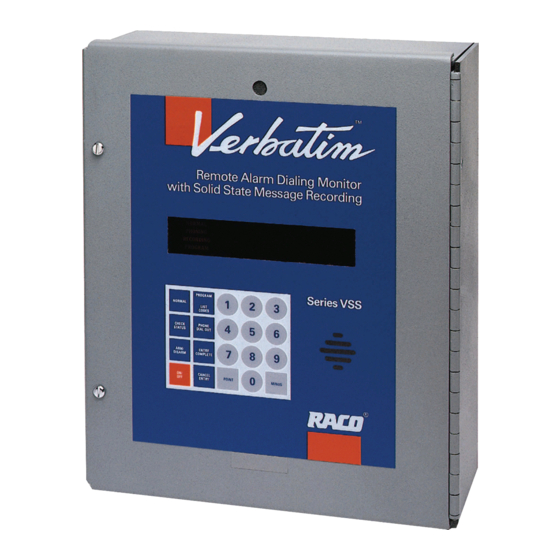
- Page 1 Owner's Manual Verbatim Owner's Manual...
- Page 2 Department will automatically void this warranty. If alterations of the unit are authorized by RACO, please complete the authorization form in the Owners Manual and return the form to RACO to ensure the warranty. Under no circumstances will RACO be responsible for consequential or secondary damages.
-
Page 3: Table Of Contents
Recording Voice Messages Planning Messages ................. 4-2 Managing Available Speech Memory ..........4-2 4.2.1 Verifying/Extending Recording Time ..........4-3 Record Your Messages ..............4-4 Using Your Verbatim Autodialer Placing Inquiry Calls to the Verbatim Autodialer ......5-1 Verbatim Owner's Manual... - Page 4 Continued Dialing in the Absence of Acknowledgment ....5-3 Acknowledging the Alarm Call ............5-4 Alarm Reset Timeout After Acknowledgment....... 5-4 Programming by Phone ..............5-4 Dialing Out and Conversing Through the Verbatim Autodialer ..5-6 Advanced Programming Program Codes ................6-1 6.1.1 Notes for Programming Code Table: ..........
- Page 5 Programming Input Channels ............A-5 A.2.4 Initial Testing ................. A-5 Recording Messages In Your Own Voice ........A-5 UsingYour Programmed Verbatim Autodialer ......A-6 Remainder of the Manual .............. A-6 Enhanced Telephone Interface Features ........A-7 Analog Signal Input Analog Connections ..............B-1 B.1.1...
- Page 6 Recording Speech Messages for Analog Channels ....... B-9 B.1.9 If Analog Inputs Do Not Work Correctly ........B-11 B.1.10 Troubleshooting Analog Grounding Problems For Verbatim Analog ..............B-11 Remote Supervisory Control Output Remote Supervisory Control (VRSC) Output Installation and Operation Instructions ............C-1 C.1.1 Mounting and Wiring Connections for Remote Supervisor Control ...................
- Page 7 Network Status Codes ..............F-22 F.17.2 Diagnostic & Communications Error Codes ....... F-23 PLC Programming Code Table ............ F-25 Cabling Diagrams RACO VSER-01 Serial Cable Connection Diagram ..... G-2 RACO VPPC-1 Parallel Cable Connection Diagram ....G-3 Verbatim Owner's Manual...
- Page 8 Contents Verbatim PLC Network Connections Diagram ......G-4 RACO VMB-2 Serial Cable Connection Diagram ......G-5 RACO VMBM-1 Serial Cable Connection Diagram ..... G-6 RACO VBB-1 Serial Cable Connection Diagram ......G-7 VTI 405/505-DCM Serial Cable Connection Diagram ....G-8 Verbatim Floobydust Adjusting Internal Speaker Volume ..........
- Page 9 Worksheet B Alarm Call Grouping Programming ........... J-3 Part 1: Group Description Naming ..........J-3 Part 2: Linking Channels To Groups ........... J-4 Worksheet B Alarm Call Grouping Programming Cont........ J-5 Worksheet C Message Planning & Recording ..........J-11 Verbatim Owner's Manual...
- Page 10 Standard Annunciator Sequence (Manual Reset) ......K-2 Clear On Return To Normal (Automatic Reset)......K-3 Report Return To Normal (Ringback) ........... K-3 Annunciator Sequence Option Summary ........K-5 Glossary Index FCC Notice to Users Warranty Registration Card Response Card viii Verbatim Owner's Manual...
-
Page 11: Overview
An alarm condition can be indicated by change at a sensor, by new data from a Remote Channel (RC), or by loss of AC power. When an alarm occurs, the Verbatim accesses the standard phone line to which it is connected, dials the appropriate phone numbers and delivers the user’s own pre-recorded voice message corresponding to those particular alarm conditions that are currently active. -
Page 12: Manual Description
Most programming is entered in the form of 3-digit codes as described in this manual. All user programming, including recorded messages, is maintained in permanent non-volatile memory. The Verbatim autodialer incorporates extremely thorough and effective electri- cal surge protection and overall rugged construction, to deliver reliable opera- tion under real-world conditions. - Page 13 The phone indicates that you can access the Verbatim autodialer through your phone. MINUS Other icons include button or keys on the Verbatim autodialer front panel. “items in quotes” Quotation marks indicate titles of sections and mes- sages.
- Page 14 Overview Verbatim Owner's Manual...
-
Page 15: Installation
5 feet of a standard RJ-11 phone jack and a grounded 120 VAC power outlet. 1. Mount the Verbatim autodialer on centers of 6" x 11 3/8" using the external mounting ears on the enclosure. #10 or 3/16" bolt sizes are best. - Page 16 If there are any green grounding wires in place on TS3 originating from plug-in expansion cards, leave those green grounding wires in place on the terminal marked GRN (Green). If the Verbatim autodialer turns on when power is applied, turn it off with the red POWER ON/OFF key.
-
Page 17: Electrical Connection Diagram For Dry Contact Inputs
TS1. The other side of each contact connects to the common return (the "C" terminals on TS1). 8 Or More Channel Verbatim: Connect one side of each contact to the corresponding numbered terminals on the VX32 expansion card. Connect the other side of each contact to the common return (the "C"... -
Page 18: Installing The Parallel Printer
The VPPC-1 cable attaches to the front panel circuit board where the mating pins protrude, just inside the front door of the Verbatim . Orient the connector so the cable’s Pin 1 index (a red stripe on the cable or an arrow on the connector) is near the corner of the front panel board. -
Page 19: Load Paper And Place Printer On Line
Verbatim options are configured (i.e., analog, RSC, PLC interface, etc.). If the printer is off line or out of paper, printout data is sent to the Verbatim buffer each time it would otherwise be printed on the printer. Once the amount of data sent to the buffer exceeds the size of the buffer, printout items will continue to be copied to the buffer but will begin to overwrite buffered data. -
Page 20: Printout At Regular Intervals
2.3.4 Printout at Regular Intervals The Verbatim autodialer may be programmed to automatically log (print on the printer) all input conditions at regular intervals, by entering the following code: 943 XXX.X ENTER where XXX.X is the desired printing interval in hours, from 0.1 to 999.9... -
Page 21: Turning Off The System With A Printer
Verbatim when it is powered off, resulting in the Verbatim not remaining turned off. It is possible that a few seconds after powering off the Verbatim it will turn itself back on again. To remedy this condition simply turn off the printer whenever turning off the Verbatim . - Page 22 Installation 2 - 8 Verbatim Owner's Manual...
-
Page 23: Programming And Testing
If you make an error in code entry, press CANCEL and start again. Exceptions: If you have powered up your Verbatim without connecting a live telephone line to the unit you may observe that the TFAIL indicator is on. This indicates that the unit is checking for the presence of a telephone connection and attempting to determine the line configuration. -
Page 24: Front Panel Keys And Indicators Diagram
Programming and Testing Front Panel Keys and Indicators Diagram 3 - 2 Verbatim Owner's Manual... -
Page 25: Programming Phone Numbers
Monitoring phone fault detection, etc., or to establish and use a call forward phone number, etc. Programming Input Channels Your Verbatim autodialer needs to know whether its input channels are to be normally closed (alarm on Open Circuit), or normally open (alarm on Closed Circuit). - Page 26 Make sure all inputs are in their normal (non-alarm) state. Then press: 5 0 0 ENTER The Verbatim autodialer automatically examines all inputs and programs them to alarm on the opposite input state from their present status. This code 500 does not affect any channels that have been programmed for Disabled Channels, Status Only, Run Time Meter, or Pulse Totalizer function.
-
Page 27: Initial Testing
To set any of your contact inputs for the Pulse Totalizer function, see Section 6.2.3, “Channel Programming (Configuring)." Initial Testing Perform the following steps to ensure that your Verbatim autodialer is properly installed. 1. First, temporarily disarm the unit by pressing: DISARM DISARM/RE-ARM until the DISARM LED is flashing. - Page 28 Programming and Testing 6. Your Verbatim autodialer is now able to operate, having at least one dialout phone number programmed and having its input channels config- ured. However, you may wish to record your own voice messages (see the next section) or perform special advanced programming items (see Section 6, “Advanced Programming”) before referring to Section 5, “Using Your...
-
Page 29: Recording Voice Messages
Using Default Messages Instead of Recording Your Own. Recording messages is an optional step. Your Verbatim autodialer comes with built-in default normal and alarm messages for all channels. Recording voice messages can be postponed until you have become more familiar with your unit. -
Page 30: Planning Messages
130 sec 200, 270 or 399 sec 41-48 chan. unit 156 sec 240, 324 or 476 sec 49-56 chan. unit 182 sec 280, 378 or 555 sec 57 or more 208 sec 320, 432 or 624 sec Verbatim Owner's Manual... -
Page 31: Verifying/Extending Recording Time
During this time, the Verbatim autodialer will not be recording your spoken messages. Instead, it will be timing you. -
Page 32: Record Your Messages
ZERO to begin recording, and press ZERO again to stop recording. See Section 5.7, “Programming by Phone.” The Verbatim autodialer will immediately play back the message you have just recorded, allowing you to determine if you need to re-record it louder, softer or more clearly, etc. - Page 33 9 1 4 N ENTER where N is the desired ID number which may be up to 16 digits long. Some users program the Verbatim autodialer’s own phone number as its ID number. If you want to set a specific recording rate rather than letting Autoextend...
- Page 34 Recording Voice Messages Verbatim Owner's Manual...
-
Page 35: Using Your Verbatim Autodialer
Placing Inquiry Calls to the Verbatim Autodialer You may call the Verbatim autodialer at any time from any phone. The unit will wait the programmed number of rings before answering and then will begin a full status report. The status report starts with the Station ID Message, followed by any special warning messages (e.g.: no phone numbers programmed, or the... -
Page 36: Receiving Alarm Calls
The voice messages follow the same format as an inquiry call, including the prompting beep, except the channels having no alarm activity are not included in the alarm report. If there is no acknowledgment, the Verbatim autodialer will replay the message for the programmed number of repeats (default is 3) and then will say, “Goodbye,”... -
Page 37: Continued Dialing In The Absence Of Acknowledgment
"Power is On" is reported. Continued Dialing in the Absence of Acknowledgment The Verbatim autodialer will then wait for the programmed Time Between Alarm Calls (default 2 minutes; See Section 6.2.12, "Miscellaneous Programming Tips," to change default time), during which you may call the Verbatim autodialer back to acknowledge the alarm. -
Page 38: Acknowledging The Alarm Call
If you press a Command Tone “1” at the sound of the warble tone, the Verbatim autodialer will prompt you to enter a program code. (Or, if you have established a Security Access Code, you will first be prompted for this code). - Page 39 To end a phone call after programming: Press # # without a prior digit entry. The Verbatim autodialer will then issue a prompting beep which is another opportunity to enter a “1” if you didn’t want to end the call. It will then say “Goodbye”...
-
Page 40: Dialing Out And Conversing Through The Verbatim Autodialer
Continue the conversation in this manner. To end the call press NORMAL. If the DIALOUT/PRESS TO TALK key is not pressed for more than 2 minutes (or as previously set), the Verbatim autodialer will automatically end the call. -
Page 41: Advanced Programming
Examples: 1, 5, 20. A two-digit Designation Number for phone numbers (01 for first number, 02 for second, etc.). Used to turn a function ON (1) or OFF (0). 2-digit channel number (use ZZ=00 for ID message). Verbatim Owner's Manual... -
Page 42: Notes For Programming Code Table
11. To pre-set a Run Time value, include the value before ENTER. 12. Maximum value that can be entered is 4,294,967,294. 13. Omits all mention of disabled channel. Restore by setting for Normally Closed, Normally Open, etc. Verbatim Owner's Manual... -
Page 43: Programming Code Table
5ZZ 7 N Pulse totalizer: ACTIVATES 12, 2 6.2.5 with starting value N 5ZZ 8 N Pulse totalizer: sets scale factor N 6.2.5 5ZZ 6 N Pulse totalizer: sets alarm setpoint N 6.2.5 with starting value N Verbatim Owner's Manual... - Page 44 2 = Phone Fault OFF/Auto Tone-Pulse ON 3 = Phone Fault ON/Auto Tone-Pulse ON CPM Ring Count 10 rings 5 - 20 rings 6.2.12 928 N Extends length of inserted 1 sec 1 - 10 sec 6.2.7 dialing delays to N sec Verbatim Owner's Manual...
- Page 45 Sets holiday rearm date 12/24/90 Today - 12/31/20 MM = month MMDDYY DD = day YY = year Reads holiday disarm date Sets holiday disarm date 12/24/90 The day after the holiday rearm date MMDDYY (see Code 964) - 12/31/20 Verbatim Owner's Manual...
- Page 46 B.1.5 X.XX 5 ZZ 3 Sets high signal input value B.1.5 X.XX 5 ZZ 3 Sets high signal input value B.1.5 to real world point POINT 5 ZZ 4 Sets high signal input spoken value B.1.5 X.XX Verbatim Owner's Manual...
- Page 47 B.1.3 0 = 4-20 ma signal 1 = 0-1 VDC signal 2 = RACO TS-705A Remote Supervisory Control For all items in this section: N = output number, Range = 01, 02, 03, 04, 05, 06, 07, 08 95 N Reads RSC output #N C.1.3...
- Page 48 6.2.18 ARMED 925 0/1 Turns on/off alarm acknowledgment on call-in to 0 = OFF dialer. 1 = ON 926 V Sets delay before return to 2 min 1-99.9 min Nonrecurring 6.2.18 normal (Exit Delay) to V Function Verbatim Owner's Manual...
- Page 49 Reads call in count (add 0 to clear) 6.2.20 940 2 Reads dial out count (add 0 to clear) 6.2.20 940 3 Reads acknowledged alarm count (add 0 to clear) 6.2.20 940 4 Reads power failure alarm count (add 0 to clear) 6.2.20 Verbatim Owner's Manual...
-
Page 50: Programming Operations
The following descriptions show the relevant program codes in parenthesis, and are organized according to their appearance in the preceding Program Codes table located in Section 6.1, “Program Codes.” Refer also to Section 5, “Using Your Verbatim Autodialer,” for a description of over-the-phone programming. 6.2.1... -
Page 51: Channel Programming (Configuring)
5 ZZ 2 Set Channel ZZ for A Closed Circuit condition will cause an alarm. Normally Open Operation APPLIES ONLY TO CONTACT INPUTS. 5 ZZ 3 Set Channel ZZ for No Alarm (Status Only) APPLIES ONLY TO CONTACT INPUTS. Verbatim Owner's Manual 6-11... -
Page 52: Run Time Meter Programming
This function must be done to Activate the Totalizer. It is only possible to program up to 8 contact input channels for Pulse Totalizer. However, any 8 inputs may be used from the full set of contact inputs in your unit. 6-12 Verbatim Owner's Manual... -
Page 53: Alarm Trip Delays
Delay times out, no alarm or dialout will occur. There are two ways to change this Alarm Trip Delay: global (common for all channels except power failure) programming, and individual programming for each channel and power failure. Verbatim Owner's Manual 6-13... -
Page 54: Phone Numbers And Pulse/Tone Dialing
When leaving program mode all timers for unacknowledged alarms and violations will be reset. 6.2.7 Phone Numbers and Pulse/Tone Dialing Also see the section 6.2.13, “Alarm Call Grouping,” and Section 3.1, “Starting Up and Clearing the Unit.” 6-14 Verbatim Owner's Manual... - Page 55 To extend the length of each delay beyond 1 second, press: 9 28 N ENTER where N is the number of seconds of delay desired for each delay invoked with the MINUS key. Verbatim Owner's Manual 6-15...
-
Page 56: Enhanced Telephone Interface Features
The Enhanced Telephone Interface Features are included on Verbatims with a mainboard Revision of VMP-5a and above and firmware revisions 2.09 and above ONLY. Contact your RACO Representative about upgrading if the Enchanced Telephone Interface is required. 6-16 Verbatim Owner's Manual... -
Page 57: 60 Digit Phone Numbers
60 Digit Phone Numbers Telephone numbers may be as long as 60 digits. This allows, for instance, the Verbatim autodialer to make calls using long distance companies which require entry of access codes. Even with many digits occupied by long distance... -
Page 58: Automatic Tone/Pulse Selection
When telephone service is restored, a message will be sent to the Local Data Logger’s printer and the TFAIL LED will go from flashing to solid ON. The Verbatim autodialer will then resume making any pending phone calls. The TFAIL LED will remain ON until a voice message about the Phone Fault is communicated via the phone or to an operator at the front panel by pressing the CHECK STATUS button. -
Page 59: Call Progress Monitoring (Cpm)
Detect and Auto. Tone/Pulse Select ON. Setting Automatic Tone/Pulse Selection ON when it was previously OFF will cause the Verbatim autodialer to perform the test for Tone/Pulse Selection even though it has been longer than one minute since the unit was last powered on or reset. - Page 60 0 parameter to program CPM ON (1) or OFF (0). The CPM ring count is the number of rings Verbatim autodialer will wait for an answer before considering the call to be incomplete. Use code 918 to read or set the number of CPM rings.
-
Page 61: Alarm Call Grouping
Alarm Call Grouping is typically done when certain channels are associated with a specific category of personnel, such as electrical, plumbing, security, etc. However, Power Failure to the Verbatim autodialer causes dialing of all phone numbers. If you need to limit Power Failure alarm calls to selected numbers: 1. -
Page 62: Alarm Ready Scheduling
This is the length of time after ending one alarm call-out and before beginning the next call-out. Default value is 2 minutes; range is 0.1 to 99.9 minutes. To program a different number of minutes V, press: 9 03 V ENTER 6-22 Verbatim Owner's Manual... - Page 63 Power Failure) is automatically reset to a clear condition, ready to act on a new alarm condition. Refer to the diagram “Anatomy of an Alarm” in Section 5, “Using Your Verbatim Autodialer,” for a depiction of the various events in- volved in association with the Alarm Reset Time. Default value is 1 hour; range is 0.1 to 99.9 hours.
- Page 64 (908) Autocall Test Function The Autocall Test Function causes the unit to place test calls at regular intervals for the purpose of ongoing verification of Verbatim autodialer and phone line functioning. Calls are placed only once for each interval, to each regular phone number programmed (7 01 through 7 16).
- Page 65 15 seconds. Then it will end the current call in preparation for placing the callback call. If you have executed this com- mand at the front panel, the dialing will occur immediately. Verbatim Owner's Manual 6-25...
- Page 66 Advanced Programming Note: If the Verbatim autodialer is in the disarmed mode, call-outs/autocalls will not be made. (926) Delay Before Return to Normal (Exit Delay) Sometimes it is desirable to prepare the unit for the ability to detect violations and dial out, but with an “exit delay” that allows the user time to exit or remove temporarily existing alarm violations before the unit becomes active.
-
Page 67: Program Clear Out Operations
( Does not clear 913, 930, 941, and 942) 935 6 Clears all Totalizer counts to zero. 935 7 Clears and initializes clock. 935 9 Total clear out (Does not clear 941 and 942). Caution: Code 9 35 9 erases all programming and messages. Verbatim Owner's Manual 6-27... -
Page 68: (940) Diagnostic Readouts
940 2 Reads Dial Out Count (add 0 to clear) 940 3 Reads Acknowledged Alarm Count (add 0 to clear) 940 4 Reads Power Failure Alarm Count (add 0 to clear) 940 0 To Clear all Counts 6-28 Verbatim Owner's Manual... -
Page 69: Using The Alarm Ready Schedule Feature
REARMED and the input violation is still present then the Verbatim autodialer will begin calling after the trip delay has elapsed. If the Verbatim autodialer is doing a sequence of alarm calls or Autocall calls at the time when an Alarm Ready Schedule should change the Verbatim autodialer’s REARM/DISARM state the change will be delayed until after the... - Page 70 REARM/DISARM button. However, if the REARM/DISARM button is pressed during an active Alarm Ready Schedule the schedule still remains active. If the operator DISARMs the Verbatim autodialer in the middle of an Alarm Ready Schedule the schedule will actually continue to it’s ending time.
-
Page 71: Alarm Ready Schedule Modes
Mode 3 Holiday Schedule For example, if there was a weekday schedule enabled to REARM the Verbatim at 1700 daily, when the weekday schedule became active the Verbatim would say, “REARMED for mode 1”. Also, when there is a local printer connected to... -
Page 72: Weekday Schedule Mode 1
Verbatim autodialer could be REARMED every Friday afternoon at 1700 and DISARMED again every Monday morning at 0800. The weekend schedule could be changed from the defaults, for example, so that the Verbatim autodialer would be REARMED on Saturday and DISARMED on Monday (for organizations with 6 day work-weeks). - Page 73 When the weekend schedule is over then the weekday schedule will resume. Programming Alarm Ready Schedule Parameters The following section explains the Verbatim autodialer codes to be used for programming Alarm Ready Schedules and the Alarm Ready Schedule Control Numbers. Alarm Ready Schedule parameters may be entered either at the front panel or over the phone.
- Page 74 As explained below, the holiday schedule uses the weekend times for the time-of-day of the holiday REARM and DISARM. 3. It’s useful to understand that the Verbatim autodialer's internal count- down timers used for REARM/DISARM times are re-calculated as a result of the operator making certain Alarm Ready Schedule programming changes.
- Page 75 Sunday. The user is allowed to change only the REARM d-o-w if so desired, e.g.; 963 7 ENTER to set the REARM d-o-w to Saturday. But, if the user wants to change the DISARM d-o-w then both the REARM d-o-w & DISARM d-o-w must be entered. Verbatim Owner's Manual...
- Page 76 0 OFF No Alarm Ready Schedules executed. Also used to reset all active Alarm Ready Schedules. 1 Only the Weekday Alarm Ready Schedule will be active. (Daily: Monday-Sunday) Default: REARMED everyday 1700 & DIS- ARMED everyday 0800. Verbatim Owner's Manual...
- Page 77 Whenever a new Alarm Ready Schedule Control Number is entered all REARM & DISARM values will be recalculated. Any active Alarm Ready Schedules will be halted and the Verbatim autodialer will be left in which ever REARM/DISARM state it was last in.
- Page 78 Saturday from 7 A.M. until 12 Noon and that the personnel would be aware of any alarm conditions at the plant and would not want the Verbatim autodialer to be making calls to phone numbers in its phone number list.
- Page 79 Weekend Alarm Ready Schedules. Note: If the Verbatim autodialer is configured with a local printer, a summary of all of the REARM and DISARM times will be printed. 8. Return to the Normal mode and make sure the Verbatim autodialer is DISARMED.
- Page 80 Using the Alarm Ready Schedule Feature 7-12 Verbatim Owner's Manual...
- Page 81 Regular testing is the main element of a maintenance program for ongoing Verbatim autodialer reliability. The test should include interrupting AC power to the Verbatim autodialer for at least 4 hours to verify the gel cell battery maintains Verbatim autodialer operation for that time. You may wish to discon- nect the phone cord to avoid nuisance calls during the test period.
- Page 82 Maintenance, Testing, and Battery Replacement Verbatim Owner's Manual...
- Page 83 Verify the presence of about 50 volts DC between the RED and GREEN conductors on phone line terminal strip TS2. This voltage will drop to just a few volts when the Verbatim autodialer or other connected phone device goes off hook (PHONING light lit).
- Page 84 Verbatim autodialer and see if it rings. If the problem is not the phone line, try temporarily connecting test point C to test point D on the main circuit board, for a period of about 5 seconds and see if it “answers”...
- Page 85 Open/Closed status you are applying by pressing 0 ZZ 0. You may also use a DC voltmeter to trace your circuit connections. With the Verbatim autodialer turned on, an Open Circuit to a channel contact input reads 5 volts DC with respect to the “C”...
- Page 86 Returning Parts to Factory Pack all parts well! To avoid extra charges, return any removed chips card guides or daughter boards to the factory at the address below: RACO Manufacturing and Engineering Co. 1400 62nd Street Emeryville, CA 94608 Remember to: Put return address on package.
- Page 87 Therefore an “advance” description of over-the-phone programming follows. When you call the Verbatim from any Touch Tone telephone, it will answer and begin reciting its message. At the end of each round of messages, you will hear a warble tone.
- Page 88 Verbatim Series SFP Autodialer Verbatim Series SFP Front Panel Diagram Verbatim Owner's Manual...
- Page 89 Verbatim Series SFP Autodialer Verbatim Series SFP Inside Front Panel ON/OFF Switch Verbatim Owner's Manual...
- Page 90 To end a phone call after programming, press # # without any prior tone digit. The Verbatim autodialer will then issue a prompting warble tone which is an opportunity to re-enter a “1” if you did not really want to end the call. It will then say, “Goodbye,”...
- Page 91 Your Verbatim Series SFP autodialer is now able to operate, having at least one dialout phone number programmed, and having its input channels configured.
- Page 92 Verbatim Series SFP Autodialer Using Your Programmed Verbatim Autodialer Section 5.7 is largely replaced by the discussion in Section 4 regarding over- the-phone programming, except for discussion of the alternative command codes “2,” “3,” “4,” and “0.” Disregard Section 5.8.
- Page 93 Verbatim Series SFP Autodialer The speaker and microphone are present. However the microphone is limited to the function of optionally “listening in” since voice recording must be done via remote telephone. The On/Off function is controlled via the slide switch inside the front panel door.
- Page 94 Verbatim Series SFP Autodialer Verbatim Owner's Manual...
- Page 95 4. In many cases you will also want to program high and low setpoint limits for each analog input. 5. You may also elect to replace the generic default voice message with your own recorded messages for any analog channel, as described in section 4. Verbatim Owner's Manual...
- Page 96 0 to 10 volts DC, the hardware input circuitry on the VAN card will have been factory configured to pre-scale the signal to a range within 0 to 1 volt DC, and corresponding special scaling information will be provided to fit the particular application. Verbatim Owner's Manual...
- Page 97 Other special inputs B.1.4 Programming the Scaling and Offset Factors This set of steps is not necessary for inputs using a Raco Temperature Sensor, since these values will be automatically inserted if the parameter 2 is selected in the above step.
- Page 98 “look up” the corresponding water level. In operation, the Verbatim autodialer measures the signal level presented to it, and then calculates the corresponding physical...
- Page 99 Enter the following pair of codes: 5 ZZ 1 POINT ENTER Verbatim Owner's Manual...
- Page 100 Then, suppose with the system in operation, you observe that the tank level is 31.7 feet, but the Verbatim reports a value of 31.45 feet. The discrepancy will most likely be due to a discrepancy of the sensor’s actual output versus the theoretical system specification.
- Page 101 Continue the example, there might also be a discrepancy toward the low end of the scale. Suppose on another day you observe a tank level of 22.5 feet but the Verbatim report 2293 feet. Since this signal is at the low end of the range, you would enter: 5 06 1 POINT ENTER 5 06 2 22.5 ENTER...
- Page 102 To turn off (disable) a high or low analog setpoint, while still leaving the channel able to report readings, enter a setpoint value of -0 for that particular setpoint. If you try to enter a setpoint value outside a wide signal range, the Verbatim will say “Error in number.” Verbatim Owner's Manual...
- Page 103 For any analog inputs, in place of the default messages you may plan to record a preamble message of the general form “The total water flow in gallons is” or “the main tank water level in feet is.” Use program code 1 ZZ to record the analog preamble message. Verbatim Owner's Manual...
- Page 104 Analog Signal Input B-10 Verbatim Owner's Manual...
- Page 105 1 2 3 4 5 6 7 8 9 0 1 2 3 4 5 6 7 8 9 0 is not including the Verbatim autodialer in the loop. Verify that the type of 1 2 3 4 5 6 7 8 9 0...
- Page 106 The Verbatim has its own limitations in this respect. It can only accommodate a departure from ground voltage potential, of 8 volts nominal, before its protective tranzorbs begin to conduct and clamp the signal.
- Page 107 Verbatim input should be relocated in the loop. Chances are good that the Verbatim had previously been placed at a point on the loop well away from ground potential and that the relocation will end the problem.
- Page 108 Analog Signal Input B-14 Verbatim Owner's Manual...
- Page 109 Supervisor Control If you are using the separate Output Relay Enclosure normally supplied with this option, mount the enclosure within 3 feet of the Verbatim Autodialer, and make your output connections to the left hand row of terminal strip points within the separate enclosure, as shown in the diagram of the VRSC Output Relay Enclosure.
- Page 110 Remote Supervisory Control Output RSC Supervisory Remote Control Output Box Diagram Verbatim Owner's Manual...
- Page 111 Connect 120 VAC power as shown on this same diagram. Route modular “Cable A” through one of the entrance holes on the bottom of the Verbatim Autodialer, and plug it into J301 (the right-hand jack on the VCP circuit card, see diagram).
- Page 112 To establish a default pulse time duration for ALL outputs in one operation, use code 9 5 0 0 8 XXXX (XXXX = 1 to 1666 minutes) 9 5 0 0 9 XXXXX (XXXXX = 1 to 99999 seconds) Verbatim Owner's Manual...
- Page 113 When the Verbatim Autodialer itself is first turned on, and at certain other times when a microprocessor reset occurs, all the outputs will be turned ON for a fraction of a second, before assuming the state dictated by the Verbatim Autodialer. In some installations this could cause problems, and in such cases external time delay relays or other measures may be required to prevent unwanted momentary activation of controlled devices.
- Page 114 Remote Supervisory Control Output Verbatim Owner's Manual...
- Page 115 Route the small “modular” plug end of this same cable through one of the holes at the bottom of the Verbatim Autodialer, and plug it into modular jack J303 located near the left side of the Verbatim Autodialer, on the vertical VCP circuit card.
- Page 116 Printer Options To activate this port, attach a RACO VPPC-1 Parallel Printer Cable (or equivalent) to the front panel port and to the parallel port on your printer. Caution: Attach the parallel printer cable to the VSS front panel port with the “red striped edge”...
- Page 117 The first such printout will occur when the period elapses, rather than immediately upon programming. To check programmed printing interval 943 ENTER To turn off regular interval printing function 943 0 ENTER To printout All User-Entered Programming 944 ENTER Verbatim Owner's Manual...
- Page 118 Printer Options Verbatim Owner's Manual...
- Page 119 3 = Sets return-to-normal mode to mode 0 - makes return to normal calls only in data mode to the SCADA Central Computer or to Central Data Logger Printer Entering this parameter does not affect the RTN ON/OFF state. Verbatim Owner's Manual...
- Page 120 SCADA units over cellular phones. Units configured for SCADA operation may place and receive calls via cellular telephones instead of standard dial-up telephone lines. If purchased from RACO, the combination of autodialer/RTU, dial-up adaptor and cellular transceiver is called the CELLULARM package.
- Page 121 To program the unit for Acknowledgement Calls, press: 982 V Where V is one of the following: 0= OFF - (Default) 1= ON - Make Acknowledgment calls 2= resets all alarm acknowledgement call status - inhibits all further attempts for this alarm acknowledgement occurence. Verbatim Owner's Manual...
- Page 122 To program the (non-Automatically selected) Modem Speed, press: 984 N Where N is 1 (1200) or 0 (300) Note: When Automatic Speed Select is set to ON (command 983) this command has no effect on modem speed. Verbatim Owner's Manual...
- Page 123 The autodialer/RTU may also be programmed for VOICE ONLY answer mode. In VOICE ONLY mode the unit will never answer with a modem answer tone and voice annunciation will begin immediately upon answering. Verbatim Owner's Manual...
- Page 124 Autocall calls made to the SCADA Central Computer or CDL printer result in logging and printing of the Autocall session. No acknowledgement is required or is possible. Autocalls calls made to personnel numbers will be standard voice annunciation sessions. Verbatim Owner's Manual...
- Page 125 To program the DATA/VOICE Autocall mode, press: 987 N Where N is 0 to 2 0 = (default) Autocall Calls made to SCADA Central Station only 1 = Autocall Calls made to personnel numbers only 2 = autocall Calls made to all numbers Verbatim Owner's Manual...
- Page 126 Data Acquisition/Central Data Logging Verbatim Owner's Manual...
- Page 127 MODBUS Interface MODBUS Interface This section covers the PLC specific functions of the Verbatim autodialer. It is assumed the reader is already familiar with the basic operation of the Verbatim autodialer. If this is not the case, please take the time now to review the previous sections of this manual.
- Page 128 When the content of the data register changes to match the alarm criteria, the RC associated with the data register goes into the alarm state. RCs in the alarm state behave in exactly the same way as Verbatim autodialer internal or “physical” channels.
- Page 129 Connecting to the PLC Network In most cases, the cable supplied by RACO will already be connected at the Verbatim autodialer end to a modular jack inside the unit. If this is not the case, please refer to the drawings in appendix H.
- Page 130 MODBUS Interface Electrical Connection Diagram for PLC Network Connection Verbatim Owner's Manual...
- Page 131 The user must have access to the PLC ladder logic program listing and know the location and properties of all data table locations which will be monitored by the Verbatim autodialer. Also the user must be able to determine the basic operating parameters of the PLC communications channel. This means being able to configure the PLC’s parameters such as the node address, baud rate, data...
- Page 132 RC and a data register. Consider the following example. Suppose the Verbatim's NET 1 is configured for the Modbus protocol and node 2 on that net is a PLC. To associate RC #01 with the16 bit data register whose...
- Page 133 RC #01. The net address portion of this command sequence is the remaining digits plus the ‘*’ used for delimiting. The 16 bit data register has the address of 40001. The PLC’s node number is 2 and the Verbatim's NET is 1.
- Page 134 The table below shows how to address specific objects in Modicon PLCs. ‘x’ represents a digit in the range 0-9. The Verbatim autodialer User Interface will accept any values for ‘xxxx’. If a value is out of range for a particular PLC, that PLC will issue an error diagnostic, which will be passed on to the user.
- Page 135 2. The COMALARM message is not user recordable. It always consists of "Remote Channel Number ZZ Communication Failure Code XXX." The failure code annunciated by the Verbatim autodialer serves as an aid in troubleshooting the network problem causing the failure. They are listed in section F.17.
- Page 136 F.7.1 Abbreviations and Typographic Conventions In the following sub-sections, the verbal response expected from the Verbatim autodialer will be given following the program code that the user is to enter for each programmable function. This verbal response will be differentiated by being in italics in the following way: Remote Channel Number TEN, Alarm, Acknowledged.
- Page 137 Record channel ZZ normal/epilogue message. N, if present, specifies the recording rate to use. If N is not present, the default recording rate is used. Append command with a ‘*’ or ‘0’ to return to default normal message. Verbatim Owner's Manual F-11...
- Page 138 Commands in the series “4 5 ZZ," are used for Remote Channels as follows: Associate a PLC net address to a Verbatim Remote Channel. This step tells the Verbatim autodialer where on the PLC network to look for the point to be monitored.
- Page 139 <ZZ> 4 5 ZZ 4 Function Set channel number ZZ to NETERR mode — alarm if and only if a communications alarm occurs. Response remote channel <ZZ> alarm on communication failurec. Verbatim Owner's Manual F-13...
- Page 140 Sets channel number ZZ alarm trip delay to 2.0 seconds. Response remote channel <ZZ> alarm trip delay is 2.0 seconds 4 6 ZZ V Function Sets RCZZ individual alarm trip delay to V. Response remote channel <ZZ> alarm trip delay is <V> seconds F-14 Verbatim Owner's Manual...
- Page 141 In the absence of communication problems, each destination channel is updated with a frequency equal to the Verbatim scan time. If there is a communications problem reading data from the source, then nothing is written to the destination.
- Page 142 4 7 ZZ * YY * Function Establishes a data mode link with RC ZZ as the source channel and YY as the destination. The value from ZZ’s net address is written to YY’s net address once per scan loop. F-16 Verbatim Owner's Manual...
- Page 143 “Enter program code” message is announced. The defaults for each parameter are also network dependent. 4 9 00 net Function Announces the current setting of all applicable parameters. Response See all codes below Verbatim Owner's Manual F-17...
- Page 144 4 9 07 net * V Function Reads/sets communications alarm trip delay. Communications errors for all RCs on net must persist continuously for V seconds before a COMALARM violation is registered. Response <net ID> communication alarm trip delay is <V> seconds F-18 Verbatim Owner's Manual...
- Page 145 4 9 09 net * N Function Reads/sets application-level timer. Units are milliseconds. This value is the maximum amount of time the Verbatim will wait for another node to respond to any command. Response <net ID> message limit time is <N> mseconds F.14...
- Page 146 Function Does all the 4935 functions. NOTE, ONLY the RC configura- tion is affected. Response Verbatim RC programming requires Firmware Revision F.16 Diagnostic Readouts In the following, N may be omitted, in which case the current value is only announced, not altered.
- Page 147 Read list of disarmed (see code 45ZZ0) RCs Response <net ID> remote channels now disarmed are <list> 4 9 43 Function Read list of uninitialized RCs. Response remote channel(s) not programmed are <list> Continued on next page . . . Verbatim Owner's Manual F-21...
- Page 148 This section lists all network status, diagnostic and communications error codes likely to be of use for customer troubleshooting. Other codes may be reported in rare instances, and information about their interpretation may be obtained from RACO customer support. F.17.1 Network Status Codes The Network Status code reflects the overall health of all devices connected to a specific net.
- Page 149 601- 608 AEG/MODICON exception codes. That code can be determined by subtracting 600 from this code. Refer to F.5, "General Modbus Reauirements," for details. Continued on next page . . . Verbatim Owner's Manual F-23...
- Page 150 NAK count limit exceeded for transmit msg 1541 ENQ count limit exceeded for transmit msg 1561 timeout waiting for response to command 2278 RAM allocation failed 2279 hardware failed self-test at warmstart 2280 cannot access net hardware F-24 Verbatim Owner's Manual...
- Page 151 Sets alarm criteria to NETERR mode ZZ=1 to 96 F.10.2 45ZZ5 N Sets analog low setpoint to N ZZ=1 to 96, F.10.2 N=0 to 65535 45ZZ6 N Sets analog high setpoint to N ZZ=1 to 96, F.10.2 N=0 to 65535 Verbatim Owner's Manual F-25...
- Page 152 4901 net *N Read/Set baud rate for net 9600 50-57600 F.13.1 to N 4902 net *N Read/Set data bits for 7 or 8 F.13.1 net to N 4903 net *N Read/Set stop bits for 1 or 2 F.13.1 net to N F-26 Verbatim Owner's Manual...
- Page 153 0 - 200 F.16 to N 49 30 *net Perform diagnostic self-test F.16 on specified net 49 40 Reads all 4940 X diagnostic F.16 for all networks 49 40 *net Reads all diagnostic information F.16 for net Verbatim Owner's Manual F-27...
- Page 154 Reads list of uninitialized F.16 49 44 Reads list of all RCs not using F.16 the default alarm criteria 49 45 ZZ Reports net address, alarm criteria, F.16 setpoints, links and alarm status for RC ZZ F-28 Verbatim Owner's Manual...
- Page 155 Cabling Diagrams Cabling Diagrams Verbatim Owner's Manual...
- Page 156 Cabling Diagrams RACO VSER-01 Serial Cable Connection Diagram Verbatim Owner's Manual...
- Page 157 Cabling Diagrams RACO VPPC-1 Parallel Cable Connection Diagram RACO VPPC-1 Parallel Cable Used for LDL parallel printer option Index color 4 unused positions 2 x 20 Header Length: 3' Receptical Type: 36 Conductor Ribbon Centronics Connector Verbatim Owner's Manual...
- Page 158 Cabling Diagrams Verbatim PLC Network Connections Diagram Serial Connection Verbatim Verbatim Gateway Monitoring a single PLC Serial Connection DAS, SCADA, Verbatim or DCS Verbatim Gateway System Monitoring a system with compatible device interface Verbatim Verbatim Gateway MODBUS Networks DH485, Modbus and other PLC Networks...
- Page 159 Cabling Diagrams RACO VMB-2 Serial Cable Connection Diagram Verbatim Verbatim Verbatim Owner's Manual...
- Page 160 Number 110XCA28201, 110XCA28202, or 110XCA28203 plus adaptor 110XCA20300. This combination of cable plus adaptor mates with above RACO cable. The Modicon cable is a flat, eight wire cable with RJ-45 male connectors on each end. The Modicon adaptor is an RJ-45 female to D-sub 9 Pin female adaptor.
- Page 161 Cabling Diagrams RACO VBB-1 Serial Cable Connection Diagram Verbatim Verbatim Verbatim Owner's Manual...
- Page 162 Cabling Diagrams VTI 405/505-DCM Serial Cable Connection Diagram Verbatim Owner's Manual...
- Page 163 This trimpot also adjusts the level of the audio signal that can be obtained via jack AJ1. However, sensitive audio systems may require an additional signal level attenuator in order to prevent overloading. SPKR COMMON GROUND Verbatim Owner's Manual...
- Page 164 1 volt RMS, when the audio level trimpot, described below, is set to full clockwise position. H.2.1 Specifications for Audio Output from Jack AJ1 Nominal output impedance 8 ohms Nominal average output amplitude with 8 ohm load 1 VRMS SPKR COMMON GROUND Verbatim Owner's Manual...
- Page 165 If the external power source is interrupted, the unit will switch to gel cell battery power and go into power failure alarm. The Verbatim autodialer is capable of being powered by other types of power source, including 240 VAC, on special order. Contact factory for details.
- Page 166 Verbatim Floobydust DC Power Connection Diagram Verbatim Owner's Manual...
- Page 167 Verbatim Floobydust Speech Recording Times The following is a table of available speech recording times on Verbatim autodialer. To find the available amount of speech recording time, first determine the total number of channels on the unit, then find the corresponding row indicating the number of seconds of speech recording time at the various recording rates.
- Page 168 In such systems it may be difficult, but usually not impossible, to obtain a "standard" analog phone line to use in interfacing devices such as a Verbatim . It may be necessary to contact the vendor of your PBX system for information on addition of analog lines.
- Page 169 Verbatim Floobydust Local Alarm Relay Option The Verbatim provides a 5 volt output that is turned on whenever the unit goes into alarm. This is available at JB4, located at the top center of the main board. Use a molex style 2 pin connector to plug onto the JB4 pins. This output can activate a sensitive (500 ohm +) relay such as a Potter &...
- Page 170 These phones will remain cut off until the alarm is acknowledged. The Verbatim provides a 5 volt output that is turned on whenever the unit goes into alarm. This is available at JB4, located at the top center of the main board.
- Page 171 Connect the incoming telephone line red wire to terminal 4 and the green wire to terminal 5. Connect the downstream extension phones to terminals 1 and 8. 4. Plug the Verbatim into the RJ-31X socket. 5. Program the Verbatim with code: 960 01 ENTER This is the code for Line Seizure configuration of the Local Alarm Relay.
- Page 172 Wiring the RJ-31X Line Seizure Jack Diagram Wiring the RJ-31X Line Seizure Jack Telephone Line In Green RJ-31X jack Verbatim Verbatim Phone Plug RACO Downstream Phones Inside the Verbatim Gateway COIL 150 ohm resistor N.C. N.O. Relay Socket P&B 27E166 H-10 Verbatim Owner's Manual...
- Page 173 “heat sinking” into the surface which the unit is mounted to. The unit’s aluminum enclosure provides relatively little thermal insulation by itself. However if RACO’s fiberglass NEMA 4X enclosure option is used, a temperature elevation of about 75 degrees is provided.
- Page 174 Verbatim Floobydust Heater/Thermostat Mounting and Wiring Diagram H-12 Verbatim Owner's Manual...
- Page 175 If you have a radio transmitter that can provides for external connection of an audio signal input and also for connection of an external contact closure to key on the transmitter, you may connect it to the Verbatim autodialer. However you should also consider the alternative of using RACO’s CELLULARM cellular phone system, which provides a superior means of signalling where regular land line phone service is not available.
- Page 176 Contact factory for details. Note that it will not be possible to perform remote programming of the unit with these radio connections. A CELLULARM cellular system eliminates all such contraints. H-14 Verbatim Owner's Manual...
- Page 177 Verbatim Floobydust TS2 Connection Diagram RING AUDIO XMITTER INPUT KEY ON TRANSMITTER Jumper Wires For RF Link Diagram Verbatim Owner's Manual H-15...
- Page 178 In most cases, the entire pager calling sequence is handled within the dialing string of the Verbatim. That is, it is all part of the phone number. The unit will handle up to 60 digits, including any timing delays you insert. The dialer must be programmed for touch tone dialing (program code 9011), as a pager terminal will not recognize pulse dialing.
- Page 179 If you have only one dialer (and no one else uses the number!) you assume that any call from the pager is a Verbatim alarm call, and proceed from there. Of course, if you had two possible callers, you wouldn't know which one had called.
- Page 180 After that, an ID number is entered. Often the ID number is simply the phone number at the Verbatim autodialer site. A # terminator *8 is inserted. Finally, the characters *5 are added to designate this phone session as a pager call and not a voice annunciation.
- Page 181 In our example we programmed Phone #1: 701 1 713 235 2456 ### 7711 # 548 1234 ENTER (Remember that each # represents a 3 second delay). and Phone #2: 702 548 7632 ENTER (our foreman again) Verbatim Owner's Manual H-19...
- Page 182 Case 2 Pager Calling Sequence (ex. 1) Case 2: Pager Calling Sequence Using Delays (Example 1) Note that this delay is normally about 5-12 seconds Time this Delay Verbatim Phone # Pager Phone # or Identifier 548 1234 9 1 713 235 2456 TIME...
- Page 183 Verbatim Floobydust Cellularm Cellular Communications Diagram (AC Only) Verbatim Owner's Manual H-21...
- Page 184 Verbatim Floobydust Cellularm Cellular Communications Diagram (12V DC Only) H-22 Verbatim Owner's Manual...
- Page 185 Verbatim Floobydust Cellularm Cellular Communications Diagram (24V DC Only) Verbatim Owner's Manual H-23...
- Page 186 Verbatim Floobydust Verbatim Enclosure Outline Diagram VERBIAM.FH4 DATE: 07/31/95 Verbatim Enclosure Diagram REV: 2.0c H-24 Verbatim Owner's Manual...
- Page 187 Verbatim Floobydust NEMA 4X Enclosure Diagram NEMA 4X Enclosure Mechanical Drawing 11.5" NEMA 4X ENCLOSURE 12.5" 13.5" 8" RECTANGULAR MOUNTING CENTERS: 8" W x 12.5" H OVERALL DIMENSIONS 11.5" W x 13.5" H x 5.5" D Verbatim Owner's Manual H-25...
- Page 188 Verbatim Floobydust Motherboard Component Diagram H-26 Verbatim Owner's Manual...
- Page 189 Verbatim Floobydust Jumper Block Diagram Verbatim Owner's Manual H-27...
- Page 190 AJ-1 an audio output jack, for using an external speaker or connecting to another audio system. lower two pins makes AJ-1 a 12vdc power input jack for powering the unit from an external source. JB9 - factory use only H-28 Verbatim Owner's Manual...
- Page 191 1.36 or below. A maximum of two speech RAM may be used. If using just one RAM chip, it goes in socket U104. A second one if used can go in U105 (U103 is skipped). Verbatim Owner's Manual H-29...
- Page 192 Verbatim Floobydust H-30 Verbatim Owner's Manual...
- Page 193 Verbatim Autodialer Specifications Verbatim Series VSS Autodialer Specification Description & Phone Number Dialing The autodialer shall be a solid state component capable of dialing up to 16 phone numbers, each up to 60 digits in length. Phone numbers and Standard pulse dialing or Touch Tone DTMF dialing are user programmable via the system’s keyboard or Touch Tone phone.
- Page 194 Verbatim Autodialer Specifications I.2.2 Permanent Resident Non-Recorded Messages Permanent built-in messages shall be included to support user programming operations, to provide supplemental warning messages such as advising that the alarms have been disabled, and to allow the unit to be fully functional even when the installer has not recorded any messages of his own.
- Page 195 The unit shall continuously scan all properly configured Remote Channels. The unit shall monitor remote channels which physically reside in other industrial equipment interfaced to the Verbatim via the serial interface. The unit shall be capable of interfacing to at least two PLC networks simultaneously. The unit shall be capable of monitoring any PLC data register regardless of register type, whether digital, analog, input, output or status point.
- Page 196 Verbatim Autodialer Specifications Input Monitoring Function The unit shall continuously monitor the presence of AC power and the status of four contact closure inputs. Unit shall optionally be field upgradeable to incor- porate a total of 8, 16, 24, or 32 dry contact inputs. AC power failure, or violation of the alarm criteria at any input, shall cause the unit to go into alarm status and begin dial-outs.
- Page 197 Verbatim Autodialer Specifications I.11 Communications Protocol The unit shall interface to standard networks commonly used in industrial installations. The unit shall be capable of network communications using the Modbus RTU protocol. I.12 Diagnostics The unit shall include user commands to execute diagnostics of the PLC network to determine the health of the network.
- Page 198 Verbatim Autodialer Specifications the main circuit board shall not be an acceptable substitute. The installer shall provide a good electrical ground connection point near the unit to maximize the effectiveness of the surge protection. I.17 Local Data Logging The system shall include a parallel printer interface for local data logging. The local printer will automatically print out, with date and time stamp, each activity that occurs;...
- Page 199 Verbatim Autodialer Specifications I.22 Additional Features: Sealed Switches, LED Indicators, Alarm Disable Warning, TalkThrough All keyboard and front panel switches shall be sealed to prevent contamination. Front panel LED’s shall indicate: Normal Operation, Program Mode, Phone Call in Progress, Status for each channel, AC Power Present, AC Power Failure, and Low, Discharging or Recharging Battery.
- Page 200 Verbatim Autodialer Specifications Verbatim Owner's Manual...
- Page 201 Worksheets Worksheets Verbatim Owner's Manual...
- Page 202 Optional Programing Record of any optional programming to alter selected parameters from their normal default values. (Sample highlighted) Program Parameter Default Write In Any Altered Code Description Value Values YouProgram Alarm Trip Delay 2 seconds 40 seconds Verbatim Owner's Manual...
- Page 203 (Sample highlighted) 2-Digit Phone # 2-Digit Phone # Group Description Group Description Designation Designation (Electrical, etc.) (Electrical, etc.) (Taken from Worksheet A) (Taken from Worksheet A) Maintenance 01, 04, 05, 06 Electrical 03, 04 Security 02, 05 Verbatim Owner's Manual...
- Page 204 AAAA AAAA AAAA AAAA AAAA AAAA AAAA AAAA AAAA AAAA AAAA AAAA AAAA AAAA AAAA AAAA AAAA AAAA AAAA AAAA AAAA AAAA AAAA AAAA AAAA AAAA AAAA AAAA AAAA AAAA AAAA AAAA AAAA AAAA AAAA AAAA AAAA Verbatim Owner's Manual...
- Page 205 506 9 507 9 508 9 509 9 510 9 511 9 512 9 513 9 514 9 515 9 516 9 517 9 518 9 519 9 520 9 521 9 522 9 523 9 524 9 Verbatim Owner's Manual...
- Page 206 530 9 531 9 532 9 533 9 534 9 535 9 536 9 537 9 538 9 539 9 540 9 541 9 542 9 543 9 544 9 545 9 546 9 547 9 548 9 Verbatim Owner's Manual...
- Page 207 4506 9 4507 9 4508 9 4509 9 4510 9 4511 9 4512 9 4513 9 4514 9 4515 9 4516 9 4517 9 4518 9 4519 9 4520 9 4521 9 4522 9 4523 9 4524 9 Verbatim Owner's Manual...
- Page 208 4530 9 4531 9 4532 9 4533 9 4534 9 4535 9 4536 9 4537 9 4538 9 4539 9 4540 9 4541 9 4542 9 4543 9 4544 9 4545 9 4546 9 4547 9 4548 9 Verbatim Owner's Manual...
- Page 209 4554 9 4555 9 4556 9 4557 9 4558 9 4559 9 4560 9 4561 9 4562 9 4563 9 4564 9 4565 9 4566 9 4567 9 4568 9 4569 9 4570 9 4571 9 4572 9 Verbatim Owner's Manual...
- Page 210 4579 9 4580 9 4581 9 4582 9 4583 9 4584 9 4585 9 4586 9 4587 9 4588 9 4589 9 4590 9 4591 9 4592 9 4593 9 4594 9 4595 9 4596 9 J-10 Verbatim Owner's Manual...
- Page 211 AAAA AAAA AAAA AAAA AAAA AAAA AAAA AAAA AAAA AAAA AAAA AAAA AAAA AAAA AAAA AAAA AAAA AAAA AAAA AAAA AAAA AAAA AAAA AAAA AAAA AAAA Total estimated recorded message length in seconds, this page ___________ Verbatim Owner's Manual J-11...
- Page 212 AAAA AAAA AAAA AAAA AAAA AAAA AAAA AAAA AAAA AAAA AAAA AAAA AAAA AAAA AAAA AAAA AAAA AAAA AAAA AAAA AAAA AAAA AAAA AAAA AAAA AAAA Total estimated recorded message length in seconds, this page ___________ J-12 Verbatim Owner's Manual...
- Page 213 AAAA AAAA AAAA AAAA AAAA AAAA AAAA AAAA AAAA AAAA AAAA AAAA AAAA AAAA AAAA AAAA AAAA AAAA AAAA AAAA AAAA AAAA AAAA AAAA AAAA AAAA Total estimated recorded message length in seconds, this page ___________ Verbatim Owner's Manual J-13...
- Page 214 AAAA AAAA AAAA AAAA AAAA AAAA AAAA AAAA AAAA AAAA AAAA AAAA AAAA AAAA AAAA AAAA AAAA AAAA AAAA AAAA AAAA AAAA AAAA AAAA AAAA AAAA Total estimated recorded message length in seconds, this page ___________ J-14 Verbatim Owner's Manual...
- Page 215 AAAA AAAA AAAA AAAA AAAA AAAA AAAA AAAA AAAA AAAA AAAA AAAA AAAA AAAA AAAA AAAA AAAA AAAA AAAA AAAA AAAA AAAA AAAA AAAA AAAA AAAA Total estimated recorded message length in seconds, this page ___________ Verbatim Owner's Manual J-15...
- Page 216 AAAA AAAA AAAA AAAA AAAA AAAA AAAA AAAA AAAA AAAA AAAA AAAA AAAA AAAA AAAA AAAA AAAA AAAA AAAA AAAA AAAA AAAA AAAA AAAA AAAA AAAA Total estimated recorded message length in seconds, this page ___________ J-16 Verbatim Owner's Manual...
- Page 217 AAAA AAAA AAAA AAAA AAAA AAAA AAAA AAAA AAAA AAAA AAAA AAAA AAAA AAAA AAAA AAAA AAAA AAAA AAAA AAAA AAAA AAAA AAAA AAAA AAAA AAAA Total estimated recorded message length in seconds, this page ___________ Verbatim Owner's Manual J-17...
- Page 218 AAAA AAAA AAAA AAAA AAAA AAAA AAAA AAAA AAAA AAAA AAAA AAAA AAAA AAAA AAAA AAAA AAAA AAAA AAAA AAAA AAAA AAAA AAAA AAAA AAAA AAAA Total estimated recorded message length in seconds, this page ___________ J-18 Verbatim Owner's Manual...
- Page 219 AAAA AAAA AAAA AAAA AAAA AAAA AAAA AAAA AAAA AAAA AAAA AAAA AAAA AAAA AAAA AAAA AAAA AAAA AAAA AAAA AAAA AAAA AAAA AAAA AAAA AAAA Total estimated recorded message length in seconds, this page ___________ Verbatim Owner's Manual J-19...
- Page 220 AAAA AAAA AAAA AAAA AAAA AAAA AAAA AAAA AAAA AAAA AAAA AAAA AAAA AAAA AAAA AAAA AAAA AAAA AAAA AAAA AAAA AAAA AAAA AAAA AAAA AAAA Total estimated recorded message length in seconds, this page ___________ J-20 Verbatim Owner's Manual...
- Page 221 AAAA AAAA AAAA AAAA AAAA AAAA AAAA AAAA AAAA AAAA AAAA AAAA AAAA AAAA AAAA AAAA AAAA AAAA AAAA AAAA Total estimated recorded message length in seconds, this page ____________ See next page to complete calculations Verbatim Owner's Manual J-21...
- Page 222 Run Time Metering, the message to be spoken on Open Circuit input is recorded with the Program Code ordinarily used for the Alarm Message; the message to be spoken on Closed Circuit input is recorded with the program code ordinarily used for the Normal Message. J-22 Verbatim Owner's Manual...
- Page 223 DTMF tones over the phone. The Verbatim gives visual indications for the state of each channel or group of channels. If normal, the LED is OFF. When alarmed, the LED is blinking.
- Page 224 The annunciator state may at any time be completely reset by pressing the ARM/DISARM key twice. This action will also reset the state of each channel. In terms of ANSI/ISA-S18.1, there is one more property that all Verbatim annunciator sequences share: there is no support for the first out sequence designations (F1, F2, F3).
- Page 225 ANSI designation A-1 (automatic reset with silence pushbutton). The main distinction of these from the M-1 sequence is that the alarm state is automatically reset when the channel enters the RTN state. The Verbatim sequences in this category differ amongst themselves mainly in when this RTN transition is allowed to occur.
- Page 226 So long as any unacknowledged alarm or RTN condition exists, the Verbatim will be making calls. Alarm conditions have priority. Hence, if an alarm is one call group and an RTN is in another, no calls will be placed to the RTN group until the alarm is acknowledged.
- Page 227 Annunciator Sequence Option Summary The following paragraphs provide a concise summary of the available annunciator sequence options. The ANSI designator is given, along with the Verbatim configuration code, followed by a short functional description. M-1: Manual Reset with Silence Pushbutton. Code (923 1) Alarm states are registered directly from configured criteria without regard for return to normal conditions.
- Page 228 R-1-5-6: Ringback with Silence Pushbutton, No Flashing, and No Audible. Code (981 1) - with no phone numbers programmed. Same as R-1-8 except all unacknowledged alarm and RTN states are immediately converted to the acknowledged state. Verbatim Owner's Manual...
- Page 229 Once acknowledged, further activity on that particular channel will not cause further dialing until the expiration of the Alarm Reset Time. See Section 5.1, “Placing Inquiry Calls to the Verbatim autodialer,” and Section 5.5, “Acknowledging the Alarm Call." Special programming established to cause ALARM CALL GROUPING specific input channels to cause dialing of only selected phone numbers.
- Page 230 CDL (Central Data Logger) The combination of a modem, a serial interfaced printer and a special Raco-built interface box is called a Central Data Logger (CDL). A Raco autodialer/RTU may be configured to call and log data to the CDL printer. CDL RTUs first call the CDL printer to log alarm and status information then proceed on to calling personnel by voice.
- Page 231 ID MESSAGE See Station ID Message. A call placed by personnel to the Verbatim autodialer. INQUIRY CALL See Section 5.1, “Placing Inquiry Calls to the Verbatim autodialer.” A lighted legend indicator on the front panel. LINK See Alarm Call Grouping.
- Page 232 NETWORK ID A voice message identifying a specific network. By default, the message is "Verbatim Net X", where 'X' is a number from 0 to 5. Custom messages, such as "Building 320 LAN" may be recorded. See 'NETWORK' entries below for more details.
- Page 233 NORMALLY OPEN signal is open in the normal, non-alarm state and closes when an alarm occurs. This requires that this input be programmed as Normally Open on the Verbatim autodialer, which is the default setting for a contact type input.
- Page 234 When a Raco Verbatim autodialer is configured with the asynchronous communications module it is known as an RTU. The Verbatim RTU does not loose any of the basic features of the Verbatim autodialer. In addition, the Verbatim RTU is capable of receiving polling calls from the Raco SCADA Central Computer.
- Page 235 Closed Circuit is a violation for that input. If the violation persists for the Alarm Trip Delay time, the unit will go into Unacknowledged Alarm state and begin placing alarm calls. See Section 3.3, “Programming Input Channels, ” 5.3, “Receiving Alarm Calls,” and 5.6, “Alarm Rest Timeout After Acknowledgment.” Verbatim Owner's Manual Glossary-7...
- Page 236 Glossary Glossary-8 Verbatim Owner's Manual...
- Page 237 6-9 Annunciator Sequence Clearout Operations F-19, F-27 Answer mode E-5 codes ARM/DISARM (930) 6-25 clock audio output starting 7-6 Autocall Test 6-24, I-2 Closed Circuit alarm 3-2 Autodialer (DFP) A-1 CMOS inputs 2-2 Autoextend 4-2, 4-3 Verbatim Owner's Manual Index-1...
- Page 238 DISARM configuring codes 6-11 reading, setting time 7-7 connecting setting date 7-7 four-channel unit 2-2 disarm unit 3-4 Verbatim to PLC F-1 DISARM/REARM (930) 6-25 connection DTMF H-15 8 or more input unit 2-2 connector 36 pin 2-4 Call Progress Monitoring (CPM) 6-16,...
- Page 239 5-5 automatic speed selection E-4 REARM/DISARM 7-1 Modicon RECORD 4-4 PLC F-7 protocols F-7 Modular Upgrades I-6 monitor inputs 1-1 ladder logic program listing F-5 Motherboard diagram H-24 (LDL) Local Data Logger 6-18 mounting location 2-1 Verbatim Owner's Manual Index-3...
- Page 240 J-3 thru J-10 phone alarm call grouping 6-21 callback 6-25 Alarm Ready Schedule 7-5, 7-10 designation number (DN) 6-2 analog connections B-1 dialing out through autodialer 5-6 by phone 5-5 ending call 3-4 clear all 3-1 Index-4 Verbatim Owner's Manual...
- Page 241 Special Order Items I-7 key 3-4 speech messages reading, setting time 7-7 analog programming B-9 setting date 7-7 recording times H-5 recording Station ID 4-1 alarm relay H-7 STATUS key 5-2 extending individual messages 4-5 Status, network F-22 Verbatim Owner's Manual Index-5...
- Page 242 H-15 selection 6-16 Tone/Pulse automatic selection 6-18 dialing codes 6-4 Totalizer default value 6-13 Troubleshooting 9-1 analog channels B-11 TS705 H-7 TTL inputs 2-2 upgrades I-6 version level 2-4 Voice/Data Autocalls E-6 VPPC-1 cable 2-4 Index-6 Verbatim Owner's Manual...
- Page 243 Verbatim. If the substitute telephone works correctly, your Verbatim has a problem and should be returned for repairs (in or out of warranty). If the substitute telephone does not work correctly, notify the telco that they have a problem and request prompt repair service (at no cost to the user).
- Page 244 Verbatim Owner's Manual...
- Page 245 Within 14 days of purchase, please complete this Warranty Registration. Detach the top portion, fold in half and drop in the mail. Postage is paid if mailed in the U.S. Otherwise, please return to: RACO Manufacturing and Engineering Co. Inc. Service Department 1400 62nd Street...
- Page 246 The following additional information will assist us in our continuing efforts to provide you with products that meet your specific requirements. Please send me more information on the following quality products from RACO Manufacturing: 1. This Autodialer is used in: _ wastewater __ gas pipeline...
Need help?
Do you have a question about the Verbatim and is the answer not in the manual?
Questions and answers