Table of Contents
Advertisement
Quick Links
Advertisement
Table of Contents

Summary of Contents for Brady NG Guillotine Cutter Standard
- Page 1 NG Guillotine Cutter Standard and Heavy Duty USER MANUAL...
-
Page 2: Table Of Contents
Table of Contents Licenses ..............................4 Reference to the EU Declaration of Conformity ..................4 1.2 FCC and Country-Specific Agency Approval Information ................. 4 Technical Support & Repair ........................5 Introduction ............................6 3.1 Instructions ............................... 6 3.2 Intended Use ............................6 3.3 Safety Instructions ............................ 7 Environment ............................. - Page 3 Standard Heavy Duty Disclaimer This manual, as well as translation hereof, is proprietary to Brady Worldwide, Inc. (hereafter "Brady"), and may be revised from time to time without notice. Brady disclaims any understanding to provide you with such revisions, if any. This manual is copyrighted with all rights reserved. No portion of this manual may be copied or reproduced by any means without the prior written consent of Brady. While every precaution has been taken in the preparation of this document, Brady assumes no liability to any party for any loss or damage caused by errors or omissions or by statements resulting from negligence, accident, or any other cause. Brady further assumes no liability arising out of the application or use of any product or system described, herein; nor any liability for incidental or consequential damages arising from the use of this document. Brady disclaims all warranties of merchantability of fitness for a particular purpose. Brady reserves the right to make changes without further notice to any product or system described herein to improve reliability, function, or design. Trademark All brand or product names referenced in this manual are trademarks (™) or registered trademarks (®) of their respective companies or organizations. ©2020 Brady Corporation. All rights reserved. Editor Regarding questions or comments please contact Brady Technical Support. Topicality Due to the constant further development of products discrepancies between documentation and product can occur. Please check BradyID.com for the latest update. Terms and conditions Deliveries and performances are effected under the General conditions of sale of Brady. Brady Warranty Our products are sold with the understanding that the buyer will test them in actual use and determine for him or herself their adapt- ability to his/her intended uses. Brady warrants to the buyer that its products are free from defects in material and workmanship, but limits its obligation under this warranty to replacement of the product shown to Brady’s satisfaction to have been defective at the time Brady sold it. This warranty does not extend to any persons obtaining the product from the buyer. THIS WARRANTY IS IN LIEU OF ANY OTHER WARRANTY, EXPRESS OR IMPLIED, INCLUDING, BUT NOT LIMITED TO, ANY IMPLIED WARRANTY OF MERCHANTABILITY OR FITNESS FOR A PARTICULAR PURPOSE, AND OF ANY OTHER OBLIGA- TIONS OR LIABILITY ON BRADY’S PART. UNDER NO CIRCUMSTANCES WILL BRADY BE LIABLE FOR ANY LOSS, DAMAGE, EXPENSE OR CONSEQUENTIAL DAMAGES OF ANY KIND ARISING IN CONNECTION WITH THE USE, OR INABILITY TO USE, BRADY’S PRODUCTS. User Manual...
-
Page 4: Licenses
Licenses Reference to the EU Declaration of Conformity The cutters of the NG series comply with the relevant fundamental regulations of the EU Rules for Safety and Health: • Directive 2014/30/EU relating to electromagnetic compatibility • Directive 2011/65/EU on the restriction of the use of certain hazardous substances in electrical and electronic equipment EU Declaration of Conformity bradyeurope.com/conformity FCC and Country-Specific Agency Approval Information NOTE : This equipment has been tested and found to comply with the limits for a Class A digital device, pursuant to Part 15 of the FCC Rules. These limits are designed to provide reasonable protection against harmful interference when the equipment is operated in a commercial environment. The equipment generates, uses, and can radiate radio frequency and, if not installed and used in accordance with the instruction manual, may cause harmful interference to radio communications. Operation of this equipment in a residential area is likely to cause harmful interference in which case the user may be required to correct the interference at his own expense. Changes or modifications not expressly approved by the party responsible for compliance could void the user’s authority to operate the equipment. This device complies with Part 15 of the FCC Rules. Operation is subject to the following two conditions: (1) This device may not cause harmful interference and, (2) this device must accept any interference received, including interference that may cause undesired operation. Prop 65 Warning Statement Prop 65 information related to this product is available at BradyID.com/i7100compliance. Canada ICES-003 Class A Notice, Classe A This Class A digital apparatus meets all requirements of the Canadian Interference-Causing Equipment Regulations. Cet appareil numerique de la classe A respecte toutes les exigences du Reglement sur le material broilleur du Canada. CAN ICES-3 (A)/NMB-3(A) Warning! This is a class A product. In a domestic environment this product may cause radio interference in which case the user may be required to take adequate measures. -
Page 5: Technical Support & Repair
Technical Support & Repair For repair or technical assistance, locate your regional Brady Technical Support office by going to: • United States: bradyid.com/techsupport • Europe: bradyeurope.com/services • Asia Pacific: brady.co.uk/landing-pages/global-landing-page • Australia: bradyid.com.au/en-au/supportlanding • Canada: bradycanada.ca • Latin America: bradylatinamerica.com Registration Information To register your printer go to: • bradycorp.com/register Repair and Return If for any reason you need to return the product for repair, please contact Brady Technical Support for repair and replacement information. User Manual... -
Page 6: Introduction
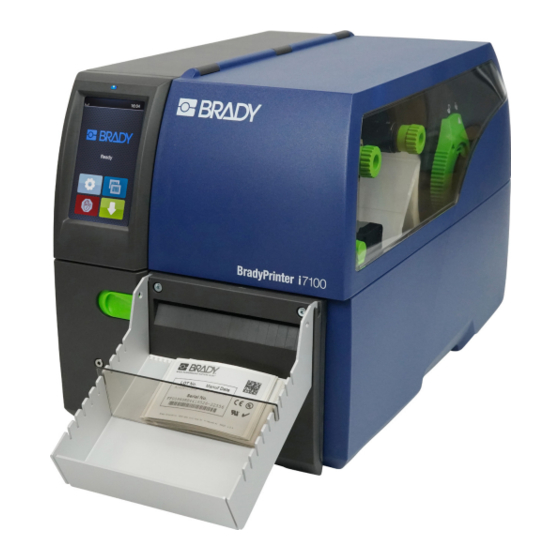
Introduction Instructions Important information and instructions in this documentation are designated as follows: Danger! Draws attention to an exceptionally great, imminent danger to your health or life due to hazardous voltages. Danger! Draws attention to danger with high risk which, if not avoided, may result in death or serious injury. Warning! Draws attention to danger with medium risk which, if not avoided, may result in death or serious injury. Caution! Draws attention to danger with low risk which, if not avoided, may result in minor or moderate injury. Attention! Draws attention to potential risks of property damage or loss of quality. Note! Advice to make work routine easier or on important steps to be carried out. Environment! Gives you tips on protecting the environment. Handling instruction Reference to section, position, illustration number or document. Option (accessories, peripheral equipment, special fittings). Time Information in the display. Intended Use • The device is intended exclusively as an option for the i7100 printer in the basic version for cutting suitable materials. Any other use or use going beyond this shall be regarded as improper use. The manufacturer/supplier shall not be liable for damage resulting from unauthorized use; the user shall bear the risk alone. -
Page 7: Safety Instructions
Introduction Safety Instructions • Disconnect the printer from the electrical outlet before mounting or removing the cutter. • The cutter may only be operated when it is mounted on the printer. • Risk of injury, particularly during maintenance, the cutter blades are sharp. • Work going beyond this may only be performed by trained personnel or service technicians. • Unauthorized interference with electronic modules or their software can cause malfunctions. Other unauthorized work on or modifications to the device can also endanger operational safety. • Always have service work done in a qualified workshop, where the personnel have the technical knowledge and tools required to do the necessary work. • Warning stickers must not be removed, as then you and other people cannot be aware of dangers and may be injured. Danger! Danger to life and limb from power supply. Do not open the device casing. Environment Obsolete devices contain valuable recyclable materials that should be sent for recycling. Send to suitable collection points, separately from residual waste. The modular construction of the device enables it to be easily disassembled into its component parts. Send the parts for recycling. Take the electronic circuit boards to public waste disposal centers or to the distributor. Technical Data NG Guillotine Cutter Technical data... -
Page 8: Mounting
Mounting Removing Covers Loosen screw (2) and remove cover (1). Loosen screws (4) and remove cover (3). Removing Anti-Static Brush The anti-static brush neutralizes the buildup of excess static electricity from the printer / printhead area. If the anti-static brush will be used, please be sure to use part number 170345 which is compatible with the cutter. This may require replacing the anti-static brush that came with the product. Turn lever (6) counterclockwise to open the printhead. Remove the anti-static brush (5) from the printer by removing the screw (4) via the threaded hole (1). Ensure that the embossing (3) un-snaps from its counterpart (2) when loosening the screw. Close the printhead. Attention! For cutter operation there has to be mounted a tear-off plate or a dispense plate on the printer, to lead the material through the blades of the cutter. User Manual... -
Page 9: Mounting Cutter
Mounting Mounting Cutter Insert the pins (3) of the cutter (5) into the holes (1) of the printer. Press the cutter against the printer. That way the plug of the cutter will be connected to the peripheral port (2) of the printer. Secure the cutter (5) with the screw (4). Mounting Cutter Tray Hook the cutter tray box (3) with the fixing brackets into the recesses (1) on the mounted cutter (2). Slide the divider (4) according to the label height into the corresponding groove in the cutter tray box. This ensures a correct stacking of the cut labels. User Manual... -
Page 10: Operation
Operation Preparation Slide lever to the left to fold down the cutter unit. Insert labels for tear-off mode Instructions of the printer. Place the media strip between the printhead and the drive roller, so that the front edge of the strip reaches through the cutter. Insert ribbon Instructions of the printer. Fold up and lock the cutter unit (2). Activate the cut mode in the software. In direct programming use the "C" command. Programming Manual of the printer. Configure the cut parameters 6 Printer Configuration. Note! The cut parameters are only accessible with cutter installed. User Manual... -
Page 11: Standard Operation
Operation Standard Operation X Switch on the printer. The cutter performs a synchronization action. Note! To operate the cutter with continuous material in the printer menu Setup - > Labels - > Label sensor the setting Continuous media has to be selected. Otherwise no synchronization cut is carried out. X Press . -
Page 12: Printer Configuration
Printer Configuration Note! The values of the setup are basic settings for the current printer/cutter combination. After changing the cutter or printer a re-adjustment may be necessary. Changes required for processing different print jobs should be implemented by additional offsets available in the software. The offset values from setup and software are added together for execution. For detailed instructions for configuration Configuration Manual of the printer. Cut Parameters Start menu. Select Setup > Cutting. Parameter Meaning Default Device info Information to the device: Software version, counts of cuts and errors Calibrate Calibration of the lower blade end position. device 7.4 Calibrating the cutter Offset of the cut position relative to the rear label edge. 0.0 mm position The setting can also be adjusted by the software. The settings of configuration and software are added together. Label Sensor ... -
Page 13: Maintenance
Maintenance Removing the Blades for Cleaning and Replacement Warning! Disconnect the printer from the electrical outlet. Caution! Risk of injury. The cutter blades are sharp. To clean the blades, they must be removed. 1. Disassemble the NG Guillotine Cutter from the printer. 2. Loosen screws (1) and remove cover (2) towards the front. 3. Using a 2.5mm hex wrench to turn the axle (3) counterclockwise. The lower blade (4) is moved down until it can be pulled out. 4. Loosen screws (5). 5. Fix the upper blade (6) while the springs (7) press against the upper blade (6).Remove the upper blade (6) and make sure that the springs (7) do not fall out. User Manual... -
Page 14: Lubricating The Blades
Maintenance Lubricating the Blades Note! When cutting through the label material instead of the label gap remains of adhesive may accumulate on the blades. If operating in backfeed mode, such remains of adhesive may be deposited on the drive roller as well. Clean often the drive roller ( Printer Instructions) and the cutter blades. For a perfect function of the cutter, it is necessary to grease the blades and guides at selected areas. After each cleaning and before installing new blades, grease must be applied. Attention! Use only a plastic grease to grease the blades and running surfaces. Grease guide slots Grease sliding surfaces Reassembling the Blades The assembly of the cleaned or new blades and the assembly of the cutter is carried out in the reverse order of disassembly. Put on the upper blade(2) and make sure that the springs (3) should not be kinked and remain in the guides Fix the upper blade (2) with the screws (1). Push the lower blade (5) in the guides upward until the toothed rail on the upper blade (5) pushes against the gear wheels on the axle (4). Then turn the axle (4) clockwise with a 2.5 mm hex wrench until the lower blade (5) is just before the upper blade (2). -
Page 15: Calibrating The Cutter
Maintenance Press the upper blade (2) inwardly and slide the lower blade (5) over the upper blade (2) by turning the axle (4) clockwise to the maximum top. Mount the cover and attach the cutter to the printer. After turning on the printer, the lower blade automatically aligns. Calibrating the cutter Attention! After every blade change and removal and installation of the blades for cleaning, the blades must be calibrated! Remove label material. Start menu. Select Setup > Cutting > Calibrate device. Press Continue to start the calibration process. After a cutter movement the display shows Device successfully calibrated. If the calibration failed an error message will appear. -
Page 16: Error Messages
Error Messages Error message Cause Remedy Cutter blocked The media cannot be cut and the blades Switch off the printer. cannot return in the home position. Remove trapped material. Switch on the printer. New start of the print job. Change material. Cutter is without function. Switch off and on the printer. If it does occur again, contact service. Cutter cover open Cover of cutter is not mounted. Mount the cover Device not locked Cutter is not in operating position. Fold up and lock the cutter unit. ... - Page 17 This page intentionally left blank. User Manual...
- Page 18 Brady Worldwide, Inc Brady EMEA Brady Corporation Asia 6555 West Good Hope Road Lindestraat 20 1 Kaki Bukit Crescent Milwaukee, WI 53223 9240 Zele Singapore 416236 bradyid.com Belgium bradycorp.com/global bradycorp.com/global User Manual (Printed-English): Brady Part No. 151153...
Need help?
Do you have a question about the NG Guillotine Cutter Standard and is the answer not in the manual?
Questions and answers