Table of Contents
Advertisement
Quick Links
Advertisement
Table of Contents

Summary of Contents for ORANGE Live Button
- Page 1 User Guide Live Button February 2019...
- Page 2 Welcome This guide will accompany you throughout the learning process and use of the Live Button.
-
Page 3: Table Of Contents
Contents Presentation of the Live Button ............04 Pack contents .................05 Step 1: turn on the Live Button ............06 Step 2: charge the Live Button ............07 Step 3: install the Live Button ............08 Step 4: use the Live Button .............09 Push the Live Button ..............09 Send a message ................10... -
Page 4: Presentation Of The Live Button
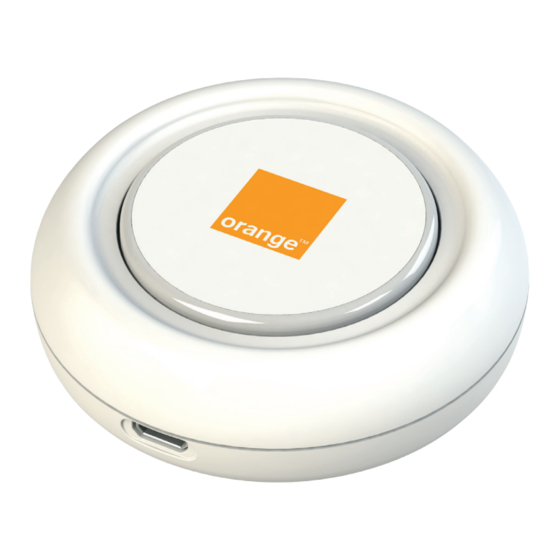
Presentation of the Live Button Bottom Magnet Push Product button reference Light-up ring Series number Power button Magnet Live Button User Guide... -
Page 5: Pack Contents
1 Live Button 1 Charging cable For customers that choose the HUB option, you will also receive a USB charging cable for the HUB and a power supply allowing you to charge multiple Live Buttons at once. Live Button User Guide... -
Page 6: Step 1: Turn On The Live Button
Step 1: Turn on the Live Button How to turn on the Live Button? In order to see the label, turn the button over that so the bottom side is visible. Using a thin tool (ex: a paper clip, the tip of... -
Page 7: Step 2: Charge The Live Button
USB cables, the HUB, and the power supply. Plug each valent to one button push per day. Live Button into the HUB via a USB cable. Connect the HUB to a For the LPWAN version (LoRa), charger which you then plug into an electrical outlet. -
Page 8: Step 3: Install The Live Button
Install the Live Button How to install the Live Button? The Live Button can either be placed on a flat surface (shelf or other) or mounted on a metallic structure using its two magnets. Be careful not to place the Live Button on an unstable surface in order to avoid any possible shocks or falls. -
Page 9: Step 4: Use The Live Button
Speak to your fleet manager to know what kind of push is necessary to trigger an action, and what kind of actions will be triggered. Be careful not to push too hard on the Live Button. A small amount of pressure is enough to trigger an action. Live Button User Guide... -
Page 10: Send A Message
Send a message Confirm that the message was sent How to send a message? After pushing the Live Button, a message is sent via the network. During the transmission of a message, the ring of light will blink green (the brightness varies). -
Page 11: Confirm That A Message Was Sent
Message sent How to know if a message was sent successfully? The Live Button blinks green in order to confirm that a message was successfully sent across the network. If there is a problem transmitting the message, the Live Button blinks red. -
Page 12: Support
“Turn on the Live Button.” Next, verify that the button is charged. In order to do so, refer to the previous chapter “Charge the Live Button.” If the problem persists, contact your fleet manager. When the Live Button blinks orange. -
Page 13: Precautions For Use
Live Button to avoid any risk of fire. Be careful not to expose the Live Button to the sun. Do not install the button next to a heat source (maintain a minimum distance of 50 cm from all heat sources). -
Page 14: Warranty
Live Button equipment is CE and RoHS 2011/65/EU certified. Recycling The Live Button contains a lithium battery that can be recycled. Speak to your fleet manager to find out how best to recycle the battery. Live Button User Guide... -
Page 15: Product Characteristics
Charge via USB cable 5V input power supply – 2A maximum LAN connectivity: Bluetooth Low Energy (BLE) WAN connectivity: LPWAN Orange (LoRa) network or Orange (GSM) cellular network depending on the version chosen by your fleet manager. Live Button User Guide... - Page 16 Find this manual on the Live Button site: live-button.orange-business.com To learn more, contact your sales representative or visit www.orange-business.com...
Need help?
Do you have a question about the Live Button and is the answer not in the manual?
Questions and answers