Table of Contents
Advertisement
Advertisement
Table of Contents

Related Manuals for Belco Tar River DRL-048

Summary of Contents for Belco Tar River DRL-048
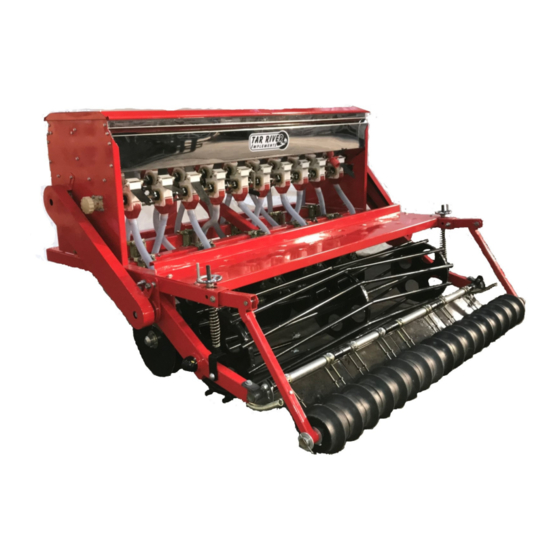
- Page 1 DRL-048 DRL-072 CROP SEEDER Operator’s Manual Rev. 8-2019...
-
Page 2: Table Of Contents
TABLE OF CONTENTS INTRODUCTION…………………………………………………………………………………….……….3 SAFETY ………………………………………………………………………………………………...………. 3 SAFETY SIGNAL WORDS ………………………………………………………………….…………….4 GENERAL SAFETY GUIDELINES …………………………………………………………………..4 SAFETY DECAL CARE ………………………………………………………………………….………….5 BEFORE OPERATION ………………………………………………………………………….………….5 DURING OPERATION …………………………………………………………………………………. ..6 HIGHWAY AND TRANSPORT OPERATIONS ……………………..………………….………...7 ASSEMBLY……………………………………………………….…….……….………………………….9-12 OPERATING INSTRUCTIONS…..…………………………………………………………………….13 BEFORE BEGINNING…………. …………………………………………………………………..…….13 ADJUST SEEDCUP OUTPUT…………………………………………………………………………...13 SEEDING/FERTILIZING RATE ADJUSTMENT HANDLE………………………………….14 SEEDCUP SHUTOFF……………………………………………………………………………………….15 SEED CHARTS………………...……………………..……………………………………………..…..15-16... -
Page 3: Introduction
INTRODUCTION Thank you for purchasing your DRL Crop Seeder. The DRL- is designed to be used in prepared seeding conditions. It is not intended as a No-Till Drill. It is important to properly maintain and keep in place all safety guards and shields that came with your Machine. These seeders can seed corn, beans, oats, wheat, etc. -
Page 4: Safety Signal Words
SAFETY SIGNAL WORDS TAKE NOTE! THIS SAFETY ALERT SYMBOL FOUND THROUGHOUT THIS MANUAL IS USED TO CALL YOUR ATTENTION TO INSTRUCTIONS INVOLVING YOUR PERSONAL SAFETY AND THE SAFETY OF OTHERS. FAILURE TO FOLLOW THESE INSTRUC- TIONS CAN RESULT IN INJURY OR DEATH. THIS SYMBOL MEANS ATTENTION! BECOME ALERT! -
Page 5: Safety Decal Care
Review the safety instructions with all users annually. This equipment is dangerous to children and persons unfamiliar with its operation. The operator should be a responsible adult familiar with farm machinery and trained in this equipment’s operations. Do not allow persons to operate or assemble this unit until they have read this manual and have developed a thorough understanding of the safety precautions and of how it works. -
Page 6: During Operation
• Don’t hurry the learning process or take the unit for granted. Ease into it and become familiar with your new equipment. • Practice operation of your equipment and its attachments. Completely familiarize yourself and other operators with its operation before using. •... -
Page 7: Highway And Transport Operations
• DO NOT operate near the edge of drop-offs or banks. • DO NOT operate on steep slopes as overturn may result. • Operate up and down (not across) intermediate slopes. Avoid sudden starts and stops. HIGHWAY AND TRANSPORT OPERATIONS •... - Page 8 • Watch for obstructions overhead and to the side while transporting. • Always operate equipment in a position to provide maximum visibility at all times. Make al- lowances for increased length and weight of the equipment when making turns, stopping the unit, etc.
-
Page 9: Assembly
ASSEMBLY Step 1. Support frame a few feet above floor with blocks or a Tar River Implement han- dler. 14” DRL-072 Align the double disc openers to the proper 7” spacing. It is easier to begin mounting the U bolts that hold the Double Disc Assembly on one end and align the next one on the same bar 14”... - Page 10 Step 3. Separate the hoses which come with the machine. The 5 longer hoses are to be installed .from the front seed cups to the rear double disc openers. Step 4. Use electrical tape (not provided) to secure the hos- es to the seed cups.
- Page 11 Step 6. Install cage roller on both roller arms. Ensure grease fitting is to the outside. Secure in place with nuts and cotter pins. Step 7. Attach the packer wheel arm. Step 8. Attach and install the roller Adjustment rod . Step 9.
- Page 12 Step 11. Lightly push seed box forward to tighten the chain.. Use allen wrench to tighten the drive sprocket after ensuring the chain is straight. Install chain shield. Step 12 Install back Bracket bolt Step. 12 Install Step Board Step 13. Attach Spring-loaded left out during roller assembly.
-
Page 13: Operating Instructions
OPERATING INSTRUCTIONS The DRL Seeder is a primary seeder intended to be used in prepared ground. BEFORE BEGINNING Be sure all the seed cups completely close and open the same, so all cups are putting • out the exact amount of seed. If they are not in sync, one cup will put out more that others. -
Page 14: Seeding/Fertilizing Rate Adjustment Handle
The LARGE SEED front section is usually driven with an 11-26 Gear ratio, while the back LEGUME SEED section is being reduced to put out less with a 12-40 Gear Ratio. SEEDING/FERTILIZING RATE ADJUSTMENT HANDLE To adjust the fertilizer rate, you will need to adjust hand wheels (on each side of hopper). The seed/fertilize rate depends on the seed/fertilizer you want to plant, please refer to your seed/ fertilizer supplier’s chart to get the proper seed/fertilize rate. -
Page 15: Seedcup Shutoff
SEED CUP SHUTOFF Depending on the crop being planted, it may be necessary to not disburse from all of the seed cups. This is easily done by simply sliding the SEED SHUT OFF FLAP in an out. In shuts it off, out opens it up. CLOSED OPEN CLOSED... -
Page 16: Seed Depth Control
Legume seed cup 11- 26 Gear Ratio Cup Setting — — — — — — Fescue — — — — — — — — Wheat — — Centipede — — — — — — — — Gran. Fertilizer 12– 40 Gear Ratio Cup Setting —... -
Page 17: Lubrication And Maintenance
operating position. During operation the tractor lift must be fully lowered to allow the machine to follow the contour of the ground. The machine is totally ground driven so proceed with a speed that is most comfortable and safe for existing conditions. Be sure to stop forward motion before lifting machine off ground. This practice will stop rollers from ’free spinning’... -
Page 18: Parts Breakdown
Crop Seeder DRL-048 & DRL-072... - Page 19 Crop Seeder DRL-048 & DRL-072 Item Part # Description DL4001-48 Main Frame - DRL-048 DL4001-72 Main Frame - DRL-072 DL1003-48 Hopper Complete - DRL-048 DL1003-72 Hopper Complete - DRL-072 DL1001-48 Hopper Lid - DRL-048 DL1001-72 Hopper Lid - DRL-072 DL6008 Disc Assembly DL6007 External Sraper Kit...
- Page 20 Crop Seeder DRL-048 & DRL-072...
- Page 21 Crop Seeder DRL-048 & DRL-072 Item Part # Description DL8003 Bracket - Roller Arm DL8008 Roller Arm DL8004 Spring - Roller DL8002 Adjustment Rod - Roller DL10001-48 Stepboard - DRL-048 DL10001-72 Stepboard - DRL-072 DL5003 Lid Piston DL7007 Seedcup Shutoff Flap DL7000-48 Hex Seed Box Shaft - DRL-048 DL7000-72...
-
Page 22: Limited Warranty
(90) days from the date of purchase of such part or to the expiration of the applicable new equipment warranty period, whichever occurs later. Warranted parts shall be provided at no cost to the user at an authorized Belco Resources Equipment Division, LLC dealer during regular working hours. Belco Resources Equip- ment Division, LLC reserves the right to inspect any equipment or parts, which are claimed to have been defective in material or workmanship. - Page 23 BELC Increasing agricultural productivity since 1974 RESOURCES Tel: 252-442-0700 P.O. Box 8164 Fax: 252-442-0787 Rocky Mount, NC 27804 EQUIPMENT Sales@BRGlimited.com www.BR-Equipment.com...
Need help?
Do you have a question about the Tar River DRL-048 and is the answer not in the manual?
Questions and answers