Table of Contents
Advertisement
Quick Links
Subject: VAL100 Installation
Manual
Version: 3.0
Date: 10/12/2020
Product names mentioned
herein are for identification
purposes only and may be
trademarks and/or registered
trademarks of their respective
companies.
© Copyright 2020
ALL RIGHTS RESERVED
Access-IS
18 Suttons Business Park, Reading
Berkshire, RG6 1AZ, United Kingdom
Tel: +44 (0) 118 966 3333
Web: www.access-is.com
Email: support@access-is.com
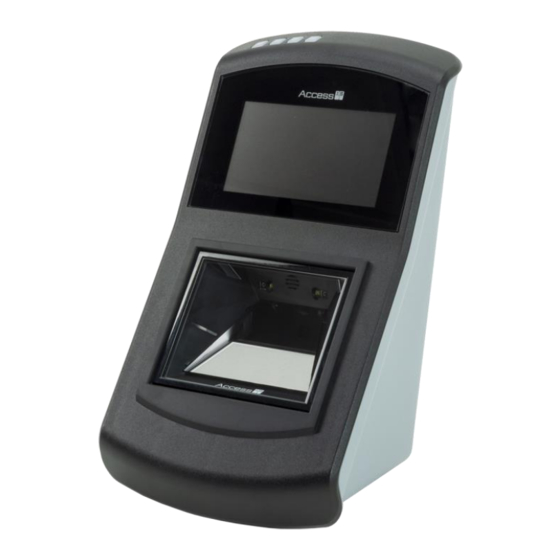
VAL100
Barcode/NFC/RFID Ticket
Validator
Installation Manual
Advertisement
Table of Contents

Summary of Contents for Access IS VAL100
- Page 1 Subject: VAL100 Installation Manual VAL100 Version: 3.0 Date: 10/12/2020 Barcode/NFC/RFID Ticket Validator Product names mentioned herein are for identification purposes only and may be Installation Manual trademarks and/or registered trademarks of their respective companies. © Copyright 2020 ALL RIGHTS RESERVED...
- Page 2 Warnings This manual contains important information regarding the installation and operation of the VAL100. For safe and reliable operation of the imager, installers must ensure that they are familiar with, and fully understand, all instructions contained herein. Warranty Access Ltd warrants that this product shall be free from defects in workmanship and materials for a period of one year from the date of original purchase.
-
Page 3: Table Of Contents
Contents Overview ..........................4 Installation ........................... 5 Unpack the VAL100 ....................5 Tool list ........................6 Cable requirements ....................6 Pole mount procedure ....................6 SAM card installation ....................8 Test the device ....................... 10 Troubleshooting ...................... 10 Maintenance ......................10 Wiring guide ........................ -
Page 4: Overview
1. Overview The VAL100 is a ticket validator designed for use on-board buses, trams, trains and boats. Designed for use in a variety of public transportation automatic fare collection systems, the VAL100 combines a multimedia ticket reader with an open architecture Linux computer to create a mobile ticket validation solution when combined with third-party software. -
Page 5: Installation
2. Installation Mount the VAL100 on a 1.25 inch or 1.4 inch diameter pole. The validator requires a 12–24 V feed from the vehicle's ignition. Operational voltage range 10.5 to 33 V. Warning: Ensure that the vehicle ignition is switched off during installation and when you connect the VAL100. -
Page 6: Tool List
USB 2.0 compatible cable - no longer than 4.5 metres Pole mount procedure Use the supplied pole mount kit to install the VAL100 on a pole in the vehicle. You can mount the VAL100 on a 1.25 inch or 1.4 inch diameter pole. - Page 7 4G only: If you are using the 4G dongle, pass the provided USB dongle cable through the cable aperture in the mounting bracket before carrying out this step. Make sure the USB cable passes the pole on the right side (when looking at it from the front of the validator). 5.
-
Page 8: Sam Card Installation
SAM card installation SAM cards are usually installed at the factory. For on-site installation, follow these steps. 1. Remove the 11 screws securing the rear cover housing and prise the front and rear cover housing apart. 2. Remove the screw securing the cover plate. 3. - Page 9 4. Slide the metal lock bar to release the SAM socket cover. 5. Pivot the SAM socket cover up and insert the card (note the orientation of the chamfered corner on the card). 6. Pivot the cover closed and slide the lock bar to the lock position. 7.
-
Page 10: Test The Device
Troubleshooting section in this document. Troubleshooting If the VAL100 does not appear to be working, refer to the following table to help identify and resolve the problem. For further assistance, contact Customer Support (support@access-is.com). -
Page 11: Wiring Guide
A. Wiring guide Figure 3: Wiring guide and connector orientation Page 11 of 17 Copyright © Access-IS 2020... - Page 12 Table 4: Molex, Ethernet, USB and Power connections Molex Ethernet USB* Power 7 - TxP3 - WHITE/BROWN 8 - TxN3 - BROWN USB 5 V USB+ USB- USB GND BLACK - VEHICLE GROUND 5 - TRP2 - WHITE/BLUE 4 - TRN2 - BLUE 1 - TxP1 - WHITE/ORANGE 2 - TxN1 - ORANGE 3 - TxP0 - WHITE/GREEN...
-
Page 13: Installation Drawings
B. Installation drawings Figure 4: Attach the mounting bracket to the pole Figure 5: Mounting bracket attached to the pole 4G only 4G only Figure 6: Fit the USB dongle bracket onto the Figure 7: USB dongle bracket showing all fixings mounting bracket and secure 4G only 4G only... - Page 14 Figure 10: Connect the wiring block Figure 11: Attach the back cover Figure 12: Positions of the keyholes for attaching the Figure 13: Attach the validator validator Page 14 of 17 Copyright © Access-IS 2020...
-
Page 15: Specifications
C. Specifications Specification Details Dimensions - Main unit 145.5 mm x 265 mm x 188 mm (W x H x D) Weight Validator: 1.7 kg, Mounting kit: 0.95 kg Environmental Operating temperature: -20ºC to 50ºC Storage temperature: -30ºC to 70ºC Humidity: 0–95% RH, non-condensing Body PC/ABS... -
Page 16: Main Model Numbers
D. Main model numbers Validators RFID Bluetooth Flash Model Barcode cEMV Wi-Fi Serial Ethernet memory VAL100-210-WE-D3 32GB VAL100-210-WE-D1 128GB VAL100-210-WS-D3 32GB VAL100-210-WS-D1 128GB VAL100-210-WB-D3 32GB VAL100-210-WB-D1 128GB VAL100-220-WE-D3 32GB VAL100-220-WE-D1 128GB VAL100-220-WS-D3 32GB VAL100-220-WS-D1 128GB VAL100-220-WB-D3 32GB VAL100-220-WB-D1 128GB Mounting kits... -
Page 17: Document History
E. Document history Version Date Description 15/09/2016 First issue. 06/10/2016 Changes to USB connections and wiring guide. 10/01/2017 Addition of 4G dongle installation steps. Changed compliance statements and overview text, removed 1.5 inch pole option, changed operational voltage range, added 10/12/2020 SAM card installation, updated specifications and approvals, revised main model number section.
Need help?
Do you have a question about the VAL100 and is the answer not in the manual?
Questions and answers