
Subscribe to Our Youtube Channel
Related Manuals for PICOLAS LDP-VRM 025-100 CA


Summary of Contents for PICOLAS LDP-VRM 025-100 CA
- Page 1 User Manual LDP-VRM 025-100 CA PicoLAS GmbH Burgstr. 2 52146 Würselen Germany Phone: +49 (0) 2405-64594-60 Fax: +49 (0) 2405-64594-61 E-mail: info@picolas.de Web: www.picolas.de Rev. 1909...
- Page 2 Table of Contents How to use the Manual....................3 Absolut maximum Ratings ..................3 Dos an Don’ts ......................3 Product Overview..................... 4 How to get started.....................5 Required Laser Diode Pinout ..................6 Power Driver Block Diagram ..................6 Description of the Connectors.................. 6 Power Supply and absolute maximum Ratings............
- Page 3 How to use the Manual Remark: Please read all instructions before powering up the device. Please see section “Power Dissipation” for more details about thermal power losses during operation. Please pay attention to all safety warnings. If you have any doubt or suggestion, please do not hesitate to contact us! Absolute maximum Ratings (destroying limits) ...
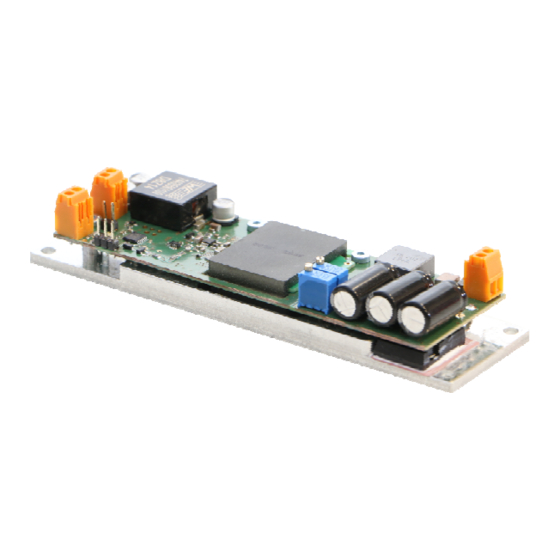
- Page 5 Make sure not to overload the laser diode! Required Laser Diode Pinout The LDP-VRM 025-100 CA is designed for a direct connection to almost all kinds of laser diodes. The laser diode can be connected directly by a screw terminal.
- Page 6 Power Driver Block Diagram Description of the Connectors Power Supply and absolute maximum Ratings Pin of conn. #3 Allowed range Best performance Destroying limit 1 VCC (laser supply) 24 V .. 26 V 30 V 2 (GND) 3 (Input terminal) 0 V ..
- Page 7 Input for Current Setpoint The analog setpoint signal is provided via this connector. The output current follows the input signal proportionally within the driver’s limitations (bandwidth, max. current, rise time). Jumper The analog input can be switched to an inverted digital input. Set the jumper left to activate the inverted digital input.
Need help?
Do you have a question about the LDP-VRM 025-100 CA and is the answer not in the manual?
Questions and answers