Advertisement
Quick Links
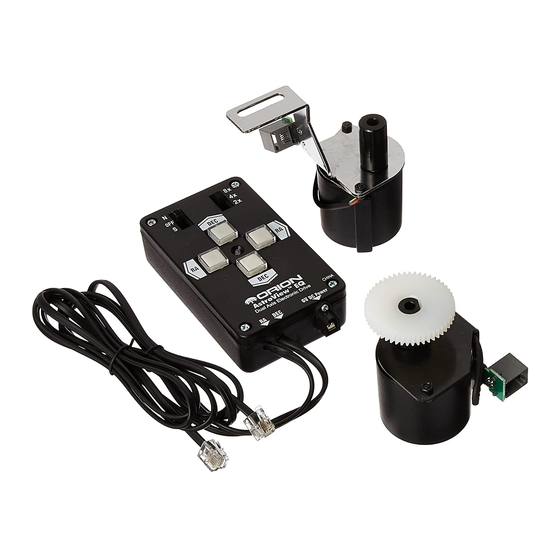
Orion
EQ-3M Dual-Axis DC Motor Drive System
®
#7828
Welcome to a new world of adventure. The Orion EQ-3M
Dual-Axis DC Motor Drive System allows convenient hands-
free sidereal tracking of the night sky for telescopes, like the
SkyWatcher 120, that utilize the Orion EQ-3 Equatorial Mount.
The motor drive system is also a necessary component for
doing long-exposure astrophotography. The electronic hand
controller allows positional corrections to be made to both the
right ascension (R.A.) and declination (Dec.) axes of the
mount during an astrophotographic exposure.
1. Parts List
1 R.A. motor assembly
1 Dec. motor assembly (with white nylon gear wheel)
1 Dec. clutch assembly
1 Hand controller
1 Battery pack
1 Socket-head cap screw
1 Washer
1 5mm Allen wrench
1 4mm Allen wrench
1 2mm Allen wrench
2. Installing the R.A. Motor Assembly
1. When facing the front of the mount, the R.A. slow-motion
control cable should be mounted to the right end of the
R.A. worm gear shaft (Figure 1). If it is mounted on the left
end, remove it, and reinstall it on the right end of the
shaft.
Left end of
R.A. worm
gear shaft
Figure 1
2. The R.A. motor is the one with the chrome-colored bracket
and black cylindrical coupling, pictured in Figure 2. Using
the provided 2mm Allen wrench, loosen the socket-head
setscrew on the end of the coupling).
Dec. worm gear
assembly
Right end
of R.A.
worm gear
shaft
Setscrew
on end of
R.A. motor
drive coupling
Figure 2
IN 134 Rev. B 02/09
Advertisement

Related Manuals for Orion EQ-3M


Summary of Contents for Orion EQ-3M
- Page 1 ® #7828 2. Installing the R.A. Motor Assembly Welcome to a new world of adventure. The Orion EQ-3M Dual-Axis DC Motor Drive System allows convenient hands- 1. When facing the front of the mount, the R.A. slow-motion free sidereal tracking of the night sky for telescopes, like the control cable should be mounted to the right end of the SkyWatcher 120, that utilize the Orion EQ-3 Equatorial Mount.
- Page 2 3. Use the provided 4mm Allen wrench to remove the socket- The motor is now properly installed on the EQ-3 mount, and head bolt on the left side of the mount (Figure 3). should appear as in Figure 4. Socket- head bolt Figure 4 3.
- Page 3 setscrew so it seats into the groove and makes a firm The Dec. motor is now properly installed on the EQ-3 mount, connection. and should appear as in Figure 7. 3. Attach the Dec. motor assembly to the flange on the head casting of the mount (refer to Figure 5) with the socket- head cap screw and washer.
- Page 4 Orion’s option, any warranted instrument that proves to be defective, provided it is returned postage paid to: Orion Warranty Repair, 89 Hangar Way, Watsonville, CA 95076. If the product is not registered, proof of purchase (such as a copy of the original invoice) is required.