Advertisement
Quick Links
Advertisement

Related Manuals for NextBase SDV47


Summary of Contents for NextBase SDV47
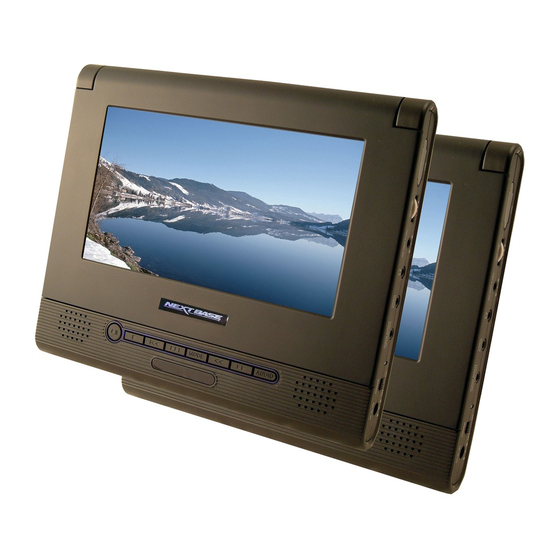
- Page 1 TABLET DVD PLAYER Operating instructions SDV47...
- Page 2 1. Read these instructions. 2. Keep these instructions. 3 Heed all warnings. 4. Follow all instructions. 5. Do not use this apparatus near water. 6. Clean only with dry cloth. 7. Do not block any ventilation openings. Install in accordance with the manufacturer's instructions.
- Page 3 Thank you for purchasing this tablet DVD player. Please read this manual carefully before operating and reserve it for future reference. It will be helpful to you if you encounter any operational problem. This Digital Video Disc player em ploys a Laser System. To ensure proper use of this product, please read this owner s manual carefully and retain it for future reference.
- Page 4 The lightning flash with the arrowhead symbol, within an equilateral triangl e, is intended to al ert the user to the presence of uninsulated “ ” dangerous voltage within the product enclosure that may be of sufficient magnitude to constitute a risk of electric shock to pers ons.
- Page 6 PLAYABLE FORMATS............. PACKAGE CONTENTS PACKAGE CONTENTS............ FITTING PORTABLE DVD PLAYER TO HEADREST MOUNT............CONNECTING THE ADAPTER TO THE DC IN 12V SOCKET...................
- Page 7 PLAYING DivX FILES..........USING THE USB PORT..........USING THE SD/MS/MS-PRO/M MC CARD SLOT..IR HEADPHONE............38...
- Page 8 During playback, the disc spins at high speed. So do not lift or move the player. Doing so may damage the disc. We s trongl y advis e aga inst us ing the playe r while drivin g. Most count ries an d stat es hav e laws which prohi bit or s everely restrict the use o f the p layer in vehicles while dr iving.
- Page 9 first use. Normally clean the player with a soft, dry cloth. For tough dirt, apply some neutral detergent diluted in 5 to 6 parts water to a soft cloth, wring out thoroughly. Wipe off the dirt, then wipe off the player with a dry cloth. Note that alcohol, thinner, benzene, insecticides, etc., may cause the print or coating to peel off.
-
Page 10: Playable Formats
PLAYABLE FORMATS The unit is able to play most audio/video files such as: PICTURE: JPEG AUDIO: MP3, WMA VIDEO: DAT, VOB, MPEG2, MPEG4 (AVI, DIV) - Page 11 Main unit AC / DC adapter AV cable Card-type remote control unit Car power cable Headrest mount NOTES:Actual products' appearance might vary slightly from the pictures shown.
- Page 12 DC OUT jack (DC 7~12V) USB port SD / MS / MS-PRO / MMC card slot...
- Page 13 Press it to enter AV IN/OUT adjustment, brightness, color, TFT mode and view mode. Press the button once to enter AV IN / OUT adjustment. Use to adjust. Press the button again to enter BRIGHTNESS mode. Use button to adjust levels between 0 and 8.
- Page 16 High speed rewind key. angles. Press this button to display the DVD's menu screen. While playing VCD disc, press it to switch between menu on or off. switching the screen.
- Page 17 NOTE: To pr event leakage of fluid fro m the lithiu m batter y, remov e the ba ttery when not usin g the re mote con trol unit f or long p eriods o f time (o ne mont h or mor e). If the battery leaks fluid, carefull y wipe it out of th e batte ry case , then ch ange to a new lithiu m batter y.
-
Page 18: Fitting Portable Dvd Player To Headrest Mount
1. Place the two mounting straps over your headrest with the mount's sponge facing the headrest, and the release button on top. 2. Adjust to your deserved viewing angle, then firmly secure the mount by tightening the straps. See diagrams below. FITTING PORTABLE DVD PLAYER TO HEADREST MOUNT Gently slide the Portable DVD player down... -
Page 20: Connecting The Adapter To The Dc In 12V Socket
CONNECTING THE ADAPTER TO THE DC IN 12V SOCKET plug... - Page 21 With this player, you can enjoy powerful Dolby Digital or MP EG sound. Output the digital si gnals from the pl ayer's di gital output to a d ecoder or amplif ier with the built-in decoder. Main unit right panel...
- Page 22 Output the digit al signal s from the player 's digital output t o a digital amplif ier that is not Dolby/MPEG com patible. For instructions o f audio settings, refer to AUDIO OUT of AUDIO SETUP. Main unit right panel Carefu lly check the player s digital output settings before c onnecting the pla yer to an amplifier equipp ed...
- Page 24 Connect the AC/DC adapter to the socket.
- Page 26 1. Open the batteries cover. 2. Replace the 6 PCS AA batteries. 3. Generally speaking, DVD playback time will be more than two hours with 6 PCS NI-MH batteries of 2300 mAH. 1. The playback time of the batteries has much to do with discs and operation factors etc..
- Page 27 does not play, by pressing the key.
- Page 28 each time you press the button. 1 Press the button on the remote control during playback. The playback speed becomes1/2, 1/3, 1/4, 1/5, 1/6 or 1/7 of the normal speed each time you press the button. 2 When pressing during pause status, the player will show a still picture on the screen.
- Page 29 Press 2 For VCD or CD, you can choose the channels to play.
- Page 30 The menu appears as below. Selecting an inexistent title, chapter or program playback will resoit in an actomatic cancellation.
-
Page 32: Playing Divx Files
PLAYING DivX FILES 1. If the disc is playing, the USB card can not be read. 2. The player may not work properly if using the USB connecting cable. It is suggested not to use it. 3. Supply USB 1.1 use. - Page 33 CD/DVD Discs, or USB device must be removed f om the portable DVD player for SD/MS/MS-Pro/MMC card to be read by the unit. Install the card-reader as the following picture shows: This product has been tested with most brand name flash media cards. Using poor quality flash cards may affect the readability of the unit.
- Page 34 the options that appear.
- Page 35 when it is paused...
- Page 37 Step1: For first time use: enter 0000 as password or assigned password to unlock. Step2: Once parental control is unlocked, go to rating menu and assign rating. Step3: Enter a new password of your choice in 4 digits to lock the player rating. If you forget your assigned password, you can use 0000 to unlock the rating again.
- Page 38 the OSD in the language you have chosen. There are 5 optional OSD languages: English, German, Spanish, French and Italian. Highlight the AUDIO LANG option, and press the Arrow buttons to choose the audio language you prefer. Press ENTER to confirm. If the disc you are playing has that language available, it will output audio in that language.
- Page 40 outputted outputted from the optical Output jack.
- Page 43 DivX(R) VOD Choose this setting to adjust the line out compressing ratio and get different effects. If adjusting to FULL, the audio signal peak value will be compressed to be minimum; while adjusting to OFF, to be maximum. DivX(R) VOD...
- Page 44 DivX(R) VOD ,you need to input DivX(R) VOD DIV X(R) V IDEO ON D EMAN D Y OUR REG ISTRATION COD E IS: X XXX XXXX T O LEA RN M ORE VISIT WWW.DIVX .COM /VOD [DON E] The registration code will be changed each time you use it to download the DivX files.
- Page 46 Disc is loaded incorrectly. Maintenance and clean the unit only as recommended in the operational instructions.
Need help?
Do you have a question about the SDV47 and is the answer not in the manual?
Questions and answers