Table of Contents
Advertisement
Advertisement
Table of Contents

Summary of Contents for Ridder Drive Systems PolyDrive RPD 506 Series
- Page 1 Ridder Drive Systems B.V. Lorentzstraat 32 T +31 (0)341 416 854 3846 AX Harderwijk F +31 (0)341 416 611 PO Box 360 I ridder.com 3840 AJ Harderwijk E info@ridder.com the Netherlands Product Manual Ridder PolyDrive RPD Original product-manual 265702EN - 2020.06 - V04...
-
Page 2: Table Of Contents
7.5 Unlock the “Fail-Safe” position 8. MAINTENANCE INSTRUCTIONS 8.1 Maintenance 9. SERVICE 9.1 Troubleshooting 9.2 Technical support 10. ENVIRONMENT 10.1 Decommissioning and removal 10.2 Waste disposal Ridder Drive Systems B.V. T +31 (0)341 416 854 - F +31 (0)341 416 611 - I ridder.com... -
Page 3: Guidelines, Standards And Conditions
Refer to §2.3. Refer to §3.3 for a description of the intended use. Ridder Drive Systems B.V. T +31 (0)341 416 854 - F +31 (0)341 416 611 - I ridder.com... -
Page 4: Warranty Provisions
Use a soft brush with a small quantity of water without cleaning agents. Warning - Electrical voltage Read the product manual. Refer to §4.3 Installation / Pressure levelling. Ridder Drive Systems B.V. T +31 (0)341 416 854 - F +31 (0)341 416 611 - I ridder.com... -
Page 5: Precautions And Safety Instructions
• Monitor the danger zone when you work with or near the system. • Stop and de-energize systems during maintenance and cleaning work on or near the system. Ridder Drive Systems B.V. T +31 (0)341 416 854 - F +31 (0)341 416 611 - I ridder.com... -
Page 6: Residual Risks
Screw-in depth Reversing relay for direction-of- K21, K22 rotation (3-phase) Width-across-flats L1, L2, L3 Voltage source Manual switch (bridged safety circuit) MBRN Membrane Ridder Drive Systems B.V. T +31 (0)341 416 854 - F +31 (0)341 416 611 - I ridder.com... -
Page 7: Product Details
Alternatives: 5, 3.6 or 6 150: Torque RPD motor gearbox in Nm Alternatives: 300 or 450 RPD: General designation Ridder PolyDrive-RPD motor-gearboxes Ridder Drive Systems B.V. T +31 (0)341 416 854 - F +31 (0)341 416 611 - I ridder.com... -
Page 8: Description
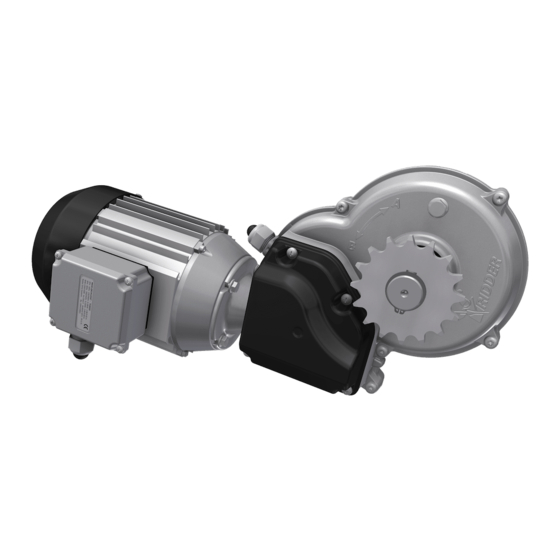
3.3 Application The RPD drive units are used in poly greenhouses for driving ventilation systems and roller screen systems. For other (different) applications approval from Ridder Drive Systems is necessary. 1 Continuous ventilation Sidewall ventilation with Sidewall ventilation with sliding cardan- 2 Push-pull screening. -
Page 9: Dimensions
M20x1.5 mm Ø 6.0-12.0 mm, tightening torque 5 Nm Ambient Protection rating IP55 Ambient temperature 0 to +60 °C (+32 to +140 °F) Ridder Drive Systems B.V. T +31 (0)341 416 854 - F +31 (0)341 416 611 - I ridder.com... -
Page 10: Install Instructions
Make sure that the correct equipment and tools are used. 4.2 Mounting positions Installation of RPD motor-gearboxes is permitted in all necessary mounting positions. Ridder Drive Systems B.V. T +31 (0)341 416 854 - F +31 (0)341 416 611 - I ridder.com... -
Page 11: Installation
2. Loosen the sealing plug (A) and make sure that the internal pressure (P1) and the external pressure (P) are the same. 3. Tighten the sealing plug (A) with the correct tightening torque (9 Nm). - 9 Nm Ridder Drive Systems B.V. T +31 (0)341 416 854 - F +31 (0)341 416 611 - I ridder.com... - Page 12 Make sure that easy access to the covers of the drive-unit is possible for all work. Ridder Drive Systems B.V. T +31 (0)341 416 854 - F +31 (0)341 416 611 - I ridder.com...
-
Page 13: Connect Instructions
Use only applicable components and electrical material. Refer to the information of the components and electrical material. The RLS is NOT applicable for motor-current connection through the limit-switch unit. Ridder Drive Systems B.V. T +31 (0)341 416 854 - F +31 (0)341 416 611 - I ridder.com... -
Page 14: Protection - Conditions And Starting Points
Tighten the motor connections with the correct tightening torque! 2 Nm! • M4 connections: 2 Nm • M5 connections: 3 Nm. 3 Nm! Ridder Drive Systems B.V. T +31 (0)341 416 854 - F +31 (0)341 416 611 - I ridder.com... -
Page 15: Wiring Diagram: 3-Phase Motor
Interchange U1 and V1 on the terminal block (EM). Change switching sense: Interchange 1 and 3, plus 2 and 4 of the RLS. Ridder Drive Systems B.V. T +31 (0)341 416 854 - F +31 (0)341 416 611 - I ridder.com... -
Page 16: Wiring Diagram: 1-Phase 3-Wire Motor
Interchange V1 and W1 on the terminal block (EM). Change switching sense: Interchange 1 and 3, plus 2 and 4 of the RLS. Ridder Drive Systems B.V. T +31 (0)341 416 854 - F +31 (0)341 416 611 - I ridder.com... -
Page 17: Wiring Diagram: 1-Phase 5-Wire Motor
Interchange V1 and W2 on the terminal block (EM). Change switching sense: Interchange 1 and 3, plus 2 and 4 of the RLS. Ridder Drive Systems B.V. T +31 (0)341 416 854 - F +31 (0)341 416 611 - I ridder.com... -
Page 18: Alternative Control-Circuit (Without Safety Relay K11)
Connect all connections (6x) of all safety switches and duty switches. A1 Duty Switch: 1-2 (RLS) B1 Duty Switch: 3-4 (RLS) A2/B2 Safety Switch: 5-6 (RLS) Ridder Drive Systems B.V. T +31 (0)341 416 854 - F +31 (0)341 416 611 - I ridder.com... -
Page 19: User Instructions
(§7.5). Make sure that the system can be safely operated. • If necessary: Adjust the end positions again. This prevents damage or injury. Ridder Drive Systems B.V. T +31 (0)341 416 854 - F +31 (0)341 416 611 - I ridder.com... -
Page 20: Direction-Of-Rotation Of Rpd Motor Gearbox
5. Thermal-overload protection of the electric motor with a built-in PTO switch. (The model with 150 Nm and 3 rpm (150-3, 1-phase 3-wire).) Ridder Drive Systems B.V. T +31 (0)341 416 854 - F +31 (0)341 416 611 - I ridder.com... -
Page 21: Commissioning Instructions
6. Stopper A2. Safety switch Duty Duty Safety 7. Hex wrench 2 mm B2. Safety switch switch switch switches 8. Switching cam Ridder Drive Systems B.V. T +31 (0)341 416 854 - F +31 (0)341 416 611 - I ridder.com... - Page 22 Note: The starting point is with the connection nuts (4) in locking position. Refer to §7.2.6 for more information about the locking system of the connection nuts (4). Ridder Drive Systems B.V. T +31 (0)341 416 854 - F +31 (0)341 416 611 - I ridder.com...
- Page 23 • Movement of the switching cam (8) above the lifting element (5a) is possible. • To unlock the system refer to §7.5. Ridder Drive Systems B.V. T +31 (0)341 416 854 - F +31 (0)341 416 611 - I ridder.com...
-
Page 24: Check - Connections And Functional Operation
Let the motor turn to the direction A. • MOTOR STOPS - Go to step 4. • MOTOR DOES NOT STOP - Go to step 3. Ridder Drive Systems B.V. T +31 (0)341 416 854 - F +31 (0)341 416 611 - I ridder.com... - Page 25 • Connections 1 and 3 • Connections 2 and 4. • Unlock the connection nut A. Do step 1 again for connection nut A. Ridder Drive Systems B.V. T +31 (0)341 416 854 - F +31 (0)341 416 611 - I ridder.com...
-
Page 26: Adjustment Rls Limit-Switch System
• Do the adjusting procedure (§7.4) immediately after the check procedure (§7.3). • The adjusting sequence can be from end position A to B or from B to A. Ridder Drive Systems B.V. T +31 (0)341 416 854 - F +31 (0)341 416 611 - I ridder.com... - Page 27 Go to step 5 to adjust the opposite end position (A or B). Go to step 7 if the two end positions are adjusted. Ridder Drive Systems B.V. T +31 (0)341 416 854 - F +31 (0)341 416 611 - I ridder.com...
- Page 28 Always do a check of correct functional operation of the limit- switch system, after the two end positions are adjusted! • The procedure to adjust the limit-switch system is completed. Ridder Drive Systems B.V. T +31 (0)341 416 854 - F +31 (0)341 416 611 - I ridder.com...
-
Page 29: Unlock The "Fail-Safe" Position
(a) accessible for the hex wrench (7). • Loosen the adjusting screw (a) approximately 360° (counterclockwise). Make sure the adjusting ring (3) can turn freely. Ridder Drive Systems B.V. T +31 (0)341 416 854 - F +31 (0)341 416 611 - I ridder.com... - Page 30 (11b) as the pivoting point. The switching spring (5) goes back to the position which is used “in operation”. Ridder Drive Systems B.V. T +31 (0)341 416 854 - F +31 (0)341 416 611 - I ridder.com...
- Page 31 • Tighten the bolts crosswise and gradually with the correct tightening torque (2x4). Metal cover Plastic cover PH/PZ -1.0 Nm PH/PZ - 0.5 Nm PZ2 (4x) 2.5 Nm (4x) Ridder Drive Systems B.V. T +31 (0)341 416 854 - F +31 (0)341 416 611 - I ridder.com...
-
Page 32: Maintenance Instructions
• A problem is found with no solution. Refer to §9.1 first. Refer to the Ridder catalogue or the website ridder.com for more information about spare parts (or accessories) that are available. Ridder Drive Systems B.V. T +31 (0)341 416 854 - F +31 (0)341 416 611 - I ridder.com... -
Page 33: Service
Remove the electric motor (EM). Do a check of the key and replace it if defective. If the key is not defective, then replace the reductor. Ridder Drive Systems B.V. T +31 (0)341 416 854 - F +31 (0)341 416 611 - I ridder.com... -
Page 34: Technical Support
4. Make the product unserviceable and make a mark on the product. This prevents that the product is (accidentally) used again. 5. The permanent decommissioning is completed. Refer to §10.2 “Waste disposal”. Ridder Drive Systems B.V. T +31 (0)341 416 854 - F +31 (0)341 416 611 - I ridder.com... -
Page 35: Waste Disposal
10.2 Waste disposal Discard products of Ridder Drive Systems after their lifespan and obey the applicable national and/ or local regulations. Make sure that after disassembly there is a separation of: • The collected operating materials (if applicable) such as oil, grease and such •...
Need help?
Do you have a question about the PolyDrive RPD 506 Series and is the answer not in the manual?
Questions and answers