Advertisement
Quick Links
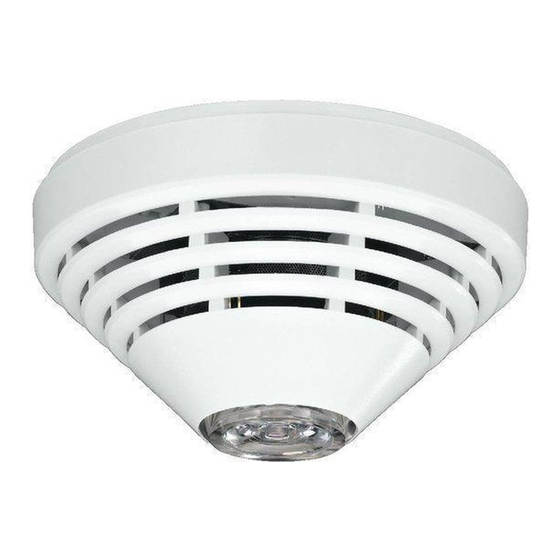
This device is designed to detect the presence of fire inside residential or
commercial buildings. It should not be installed in industrial premises. The battery-
powered detector has a built-in local warning siren combined with a red LED
indicator. Alarm information can also be transferred
OASiS systems.
The JA-80S detector combines an optical smoke sensor with a heat sensor. Both
sensors have their outgoing signals processed digitally, resulting in higher false
alarm immunity. The optical sensor works using a light diffusion principle and is
very sensitive to the presence of large-sized particles which are characteristic of
dense smokes. By contrast, the sensor is less sensitive to small-sized particles
which are typical of cleanly burning fires. In particular, the smoke sensor is not
capable of detecting the by-products of cleanly-burning fluids such as alcohols, for
instance. This deficiency is compensated for by the built-in heat sensor. This
sensor provides a slower reaction when compared to the smoke sensor, but is
much better at reacting to fires with rapidly rising heat producing only a little smoke.
Smoke / heat sensor participation is configurable by jumper-settings.
Detection range, detector positioning
The smoke detector must be installed so that any smoke easily drifts into the
detector, such as on the ceiling. It is suitable for residential buildings, but not
suitable for free spaces or an outdoor environment.
suitable for installation in outdoor spaces or interiors with an extremely high ceiling
(more than 5 m) where fire by-products would not reach the detector position.
The detector must always be placed in the section leading to the exit of the
apartment (escape route), see Figure 1. If the apartment has a floor area greater
2
than 150 m
, an additional detector is required in the apartment, see Fig.2.
An apartment block must be equipped with a detector in each apartment. In
family houses and residential flats or maisonettes a detector must also be placed
at the highest point of common hallways or spaces (escape routes), see Fig.3.
BEDROOMS
KITCHEN
LIVING ROOM
BEDROOM
MINIMUM SECURITY
FOR MORE SECURITY
Fig. 1
It
is
recommended
to
place
additional detectors in rooms where
people sleep or in rooms with an
increased risk of fire, see Fig.2.
Positioning on level ceilings
Place the detector in the center of
the room, as level as possible.
Detectors must not be recessed into
the ceiling (worse conditions for the
spread of smoke). Never place the
detector in a room corner (ensure a
distance of at least 0.5 meters from
the corner), see Fig 4.
• Installation on sloping ceilings
If the ceiling is not suitable for mounting on a level surface (e.g. a room under a
roof ridge), the detector can be installed as in Figure 5.
0.5m
CEILING
BEST LOCATION
(CENTRE OF CEILING)
ACCEPTABLE
LOCATION
Fig. 4
• Walls, partitions, barriers and lattice ceilings
The JA-80S must not be installed closer than 0.5 m from any wall or partition. A
narrow room with a width of less than 1.2m requires the detector(s) to be placed at a
distance of at least one third of the room's width away. In the case of separating walls
(partitions, warehouse objects) which do not reach the ceiling, the space is considered
to be fully separated if the gap between the top of the separating wall and the
ceiling does not exceed 0.3 m. A free space of at least 0.5m is required under the
detector. Irregularities in ceiling shape which do not
considered insignificant – the ceiling can be regarded as being even and limits from
the table are
applicable. However, any irregularity (including beams) exceeding 5%
of the ceiling height is considered to be a wall with the consequences stated
above.
The JA-80S wireless fire detector
The JA-80S wireless fire detector
via a wireless connection to
However, the detector is not
BEDROOMS
KITCHEN
LIVING ROOM
BEDROOM
MINIMUM SECURITY
FOR MORE SECURITY
BEDROOM
Fig. 2
BED
ROOM
BED
KITCHEN
ROOM
BED
ROOM
MINIMUM SECURITY
Fig. 3
90cm
Fig. 5
exceed 5% of ceiling height are
• Ventilation and air circulation
The detectors must not be installed directly by a fresh air inlet, e.g. air
conditioning vents. In the case of air being supplied through a perforated ceiling, each
detector must be placed so that no perforation hole occurs within 0.6m of the detector.
• Avoid installing the detector in the following locations:
•
Places with poor air circulation (niches, corners, apexes of A-shaped roofs).
•
Places exposed to dust, cigarette smoke or steam.
•
Places with over-intense air circulation (close to ventilators, heat sources or air
conditioning outlets).
•
Kitchens and other cooking places (because steam, smoke or oily
fumes can reduce detector sensitivity).
•
Beside lights (electrical interference can cause a false alarm)
•
Areas with lots of small insects
Caution: Most false alarms are due to detector misallocation
See CEN/TS 54-14 standards for detailed installation guidelines.
Installation
1. Open the detector by turning the rear cover to the left and remove the battery
2. Screw the rear cover onto the desired location
3. Set the required function using the jumpers – see the table below
4. Please read the receiving device (control panel) installation manual before you connect the
battery (remove the insulation tape) and set the control panel to enrollment mode
5. When the battery is connected, the detector sends a signal to connectto the system
6. After installing the detector, allow approx. 20 seconds for stabilisation. This
period is indicated by the LED being continuously lit and is followed by an
auto-test. Successful performance of the auto-test is confirmed acoustically.
1
ON
INSTANT alarm mode
1
OFF
FIRE alarm mode
ON
Memory ON
2
OFF
Memory OFF
1
ON
1 2
3 4
OFF
Testing the detector is automatically performed up to 10 secs after
battery insertion. New settings are saved directly afterwards.
J1: The FIRE / INST
alarm mode jumper sets the reaction of the system. FIRE
= alarm is triggered even if the system is disarmed while INST = alarm is
triggered only in an armed system. The FIRE / INST jumper only has an effect if
the detector has a natural reaction assigned to its address in the Oasis control
panel. It also has no effect when used with a UC-8x or AC-8x receiver.
Warning: In the INST position, while the system is disarmed, it is not
protecting against fire.
This setting also fully disables the optical and
acoustic indication on the detector itself.
J2: Alarm memory:
If the event memory is ON at the time of alarm, alarm LED
indication continues even if normal conditions are restored. The indication can be
stopped by pressing the button (indication is valid only for FIRE settings).
J3 and J4: Smoke / heat sensor participation
Optical smoke sensor: Smoke entry into the detector is indicated as a pre-alarm
state by the LED flashing. If the smoke threshold density is exceeded, a siren
sound is generated (indication is valid only for FIRE settings).
Heat sensor: indication logic is equal to that of the smoke sensor.
Whenever the detector cover is opened, a tamper signal is sent.
Testing the detector
The functioning of the detector can be tested by pressing and holding the test
button (e.g. for 1 sec). This activates the siren and the LED flashes (LED only if
1
3
OFF
Smoke (EN 14064)
or heat (EN 54-5)
4
OFF
3
ON
Only smoke (EN 14604)
(heat indifferent)
4
OFF
3
OFF
Only heat (EN 54-5)
4
ON
(smoke indifferent)
3
ON
Smoke and heat
4
ON
(both simultaneously)
MHS51505
TEST
Advertisement

Subscribe to Our Youtube Channel
Related Manuals for jablotron JA-80S


Summary of Contents for jablotron JA-80S
- Page 1 This setting also fully disables the optical and The JA-80S must not be installed closer than 0.5 m from any wall or partition. A acoustic indication on the detector itself. narrow room with a width of less than 1.2m requires the detector(s) to be placed at a...
- Page 2 Battery replacement JABLOTRON ALARMS a.s. hereby declares that the JA-80S is in compliance The detector monitors its battery voltage and if too low, a transmission is sent to the with the essential requirements and other relevant provisions of Directives control panel to inform the installer or user.
Need help?
Do you have a question about the JA-80S and is the answer not in the manual?
Questions and answers