Table of Contents
Advertisement
THALES 25 PORTABLE RADIO (RACAL) ANALOG CHANNEL PROGRAMMING
1. Select a channel for programming by rotating the Channel Select Knob to one of the sixteen rotary positions.
2. Press the "ENTER" key to bring up the Main Menu screen. (See Figure 1)
3. Scroll up/down using the "O" and " " (up/down arrow keys ) to select "PROGRM" and press the "ENTER" key.
4. Enter a 6-Digit Password if requested and press the " ENTER" key.
Note: NIFC password is "000000".
5. Scroll up/down and select "CHANEL" and press the "ENTER" key to program Channel Parameters . (See Figure 2)
6. Scroll down and select "TAG" and press the "ENTER" key. (See Figure 3)
Change the channel name/label using the keypad and press the " ENTER" key when complete.
Note: "ID" cannot be changed, it is automatically updated when programming a channel.
7. Scroll down and select "MODE" and press the "ENTER" key to program the Channel Mode. (See Figure 4)
Select either "ANALOG" or "DIGITAL" and press the "ENTER" key.
Note: NIFC Default is "ANALOG" for all channels.
8. Scroll down and select "B/W" and press the "ENTER" key to program the Channel Bandwidth. (See Figure 4)
Select either "25Khz" or "12.5Khz" and press the "ENTER" key.
Note: 25Khz= Wide-Band, 12.5khz= Narrow-Band.
Note: NIFC Default is "12.5 Khz" for Narrow-Band operation.
9. Scroll down and select "ENCRPT" and press the "ENTER" key to program Encryption. (See Figure 5)
Select either "ENABLD" or "DISABD" and press the "ENTER" key.
Note: If Encryption is enabled, a key must be loaded first into the radio with the PC Programmer.
Note: NIFC Default is " DISABD"
10. Scroll down and select "RX" and press "ENTER" key to program the RX Frequency. (See Figure 6)
Enter a valid RX frequency from 136-174 Mhz using the keypad and press the " ENTER" key.
11. Scroll down and select "RX SQMD" and press the "ENTER" key to program the RX Squelch Mode . (See Figure 7)
Select either "NOISE", "DCS", "CTCSS", or "NONE" and press the "ENTER" key.
Note: If "Noise" is selected, the program will proceed with the Squelch Adjust parameter ( SQ=), select a squelch
setting and press "ENTER" when done; this setting opens the squelch with any corresponding analog signal. If
"CTCSS" is selected, the program will proceed with a SUB Audible Tone menu, select a tone from the menu by
scrolling through and then press "ENTER"; this sitting will open the squelch with any corresponding analog signal
that contains the correct "CTCSS" tone. If "DCS" is selected, the program will proceed with the Digital Coded
Squelch tone menu, select a tone from the menu by scrolling through and then press "ENTER"; this setting will
open the squelch with any corresponding analog signal that contains the correct "DCS" tone. If "None" is selected,
squelch will be open at all times ( Constant Open Squelch).
Note: NIFC Default is "Noise" with a "SQ" setting of 8.
12. Scroll down and select "TX" and press the "ENTER" key to program the TX Frequency. (See Figure 8)
Enter a valid TX frequency from 136-174 Mhz using the keypad and press the " ENTER" key.
13. Scroll down and select "TX SQMD" and press the "ENTER" key to program the TX Squelch Mode . (See Figure 9)
Select either "DCS", "CTCSS", or "NONE" and press the "ENTER" key.
Note: If "CTCSS" is selected, the program will proceed with a Sub Audible Tone menu, select a tone from the menu
by scrolling through and press "ENTER" ; this sitting will include a " CTCSS" tone on the analog transmit signal.
IF "DCS" is selected, the program will proceed with a Digital Coded Squelch menu, select a tone from the menu by
scrolling through and then press "ENTER"; this setting will include a " DCS" tone on the analog transmit signal.
If "None" is selected, no tones are sent out on the analog transmit signal.
Note: NIFC Default is "None".
14. Scroll down and select "LO PWR" and press "ENTER" to program the Low Power Setting. (See Figure 10)
Select either "0.1", "0.5", "1.0", "2.0", or "5.0" Watts for low power setting and press the " ENTER" key.
Note: NIFC Default for Low Power is 1.0 Watts.
15. Scroll down and select "HI PWR" and press the "ENTER" key to program the High Power Setting. (See Figure 10)
Select either "0.1", "0.5", "1.0", "2.0", or "5.0" Watts for high power setting and press the" ENTER" key.
Note: NIFC Default for Hi Power is 2.0 Watts.
16. If screen reads "SAVE CHANNEL", select "YES" to save. If not, channel information was stored and you can select
another channel using the channel select knob and continue programming other channels or press " ESC" a few
times to return to the main display.
NIICD RADIOS ONLY 2007/J.Lopez
NATIONAL INTERAGENCY INCIDENT COMMUNICATIONS DIVISION
RACAL ANALOG CHANNEL PROGRAMMING GUIDE
RACAL ANALOG CHANNEL PROGRAMMING
Figure 1
Figure 2
Figure 3
Figure 4
Figure 5
Figure 6
Figure 7
Figure 8
Figure 9
Figure 10
Page 1 of 4
Advertisement
Table of Contents

Subscribe to Our Youtube Channel
Related Manuals for Racal Instruments PRC-6894

Summary of Contents for Racal Instruments PRC-6894
- Page 1 NATIONAL INTERAGENCY INCIDENT COMMUNICATIONS DIVISION THALES 25 PORTABLE RADIO (RACAL) ANALOG CHANNEL PROGRAMMING RACAL ANALOG CHANNEL PROGRAMMING GUIDE 1. Select a channel for programming by rotating the Channel Select Knob to one of the sixteen rotary positions. 2. Press the "ENTER" key to bring up the Main Menu screen. (See Figure 1) Figure 1 3.
- Page 2 NATIONAL INTERAGENCY INCIDENT COMMUNICATIONS DIVISION THALES 25 PORTABLE RADIO (RACAL) SETTINGS/OPTIONS GUIDE ADD/REM OVE CHANNEL FROM SCAN LIST 1. Select a channel to be added to the Scan List by using the Channel Select knob. 2. To Add Channel , briefly press and release the " " key, when released a box " "...
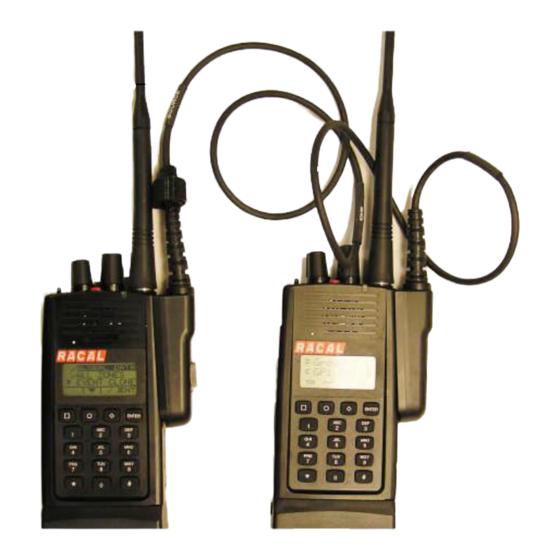
- Page 3 NATIONAL INTERAGENCY INCIDENT COMMUNICATIONS DIVISION THALES 25 PORTABLE RADIO (RACAL) CLONING INSTRUCTIONS CLONING PROCEDURES 1. Turn both radios on. 2. Connect Source end of cloning cable to Master Radio. (See Figure 8) 3. Connect Target end of cloning cable to Slave/Target Radio. Master radio automatically detects the target radio, and brings up the Cloning Main Menu.
- Page 4 NATIONAL INTERAGENCY INCIDENT COMMUNICATIONS DIVISION RACAL BASIC OPERATION AND RADIO CONTROLS RACAL BASIC OPERATION AND RADIO CONTROLS 1. Turn power ON by turning the ON/OFF Volume knob clockwise. A beep indicates the radio is operational. The LCD will indicate the current group and channel. 2.
Need help?
Do you have a question about the PRC-6894 and is the answer not in the manual?
Questions and answers