Table of Contents
Advertisement
Quick Links
Advertisement
Table of Contents

Summary of Contents for BioCare Medical VALENT
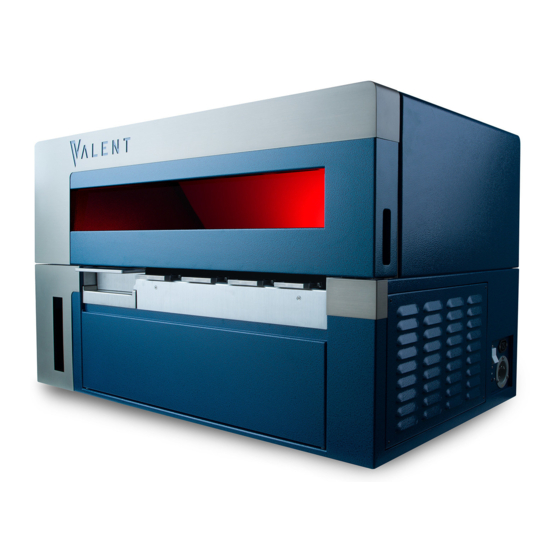
- Page 1 ® VALENT Manual Automated Slide Staining Platform User Manual www.biocare.net...
- Page 2 Biocare Medical Technical Support: 800-799-9499 Option 3 Customer Service: 800-799-9499 Option 2 Fax: 925-603-8080 Corporate Office: 60 Berry Drive Pacheco, CA 94553 www.biocare.net...
-
Page 4: Table Of Contents
Safely Turning on the Cart ............................. 11 Turn ON the Cart ..............................11 Turn OFF the instrument ............................12 Symbols Glossary ..............................13 Chapter 3: VALENT Software Features & Functions ����������������������������������������������������������������������������������������������������������������� 14 User Access ................................. 14 Login .................................. 14 Home Screen ............................... 14 Home Screen Features ............................ - Page 5 Contamination List ............................... 20 PrepWash List ..............................20 Aqua Rinse Wash List ............................20 View Menu ................................21 Notifications ................................ 21 Run Time Estimates ............................. 21 Cleaning Log ................................ 22 Run Log ................................22 Help .................................. 22 Chapter 4: Program Preparation & Setup �������������������������������������������������������������������������������������������������������������������������������� 23 Administrator Program Preparation &...
- Page 6 Reagent Label Designer ............................38 Report Field ................................ 39 Chapter 5: Before Starting a Run ������������������������������������������������������������������������������������������������������������������������������������������� 40 Tissue Preparation ..............................40 Positive and Negative Controls ..........................40 Bulk Reagent Preparation............................40 Slide Preparation ................................ 41 Slide Specifications .............................. 41 Slide Labels ................................. 41 Tissue Placement on Slide ............................
- Page 7 Prepare and Edit Slides ............................66 Add, Delete and Copy Slides from Slide Manager ....................67 Import Slides from Slide Manager .......................... 69 Save Slides for a Later Run ..........................70 3. Print Labels ................................71 View and Print Reagent Worksheet ......................... 72 4.
- Page 8 Definitions, Acronyms and Abbreviations: Name Description Antigen Retrieval 3, 3’ Diaminobenzidine DePar Deparaffinization (also called Dewaxing). DI Water Deionized Water FFPE Formalin Fixed Paraffin Embedded HIER Heat Induced Epitope Retrieval Horseradish Peroxidase Immunohistochemistry Immunofluorescence Liters Light Emitting Diode Milliliter Millimeter Probe dispense range The minimum and maximum reagent volume that can be dispensed by an instrument.
-
Page 9: Chapter 1: Introduction
Intended Use This manual is intended for use by clinical, research, industry and reference laboratory personnel who use the VALENT Automated Staining Platform to perform immunohistochemistry (IHC) staining. This manual describes how to operate the VALENT using the VALENT Software and will assume users have been trained and have a basic understanding of IHC procedures. -
Page 10: Valent Cart Specifications
Warranty The VALENT warranty is for one year from date of installation and covers all parts and labor when service is performed solely by Biocare Medical Field Services Personnel. The warranty is invalidated if equipment is abused, damaged, misused, or improperly maintained by the customer, as determined by Biocare Medical at its sole discretion. -
Page 11: Valent Components
VALENT Components 1. System Lid 2. Window 3. Slide Trays 4. Reagent Rack 5. System Board Cover 6. Power Switch 1. Z-head 7. System Lid 2. Probe Wash Station 8. Fans (8 Total) 3. Dispense Manifold 9. Troughs (Below Slide Tray) 4. -
Page 12: Z-Head Schematic
A probe schematic which includes a separate probe for Val DePar, reagent and Wash-Blow-Wash. 1. Liquid Level Sensor 2. Barcode Camera 3. Wash-Blow-Wash 4. Val DePar Probe 5. Reagent Probe VALENT Cart Components Carboy Connections RMIPH50081 REV A Image of carboy connection panel. - Page 13 (Blue) HAZARDOUS WASTE (Black) WASTE (Teal) Image of a carboy and carboy sensor cables Side view of the VALENT Cart displaying electrical connections. 1. Carboys 2. Secondary Containment 3. Instrument Power Circuit Breaker 4. Cart Power Circuit Breaker 5. Battery Circuit Breaker 6.
-
Page 14: Valent Description Of Parts
System lid lid must be closed during the operation of the instrument. The system lid status can be viewed from the VALENT Software Home Screen or by the LED light (red if locked, green if unlocked). The syringe pump is a positive displacement pump used for aspiration and dispensing of Syringe pump reagents on slides, for mixing reagent components and probe washing. - Page 15 Dispense Manifold There is a dispense manifold for each trough that dispenses AR and Aqua Rinse onto the slide. There are four troughs on the VALENT, located below the slide trays, that are used for Troughs the antigen retrieval step and draining reagents to waste.
-
Page 16: Storage And Handling
Always follow manufacturers’ instructions for storage and handling of reagents. To prevent contamination, follow good laboratory practices of sterile technique when opening, diluting, and decanting all solutions. When not in use, store Biocare Medical reagents at the recommended storage conditions as specified in the data sheets to maintain reagent stability. -
Page 17: Humidity
Additional consideration must be made for a minimum clearance of 2 inches on all sides for ventilation and room for an all in one computer, keyboard and mouse next to the instrument. The label and report printers for the VALENT may be located anywhere that allows them to be connected to the instrument. -
Page 18: Chapter 2: Safety Precautions
Reagent vials must have the label positioned toward the front of the VALENT, facing the user. -
Page 19: Lithium Battery
Safely Turning on the Cart If the VALENT Cart must has to be switched on or off, the instrument must be switched on or off in a specific order to avoid system failure. Instances where the instrument cart may need to be turned on or off include: •... -
Page 20: Turn Off The Instrument
Turn OFF the instrument Turning off the instrument is the reverse order as turning on instrument: • Exit out of software, then turn off the cumputer. • Turn off the instrument using the large white power switch on the right side of the instrument. •... -
Page 21: Symbols Glossary
Symbols Glossary The following symbols may appear on the instrument label: Warning. Biohazardous materials may be present. Personal Attention. Des matières biologiques dangereuses peuvent protection is required. être présentes. Une protection individuelle est requise. Warning. Electrical shock hazard. Attention. Risque de choc électrique. CE Marking Marquage CE In-Vitro Diagnostic Medical Device... -
Page 22: Chapter 3: Valent Software Features & Functions
Login To log in, double-click the VALENT icon on the desktop, enter the User ID and Password in the dialog box, select Language, and click Login to continue. Note: Default User ID is admin, default password is valent. -
Page 23: Home Screen Features
A reminder will be displayed when bulk reagent carboys are low and when waste carboys need to be emptied. The VALENT Software displays the location of each slide on the slide tray numbered from Slide Tray Position 1-12. Hovering over a mapped slide allows the user to view slide information and protocol during a run. -
Page 24: Run Designation Buttons
Allows user to abort a run. This button is red when a run is in process. Menu Bar The menu bar in the upper left corner of the VALENT application’s main screen and provides access to a number of functions. Staining Run... -
Page 25: Data Manager
Data Manager Data Manager allows the user to access reagent lists, inventory, protocols, templates, user accounts, custom groups, and slide information. Function Description Reagent Manager Add new reagents, modify existing reagents and print reagent labels. Protocol Manager Design, edit and manage protocols. Template Manager Design, edit and manage detection templates. -
Page 26: Tools
Tools allows the user to access the instrument functions listed below. Function Description This feature allows the administrator to set preference and default parameters. VALENT Software Software Settings settings can be entered manually or accessible from a dropdown menu. Print Reports allows the user to print out Slide Layouts, Reagent Layouts, Run Logs, and Reagent Worksheets. -
Page 27: Print Reports
Print Reports Use the Print Reports button to view and print the following reports: IHC Summary, IHC Report, IHC Short Report and Protocol Validation. There are two ways to print reports: • The Print Report button is displayed on the left side of the Home Screen. •... -
Page 28: Configure Reagent Wash Lists
Configure Reagent Wash Lists The Configure Reagent Wash Lists is composed of a Contamination List, PrepWash List and Aqua Rinse Wash List. Adding reagents to these lists according to the three conditions explained below will prompt the probe to undergo a ValPrep washing to ensure the probe is clean in order to prevent contamination. -
Page 29: View Menu
Notifications If a problem occurs during the run, the VALENT Software will display a notification. The Notification Details window will appear with a description of the action required and the slide(s) affected. Follow prompts on the screen to clear the notification. -
Page 30: Cleaning Log
Run Log The Run Log documents the time, date, instrument ID & serial number, VALENT Software version, and run name. The Run Log also displays all operations performed by the instrument. As an operation is performed, the log is updated. -
Page 31: Chapter 4: Program Preparation & Setup
Chapter 4: Program Preparation & Setup Administrator Program Preparation & Setup Administrators can follow the detailed steps in this chapter to add or change users, passwords, reagents, and protocols. Summary of Administrator vs. Regular User Profile Below is a summary of the features that are available for an administrator and a regular user. Regular User Action Buttons Administrator... -
Page 32: User Information Guideline
• Enter the appropriate user information and click Save (green check mark). User Information Guideline User Information Description This must be unique. The system does not require a specific naming convention and is at the discretion of User ID the user. This must be unique. -
Page 33: Software Settings
Modify Passwords Administrators and regular users may change their password through User Accounts. • From the top right side of the Data Manger dropdown menu select User Accounts. • From the User Manager window, select the edit button located at the bottom left (3 gray arrows) button. •... -
Page 34: System Parameters
Time in minutes between buffering of slides after run completion. Valid range is between 15 and 30 Buffer Interval minutes. Default Vendor Default Vendor is Biocare Medical. This is displayed when creating a new reagent in Reagent Manager. Default Negative The Val Universal Negative Control is catalog number VLT8015 Instrument Parameters... -
Page 35: Reagent Manager
The user is required to use Biocare Medical's DePar and cannot edit this group Antigen Retreval The user is required to use Biocare Medical's Antigen Retreval Solution and cannot edit this group Enzyme This group is used to add, modify and delete enzymes. -
Page 36: At The Bottom Of The Reagent Details Box
Mix Group The Mix reagent group is used to designate components of chromogens, enzymes, and ancillary reagents which will be used by the VALENT to perform on-board mixing of these reagents. Display Reagent Information • Use the search field at the top of the Reagent Manager window to quickly find a reagent under the selected Reagent Group. -
Page 38: Template Manager
Template Manager Template Manager allows an administrator to modify or delete templates. Regular users can edit current templates under Template Manager but cannot add or delete templates. Important Note: When creating or editing a protocol from an existing template, click out of the current cell and to a different cell to lock in the changes. - Page 39 • In the Template Name field, type in the name of the new template. • Under Options, select Blank Template. • Click Create. • Select Add (+) located at the bottom of the window, this opens the Add a New Step window.
-
Page 40: Create A Template From An Existing Template
• Using the dropdown menu Select a Step along with the reagent required for this step, then click Add Step. • Continue adding steps to protocol by selecting Add (+) button. Use the icons to create a template. • Once all steps are added, the user can program time, select reagents from a dropdown menu, (to add reagents go to Reagent Manager). -
Page 41: Additional Program Preparation & Setup
Additional Program Preparation & Setup Custom Groups Custom Groups allows the laboratory to create groups of protocols frequently used by the laboratory rather than having to scroll through a list of protocols How to Create a Custom Group • From the Home Screen, go to Data Manager, then select Custom Groups. •... -
Page 42: Delete A Custom Group
Delete a Custom Group • From the Home Screen, go to Data Manager, then select Custom Groups. • The Group Manager window will appear. • From the Group Manager window the user can delete a Custom Group by selecting the Custom Group and clicking the red X button. Edit a Custom Group •... -
Page 43: Slide Fields
Slide Fields Slide Fields allows the user to choose the fields to display in the Slide Details sections of the Slide Manager window and Add Slides window when preparing slides. • From Data Manager on the Home Screen, choose Slide Fields. The Design Slide Fields window will open. •... -
Page 44: Slide Map Fields
Slide Map Fields • Slide Map Fields is located in the Data Manager dropdown menu of the Home Screen. Upon selection, the Set Slide Display Information window will open. • There are 4 configurable fields: o Top Line o Middle Line o Bottom Line o Work flow list •... -
Page 45: Slide Label Designer
• A preview of the label is available in the upper right. • Several settings are visible in the lower right, these are set up by Biocare Medical Personnel. • Click Test Print to test and confirm that desired settings have been achieved. -
Page 46: Reagent Label Designer
• A preview of the label is available in the upper right of the screen. • Seceral Settings are visible in the lower right, these are set up by Biocare Medical Personnel. • Click Test Print to test and confirm desired settings have been achieved. -
Page 47: Report Field
Report Field The system allows a user to configure an IHC Summary report and add or delete information based on lab requirements. • From the Home Screen select Tools and go to Print Reports then click Report Generator. • The Generate Reports window will appear, go to Tools and click Configure Report Fields. •... -
Page 48: Chapter 5: Before Starting A Run
Chapter 5: Before Starting a Run This chapter contains general guidelines for preparing samples, reagents, protocols on the VALENT prior to starting a run. Tissue Preparation Deparaffinization and antigen retrieval are performed onboard the VALENT to streamline the IHC workflow. -
Page 49: Slide Preparation
Slide Preparation Slide Specifications The VALENT works best with slides that do not contain a logo under the frost. If a slide with a logo is used, cover the logo with the slide label. Below are slide specifications for the VALENT. -
Page 50: Slide Trays
Slide Trays Run Requirements Although most runs will have similar protocol conditions and can be processed in the same slide tray, there are certain conditions where protocols cannot be processed in the same tray or the same run. DePar and non-DePar slides cannot be on the same slide tray. Non-DePar slides with antigen retrieval require a different slide tray. -
Page 51: Instrument Preparation
When liquid flow is affected, reagents will wick and may yield poor staining quality. 11. All slides require a label. If manually mapping, use a VALENT slide label. Failing to use a slide label may yield poor staining quality. 12. Confirm that all slides are inserted all the way under the slide clips, placed securely in the slide clips, and centered. It is important that slide labels are viewable by the barcode camera. -
Page 52: Drain Waste & Prime Buffers
Drain Waste & Prime Buffers Priming the instrument should be done daily before the first run of the day. The user should prime until there are no remaining bubbles in the carboy tubing or probe coil. When priming the manifold, prime until the stream coming from the port is steady and even across the 12 ports. -
Page 53: Prime Depar
Prime DePar • To prime, select Prime under Select Operation, then click DePar under Select a Priming Option. • Adjust the duration of prime in seconds as needed and click Prime Solution. • When priming is complete, click Close or select another priming option. Prime Troughs and Manifold •... -
Page 54: Drain Waste
Drain Waste • This screen can be reached from the Tools and then selecting Instrument Operations. • There are 2 selections: Drain Waste or Prime Buffers. • Select Drain under Select Operation, then click the trough to be drained under Select Trough or Wash Station •... -
Page 55: Reagent Manager
Reagent Manager Add, Delete, and Modify Reagents Users can add delete and modify reagents under Reagent Manager. Add a New Reagent • From the Home Screen, select Data Manger, then go to Reagent Manager. • To the left of the screen, under Reagent Groups, highlight the Reagent Group to which the new reagent belongs. •... -
Page 56: Delete A Reagent
Delete a Reagent • From the Home Screen, select Data Manager, then go to Reagent Manager. • To the left side of the screen, under Reagent Groups, click the Reagent Group to which the new reagent belongs. • From the reagent table, click the reagent to be deleted. •... -
Page 57: Import A Reagent From Reagent Manager
Note: Reagents in gray signify that they are already part of the Reagent Master List and do not need to be imported, while reagents in black have not been imported to Reagent Master List� Only Biocare Medical Reagents can be added to the Reagent Master List�... - Page 58 Print a Reagent Label • From the Home Screen, select Data Manager, then go to Reagent Manager. • Use the Print button under Reagent Details to open the Print Reagent Labels window. • To the left of the screen, under Reagent Groups, click the Reagent Group under which the reagent is to be categorized. •...
-
Page 59: Add A Reagent In Mix Group
Add a Reagent in Mix Group The Mix group is used to designate components of chromogens, enzymes, and ancillary reagents which will be used by the instrument to perform on-board mixing of these reagents. • From the Home Screen, select Data Manger, then go to Reagent Manager. •... -
Page 60: Specify Mixing Properties
Specify Mixing Properties The user can specify whether mixing of available Enzyme, Chromogen, and Ancillary Reagent Groups is performed online, by the instrument during a run, or offline manually. Once set to Mix, the Mixing Components link will be available in the top right corner of the Reagent Details box. -
Page 61: Volume Calculation For Mixing Reagents
Volume Calculation for Mixing Reagents There are 2 dead volumes to consider when mixing reagents online that is determined by the VALENT Software: • About 300µL is lost during the mixing process itself, which should be accounted for in the sample calculations below. - Page 62 • From the Chromogen Components list on the left, highlight the catalog number for the chromogen buffer and click the right arrow button to add to the list on the right. • Click the Volume field dropdown menu to select the desired volume (in µL) of buffer. •...
-
Page 63: Inventory Manager
Inventory Manager Inventory Manager allows the user to enter and track reagent lot, expiration, starting volume, current volume, and serial number to be used on the instrument. View Reagents • Inventory Manager can be opened from the Data Manager dropdown menu from the Home Screen. When Inventory Manager is chosen, the Reagent Inventory Manager window is displayed. -
Page 64: Add Reagents
Add Reagents • When Inventory Manager is chosen, the Reagent Inventory Manager window is displayed. • Select the Add (+) button to add a reagent. • The Add Reagent Inventory window will allow the user to enter reagent information such as Catalog Number, Lot Number, Expiration Date, Starting Volume and Serial Number. -
Page 65: Delete Reagents And Clean Inventory
• The user can click Clean Inventory to clear a list of inventory. The system will only allow the user to Clean Inventory if the reagent is expired and contains a volume below 350µL. • The Current Volume of reagents is calculated by the VALENT Software as the reagent is used up during staining runs. • Click Close to exit. -
Page 66: Register Reagents In Inventory Manager
Register Reagents in Inventory Manager New reagents can only be scanned into inventory when the user initially logs into the system. For example, if a protocol has been run or system cleaning executed, the user won’t be able to scan reagents into inventory. To scan reagents into inventory, the user will have to exit the software and log in again. -
Page 67: Protocol Manager
Protocol Manager Protocol Manager can be reached from the Data Manager dropdown menu of the Home Screen. Use the Protocol Manger module to save, design, and manage protocols. Important Note: When programming protocols, it is important to consider environmental conditions� Lower boiling temperatures and higher evaporation rates must be evaluated for labs at a higher elevation�... -
Page 68: Protocol Manager Features
Protocol Manager Features • The user can filter the list of protocols by choosing All Protocols or by choosing a Custom Group in the Protocol’s dropdown menu. • A filtered list of protocols will appear below the Protocol’s dropdown menu based on the dropdown choice. The user can check the Show Biocare Protocols box to only view additional Biocare Protocols. -
Page 69: Create A Protocol
Create a Protocol There are three ways to create a protocol; the user can either Create a New Protocol, Create from a Template or Create from a Selected Protocol. Create a New Protocol • From the Home Screen, go to Data Manager, then select Protocol Manager. •... -
Page 70: Create A Protocol From A Template
Create a Protocol from a Template • From the Home Screen, go to Data Manager, then select Protocol Manager. • To the bottom left of Protocol Manager window select the green Add (+) icon. • Once Add (+) is selected, select the Create from a Template option. •... -
Page 71: Create A Protocol From A Selected Protocol
• Select desired protocol to create a new protocol. • To the bottom left of Protocol Manager window select the green Add (+) icon located below Show Biocare Medical Protocols. • Once the green Add (+) icon is selected, select the Create from the Selected Protocol option. -
Page 72: Chapter 6: Prepare And Start A Run
Chapter 6: Prepare and Start a Run Once all required reagents and protocols have been entered into the VALENT Software by the administrator, both administrators and regular users can use this chapter as a guide to setup and begin their staining run. -
Page 73: Login
1. Login Login to the VALENT Software. Enter username and password in the dialog box. Note: Default User ID is admin, default password is valent� Home Screen 1. Menu Bar 2. Run Designation Buttons 3. Run End Time 4. Reagent Rack 5. System Lid Status 6. Reagent Rack Lock/Unlock Status... -
Page 74: Prepare Slides
2. Prepare Slides Prepare Slides is the orange Run Designation Button that is located to the top left of the Home Screen. It is the starting point to begin a staining run. Prepare Slide functions are listed below. Prepare and Edit Slides •... -
Page 75: Add, Delete And Copy Slides From Slide Manager
Add, Delete and Copy Slides from Slide Manager • From the Slide Manager window, there are several buttons to the bottom left of the window. • Additional slides can be added by clicking the plus (+) sign slide icon. • This will bring the user back to the Add Slides window. The user can then select additional slides for processing. •... - Page 76 • A prepared slide can be deleted by checking the box next to the slide to be deleted and clicking the red (X) sign slide icon. Important Note: Make sure only the slides desired to be deleted are check-marked or everything will be deleted�...
-
Page 77: Import Slides From Slide Manager
Import Slides from Slide Manager • From the Slide Manager window, there are several buttons to the bottom left of window. • Processed Slides, Recent Slides, Pending Slides and Saved Slides can be imported by clicking the Import Slides (blue arrow pointing down) sign slide icon. -
Page 78: Save Slides For A Later Run
Save Slides for a Later Run The user can prepare slides for a future run when the instrument is not running or while a run is in progress. • To save slides to run later, click the Save Slides button on the Prepared Slide screen. •... -
Page 79: Print Labels
3. Print Labels Once the user has set up slides from Prepared Slides in the Slide Manager window, follow the steps to start a run. Important Note: See section on how to Prepare and Edit Slides in the beginning of this chapter to obtain detailed information on how to set up slides and protocols�... -
Page 80: View And Print Reagent Worksheet
View and Print Reagent Worksheet • From the Slide Manager window, select the slides to be processed then click Show Reagent Worksheet button, located to the bottom left under Prepared Slides. • Choose from the drop down: Prepared Slides or All Slides to view Mapped Slides. •... -
Page 81: Scan Slides
4. Scan Slides Once the user has set up slides from Prepared Slides in the Slide Manager window, follow the steps to start a run. Important Note: See section on how to Prepare and Edit Slides in the beginning of this chapter to obtain detailed information on how to set up slides and protocols. - Page 82 • If the user requires more slides, the Add Slides button is located to the bottom of the Assign Slides window. • The Home Screen will display all scanned slides in the Slide Tray. Slide Positions will appear green under Assign Slides, once slides have been detected.
-
Page 83: Prepare And Load Reagents
5. Prepare and Load Reagents • Once desired slides have been loaded and scanned, click Prepare Reagents from the Assigned Slide window to open the Load Reagents window. • A list of all reagents required for the run will be displayed. •... -
Page 84: Scan Or Map Reagents
6. Scan or Map Reagents Ensure all reagent vials are properly labeled and load all reagents listed in the reagent rack in order of use, to facilitate optimal reagent dispensing time. • Choose from three loading reagent options: Auto Map, Manual Map, and Scan Reagents. o Auto Map will load reagents in the reagent rack in the order listed in the Load Reagents screen. -
Page 85: Pre-Start Checklist
7. Pre-Start Checklist Use the Pre-Start Checklist to verify that the appropriate carboys have been filled, and hazardous and non-hazardous carboys have been emptied. Check the carboy status categories under Bulk & Waste. • Make sure that all reagents and mixing vials have been loaded as shown on the screen and volumes are sufficient. Do not re-use mixing vials, always use new, clean mixing vials. -
Page 87: Start Staining
8. Start Staining • Once everything has been checked, select Start Run. • Note: If the Delayed Run box was selected in the Pre-Start Checklist screen, after clicking Start Run, the Run will start in… countdown clock will appear in orange at the top of the Home Screen. The run automatically begins after the countdown is completed. -
Page 88: Reagent Information
Reagent Information Once the run has started, the user can view Reagent Information by using the mouse cursor to hover over a reagent. Once the run has started, the user can view Reagent Information by using the mouse cursor to hover over a reagent. Run Complete When a run is complete, slides will turn blue and a Run completed notification will appear. -
Page 89: Clear The Completed Trays
• At the end of run an icon appears below the slide trays. Clicking this icon allows the user to clear reagents and the slides in the VALENT Software. • Reagents are automatically cleared after the run completes. -
Page 90: Map Slides
5. Prepare & Load 6. Scan or Map 7. Pre-Start 8. Start Staining Reagents Reagents Checklist 1. Login Login to VALENT Software. Enter username and password in the dialog box. Note: Default User ID is admin, default password is valent. -
Page 91: Map Slides
2. Map Slides • From the Home Screen select Map Slides and the Assign Slides window will appear. • Multiple view options are available from the Select Protocols dropdown menus. Below is a description of each protocol group. Protocol Description All Protocols Lists every protocol in the system. -
Page 92: Manually Assign Slides
3. Manually Assign Slides • From the list of protocols, choose the protocol to assign and then click the slide position where the user will load the slide, the protocol will be assigned to that slide position. • To assign the same protocol to an entire tray, choose the protocol and click Map Tray. •... -
Page 93: Load Labeled Slides
4. Load Labeled Slides • All slides require a VALENT Slide Label. If slide does not have a label, use a VALENT Slide Label. Failing to use a slide label may yield poor staining quality. 5. Prepare and Load Reagents •... -
Page 94: Scan Or Map Reagents
• If reagents are manually mapped or auto mapped, the user is required to click the Levels button to detect reagent levels before starting a run. • If reagents are scanned, the VALENT will automatically detect reagents levels without having to click Levels. - Page 95 • Manual override of reagents is available. Once the vials have been checked, if a reagent is highlighted in red indicating the volume is low, the user can manually override the system and enter the correct volume in the vial. •...
-
Page 96: Pre-Start Checklist
7. Pre-Start Checklist Use the Pre-Start Checklist to verify that carboys have been filled, hazardous and non-hazardous carboys have been emptied. Check the carboy status categories under Bulk & Waste. • Make sure that all reagents and mixing vials have been loaded as shown on the screen and volumes are sufficient. Do not re-use mixing vials, always use new, clean mixing vials. -
Page 97: Start Staining
8. Start Staining • Once everything has been checked, select Start Run. • Note: If the Delayed Run box was selected in the Pre-Start Checklist screen, after clicking Start Run, the Run will start in… countdown clock will appear in orange at the top of the Home Screen. The run automatically begins after the countdown is completed. -
Page 98: Chapter 7: System Cleaning
Chapter 7: System Cleaning The VALENT should be cleaned on a daily, weekly, and monthly basis. Failing to clean the instrument may result in poor quality staining. Daily • Rinse the used slide racks in tap water and dab (do not wipe) dry with a paper towel after every run. Always wear gloves while performing this cleaning step. -
Page 99: Program Cleaning
Program Cleaning • From the Home Screen select Tools -> Instrument Operations -> System Cleaning. • The System Cleaning Window will appear, follow each instruction and check mark each box for Prerequisites for Cleaning once the task is complete. • Once all boxes have been check marked, click Verify Carboy & Reagents and ensure there is sufficient reagent in the bulk reagent carboys and waste carboys have capacity for waste. - Page 100 • Click Start Cleaning when carboys have been verified. • Once cleaning is completed, the System Cleaning Screen will show Cleaning Complete. • The user can select View Cleaning Log on the top right-hand side and print the log if needed. •...
-
Page 101: Monthly
Quaternary Disinfectant Cleaner. • Shake the carboys so the walls of the carboys are well sanitized. • Log in to the VALENT Software. • From the Home Screen go to Tools-> Instrument Operations-> Drain Waste & Prime Buffers. • Select Prime than Probe. - Page 102 • Select Trough under Priming Option. Select Trough 1, keep the prime Duration at 5 sec, and select Prime Solution. Repeat for all 4 troughs. • With Trough 4 selected, Check the Prime Manifold box, and select Prime Solution. Repeat for all 4 troughs. •...
-
Page 103: Clean Ar Carboys
• Remove the slide racks and soak using Lysol® I.C. Quaternary Disinfectant Cleaner, wiping if necessary, being careful not to bend the slide clips. • With all the slide trays removed, clean the interior of the VALENT by wiping the troughs, with 70% Isopropyl alcohol lint free wipe, being careful to avoid the filters in the troughs. -
Page 104: Chapter 8: Troubleshooting
• USB cables are plugged into the printers and VALENT Cart • Printers are switched on If printers are connected properly and powered on, and still no labels are print, log into the VALENT software and go to Tools-> Label Designers-> Slide Label Designer. -
Page 105: Staining Performance
Need access to a previous run log to Cause: The VALENT Software only displays a run log for the most current run, access to help determine root cause of weak previous run is not available in the VALENT Software. -
Page 106: Mechanical
Cause: When a user is manually mapping slides, if the user removes the slide tray from the VALENT, that particular slide tray will disappear from the Home Screen not allowing the user to map slides. The slide tray needs to be loaded into the VALENT to allow slides Map of slide layout disappears once to be manually mapped in the software. -
Page 107: Electrical
Cause: The instrument and software are not connected. The VALENT is in demo mode� Resolution: Be sure to turn on the instrument before logging into the VALENT Software. Cause: There are run requirements that limit what protocol can be processed in the same slide tray. - Page 108 Cause: Biocare Medical Protocols cannot be edited, doing so will cause the message below to appear. Resolution: The user can copy and rename a selected Biocare Medical protocol to make edits, refer to the Protocol Manager section in Chapter 5.
- Page 109 Cause: The instrument is out of level and needs to be re-leveled. Resolution: Call Technical Support for instructions on how to re-level the VALENT. Notification that instrument is not level� Cause: Trough not filling for AR step. Resolution: Check carboy tubing connections. Use the Drain Waste & Prime buffers tool to confirm proper connection (even flow of solution with minimal bubbles in the line).
-
Page 110: Appendix- Quick Start Guides
When current flow is affected, reagents will wick and may yield poor staining quality. 11. All slides require a label. If manually mapping, use a VALENT slide label. Failing to use a slide label may yield poor staining quality. 12. Confirm that all slides are inserted all the way under the slide clips, placed securely in the slide clips, and centered. It is important that slide labels are viewable by the barcode camera. -
Page 111: Quick Start Guide 2-Creating A Protocol
Quick Start Guide 2-Creating a Protocol 1. Log in to the VALENT Software. 2. Find Data Manager from the menu bar and Click Reagent Manager� 3. Select which reagent group the new reagent is classified under and click 4. Add the reagent information and click to Save and click Close�... -
Page 112: Quick Start Guide 3-Preparing Slides
Quick Start Guide 3-Preparing Slides 1. Log in to the VALENT Software. 2. Click Prepare Slides� 3. In the Add Slides window enter Slide Details. 4. Highlight the required protocol and click the green Right Arrow� Repeat until all required protocols have been selected. -
Page 113: Quick Start Guide 4-Process Overview
Checklist Process Overview 2 Summary of the run setup process using Manual Mapping of Slides. Details of each step are provided in Chapter 6. 2. Select 3. Manually Assign 4. Load VALENT 1. Login Map Slides Slides Labeled Slides 5. Prepare & Load 6. -
Page 114: Appendix- Electrical Labels
Appendix- Electrical Labels Electrical Label for the VALENT Cart Power: 1,800 VA 115 VAC 100/120 VAC TO INSTRUMENT Model VLT8102: 50 Hz Model VLT8103: 60 Hz Circuit Breaker: ISA Resettable COMPUTER CART BATTERY INSTRUMENT POWER WARNING Turn cart battery OFF when cart power is off or cart is unplugged. - Page 116 800.799.9499 60 Berry Drive Pacheco, CA 94553 www.biocare.net VLT8118 010219-V3...
Need help?
Do you have a question about the VALENT and is the answer not in the manual?
Questions and answers