Advertisement
Quick Links
Advertisement

Related Manuals for Eureka MGPTS TYPE I


Summary of Contents for Eureka MGPTS TYPE I
- Page 1 OPERATOR INSTRUCTION MANUAL INCLUDING REPAIR PARTS MODULAR GENERAL PURPOSE TENT SYSTEM (MGPTS) TYPE I Johnson Outdoors Gear, Inc. Eureka! branded tent products 625 Conklin Road Binghamton, NY 13903 Customer Service: 1 800 847-1460 TYPE I Web Site: http://www.eurekamilitarytents.com...
-
Page 2: Site Requirements
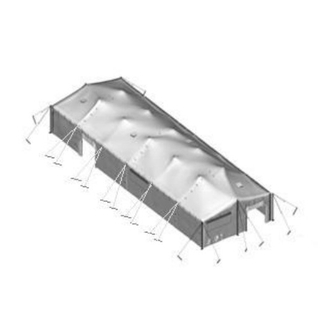
The MGPTS tent is a pole supported modular structure. The MGPTS tent is issued in four sizes: small, command post, medium and large. The MGPTS can also be complexed in various combinations of length and to other types of equipment. SITE REQUIREMENTS NOTE These instructions are based on the medium MGPTS. - Page 3 4. Position end sections (2) on either side of the mid section (1) so that becket laces (3) align. Lay tent out flat. Fold side walls and end walls of mid (1) and end sections (2) under roof section so that only roof portions are exposed.
- Page 4 1. Find the two large snap hooks (1) at the center edge of end section and mid section roofs on underside of tent. Connect the snap hooks (1). 2. Find becket lace (2) at one end of roof. You may start at either end of roof.
- Page 5 3. Lace the fabric sections together by using the following instructions. Insert the first rope loop (1) on one roof section through the first small grommet (2) of the adjoining roof section (3). Loops always enter the white side of the fabric and exit the green or tan side. All loops should be pulled tight. Insert the second loop (4) through the second grommet (5) and through the first loop (1).
- Page 6 6. Connect d-ring (12) on 3/4 inch strap at the eave to adjoining section’s snap hook (13). NOTE Make sure d-ring strap is below 1-1/2 inch web pole loop. 7. Fold one flap (14) over becket lace. NOTE Flaps are identical. It does not matter which is on top or bottom.
- Page 7 8. Feed 1-1/2 inch web pole loop (10) at eave through slit in flap (14). 9. Fold other flap (15) along the length of the tent over the first flap (14) and feed 1-1/2 inch web pole loop (10) through slit in outer flap (15). 10.
- Page 8 NOTE At each corner of the tent make sure web loops are pulled through slit in fabric shingle. 4. Find two end poles (1). Adjust them to maximum height by pulling pin (2) out at bottom of pole. Push pin (2) back in when holes are aligned.
- Page 9 5. Corner poles should be aligned with fabric seam (1) in end section roof. Stakes may then be placed 6 feet out along pole and 1-foot on either side of pole. 6. Follow staking diagram below. Drive in the 36-inch wood stakes at all points indicated on diagram. It is important to have a stake at each of the marked points.
- Page 10 7. Drive stakes six feet out from tent edge and angle stake slightly away from tent. Wood stakes should be driven in until only six inches extend above the ground. 8. Place corner pole guy ropes (1) over wood stakes (2), making sure that ropes are not twisted or crossed. Loosen rope adjustment to leave plenty of slack.
- Page 11 12. Repeat step eleven for all side poles. 13. Two persons are required. Stand end pole up. One person lifts roof fabric (3). Other person grasps pole, rotates bottom of pole under roof fabric (3) and stands pole up so that bottom of pole is angled slightly in towards center of tent.
- Page 12 2. Locate y poles (1). Identify the peak fittings (2) which are metal tubes attached to flat metal plates located on the inside of the roof fabric. Using two people carry each y pole (1) into tent through the sidewall opening.
- Page 13 WARNING Use care to ensure fingers, or other parts are not pinched while inserting y-arms into peak fittings. 4. Once both peak fittings (2) are inserted into y-arms (3), lift y pole (1) to a vertical position. 5. Repeat this procedure for all y poles. 6.
- Page 14 NOTE Sidewall can be configured in three different ways: all walls down, cloth walls rolled up with screen walls down or both cloth walls and screen walls rolled up. 2. Secure vertical fabric sections. Pull wind tie straps at all side pole locations through slit in opposing wall section.
- Page 15 NOTE Do not drive 12-inch stakes all the way into the ground, leave them about two inches out, this will make it easier to remove the stakes. d. Repeat step c for all rope loops. Drive a stake through the stake tube (2) at base of poles. Repeat this procedure for all stake tubes.
-
Page 16: Operating Procedures
OPERATING PROCEDURES Operate doors Use following procedures to operate the doors on the MGPTS: Door is opened and closed using hook and pile fasteners. The inner door can be rolled up (towards the inside to prevent rain from being trapped within the folds) and secured with straps at the top. Outside the tent there is a sliding door. - Page 17 Operate fabric walls Outside walls can be rolled up (towards the inside to prevent rain from being trapped within the folds) and tied off for ventilation if needed. Operate stovepipe openings The stovepipe vent is opened and closed by pulling the cord (1) attached to the vent cover (2). To open, pull the cord (1) to the opposite side of the tent.
- Page 18 WARNING While folding down y pole arms caution must be used to avoid pinching fingers. Move y poles to outside of tent for placement in pole bag. 6. Drop poles. Loosen guy ropes for poles. Lower poles to the ground in the following order: end, side and corner poles. Remove poles from 1-1/2 inch web loop.
- Page 19 Move fabric sections for folding and placement in transport bags. Fold fabric sections The following section will demonstrate tent packing procedures for the MGPTS: 1. The end sections are to be folded as follows: Start with the end fabric section spread out flat, with the green or tan side facing upward. b.
- Page 20 2. The mid sections (if used) are to be folded as follows. Start with the mid section spread out with the green or tan side up, as shown below. b. Fold mid section walls over mid section roof so that the two outer edges of the fabric meet at the middle of the roof.
-
Page 21: End Of Manual
END OF MANUAL...
Need help?
Do you have a question about the MGPTS TYPE I and is the answer not in the manual?
Questions and answers