Table of Contents
Advertisement
Quick Links
Advertisement
Table of Contents

Related Manuals for CEM AI-321

Summary of Contents for CEM AI-321
- Page 1 USER MANUAL...
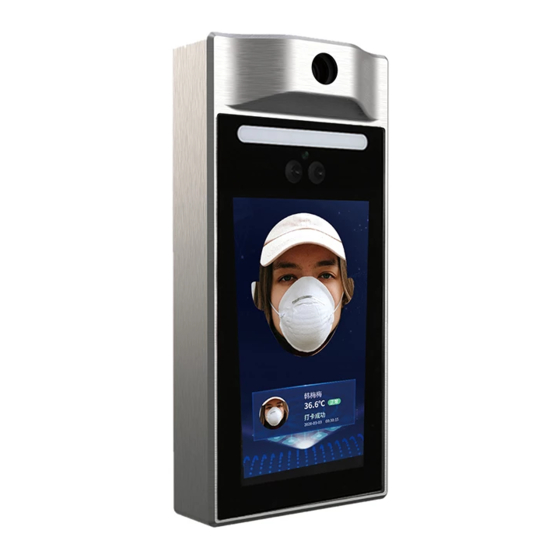
- Page 2 Face Recognition Temperature Monitor AI-321 user's manual The Face Recognition Temperature Monitor effectively combines traditional infrared temperature measurement with AI face recognition. It only requires the user to stand in front of the device to quickly complete user identification and temperature measurement. Once the temperature exceeds the normal value, it will alarm and prohibit passage.
-
Page 3: Product Appearance
Product Appearance Temperature Probe White Fill Light Infrared Fill Light Color Camera Infrared Camera LCD Screen Microphone Reset Button Speaker Screw holes for hanging board... -
Page 4: Install Instruction
Install Instruction Box 86 for Wall-Mounted Installation Install stickers on the wall, and make holes in the wall according to the height and position of the stickers to install Box 86. Align the outlet of the hanging board with the center of the Box 86, punch four mounting holes on the wall according to the punching size diagram, and insert four wall plugs. - Page 5 Wall-Mounted Installation Attach an installation sticker to the wall, make holes in the wall according to the height and position of the sticker, insert a wall plug, and install 4 hex screws. Fix the hanging board on the wall with four KM4*10 screw. Hook the device from top to bottom on the hanging board, and make sure that the upper part of the hanging board is inserted into the groove on the back of the device.
-
Page 6: Interface Instruction
Interface Instruction 6 PIN Door Button , Door Sensor , Alarm Interface Door Button Door Sensor Alarm 11 PIN Reversed IO PWRON 3.3V 3 7 PIN 12V Power Supply , Relay Interface Ethernet Port 5 2 PIN 485 Interface 485A 485B Temper Key Micro-USB Port... -
Page 7: Wiring Instruction
Wiring Instruction... -
Page 8: Technical Specifications
Technical Specifications... - Page 9 Access Control & Attendance for Company At this mode, User need to login to the Attendance & Access Control Management Platform Software for Company to add the device ID, import employees’ information and their face photos and configure this device as an attendance device for employees. After the configuration is complete, the user can use the device to synchronize data.
Need help?
Do you have a question about the AI-321 and is the answer not in the manual?
Questions and answers