Table of Contents
Advertisement
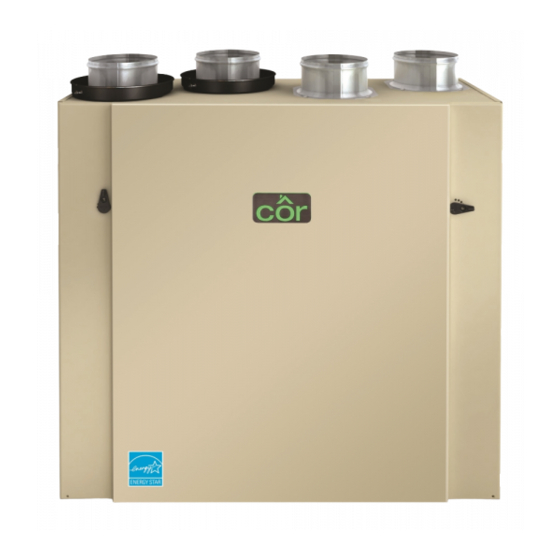
HRVCRSVU1157
Heat Recovery Ventilator
Installation Instructions
NOTE: Read the entire instruction manual before starting the
installation.
SAFETY CONSIDERATIONS
Improper installation, adjustment, alteration, service, maintenance,
or use can cause explosion, fire, electrical shock, or other
conditions which may cause death, personal injury or property
damage. Consult a qualified installer, service agency or your
distributor or branch for information or assistance. The qualified
installer or agency must use factory- authorized kits or accessories
when modifying this product. Refer to the individual instructions
packaged with the kits or accessories when installing.
Follow all safety codes. Wear safety glasses, protective clothing,
and work gloves. Have a fire extinguisher available. Read these
instructions thoroughly and follow all warnings and cautions
included in literature and attached to the unit. Consult local
building codes and the current edition of the National Electrical
Code (NEC) NFPA 70.
In Canada, refer to the current editions of the Canadian Electrical
Code CSA C22.1.
Recognize safety information. When you see this symbol
on
the unit and in instructions or manuals, be alert to the potential for
personal injury. Understand the signal words DANGER,
WARNING, and CAUTION. These words are used with the
A11189
safety- alert symbol. DANGER identifies the most serious hazards,
HRVCRSVU1157
which will result in severe personal injury or death. WARNING
signifies hazards, which could result in personal injury or death.
CAUTION is used to identify unsafe practices, which may result
in minor personal injury or product and property damage. NOTE
is used to highlight suggestions which will result in enhanced
installation, reliability, or operation.
INTRODUCTION
The Heat Recovery Ventilator (HRV) is used to exchange indoor
stale air with outside fresh air. The HRV unit is equipped with a
special heat recovery core which transfers sensible heat between
the fresh incoming air and stale exhaust air.
It is required to locate the HRV in a conditioned space. Special
attention should be given to condensate drain, duct application,
balancing the HRV, and locating unit for easy access and routine
maintenance. The cross- flow design core allows entering and
leaving air streams to transfer heat energy without mixing.
LOCATION
Inspect Equipment
Move carton to final installation location. Remove the HRV from
carton taking care not to damage unit. Remove all packaging and
inspect unit for damage. Remove parts bag from inside unit. File
claim with shipping company if shipment is damaged or
incomplete.
Advertisement
Table of Contents

Subscribe to Our Youtube Channel
Summary of Contents for Cor HRVCRSVU1157
- Page 1 HRVCRSVU1157 Heat Recovery Ventilator Installation Instructions NOTE: Read the entire instruction manual before starting the installation. SAFETY CONSIDERATIONS Improper installation, adjustment, alteration, service, maintenance, or use can cause explosion, fire, electrical shock, or other conditions which may cause death, personal injury or property damage.
- Page 2 Table 1 – Solid State Speed Control Device UNIT CONTROL HRVCRSVU1157 One Touch main wall control Standard main wall control Basic main wall control 20 minute timer...
-
Page 3: Air Distribution
(599 mm) (53 mm) ” (97 mm) ” (624 mm) ” 22 ½” (189 mm) (572 mm) NOTE: Every port fits 6” round duct. 18 ¼” ” (464 mm) (358 mm) ” (380 mm) A11192 Fig. 3 - Dimensions HRVCRSVU1157... -
Page 4: Typical Installations
Inspect the exterior of the unit for shipping damage. Ensure that there is no damage to the door, ports, power cord, etc. Unit Door HRVCRSVU1157 has one door. The unit door can be relocated on A11193 the back of the unit. This can be helpful to optimize duct Fig. - Page 5 Locating the unit S If the house has two floors or more, be sure to plan for at least one exhaust register on the highest lived- in level. Choose an appropriate location for the unit. S Within an area of the house where the ambient temperature is Calculating duct size between 50_F (10_C) and 122_F (50_C) (basement, furnace Use Table 2 to ensure that the ducts you intend to install will be...
- Page 6 4-in 4-in 4-in 4-in 4-in 4-in ∅, 4-in ∅, 4-in ∅, 4-in ∅, 47 cfm 46 cfm 24 cfm 37 cfm 5-in ∅, 4-in 4-in 5-in 5-in ∅, 62 cfm 5-in ∅, 74 cfm 5-in 5-in 93 cfm 5-in ∅, 5-in 6-in 67 cfm...
-
Page 7: Simplified Installation
CAUTION PROPERTY DAMAGE HAZARD Failure to follow this caution may result in property damage. When performing duct connections to the furnace supply duct, this duct must be sized to support the additional airflow Minimum 18-in produced by the unit. Also, the use of metal duct is highly (0.5m) Metal duct recommended. -
Page 8: Connecting The Ducts To The Unit
NOTE: For Method 1, it is not essential to synchronize the 4. Pull down the vapor barrier (shaded part in Fig. 15) over the outer ring to cover it completely. Fasten in place the vapor furnace blower operation with the unit operation, but it is barrier using the port strap (included in unit parts bag). -
Page 9: Installing Two Exterior Hoods
INSTALLING TWO EXTERIOR HOODS Make a water trap loop in the tube to prevent the unit from drawing unpleasant odors from the drain source. Make sure this loop is Choose an appropriate location to install the exterior hoods: located OVER the “T” as shown. Run the tube to the floor drain or S There must be a minimum distance of 6- ft (1.8 m) between the to an alternative drain pipe or pail. - Page 10 Refer to Table 3 to see how to operate the unit using its integrated Use the terminal connector included in the installation kit to control. perform the electrical connection for main and optional wall controls. Check if all wires are correctly inserted in their corresponding holes in the terminal block.
-
Page 11: Electrical Connection To The Furnace
20-MINUTE PUSH-BUTTON SWITCHES (5 MAXIMUM) NO C NC I OC OL Y R G B A11214 Fig. 24 - Electrical connection to 20- minute lighted push button timer(s) NOTE: If an optional auxiliary control is activated and then, the NOTE: For information about the operation of the wall controls, Dehumidistat (or Humidity Control) is being activated, the refer to the user guide. -
Page 13: Balancing The Unit
BALANCING THE UNIT Balancing procedure 1. Set the unit to high speed. What you need to balance the unit NOTE: Make sure that the furnace/air handler blower is S A magnehelic gauge capable of measuring 0 to 1 inch of water ON if the installation is in any way connected to the duct- (0 to 249 Pa) and 2 plastic tubes. -
Page 14: Service Parts
SERVICE PARTS A11223 Fig. 31 - Parts ITEM DESCRIPTION HRVCRSVU1157 Oval Port 18206 Double Collar Oval Port 18207 Exhaust Damper Spring 18221 Motor Assembly 18197 Balancing Tool 18220 Defrost Damper 18200 Damper System Assembly (including Item 6) 18199 Core Filter... - Page 15 LED will light GREEN). Using a multimeter, check the voltage on J4- 1 and J4- 2 (for supply motor), and on J5- 1 and J5- 2 (for exhaust motor). If all the readings cor- respond to the right voltage values, the circuit board is not defective.
- Page 16 These products earned ENERGY STAR ® by meeting strict energy efficiency guidelines set by Natural Resources Canada and the US EPA. They meet ENERGY STAR requirements only when used in Canada. Catalog No: IM- HRVCRSVU - 01 2018 CAC / BDP D 7310 W. Morris St. D Indianapolis, IN 46231 Edition Date: 05/18 Manufacturer reserves the right to change, at any time, specifications and designs without notice and without obligations.
Need help?
Do you have a question about the HRVCRSVU1157 and is the answer not in the manual?
Questions and answers