Advertisement
Quick Links
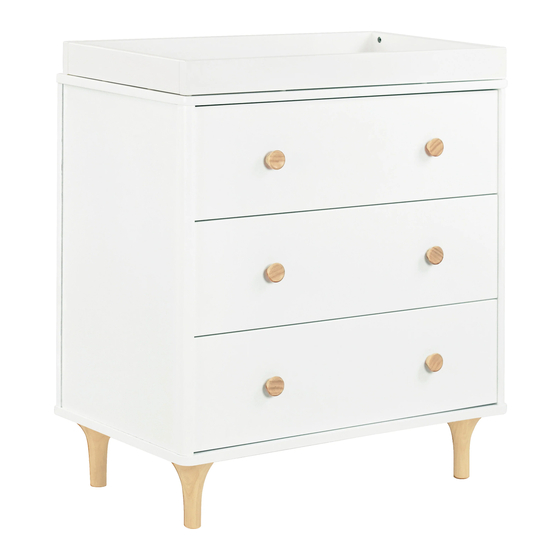
Item# 9023
Lolly 3-Drawer Changer Dresser
Commode à langer à trois tiroirs Lolly
WARNING!
!
READ ALL INSTRUCTIONS BEFORE USE OF THE CHANGING TABLE, ADD-ON
CHANGING UNIT, OR CHANGING PAD.
AVERTISSEMENT!
!
LISEZ TOUTES LES INSTRUCTIONS AVANT D'UTILISER LA TABLE À LANGER,
L'UNITÉ COMPLÉMENTAIRE OU LE COUSSIN À LANGER.
revised 19JUN2020
Assembly Instructions
Manuel d'assemblage
1
Advertisement

Subscribe to Our Youtube Channel
Related Manuals for Babyletto Lolly 3 9023


Summary of Contents for Babyletto Lolly 3 9023
- Page 1 Item# 9023 Lolly 3-Drawer Changer Dresser Assembly Instructions Commode à langer à trois tiroirs Lolly Manuel d’assemblage WARNING! READ ALL INSTRUCTIONS BEFORE USE OF THE CHANGING TABLE, ADD-ON CHANGING UNIT, OR CHANGING PAD. AVERTISSEMENT! LISEZ TOUTES LES INSTRUCTIONS AVANT D’UTILISER LA TABLE À LANGER, L’UNITÉ...
- Page 2 Thank you for purchasing a Babyletto nursery product! To ensure safe use of your product, please follow these assembly instructions closely. If you are missing parts or have any questions, please visit our website at www.babyletto.com/support. For assembly, use the Allen wrench if it is included in the hardware box. We also recommend using a Phillips head screwdriver (not included) to complete assembly.
- Page 3 PARTS • PIÈCES Not to Scale/Pas à l'échelle F. Dresser Foot (4) F. Pied de commode (4) G-3. Drawer front (3) G-3. Façade de tiroir (3) A-2. Left Side Panel B-2. Right Side Panel A-2. Panneau latéral B-2. Panneau latéral gauche droit H-2.
- Page 4 HARDWARE • ACCESSOIRES DE MONTAGE Bolts in Actual Size/Boulons (taille réelle) H1. 1-3/4” Phillips head bolt (4) H3. 1-1/4” Phillips head screw (24) H4. Cam bolt (12) H1. Boulon à tête cruciforme H3. Vis à tête cruciforme de H4. Boulon de came (12) de 4,5 cm (1-3/4 po) (4) 3,2 cm (1-1/4 po) (24) H5.
- Page 5 H6 H4 H4 H6...
- Page 6 * Rotate H5 clockwise to secure. * Tourner H5 dans le sens horaire pour fixer. * Rotate H5 clockwise to secure. * Tourner H5 dans le sens horaire pour fixer.
- Page 7 * Rotate H5 clockwise to secure. * Tourner H5 dans le sens horaire pour fixer.
- Page 8 DRAWER ASSEMBLY INSTRUCTIONS INSTRUCTIONS D' A SSEMBLAGE DES TIROIRS...
- Page 9 * Make sure that the drawer is placed on the tabs on the glide rails. * S’assurer que le tiroir est bien placé sur les onglets des glissières.
- Page 10 * Screw the 9/16” wood screw (H13) in the pre-drilled holes on the drawer side panels. * Visser les vis à bois de 1,4 cm (9/16 po) (H13) dans les avant-trous des côtés du tiroir. * Make sure that the glide touch the drawer front panel.
- Page 11 TRAY ASSEMBLY INSTRUCTIONS INSTRUCTIONS D' A SSEMBLAGE DU PLATEAU TRAY PARTS • PIÈCES DU PLATEAU Not to Scale/Pas à l'échelle T-1. Front / Back Panel (2) T-4. Bottom panel T-1. Panneau avant / arrière (2) T-4. Panneau de fond T-2. Side Panel (2) T-3.
- Page 12 TH-3 TH-1 TH-1 TH-2 TH-3 TH-2 TH-2 TH-2 * Rotate TH-2 clockwise to secure. * Tourner TH-2 dans le sens horaire pour fixer.
- Page 13 TH-2 TH-1 TH-3 TH-2 TH-2 * Make sure that the end of cross support (T-3) fits the notch centered in the front rail (T-1). * Rotate TH-2 * S’assurer que l’extrémité du clockwise to secure. support transversal (T-3) est * Tourner TH-2 dans l’encoche au centre de la dans le sens bordure avant (T-1).
- Page 14 TH-6 TH-7 TH-6 TH-7 TH-4 TH-5 (back) (arrière) CHANGER PAD IS NOT INCLUDED, SOLD SEPARATELY. 31” X 16” X 4” CONTOUR CHANGER PAD IS RECOMMENDED. LE COUSSIN À LANGER N'EST PAS INCLUS MAIS VENDU SÉPARÉMENT. LE COUSSIN À LANGER DE 79 X 41 X 10 CM (31 x 16 x 4 po) AVEC CONTOUR EST RECOMMANDÉ.
- Page 15 ANTI-TIP KIT INSTALACIÓN DEL KIT INSTALLATION DE LA INSTALLATION CONTRA VOLCAMIENTOS TROUSSE ANTI-BASCULEMENT Children have died from furniture tipover. To reduce the risk of furniture tipover, ALWAYS install tip over restraint provided. Han muerto niños al volcarse los muebles. Para reducir el riesgo de que se vuelque un mueble, SIEMPRE instale la sujeción contra volcamientos incluida.
- Page 16 Find your wall material and follow Determine el material de la pared y Trouvez votre propre matériau mural steps to attach the anti-tip kit to your siga los pasos para instalar el kit et suivez les étapes pour fixer la wall.
- Page 17 Fasten strap to back of dresser. Fije la tira en la parte posterior de la cómoda. Fixez la sangle à l’arrière de la commode. Mark spot on wall 1-2” (25-50mm) below the top of the dresser. Marque el punto en la pared a 25-50 mm (1-2 pulgada) debajo de la parte superior de la cómoda.
- Page 18 Fasten strap/bracket by screwing into plastic anchor or wood stud. FIje la tira/el soporte atornillando en la fijación de plástico o el remache de madera. Fixez la sangle/le support par vissage dans l’ancrage de plastique ou le montant en bois. Complete! ¡Listo! C’est terminé!
- Page 19 Finish Terminé KEEP THIS MANUAL IN A SAFE PLACE FOR FUTURE REFERENCE. GARDER CE MANUEL EN LIEU SÛR POUR UN USAGE ULTÉRIEUR. READ ALL INSTRUCTIONS BEFORE USING The recommended maximum weight of THE PRODUCT. KEEP THE INSTRUCTIONS the occupant is 30 lbs on changing table. FOR FUTURE USE.
-
Page 20: Fall Hazard
Follow all instructions on attaching and using the changing table. • Only use the pad provided by BABYLETTO. • The maximum weight of the child for which the changing table is intended is 30 lbs. - Page 21 Suivre les instructions sur la façon d’attacher et d’utiliser la table à langer. • N’utiliser que le coussin fourni par BABYLETTO. • Le poids maximal de l’occupant pour lequel cette table à langer est conçue est de 13,6 kg (30 lb).
-
Page 22: One-Year Limited Warranty
ONE YEAR LIMITED WARRANTY: We will replace any missing parts at the time of purchase or any defective item within a one year period from the date of original purchase. Please keep your receipt so that we may process your warranty request. - Page 23 Restraint System Système de retenue • WARNING: During the diaper changing process, be sure always to keep one hand on the baby to prevent the baby from falling off the changing pad. Falling from the changing pad could cause severe injury or even death to the baby.
- Page 24 Registering your product is even easier than before. You can register your product on our website at : www.babyletto.com/registrations IF YOU WOULD LIKE TO ORDER REPLACEMENT OR MISSING PARTS PLEASE VISIT US AT: WWW.BABYLETTO.COM/PARTS OR YOU CAN CONTACT US BY MAIL: BABYLETTO 8700 REX RD., PICO RIVERA, CA 90660...
Need help?
Do you have a question about the Lolly 3 9023 and is the answer not in the manual?
Questions and answers