Table of Contents
Advertisement
Quick Links
Advertisement
Table of Contents

Related Manuals for Modor DR-2


Summary of Contents for Modor DR-2
- Page 1 USER MANUAL - v1 MODOR DIGITAL DRUM SYNTHESIZER...
-
Page 3: Table Of Contents
2 Overview Structure of the DR-2 ......Patterns, songs and drumsets ..... . - Page 4 Cymbals ....... . . 3.5.1 Hihats ......3.5.2 Ride cymbal .
-
Page 5: Getting Started
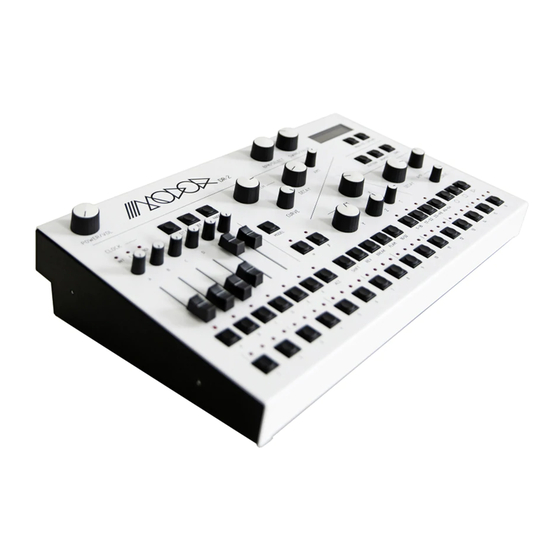
1.1 Overview Thanks for buying a Modor DR-2! The DR-2 is a digital 6 instrument drum machine with a 128 32nd note step se- quencer. Soundwise, the DR-2’s digital drum models offer a lot of sound sculpting flexibility. It is not based on samples or analog circuits, the DR-2 is actually a real digital DSP drum synthesizer. -
Page 6: Connections
1.3 Connections Before you can start playing the Modor DR-2 a few connections have to be made. This chapter is written to help you make the first connections so that you can immediately start playing your instrument. By following these instructions, you will have your Modor drum machine up and running in a few minutes time. -
Page 7: Pattern Programming
1.4 Pattern programming Programming basic patterns on the DR-2 is quite simple. Push the A-F buttons to select an instrument and hit the 1-16 buttons to toggle drum hits. Then press play to hear the pattern you programmed. That’s the basic pattern programming as can be found on many classic drum machines. -
Page 8: Modulations
α or β to program α/β drum hits. 1.6 Menu navigation The menu of the Modor DR-2 consists of 7 menu items. When the MENU/YES button is hit you enter the menu, and the first menu item is shown on the upper display line. -
Page 9: Loading Patterns, Songs And Drumsets
If you are loading drumsets, the selected drumset can be heard when playing the DR-2. This way you can listen to the drumsets in the memory without loosing your actual work, and compare your active drumset to any drumset in the Modor DR-2’s memory. -
Page 10: From The Frontpanel
SRC/YES to confirm. When you play the DR-2 during the save operation for drumsets, you can hear the drumset in the Modor DR-2’s memory that’s about to be overwritten. This way you can check which memory position can be overwritten before actually doing it. -
Page 11: Fingerdrumming
1.11 Key combinations The DR-2 has a number of key and knob combinations to make things faster and easier. Try the combinations in the table below, to get accustomed to what all these different keys and knobs can do. - Page 12 1.11. KEY COMBINATIONS CHAPTER 1. GETTING STARTED . . . 16/32 + 1...16 Toggle 32nd Notes SHIFT + 1...16 Set Number of Pattern Parts SHIFT + 1-16/.../49-64 Set Pattern Length SHIFT + A...F Mute/Unmute Instrument VELOCITY + Knob Set Velocity/Accent Parameter and Amount RANDOM + Knob Set Random Parameter and Amount DEF + Knob...
-
Page 13: Overview
DR-2. This can be used to send each channel separately to external mixing gear, or to treat it with external effect gear and return it into the DR-2. After that, there’s a panning, a mixer and output amp. - Page 14 2.2. PATTERNS, SONGS AND DRUMSETS CHAPTER 2. OVERVIEW LEFT RIGHT Mixer / Amp Pan A Pan B Pan C Pan D Pan E Pan F Out/Ins A Out/Ins B Out/Ins C Out/Ins D Out/Ins E Out/Ins F Drum Synthesizer Drum A Drum B Drum C Drum D...
-
Page 15: Flash Memory
Caution: A pattern and a song are 2 different things, that are stored separately in the DR-2’s memory. A song does not ’contain’ it’s patterns, it only refers to pattern numbers. For example, imagine song Sn05 and song Sn06 both contain pattern number Pt35. - Page 16 2.4. FRONTPANEL OVERVIEW CHAPTER 2. OVERVIEW – amp env CURVE [0,127] – PAN [-64, +63] – β button to set 1 β modulation per instrument – VELOCITY button to set velocity (or accent) modulations – DEF button to set 1 definable parameter per instrument to be controlled by the definable knobs A..F –...
-
Page 17: Drum Synthesizer
3.1 Drum models or algorithms The DR-2 uses drum ’models’ or drum synthesis algorithms that create a drum sound when a trigger from the DR-2’s step sequencer or MIDI receiver comes in. At this moment, the available drum models are: DIST BD: a sinewave bassdrum that has a parallel filtered distortion path... -
Page 18: Envelope Generator
The envelopes in the DR-2 have next to the DECAY rate, also a CURVE parameter. Behind the CURVE parameter of the DR-2’s envelope generators there are 5 different curvature types: Linear full left, 8 ’o clock setting... - Page 19 3.2. ENVELOPE GENERATOR CHAPTER 3. DRUM SYNTHESIZER Reciprocal Full right, 4 ’o clock setting: The reciprocal curve also drops fast at the beginning, even faster then an exponential curve, but it slows down a lot earlier, result- ing in a different curvature with a longer tail that never really seems to stop decaying.
-
Page 20: Bass Drums
3.3. BASS DRUMS CHAPTER 3. DRUM SYNTHESIZER 3.3 Bass drums 3.3.1 Drive BD The first bass drum model is the Drive BD. This model uses a very basic sinewave bassdrum, that has a parallel drive&filter path that can be mixed with the dry sine bassdrum to get harmonic overtones in a certain frequency range. -
Page 21: Noise Bd
3.3. BASS DRUMS CHAPTER 3. DRUM SYNTHESIZER 3.3.2 Noise BD A second bassdrum model is the Noise BD. In this bassdrum model a triangle oscil- lator creates a basic bassdrum, using the pitch and pitch envelope. It is then clipped using a soft saturation curve that ’rounds the corners’, such that the result approaches a sinewave, but still contains a small amount of the lower harmonics. -
Page 22: Square Bd
T controls the lowpass envelope decay rate SQUARE BD PITCH FILTER 3.4 Snare drums 3.4.1 Basic SN This snare model uses FM synthesis and filtered noises to create a snare drum sound that sounds the most ’realistic’ (at certain settings) from the DR-2’s snare drums. -
Page 23: Marching Sn
3.4. SNARE DRUMS CHAPTER 3. DRUM SYNTHESIZER This model uses a 2-operator FM path to create the ’fundamental’ tonal element, and a 4-operator part to create overtone harmonics. Next to that there is a noise path, that is split up in a middle and a high frequency filtering path. The amp envelope controls the volume of the fundamental, while the snare noise and the overtone harmonics are controlled by a separate harmonics and noise envelope. -
Page 24: Analog Sn
3.4. SNARE DRUMS CHAPTER 3. DRUM SYNTHESIZER ’tonal’ attack part that uses 2 sinewave oscillators, and a ’snarenoise’ part that creates separately controllable middle and high frequency noise. X controls the middle frequency noise volume Y controls the high frequency noise volume T controls the noise envelope decay rate MARCHING SN NOISE... -
Page 25: Cymbals
3.5. CYMBALS CHAPTER 3. DRUM SYNTHESIZER Tip: Add some pitch envelope to get a more ’realistic’ analog snare sound. X controls the ’snappy’ snare noise volume Y controls the snare noise envelope decay length Z controls the oscillators pitch separation T controls the second oscillators envelope decay length ANALOG SN PITCH... -
Page 26: Ride Cymbal
3.5. CYMBALS CHAPTER 3. DRUM SYNTHESIZER X controls the amount of added white noise Z controls the spectral content of the cymbal noise Tip: It is possible to make closed and open hihats on a single instrument by using the α... - Page 27 3.5. CYMBALS CHAPTER 3. DRUM SYNTHESIZER X controls the frequency of the main filter Y controls the bandwidth of the main filter Z controls the spectral content of the cymbal noise T controls the decay rate of the hipass filter’s envelope RIDE PITCH CYMBAL...
-
Page 28: Crash Cymbal
3.5. CYMBALS CHAPTER 3. DRUM SYNTHESIZER 3.5.3 Crash cymbal The crash cymbal is a set of 6 parallel filters working on white noise or a mix of white noise and 8-oscillator cymbal noise. A first bandpass filter works with white noise on a rather low frequency with a short amp envelope to create the first ’hit’... -
Page 29: Claps
3.6. CLAPS CHAPTER 3. DRUM SYNTHESIZER X controls the mix of white vs cymbal noise for the 4 middle bandpass filters Z controls the spectral content of the cymbal noise 3.6 Claps Although you could say it’s technically not really a ’drum’ sound, it’s obvious that handclaps made their way into the electronic music, and can’t be missing on an elec- tronic drum machine. -
Page 30: Tenordrum
3.7. TOMS CHAPTER 3. DRUM SYNTHESIZER Tip: Add a little pitch envelope to get a more ’realistic’ tom sound. X controls the noise volume Y controls the noise filter frequency Z controls the triangle oscillators drive gain T controls the decay rate of the third oscillator and noise ANALOG TOM PITCH NOISE... - Page 31 3.7. TOMS CHAPTER 3. DRUM SYNTHESIZER If you don’t know where to start with the pitch and Z parameters, put them both at the center (+64), and turn down the pitch envelope to get a more or less regular sounding tenordrum. X controls the noise hit volume Y controls the notch filter frequency Z controls the spectral content of the tenordrum sound...
-
Page 32: Miscellaneous
3.8. MISCELLANEOUS CHAPTER 3. DRUM SYNTHESIZER 3.8 Miscellaneous 3.8.1 Rimshot The rimshot is created out of 3 sinewave oscillators, that pass through a drive and a highpass filter. The lowest oscillator, the ’fundamental’ goes directly into the drive, the upper two ’harmonic’ oscillators are attenuated by a harmonic envelope first, and then go into the drive. -
Page 33: Cowbell
3.8. MISCELLANEOUS CHAPTER 3. DRUM SYNTHESIZER But there is a second aspect to this instrument: one of it’s envelope is multiplied by an adjustable factor (T) en then undergoes a so-called modulo division by 1. This results in a retriggering envelope that clicks multiple times for a single drum hit. The rattle envelope has the same decay rate as the amp decay (set by the amp DECAY knob), but has a separate envelope curve setting (Z). -
Page 34: Modulations
3.9. MODULATIONS CHAPTER 3. DRUM SYNTHESIZER If you don’t know where to start with the pitch and Z parameters, put them both at the center (+64), and turn down the pitch envelope to get a more or less regular sounding cowbell. X controls the filter’s cutoff Y controls the filter’s envelope amount Z controls the spectral content of sound... - Page 35 3.9. MODULATIONS CHAPTER 3. DRUM SYNTHESIZER Velocity or accents: keep the VELOCITY button pressed and turn one of a drum’s parameter knobs. Now this parameter is modulated by velocity. When playing notes with different velocity or accent you’ll hear a difference in sound. Velocity modulation can be applied on the volume parameter (VELOCITY+slider) and one extra parameter (VELOCITY+knob) per drum.
-
Page 36: Drum Sequencer
The DR-2 patterns can have up to 4 of these bars of 16 steps, so a pattern can have a length of up to 64 16th notes. That’s for example 4 bars of 4 beats of a classic four- on-the-floor pattern. -
Page 37: Bpm And Swing
4.3. BPM AND SWING CHAPTER 4. DRUM SEQUENCER Hitting PLAY puts the sequencer in ’playing’ status, ie. in Play or Record. Hitting REC puts the sequencer in ’recording’ status, ie. in Rec Pause or Record. If you hit PLAY while the sequencer was stopped, it starts playing. There are two playing ’modes’... -
Page 38: Pattern Mode
BPM and Swing are not adopted. The DR-2 keeps playing in the pace of the last pattern. When playing a song in song mode, the Song BPM and swing settings are active. - Page 39 4.4. PATTERN MODE CHAPTER 4. DRUM SEQUENCER There are two accent ’levels’ or velocity values in the DR-2’s sequencer: a separate accent line per instrument, and a general accent line for all instruments at once. Keep the ACC(ent) button down and select the steps you want to accentuate to...
- Page 40 4.4. PATTERN MODE CHAPTER 4. DRUM SEQUENCER Breaks When meeting a break, all envelopes are immediately set to zero, so the playing note is immediately silenced. Keep the BREAK button pressed and select the steps where you want the drum sound to stop. Keep BREAK and 16/32 pressed if you want to program a drum break on a 32nd note step.
- Page 41 4.4. PATTERN MODE CHAPTER 4. DRUM SEQUENCER Tuplets have a balance setting. This is the velocity ’evolution’ of the consecutive drum hits. If it is set neutral, all tuplet drum hits are played equal in volume. If it’s set positive, the drum hits decrease in velocity, sounding a bit like an echo. If the balance is negative, the tuplet’s drum hits increase in velocity, like an upcoming drum roll.
-
Page 42: Song Mode
4.5. SONG MODE CHAPTER 4. DRUM SEQUENCER 4.5 Song mode In song mode songs can be programmed and stored. A song is a list of patterns that can be played sequentially or in a loop. When the sequencer is playing in song mode, every time a pattern comes to an end, it switches to the next pattern in the list. -
Page 43: Synchronisation
4.6 Synchronisation The DR-2 can be played in synchronisation with a lot of other gear. There are 2 syn- chronisation methods, the DR-2 can use them both as a master or as a slave. Both systems use 24 clock ticks per quarter note :... - Page 44 CHAPTER 4. DRUM SEQUENCER The MIDI clock output however can be disabled or enabled in the SYSTEM SET- TINGS menu. If you don’t succeed synchronising external MIDI gear to the DR-2, check the Clock Output setting. The leds on the upper left corner of the frontpanel indicate which clock is in control...
-
Page 45: Menu Reference
Menu Reference The menu of the Modor DR-2 has 7 main menu items. When the menu button is hit you enter the menu, and the first menu item appears on the upper display line, while a black dot moves from right to left over the screen. By pressing again before it reaches the left side, the next menu item is selected. -
Page 46: Save
After entering the Save-menu, you can use the SELECT- and VALUE-controls to select a spot in the DR-2’s memory to store your pattern, song or drumset, the same way as in the load menu. When saving a drumset, the drumset you select is temporarily loaded in the synth’s memory such that you can listen to the drumset that’s going to be... -
Page 47: Copy
5.5. COPY CHAPTER 5. MENU REFERENCE Quickly hit the MENU button four times to select the INIT-menu and wait one second to enter it (the black dot reaches the left side of the screen). Press the YES/SRC- button to confirm the initialisation and exit the menu, press the NO/DEST-button to cancel. -
Page 48: System Settings
CtrlChangeRx: choose if the Modor DR-2 responds to incoming MIDI Control Change messages or not [ON,OFF] SysexRx: choose if the Modor DR-2 receives or ignores incoming MIDI sysex messages [ON,OFF] NoteOffRx: choose if the Modor DR-2 receives or ignores incoming MIDI note-... -
Page 49: Sysex Dump
MIDI, where an external computer or sequencer can capture and store them. On a later moment, the sysex data can be sent back to restore the DR-2’s memory to the situation at the moment of the sysex dump. A way to make backups of the DR-2’s memory, or to exchange patches between two Modor DR-2s. -
Page 50: Menu Overview
5.8. MENU OVERVIEW CHAPTER 5. MENU REFERENCE The sysex messages contain a checksum to detect bad reception, such that you will be informed when something went wrong. Reduce the speed of your sysex program or sequencer if you experience problems with the reception of large sysex dumps. 5.8 Menu overview... -
Page 51: Midi Implementation
MIDI Implementation 6.1 Midi channel To have your DR-2 working together with other MIDI gear, first set the right MIDI channel in the SYSTEM SETTINGS menu, it’s the first item in this menu. Press 6x MENU/YES to enter SYSTEM SETTINGS, use VALUE to set the MIDI channel (1- 16). - Page 52 Reverse drum F using A#-5 or B-5 Note Off recognition You can turn MIDI Note Off Recognition ON/OFF in the sys- tem settings menu (default:OFF). When enabled, the DR-2 recognises Note Off mes- sages and interprets them as breaks and immediately ends the note corresponding to the Note Off note number.
-
Page 53: Midi Control Changes
DAWs. This way it is easy to use the DR-2’s intuitive internal sequencer to do the basic design of your rhythms, and export them later on to a DAW or sequencer for further external treatment. -
Page 54: Midi Implementation Chart
6.5. MIDI IMPLEMENTATION CHART CHAPTER 6. MIDI IMPLEMENTATION 6.5 MIDI implementation chart MIDI Implementation Chart v. 2.0 Manufacturer: Modor Music Model: DR-2 Version: 1 Date: August 2020 Transmit Recognize Remarks 1. Basic Information MIDI channels [1-16] [1-16] Note numbers [48-83]... - Page 55 6.5. MIDI IMPLEMENTATION CHART CHAPTER 6. MIDI IMPLEMENTATION RPN 04 (Tuning Bank Select) RPN 05 (Modulation Depth Range) 2. MIDI Timing and Synchronization MIDI Clock Song Position Pointer Song Select Start Continue Stop MIDI Time Code MIDI Machine Control MIDI Show Control 3.
-
Page 56: Midi Controller List
6.6. MIDI CONTROLLER LIST CHAPTER 6. MIDI IMPLEMENTATION 6.6 MIDI controller list Control Function Transmitted Received Remarks Bank Select Drum A Pitch Drum A Pitch Env Decay Drum A Pitch Env Curve Drum A Pitch Env Amount Drum A Volume Drum A Amp Decay Drum A Amp Curve Drum A Pan... - Page 57 6.6. MIDI CONTROLLER LIST CHAPTER 6. MIDI IMPLEMENTATION Control Function Transmitted Received Remarks Drum B Amp Curve Drum B Pan Drum B X Drum B Y Drum B Z Drum B T Drum C Pitch Drum C Pitch Env Decay Drum C Pitch Env Curve Drum C Pitch Env Amount Drum C Volume...
- Page 58 6.6. MIDI CONTROLLER LIST CHAPTER 6. MIDI IMPLEMENTATION Control Function Transmitted Received Remarks Drum E Amp Curve Drum E Pan Drum E X Drum E Y Drum E Z Drum E T Drum F Pitch Drum F Pitch Env Decay Drum F Pitch Env Curve Drum F Pitch Env Amount Drum F Volume...
Need help?
Do you have a question about the DR-2 and is the answer not in the manual?
Questions and answers