Table of Contents
Advertisement
Quick Links
Advertisement
Table of Contents

Summary of Contents for Geuterbrueck G-Cam
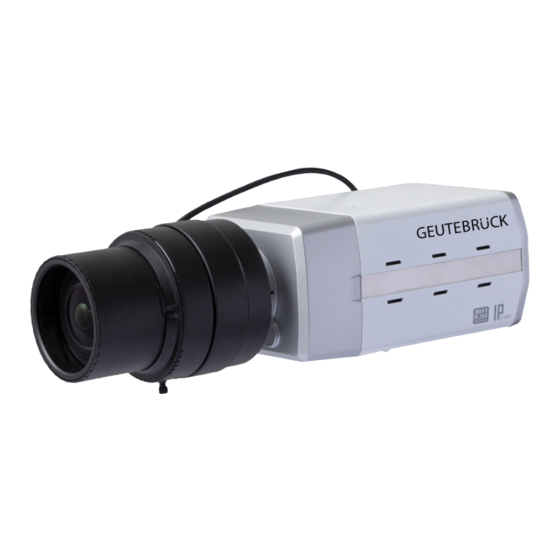
- Page 1 G-Cam/EBC-2112 Full HD IP Box Camera Installation...
-
Page 3: Preface
G-Cam/E2 Series Installation Preface The information given in this manual was current when published. The company reserves the right to revise and improve its products. All specifications are subject to change without notice. Copyright Under copyright laws, the contents of this user manual may not be copied, photocopied, translated, reproduced or reduced to any electronic medium or machine- readable format, in whole or in part, without prior written permission of the company. -
Page 4: Regulation
G-Cam/E2 Series Installation Regulation This device complies with Part 15 of the FCC Rules. Operation is subject to the following two conditions: (1) This device may not cause harmful interference, and (2) this device must accept any interference received, including interference that may cause undesired operation. -
Page 5: Precautions & Notes
G-Cam/E2 Series Installation Precautions & Notes Handle the camera carefully Do not abuse the camera. Avoid striking, shaking, etc. The camera could be damaged by improper handling or storage. Never disassemble the camera. Unauthorized disassembly may cause equipment failure or damage to the unit. - Page 6 G-Cam/E2 Series Installation INFORMATION TO USER CAUTION RISK OF ELECTRIC SHOCK, DO NOT OPEN CAUTION: TO REDUCE THE RISK OF ELECTRIC SHOCK, DO NOT REMOVE THE DEVICE COVER (OR BACK).
-
Page 7: Table Of Contents
G-Cam/E2 Series Installation Table of Contents Preface ............................2 Regulation ........................... 3 Precautions & Notes ........................4 1. FEATURES ..........................7 2. PACKAGE CONTENTS ......................8 3. PART NAMES .......................... 9 3.1. Rear View .......................... 9 3.2. -
Page 8: Features
G-Cam/E2 Series Installation 1. FEATURES Camera 1/2.8” 1080p CMOS Image Sensor CS mount True Day/Night True WDR Video H.264 Baseline, Main, High Profile(MPEG-4 Part 10/AVC), MJPEG(Motion JPEG) Max 30fps in 1080p Text Overlay ... -
Page 9: Package Contents
G-Cam/E2 Series Installation 2. PACKAGE CONTENTS Please unpack the package carefully and handle the equipment with care. The package contains: Camera CS Mount (Lens not included) Attachment Screws(M2x5) Wrench Quick Start Guide CDRom (Software and Documentation) ... -
Page 10: Part Names
G-Cam/E2 Series Installation 1. PART NAMES 1.1. Rear View ⑤ ⑨ ⑧ ① ⑥ NTSC/PAL ⑦ ③ ② ④ * Model herein and its appearance are subject to change without any prior notice. ①... -
Page 11: Side View
G-Cam/E2 Series Installation 1.2. Side View ① ① Auto iris lens connector 4-pin connector for an auto iris camera lens ... -
Page 12: Installation
G-Cam/E2 Series Installation 2. INSTALLATION 2.1. Installing a Lens High definition (HD) lenses are recommended on the camera to utilize the full resolution of a megapixel camera. Installing a standard definition (SD) lens on a megapixel camera may exacerbate camera noises and possibly introduce traditional edge effects. -
Page 13: Installing Camera Mount
G-Cam/E2 Series Installation 2.2. Installing camera mount Attach the provided camera mount to the mount screw points marked in red on the image below by using the provided two screws, and rotate the screws clockwise to tighten the camera mount. -
Page 14: Connection
G-Cam/E2 Series Installation 3. CONNECTION Audio connection Analogue video output NTSC/PAL Alarm in/out RJ45 LAN connection connection Power connection RS-485 connection (DC12V or PoE) ① Power Connection The device can be powered either via 12VDC or PoE. - Page 15 G-Cam/E2 Series Installation ‐ Alarm Input Alarm Input can be connected to either a voltage type sensor or a relay type sensor like the following figures. Settings can be done through the camera’s web page.
-
Page 16: Configuration
G-Cam/E2 Series Installation 4. CONFIGURATION 4.1. Set up Network Environment The default IP address of the device is 192.168.XXX.XXX. Users can identify the IP address of the device from converting the MAC address’s hexadecimal numbers, which is attached to the device. Be sure that the device and PC are on a same area network before running the installation. -
Page 17: Custom Ip Environment
G-Cam/E2 Series Installation 6.1.2. Custom IP Environment IPAdminTool is a management tool, which automatically scans all of the network products for users to perform administrative tasks, which includes network configurations, firmware update, device reboot, and device organizations. -
Page 18: View Video On Web Page
G-Cam/E2 Series Installation 3. On the New Information table in the Single IP Change window, modify the last two digits of the device’s IP address, and modify the rest parts including subnet mask, gateway, and DNS if necessary by checking the user/ PC network area information. -
Page 19: View Video Using Ipadmin Tool
G-Cam/E2 Series Installation 6.2.2. View Video using IPAdmin Tool IPAdminTool automatically searches for all activated network encoders and IP cameras, and shows the product name, IP address, MAC address and etc. 1. From the IPAdminTool’s product list, select the device by highlighting it. -
Page 20: Configuration In Geutebrück Software
G-Cam/E2 Series Installation 6.3.Configuration in GEUTEBRÜCK Software Attention: To install the IP cameras correctly, the software must be: or higher - GeViScope/re_porter Version 7.5.960.11 Version 1.1.3.38 or higher G-Scope Older Software must be updated. Please download at: www.geutebrueck.com... - Page 21 (1). Click on the camera’s module channel (2) and insert the new IP-adress of your G-Cam/EXX camera in the connection menu (3). Click the icon on the toolbar again to send your modifications to the server (1).
- Page 22 G-Cam/E2 Series Installation Now you must assign a media channel to transmit the camera’s pictures. Please click in "General settings" on the menu item "Media channels" (1). A list of the available media channels appears.
-
Page 23: Advanced Configuration
G-Cam/E2 Series Installation Advanced configuration In the hardware configuration you can make advanced settings like the streaming behaviour (see following screenshots). Please note, that the configurations made here will overwrite the webbrowser configurations! PTZF Move doesn’t apply to Box cameras. Please note, that the configurations made here will overwrite the webbrowser configurations! ... - Page 24 G-Cam/E2 Series Installation Click the icon on the toolbar to send your choice to the server. Please note, that the configurations made here will overwrite the webbrowser configurations! Close the GSCSetup software.
-
Page 25: Commissioning Of Ip Cameras In G-Set
G-Cam/E2 Series Installation 6.3.2 Commissioning of IP Cameras in G-Set NOTE: For correct installation of IP cameras one Option G-Core/CamConnect must be available for each camera. Available options are shown in G-Set at General settings - Options. - Page 26 G-Cam/E2 Series Installation Right clicking this URL opens a menu in which the URL can be copied, saved or opened in the default browser. After passing the URL to a browser, follow the instructions on the GEUTEBRÜCK ...
- Page 27 G-Cam/E2 Series Installation The Media Channel Wizard automatically searches for existing network cameras and displays them in the first column. Cameras for which access rights are available are also displayed with a small camera image.
- Page 28 G-Cam/E2 Series Installation Step 3: Summary (check settings, confirm and transfer settings to the server). Mouse click on tab Summary provides you with an overview of all the settings that have been defined for your cameras.
-
Page 29: Reboot
G-Cam/E2 Series Installation 4.4. Reboot Perform the following procedures to reset your device. 1. Press the reset button for 2 seconds while the device is powered on. 2. Wait for the system to reboot. Please do not hold the reset button for more than 2 seconds. - Page 30 G-Cam/E2 Series Installation How to recover your system from Safe Mode Browse Browse The messages above will appear on the webpage when your device has been rebooted in safe mode. Then, you should follow the instructions on the webpage according to each step.
-
Page 31: Appendix (A): Specifications
G-Cam/E2 Series Installation APPENDIX (A): SPECIFICATIONS G-Cam/EBC-2112_5.02002 Image sensor (Chip) 1/2,9" SONY EXMOR CMOS Picture format 16:9 Video output Composite video: 1 Vpp, 75 Ohm (BNC), permanent Scanning system Progressive scan Mega pixel 2 MP (Full HD) Minimum sensitivity 0.03 Lux (Color/DSS on), 0.006 Lux (B/W;... -
Page 32: Appendix (B): Power Over Ethernet
G-Cam/E2 Series Installation APPENDIX (B): POWER OVER ETHERNET The Power over Ethernet (PoE) is designed to extract power from a conventional twisted pair Category 5 Ethernet cable, conforming to the IEEE 802.3af Power-over-Ethernet (PoE) standard. -
Page 33: Appendix (C): Dimensions
G-Cam/E2 Series Installation APPENDIX (C): DIMENSIONS UNIT: mm ... -
Page 34: Appendix (D): Hexadecimal-Decimal Conversion Table
G-Cam/E2 Series Installation APPENDIX (D): HEXADECIMAL-DECIMAL CONVERSION TABLE Refer to the following table when converting the MAC address of the device to the IP address. Hex Dec Hex Dec Hex Dec ... - Page 36 GEUTEBRÜCK GmbH Technische Änderungen vorbehalten. Im Nassen 7-9 | D-53578 Windhagen Tel. +49 (0)2645 137-0 | Fax-999 Technical alterations reserved. Sous réserve des modifications. info@geutebrueck.com Suministro sujeto a modificaciones técnicas o disponibilidad. www.geutebrueck.com...
Need help?
Do you have a question about the G-Cam and is the answer not in the manual?
Questions and answers