Samsung LTN406W Owner's Instructions Manual
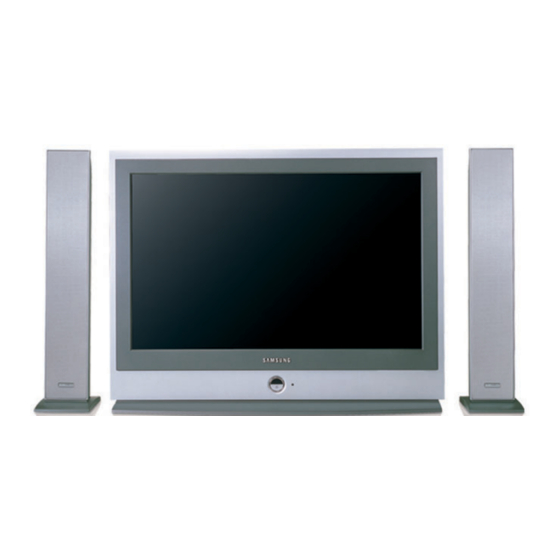
Lcd tv with life-like picture & sleek design
Hide thumbs
Also See for LTN406W:
- Manual de instrucciones (83 pages) ,
- Owner's instructions manual (82 pages) ,
- Manual (2 pages)
Table of Contents
Advertisement
Quick Links
IMPORTADO POR
SAMSUNG ELECTRONICS MEXICO. S.A. DE C.V.
Via Lopez Portillo No. 6, Col. San Francisco
Chilpan Tultitlan, Estado de Mexico C.P. 54940, Mexico
D.F. Mexico
Tel) 01(55) 5317-2551/3410/3409
Fax) 01(55) 5317-3377
EXPORTADO POR
Samsung Electronics Co., Ltd.
416, Maetan-3dong, Yeongtong-Gu,
Suwon City, Kyungki-Do Korea
This device is a Class B digital apparatus.
BN68-00448R-05
Advertisement
Table of Contents

Related Manuals for Samsung LTN406W


Summary of Contents for Samsung LTN406W
- Page 1 IMPORTADO POR SAMSUNG ELECTRONICS MEXICO. S.A. DE C.V. Via Lopez Portillo No. 6, Col. San Francisco Chilpan Tultitlan, Estado de Mexico C.P. 54940, Mexico D.F. Mexico Tel) 01(55) 5317-2551/3410/3409 Fax) 01(55) 5317-3377 EXPORTADO POR Samsung Electronics Co., Ltd. 416, Maetan-3dong, Yeongtong-Gu, Suwon City, Kyungki-Do Korea This device is a Class B digital apparatus.
-
Page 2: Precautions When Displaying A Still Image
Precautions When Displaying a Still Image Note : If the borders at the left, right and the center of the screen remain fixed for an extended period of time, the amount of light transmission will also remain varied and as a result the borders may leave traces. - Page 3 Note : If the borders at the left, right and the center of the screen remain fixed for an extended period of time, the amount of light transmission will also remain varied and as a result the borders may leave traces. Note : If the borders at the left, right and the center of the screen remain fixed for an extended period of time, the...
-
Page 4: Important Safety Instructions
Important Safety Instructions 1) Read these instructions. 2) Keep these instructions. 3) Heed all warnings. 4) Follow all instructions. 5) Do not use this apparatus near water. 6) Clean only with dry cloth. 7) Do not block any ventilation openings, Install in accordance with the manufacturer’s instructions. - Page 5 As an ENERGY STAR Partner. Samsung Electronics America, Inc. has determined that this product or product model meets the ENERGY STAR guidelines for energy efficiency. This symbol indicates high voltage is present inside.
-
Page 6: Fcc Information
004-000-00345-4. The party responsible for product compliance: SAMSUNG ELECTRONICS CO., LTD America QA Lab of Samsung 3351 Michelson Drive, Suite #290, Irvine, CA92612 USA This device complies with part 15 of the FCC Rules. Operation is subject to the following two conditions: (1) This device may not cause harmful interference, and (2) This device must accept any interference received, including interference that may cause unesired operation. -
Page 7: Important Warranty Information Regarding Television Format Viewing
Be careful in the selection and duration of television formats used for viewing. Uneven LCD aging as a result of format selection and use, as well as other burned-in images, is not covered by your Samsung limited warranty. [Note] If a still image is displayed for an extended period of time, residual images or blurring may appear. - Page 8 MEMO...
-
Page 9: Table Of Contents
O N T E N T S Chapter 1: Your New TV ....1 List of Features ..........1 List of Parts . - Page 10 O N T E N T S Fine Tuning Channels ........35 Viewing Picture-in-Picture .
-
Page 11: Chapter 1: Your New Tv
C h a p t e r O n e O U R List of Features Your TV was designed with the latest technology. This TV is a high-performance unit that includes the following special features: • Easy-to-use remote control •... -
Page 12: Familiarizing Yourself With Your New Tv
O U R Familiarizing Yourself with Your New TV Front Panel Buttons The buttons on the front panel control your TV’s basic features, including the on-screen menu. To use the more advanced features, you must use the remote control. POWER Press to turn the TV on and off. -
Page 13: Rear Panel Jacks
O U R Rear Panel Jacks Use the rear panel jacks to connect an A/V component that will be connected continuously, such as a VCR or a DVD player. For more information on connecting equipment, see pages 7-15. VIDEO/AUDIO OUTPUT VIDEO/AUDIO INPUT SUPER VIDEO INPUT HEADPHONE JACK... -
Page 14: Remote Control
O U R Remote Control You can use the remote control up to a distance of about 23 feet from the TV. When using the remote, always point it directly at the TV. POWER Turns the TV on and off. (See Page 16) P.SIZE Press to change the screen size. -
Page 15: Sleep Timer
O U R +100 Press to select channels over 100. For example, to select channel 121, press “+100”, then press “2” and “1”. (See Page 24) SLEEP TIMER Press to select a time for the TV to turn off automatically. (See Page 54) AUTOMATIC CHANNEL BUTTON... -
Page 16: Installing Batteries In The Remote Control
O U R Installing Batteries in the Remote Control Slide the cover out completely. Install two AAA size batteries. Replace the cover. The remote control doesn’t work! Check the following: 1. Is the TV power switch on? 2. Are the plus and minus ends of the batteries reversed? 3. -
Page 17: Chapter 2: Installation
C h a p t e r Tw o N S TA L L AT I O N Connecting VHF and UHF Antennas If your antenna has a set of leads that look like this, see “Antennas with 300-ohm Flat Twin Leads” below. If your antenna has one lead that looks like this, see “Antennas with 75-ohm Round Leads”... -
Page 18: Antennas With 75-Ohm Round Leads
N S TA L L AT I O N Antennas with 75-ohm Round Leads Plug the antenna lead into the TV ANTENNA terminal on the bottom of the back panel. Separate VHF and UHF Antennas If you have two separate antennas for your TV (one VHF and one UHF), you must combine the two antenna signals before connecting the antennas to the TV. -
Page 19: Connecting To A Cable Box That Descrambles All Channels
N S TA L L AT I O N Connecting to a Cable Box that Descrambles All Channels Find the cable that is connected to the ANTENNA OUT terminal on your cable box. Connect the other end of this cable to the TV ANTENNA terminal on the back of the TV. - Page 20 N S TA L L AT I O N Connect a coaxial cable between the ANTENNA OUT terminal on the cable box and the B–IN terminal on the A/B switch. Connect another cable between the other OUT terminal on the splitter and the A–IN terminal on the RF (A/B) switch.
-
Page 21: Connecting A Vcr
N S TA L L AT I O N Connecting a VCR These instructions assume that you have already connected your TV to an antenna or a cable TV system (according to the instructions on pages 7-10). Skip step 1 if you have not yet connected to an antenna or a cable system. Unplug the cable or antenna from the back of the TV. -
Page 22: Connecting An S-Vhs Vcr
N S TA L L AT I O N Connecting an S-VHS VCR Your Samsung TV can be connected to an S-Video signal from an S-VHS VCR. (This connection delivers a better picture as compared to a standard VHS VCR.) To begin, follow steps 1–3 in the... -
Page 23: Connecting A Dvd Player
N S TA L L AT I O N Connecting a DVD Player The rear panel jacks on your TV make it easy to connect a DVD player to your TV. Connect a set of audio cables between the L, R AUDIO INPUT jacks on the TV and the AUDIO OUT jacks on the DVD player. -
Page 24: Connecting The Speakers
N S TA L L AT I O N Connecting the Speakers 5.1. Channel system: 5 Channels – 2 Channels for the front (left and right), 0.1 Channel – Subwoofer Channel How to Connect 1. Connect the speaker cables to the Speaker OUT jacks on the TV and the IN jacks on the speakers. 2. -
Page 25: Connecting A Pc
N S TA L L AT I O N Connecting a PC Note: This figure shows the Standard Connector-jack panel. The actual configuration on your TV may be different, depending on the model. DVI-D TV rear panel D-SUB TV rear panel •... -
Page 26: Chapter 3: Special Features
C h a p t e r T h r e e P E C I A L E AT U R E S Turning the TV On and Off Press the POWER button. You can also use the Power button on the front panel. [Note] 1. -
Page 27: Using Mute
P E C I A L E AT U R E S Using Mute At any time, you can temporarily cut off the sound using the Mute button. Press MUTE and the sound cuts off. The word “ ” will appear in the lower-left corner of the screen. To turn mute off, press the MUTE button again, or simply press the VOL +/–... -
Page 28: Setting Up Your Remote Control
P E C I A L E AT U R E S Setting Up Your Remote Control After it has been set up properly, your remote control can operate in four different modes: TV, VCR, Cable, or DVD. Pressing the corresponding button on the remote control allows you to switch between these modes, and control whichever piece of equipment you choose. - Page 29 Setting Up the Remote to Operate Your Cable Box Note on Using Remote Control Modes: Cable Box When your remote control is in “Cable Box” mode, the volume buttons still control your TV’s volume. Turn off your cable box. Press the MODE button and make sure that the Cable LED is illuminated.
- Page 30 Setting Up the Remote to Operate Your DVD Setting Up the Remote to Operate Your DVD Note on Using Remote Control Modes: DVD When your remote control is in “DVD” mode, the volume buttons still control your TV’s volume. Turn off your DVD. Press the MODE button and make sure that the DVD LED is illuminated.
-
Page 31: Remote Control Codes
General Instrument 012,013,023,031,032, 033,038,044,075,076,077 Hamlin 011,012,020,021,042,056 Hitachi 045,051,054 Jerrold 012,013,023,031,032,033,038,044,054,070,073 Macom Magnavox 015,016,027,029,034,036,037,040,041,048,049 DVD Codes Philips Proscan Toshiba Panasonic Sony Samsung 015,088 001,002,007 Lloyd 022,025 Logik 017,038,062,065 Magnavox 017,062 Marantz 011,017,023,025,038,039,055,070 Marta 016,021 Memorex Midland Minota Mitsubishi Montgomery ward 016,024,040,041... -
Page 32: Chapter 4: Operation
C h a p t e r F o u r P E R AT I O N Plug & Play Feature When the TV is initially powered On, two basic customer settings proceed automatically and subsequently: Setting Auto program, Clock. Press the POWER button on the remote control. -
Page 33: Memorizing The Channels
P E R AT I O N Memorizing the Channels Your TV can memorize and store all of the available channels for both “off-air” (antenna) and cable channels. After the available channels are memorized, use the CH buttons to scan through the channels. This eliminates the need to change channels by entering the channel digits. -
Page 34: Storing Channels In Memory (Automatic Method)
P E R AT I O N Storing Channels in Memory (Automatic Method) First, select the correct signal source (Air, STD, HRC, IRC). See steps 1~2 on previous page. Press the MENU button. Press the UP/DOWN buttons to select “Channel”, then press the ENTER button. -
Page 35: Adding And Erasing Channels (Manual Method)
P E R AT I O N Adding and Erasing Channels (Manual Method) Use the number buttons to directly select the channel that will be Add or Delete. Press the MENU button to display the menu. Press the UP/DOWN buttons to select “Channel”, then press the ENTER button. -
Page 36: To Edit The Input Source Name
P E R AT I O N To Edit the Input Source Name Name the input device connected to the input jacks to make your input source selection easier. Press the MENU button to display the on-screen menu. Press the UP/DOWN buttons to select “Input”, then press the ENTER button. -
Page 37: Using Automatic Picture Settings
P E R AT I O N Using Automatic Picture Settings Your TV has four automatic picture settings (“Custom”, “Dynamic”, “Standard”, and “Movie”) that are preset at the factory. You can activate either Custom, Dynamic, Standard, or Movie by pressing P.MODE (or by making a selection from the menu). Or, you can select “Custom”... -
Page 38: Customizing The Picture
P E R AT I O N Customizing the Picture You can use the on-screen menus to change the contrast, brightness, sharpness, color and tint according to personal preference. (Alternatively, you can use one of the “automatic” settings. See the previous page.) Press the MENU button to display the menu. -
Page 39: Using Automatic Sound Settings
P E R AT I O N Using Automatic Sound Settings Your TV has five automatic sound settings (“Custom”, “Standard”, “Music”, “Movie” and “Speech”) that are preset at the factory. You can select “Sound Mode”, which automatically recalls your personalized sound settings. Press the MENU button to display the menu. -
Page 40: Customizing The Sound
P E R AT I O N Customizing the Sound The sound settings can be adjusted to suit your personal preference. (Alternatively, you can use one of the “automatic” settings. See the previous page.) Press the MENU button to display the menu. Press the UP/DOWN buttons to select “Sound”, then press the ENTER... -
Page 41: Selecting A Menu Language
P E R AT I O N Selecting a Menu Language Press the MENU button to display the menu. Press the UP/DOWN buttons to select “Setup”, then press the ENTER button. Press the UP/DOWN buttons to select Language. Press the ENTER button. -
Page 42: Setting The Blue Screen Mode
P E R AT I O N Setting the Blue Screen Mode If no signal is being received or the signal is very weak, a blue screen automatical- ly replaces the noisy picture background. If you wish to continue viewing the poor picture, you must set the “Blue screen” mode to “Off”. -
Page 43: To Select An External Input Device
P E R AT I O N To Select an External Output Device You can select one from TV, Input1 (Component1), Input2 (Component2), and S-Video to send the signals to a device connected to the output jacks. Press the MENU button to display the menu. -
Page 44: Lna (Low Noise Amplifier)
P E R AT I O N LNA (Low Noise Amplifier) If the TV is operating in a weak-signal area, sometimes the LNA function can improve the reception (a low-noise preamplifier boosts the incoming signal). Press the MENU button to display the menu. -
Page 45: Fine Tuning Channels
P E R AT I O N Fine Tuning Channels Use fine tuning to manually adjust a particular channel for optimal reception. Select the appropriate channel. Press the MENU button to display the menu. Press the UP/DOWN buttons to select “Channel”, then press the ENTER button. -
Page 46: Viewing Picture-In-Picture
P E R AT I O N Viewing Picture-in-Picture This product has one tuner built-in, which does not allow PIP to function in the same mode. Please see 'PIP Settings' below for details. You can use the PIP feature to simultaneously watch two video sources. Note: While V-Chip is in operation, the PIP function cannot be used. -
Page 47: C Ontents
P E R AT I O N Swapping the Contents of the PIP and Main image When you press the SWAP button, the image in the PIP window will appear on the main screen, and vice versa. Changing the PIP Channel Press the PIP CH button to change the channel that appears in the PIP window. -
Page 48: Changing The Screen Size
P E R AT I O N Changing the Screen Size Press the P.SIZE button to change the screen size. • Wide : Sets the picture to 16:9 wide mode. • Panorama : Use this mode for the wide aspect ratio of a panoramic picture. (However, it does not work in 720p and 1080i modes.) •... -
Page 49: Adjusting The Background Color
P E R AT I O N Adjusting the Background Color You can change the color of the entire screen according to your preference. Press the MENU button to display the menu. Press the UP/DOWN buttons to select “Picture”, then press the ENTER button. -
Page 50: Setting The Dnie
P E R AT I O N Setting the DNIe Samsung’s New Technology brings you more detailed images with contrast, white enhancement and 3D noise reduction. Press the MENU button to display the menu. Press the UP/DOWN buttons to select “Picture”, then press the ENTER button. -
Page 51: To Enjoy Dolby Digital Sound
P E R AT I O N To Enjoy Dolby Digital Sound Dolby Digital is a surround sound technology that reproduces sound using multiple sep- arate channels. Often called the 5.1 channel system, it consists of five channels that have the 20 – 20,000Hz bandwidth - two front channels (left and right), one central channel, and two rear channels (left and right);... -
Page 52: Turning The Dynamic Range On
P E R AT I O N To Enjoy Dolby Digital Sound Turning the Dynamic Range On Press the MENU button to display the menu. Press the UP/DOWN buttons to select “Sound”, then press the ENTER button. Press the UP/DOWN buttons to select “Dolby Digital”, then press the ENTER... -
Page 53: Speaker Settings
P E R AT I O N Speaker Settings Adjusts the output level of each speaker connected to optimize the sound quality. Speaker Press the MENU button to display the menu. Press the UP/DOWN buttons to select “Sound”, then press the ENTER button. -
Page 54: Level
P E R AT I O N To Enjoy Dolby Digital Sound Level Press the MENU button to display the menu. Press the UP/DOWN buttons to select “Sound”, then press the ENTER button. Press the UP/DOWN buttons to select “Dolby Digital”, then press the ENTER button. -
Page 55: Time Delay
P E R AT I O N Time Delay Press the MENU button to display the menu. Press the UP/DOWN buttons to select “Sound”, then press the ENTER button. Press the UP/DOWN buttons to select “Dolby Digital”, then press the ENTER button. -
Page 56: Trademark & Lavel License Notice
P E R AT I O N To Enjoy Dolby Digital Sound TRADEMARK & LABEL LICENSE NOTICE Manufactured under license from Digital Theater Systems, Inc. US Pat. No. 5,451,942, 5, 956, 674, 5, 974, 380, 5, 978, 762 and other world-wide patents issued and pending. “DTS”... -
Page 57: Changing The Stereo Settings
P E R AT I O N Changing the STEREO Settings If you live in an area that has poor reception (due to weak frequency), you may hear noise and experience poor sound quality during the channel selection. Set the stereo setting to Off to eliminate the noise. -
Page 58: Selecting The Main Or Sub Sound
P E R AT I O N Selecting the Main or Sub Sound You can select either Main or Sub when PIP is On. Press the MENU button to display the menu. Press the UP/DOWN buttons to select “Sound”, then press the ENTER button. -
Page 59: To Select An External Input Device
P E R AT I O N To Select an External Input Device Press the MENU button to display the menu. Press the UP/DOWN buttons to select “Sound”, then press the ENTER button. Press the UP/DOWN buttons to select “Ext.Audio”, then press the ENTER button. -
Page 60: Adjusting The Headphone Sound
P E R AT I O N Adjusting the Headphone Sound The headphone option is especially useful when simultaneously watching the main screen and the PIP window. Note: When TV is connected with "Digital Audio In" (refer to page 3), you cannot listen to TV with headphones. -
Page 61: Setting The Clock
P E R AT I O N Setting the Clock Setting the clock is necessary in order to use the various timer features of the TV. Also, you can check the time while watching the TV. (Just press DISPLAY.) Press the MENU button to display the on-screen menu. -
Page 62: Setting The On/Off Timer
P E R AT I O N Setting the On/Off Timer Press the MENU button to display the on-screen menu. Press the UP/DOWN buttons to select “Setup”, then press the ENTER button. Press the ENTER button to select “Time”, then press the ENTER button to select “Clock”. - Page 63 P E R AT I O N Press the LEFT/RIGHT buttons to select Setup. Press the UP/DOWN buttons to on-timer “On”. (Repeatedly pressing the UP/DOWN buttons will alternate between On and Off.) When finished, press the ENTER button. To set the Off time, press the UP/DOWN buttons to select “Off Time”.
-
Page 64: Setting The Sleep Timer
P E R AT I O N Setting the Sleep Timer Set the timer for the TV to turn off at the preset time automatically. Setting the On/Off Timer Using the Menu Press the MENU button to display the on-screen menu. Press the UP/DOWN buttons to select “Setup”, then press the ENTER... -
Page 65: Using The V-Chip
P E R AT I O N Using the V-Chip (Option) The V-Chip feature automatically locks out programming that is deemed inappropriate for children. The user must first enter a Pin (personal ID number) before any of the V-Chip restrictions can be set up or changed. Setting Up Your Personal ID Number (PIN) Press the MENU button to display the menu. -
Page 66: How To Enable/Disable The V-Chip
P E R AT I O N How to Enable/Disable the V-Chip Note: V-Chip cannot be used during PIP operation. Press the MENU button to display the menu. Press the UP/DOWN buttons to select “Setup”, then press the ENTER button. Press the UP/DOWN buttons to select “V-Chip”, then press the... - Page 67 P E R AT I O N Press the UP/DOWN buttons to select “V-Chip”, then press the ENTER button. The “Enter Pin” screen will appear. Enter your 4-digit Pin number. Press the UP/DOWN buttons, to select “TV Guidelines”, then press the ENTER button.
-
Page 68: How To Set Up Restrictions Using The Mpaa Ratings
P E R AT I O N How to set the FV, D, L, S and V sub-ratings. First, highlight one of these TV-Ratings: TV-Y7, TV-PG, TV-14 or TV-MA (See Step 4, on previous page). Next, while the TV-Rating is selected, repeatedly press the ENTER This will cycle through the available sub-ratings (FV,L, S, D or V). -
Page 69: How To Reset The Tv After The V-Chip Blocks A Channel ("Emergency Escape")
P E R AT I O N Press the UP/DOWN buttons to select “MPAA Rating”, then press the ENTER buttons. Repeatedly press the UP/DOWN buttons to select a particular MPAA category. (When a category is selected, its color changes to blue.) Pressing the UP/DOWN buttons will cycle through the MPAA... -
Page 70: Chapter 5: Pc Display
Windows and your particular video card. Even if your actual screens look different, the same, basic set-up information will apply in most cases. (If not, contact your computer manufacturer or Samsung Dealer.) First, click on “Settings” on the Windows start menu. -
Page 71: Adjusting The Screen Quality
PC D I S P L AY Adjusting the Screen Quality The purpose of the picture quality adjustment is to remove or reduce picture noise. If the noise is not removed by fine tuning alone, then do the frequency adjustments to the utmost and fine tune again. -
Page 72: Changing The Screen Position
PC D I S P L AY Changing the Screen Position Press the PC button on the remote control to select the PC mode. Press the MENU button to display the menu. Press the UP/DOWN buttons to select “Setup”, then press the ENTER button. -
Page 73: To Initialize The Screen Settings
PC D I S P L AY To Initialize the Screen Settings Use to return the screen settings to the default values. Press the MENU button to display the menu. Press the UP/DOWN button to select “Setup”, then press the ENTER button. -
Page 74: How To Dvi Select
PC D I S P L AY How to DVI Select Choose the right DVI signal for your computer. Press the MENU button to display the menu. Press the UP/DOWN button to select “Setup”, then press the ENTER button. Press the UP/DOWN buttons to select “PC Setup”, then press the ENTER... -
Page 75: How To Auto Adjust
PC D I S P L AY How to Auto Adjust Use the Auto Adjust function to have the TV set automatically adjust the video signals the monitor receives. The function also automatically fine-tunes the settings and adjusts the frequency values and positions. Press the MENU button to display the menu. -
Page 76: Chapter 6: Troubleshooting
R O U B L E S H O O T I N G If the TV seems to have a problem, first try this list of possible problems and solutions. If none of these troubleshooting tips apply, call your nearest Samsung service center. Identifying Problems... - Page 77 The TFT LCD panel uses a panel consisting of sub pixels (LTN325W - 2,949,120 / LTN406W - 2,949,120) which require sophisticated technology to produce. However, there may be few bright or dark pixels on the screen. These pixels will have no impact on the performance of the product.
-
Page 78: Appendix
P P E N D I X Installing Stand <A> Lower the TV set in the direction of the arrow (at a right angle) and fix the stand. Use the four screws to tightly fix the stand. Maintenance of Your LCD TV WARNING: To avoid risk of electric shock, do not disassemble the TV cabinet (except for gaining access to the cable connectors as described on Chapter 2). -
Page 79: Using The Anti-Theft Kensington Lock
P P E N D I X Using the Anti-Theft Kensington Lock Cable Figure 2 Figure 1 <Optional> The Kensington lock is a device used to physically fix the system when using it in a public place. The locking device has to be purchased separately. The appearance and locking method may differ from the illustration depending on the manufacturer. -
Page 80: How To Install The Wall Bracket
P P E N D I X How to Install the Wall Bracket Sold separately List of Contents Wall bracket 1 Wall bracket plate 2 Assembly hinges (Make sure they are a left /right pair.) How to Adjust the Angle of the Bracket Note: Please adjust the angle of the bracket to 0 degrees before you fix it to the wall. - Page 81 How to Attach the LCD TV to the Bracket The LCD TV in the picture may not look exactly like yours. (You assemble the plastic screw anchors and the screws the same way regardless of the model of your TV.) Assemble the plastic screw anchors and the screws.
-
Page 82: Pin Assignments
P P E N D I X Pin Assignments Pin DVI Connection Cleaning and Maintaining Your TV With proper care, your TV unit will give you many years of service. Please follow these guidelines to get the maximum performance from your TV. Placement •... -
Page 83: Specifications
-13 °F to 113 °F (-25 °C to 45 °C) 5% to 95% RCA Jack Red(R) White(L), 0.5Vrms (-9dB) 3.5ø Stereo Jack, 0.5Vrms (-9dB) Max. 10mW Output (3.5ø Stereo Jack 32) RF: 80Hz ~ 15kHz (at- 3dB) A/V: 80Hz ~ 20kHz (at - 3dB) LTN406W... -
Page 84: Display Modes
P P E N D I X Display Modes If the signal from the system equals the standard signal mode, the screen is adjusted automatically. If the signal from the system doesn’t equal the standard signal mode, adjust the mode by referring to your Videocard user guide; otherwise there may be no video.
Need help?
Do you have a question about the LTN406W and is the answer not in the manual?
Questions and answers