Advertisement
Advertisement
Table of Contents

Summary of Contents for Naish S26 Wing-Surfer
- Page 1 WING-SURFER USER MANUAL...
-
Page 2: Table Of Contents
TABLE OF CONTENTS RELEASES & AGREEMENTS ....................3 WARNING & SAFETY PRECAUTIONS ................4 INSTRUCTIONS Assembly Diagram ......................5 Inflating the Wing ......................6 Deflating the Wing......................7 Using the Paddle Holder ....................7 Removing the Y-Handles ....................7 Leading Edge Bladder Replacement ................8-9 Strut Bladder Replacement ................... -
Page 3: Releases & Agreements
To waive any and all claims that you have or may have in the future against Naish International, a division of Nalu Kai Incorporated, or any of its agents, resulting from use of this product and any of its components. -
Page 4: Warning & Safety Precautions
WARNING & SAFETY PRECAUTIONS . Wingfoiling can be a dangerous sport. . Always use extreme caution when using this product. . Misuse of this product can cause serious injury or death. . Never use this product unless you are in good physical health. . -
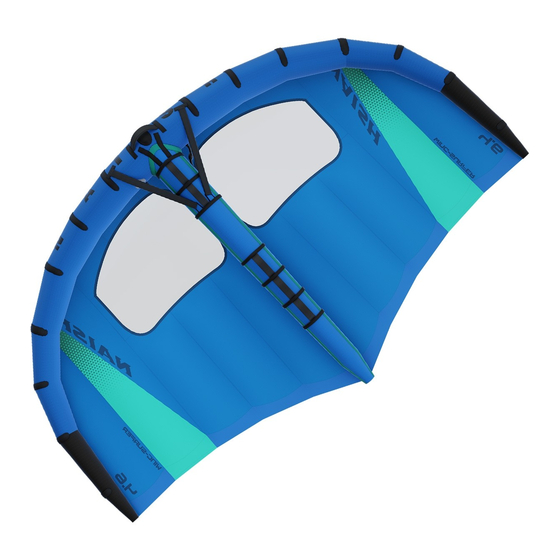
Page 5: Assembly Diagram
ASSEMBLY DIAGRAM A) Leading Edge One Point System: H) Y-handes F) Valve B) Zipper I) Sure Lock: Infl ate/Defl ate G) Hose C) Handles J) Window D) Pump/Wrist Leash Loop K) Strut E) Knuckle Cushion L) Bladder Lock ASSEMBLY DIAGRAM naish.com... -
Page 6: Inflating The Wing
E) Using a Naish pump with gauge, infl ate the wing to the recommended psi: sizes: 2.2/2.8/3.6: 8-10 psi, sizes: 4.6/5.3: 7-9 psi, sizes: 6.0/6.8 : 6-8 psi F) Remove pump nozzle from SureLock Valve and tighten the cap by turning it clockwise to the closed position. -
Page 7: Deflating The Wing
B) Open velcro C) Slide open end through the Y-handle loop on the leading edge D) Slide neoprene cover towards the open side E) Open velcro F) Slide open end through the Y-handle loop on the strut ASSEMBLY INSTRUCTIONS naish.com... -
Page 8: Leading Edge Bladder Replacement
LEADING EDGE BLADDER REPLACEMENT LEADING EDGE BLADDER REPLACEMENT... - Page 9 C) Push the valve down into the Leading Edge. This may take some effort - start in one corner and work your way around the entire valve. D) Use the wrench provided (in the spare parts kit located in the Naish Wing-Surfer bag) to loosen and remove the cap off of the inflation/deflation valve.
-
Page 10: Strut Bladder Replacement
STRUT BLADDER REPLACEMENT A) Slide the black locking collar away from the inflation/deflation valve and up the orange hose. B) Pull the orange hose off of the valve. This may take a bit of force, but is necessary to eliminate risk of unwanted detachment. -
Page 11: Size Selector
2.2 - 5 to 30+ knots 2.8 - 5 to 30 knots 3.6 - 5 to 25 knots 4.6 - 5 to 22 knots 5.3 - 5 to 20 knots 6.0 - 5 to 15 knots 6.8 - 5 to 12 knots SIZE SELECTOR naish.com... -
Page 12: Wing Care
WING CARE Do not leave your wing in direct sunlight or fluttering in the wind for long periods of time when not in use. Doing so may damage the canopy material. Do not leave your wing inflated on hot surfaces such as asphalt or sand for long periods of time. Doing so may damage the bladders. -
Page 13: Warranty Policy
The RAN number must be clearly labeled on the outside of the package or it will be refused. If a product is deemed to be defective by Naish, the warranty will cover the repair or replacement of the defective product only. Naish will not be responsible for any costs, losses or damages incurred as a result of loss of use of this product. - Page 14 Naish.com © 2020 Naish International, a division of Nalu Kai Incorporated...
Need help?
Do you have a question about the S26 Wing-Surfer and is the answer not in the manual?
Questions and answers