Advertisement
Quick Links
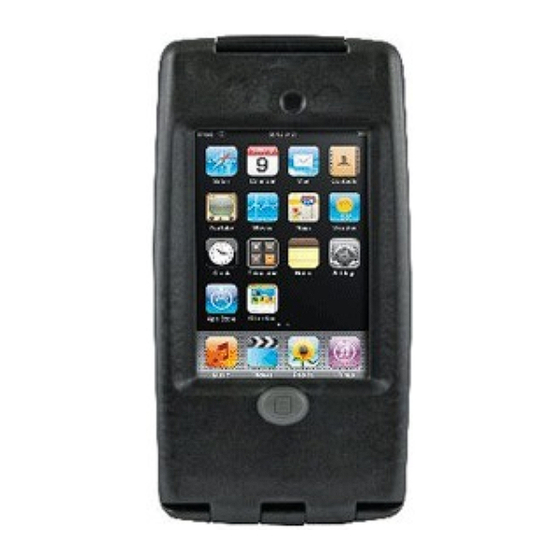
OtterBox Armor Series™ Instruction : Apple® iPod® touch™
Instructions Pour La Série OtterBox Armor™ : Apple® iPod® touch™
Instrucciones de la Serie OtterBox Armor™: Apple® iPod® touch™
For additional help visit www.otterbox.com or call 888.695.8820
Pour obtenir une aide supplémentaire, rendez-vous sur www.otterbox.com ou appelez le 888.695.8820
Para obtener ayuda adicional visite www.otterbox.com o llame al 888.695.8820
Note:
The OtterBox for iPod/iPhone cases are
designed for specifi c iPods/iPhones. Using
the incorrect iPod/iPhone in a case may
result in damage to the device.
Opening your OtterBox Case // Comment ouvrir votre boîtier OtterBox // Apertura de la funda OtterBox
Step 1/ Étape 1/ Paso 1
Step 2/ Étape 2/ Paso 2
Step 3/ Étape 3/ Paso 3
Installing Your iPod Into The Case // Comment Installer iPod dans le Boîtier // Instalación del iPod en la Funda
Step 4/ Étape 4/ Paso 4
Step 5/ Étape 5/ Paso 5
REMARQUE:
Les Boîtiers OtterBox Pour l'ipod/iPhone
Sont Conçus Pour Des Modèles d'ipods/
iPhones Spécifi ques. Utiliser Un Ipod/
iPhone Dans Un Boîtier Qui Ne Lui
Est Pas Destiné Peut Entraîner Des
Dommages À l'appareil.
Step 1
Open latch on back of case by
rotating away from the back of
the case.
Step 2
Open the case. Note, the case
does not fully open, this is to
help assure proper alignment
when installing.
Step 3
Remove the contents.
Step 4
Place the iPod into the back
half of the case with the
iPod screen lined up with the
screen on the case. Align
the headphone jack with the
headphone plug then press the
iPod into the case.
Step 5
Close the lid of the case and
refasten the latch by reversing
the process from step 1.
NOTA:
Las fundas OtterBox para iPod/iPhone
están diseñadas para ipods/iPhones
específi cos. si se usa el ipod/iPhone
incorrecto en una funda puede dañarse
el dispositivo.
Étape 1
Ouvrez le loquet à l'arrière du
boîtier en le faisant tourner
vers l'extérieur de l'arrière
du boîtier.
Étape 2
Ouvrez le boîtier. Prenez note
que le boîtier n'ouvre pas
complètement. Cela permet
d'assurer que les moitiés sont
bien l'une vis-à-vis de l'autre
lors de l'installation.
Étape 3
Retirez tout le contenu.
Étape 4
Placez l'iPod dans la moitié
arrière du boîtier de manière à
ce que l'écran de l'iPod soit vis-
à-vis de l'écran sur le boîtier
Placez la prise d'écouteur
vis-à-vis de la fi che d'écouteur,
puis appuyez sur l'iPod pour le
faire entrer dans le boîtier.
Étape 5
Refermez le couvercle du
boîtier et enclenchez le loquet
en inversant le processus de
l'étape 1.
Paso 1
Abra el pestillo girándolo en
sentido opuesto a la parte
posterior del estuche.
Paso 2
Abra el estuche. Tenga presente
que el estuche no se abre
plenamente a fi n de garantizar
el alineamiento correcto durante
la instalación.
Paso 3
Retire el contenido.
Paso 4
Coloque el iPod en la mitad
posterior del estuche con
su pantalla alineada con la
pantalla del estuche. Alinee
la toma para auricular con el
conector correspondiente y
luego presione el iPod para
introducirlo en el estuche.
Paso 5
Cierre la tapa del estuche y
vuelva a afi anzar el pestillo
invirtiendo el proceso del
Paso 1.
Advertisement

Summary of Contents for OtterBox Armor Series
- Page 1 Est Pas Destiné Peut Entraîner Des el dispositivo. Dommages À l’appareil. Opening your OtterBox Case // Comment ouvrir votre boîtier OtterBox // Apertura de la funda OtterBox Step 1 Étape 1 Paso 1 Open latch on back of case by Ouvrez le loquet à...
- Page 2 OtterBox cannot be held liable for damages to remplacera seulement le boîtier. OtterBox ne pourra pas del período de vigencia de la garantía. OtterBox no se personal property due to misuse or improper care être tenue pour responsable de dommages subis par responsabiliza por daños a la propiedad personal debido...

Need help?
Do you have a question about the Armor Series and is the answer not in the manual?
Questions and answers