
Summary of Contents for HobbyPCB RS-HFIQ
- Page 1 RS-HFIQ Quick Start Instructions Quick Start Instructions Jim Veatch WA2EUJ 3 May 2018...
-
Page 2: Table Of Contents
SIGNAL FLOW ........................2 PREPARE YOUR COMPUTER ..................... 3 PLAN YOUR STATION......................6 INVENTORY .......................... 8 CONNECTING THE RS-HFIQ .................... 10 CONNECTING THE STARTECH USB SOUND CARD ........... 12 CONNECTING THE PYLE USB MICROPHONE ............. 17 CONNECTING THE ADAFRUIT USB SPEAKER ............18 10. -
Page 3: Introduction
Terminology The Radio – AKA the HobbyPCB RS-HFIQ. During receive, it is used to convert a portion of the RF spectrum from a radio frequency to two audio frequency channels (I and Q) centered around 0 Hz. During transmit, the radio translates two audio frequency signals (I and Q) to the selected RF frequency. -
Page 4: Signal Flow
2. SIGNAL FLOW In a ‘normal’ radio the designers have taken care of the entire signal routing for you. With the RS-HFIQ the processing is distributed between the radio, the soundcard and the computer. Let’s have a look at how the signals flow through our SDR:... -
Page 5: Prepare Your Computer
3. PREPARE YOUR COMPUTER Your computer is one of the biggest variables in this installation process. Please complete the following steps to ensure that everything is up to date before installing any hardware or software from the RS-HFIQ Starter Kit. Click on in the lower left corner of the screen. - Page 6 Click "Yes" on the pop-up to allow administrator access and in the window that appears, type “set devmgr_show_nonpresent_devices=1" – without the quotes, and press ‘Enter’ Then type “start devmgmt.msc” and press ‘Enter’ to start the Device Manager. Close the Command Prompt window. Click on ‘View’...
- Page 7 I am going to stress again how integral the computer is to this radio system. If you plan to make frequent hardware and software changes to the computer that is connected to the RS-HFIQ and runs HDSDR software, you should be very familiar with these setup procedures because you will have to perform them often.
-
Page 8: Plan Your Station
USB hub included with will only be able to use the radio and sound card to the USB hub included with the RS-HFIQ Starter Kit. A single USB 2.0 port does not have the necessary bandwidth to support the sound Starter Kit. - Page 9 Think of it this way; if you opened the top of a big-box radio, (think Kenwood, Icom, Yaesu, Elecraft, etc) and you found several identical plugs and you unplugged them and swapped them around, would you expect the radio to function? Of course not. The RS-HFIQ Starter Kit includes a set of stickers so you can label the USB ports for the radio components.
-
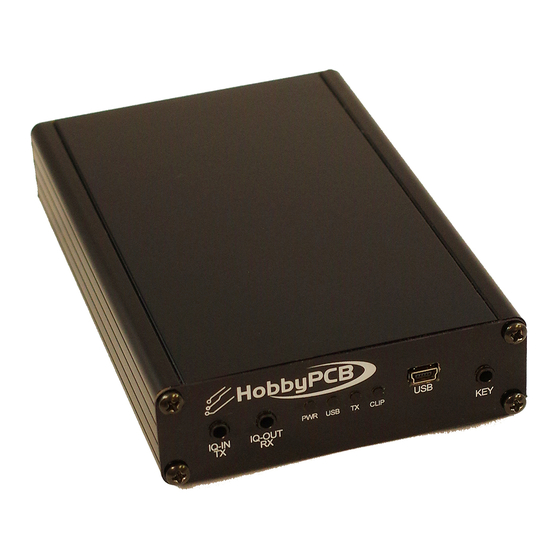
Page 10: Inventory
INVENTORY The follow items should be included with your RS-HFI HFIQ Starter Kit: RS-HFIQ Radio • StarTech ICUSBAUDIO2D USB Soundcard • Power supply, 13.5V 5A • Pyle-Pro PDMICUSB6 USB recording microphone Pro PDMICUSB6 USB recording microphone • - 8 -... - Page 11 Adafruit 3369 USB Speaker • Four Port USB hub with power switched, with AC power supply • and USB3.0 cable Two Audio Cables, 3.5mm male-to-male 6” • USB Cable 3’, Right Angle • Thumb Drive with software, reference material and utilities and a •...
-
Page 12: Connecting The Rs-Hfiq
Connect the USB hub to the computer. Connect the RS-HFIQ to the USB hub using the USB cable from the starter kit and turn on the associated port power switch. HFIQ to the USB hub using the USB cable from the starter kit and turn on the associated port power switch. - Page 13 If you get a message stating that Windows cannot find the correct driver, insert the software thumb drive, open the CH340 DRIVER folder and double-click Once the driver is installed you can find out which COM port the RS-HFIQ FINDER program. In the software thumb drive , open the UTILITIES folder and double-click After several seconds you’ll get the port number of the RS-HFIQ, jot it down somewhere, we’ll need it later.
-
Page 14: Connecting The Startech Usb Sound Card
7. CONNECTING THE STARTECH USB SOUND CARD The StarTech USB sound card should also be a ‘driverless’ install with Windows 7, 8 or 10. The software thumb drive has a STARTECH folder with driver and technical data if necessary. Before connecting the StarTech soundcard, turn the volume control all the way up (fully clockwise) and set the EQ switch in the center or ‘DIRECT’... - Page 15 Plug the USB cable from the StarTech into an available port on the USB on the hub and turn on the power switch associated with that port. You will see a device install message. If you click on the message another window will open, which after searching for drivers for a few minutes will ask you to reboot your computer.
- Page 16 Under no circumstances should the sound device attached to the RS-HFIQ be the default sound device. You MUST select some other recording device and set it as default by single-clicking on device and selecting “Set Default: at the bottom of the panel.
- Page 17 You will now be back at the Windows Sound Panel so click on ‘Playback’ and you see that the StarTech Speakers are set as the default playback device. Under no circumstances should the sound device attached to the RS-HFIQ be the default sound device. You MUST select some other sound device and set it as default by single-clicking on device and selecting “Set Default: at the bottom of the panel.
- Page 18 When the another device has been set as the default recording device, single click on the StarTech (USB Audio Device) and select properties then click on the ‘Levels’ tab. Make sure that the microphone is muted and slide the ‘Speakers’ slider all the way to the right. Click on ‘OK’...
-
Page 19: Connecting The Pyle Usb Microphone
8. CONNECTING THE PYLE USB MICROPHONE The Pyle USB microphone is equipped with a desk stand and a USB cable. Place the microphone in a convenient location and connect the Pyle microphone to an open USB slot on the computer. If your USB hub is plugged into a USB2.0 jack on the computer, DO NOT plug the Pyle USB microphone into the USB hub where the StarTech is connected. -
Page 20: Connecting The Adafruit Usb Speaker
9. CONNECTING THE ADAFRUIT USB SPEAKER The Adafruit USB speaker receives power and audio via a single USB connection. If your USB hub is plugged into a USB2.0 jack on the computer, DO NOT plug the Adafruit USB speaker into the USB hub where the StarTech is connected. -
Page 21: Hardware Installation Summary
• The StarTech headphone output (Speakers, USB Audio Device) are the I and Q signals that drive the transmitter in the RS-HFIQ Depending on the other sound devices installed in your computer the list you see may be different from the list above, but the Adafruit USB Speakers and StarTech Speakers will be present. - Page 22 SDR system. • The StarTech Microphone Input (Microphone, USB Audio Device) is connected to the I and Q output of the RS-HFIQ’s receiver. • The Pyle USB Microphone (USB PnP Audio Device), is the microphone you will use to transmit during voice mode transmissions.
-
Page 23: Installing The Hdsdr Software
INSTALLING THE HDSDR SOFTWARE Insert the software thumb drive into an available USB port. Navigate to the HDSDR folder on the thumb drive and double-click on HDSDR_Install. Click ‘Yes’ to allow the software to install. After thoroughly reviewing the freeware license, click ‘I agree to the agreement’ then click ‘NEXT’. Leave the default installation folder unchanged and click ‘NEXT’. -
Page 24: Installing The Omni-Rig Software
‘computer’ then click on the computer icon to open another file explorer window. Double-click • Local Disk (C:) • Programs Files (x86) folder Afreet folder • • OmniRig folder • Rigs folder Drag and Drop the HR-50 and RS-HFIQ files from the thumb-drive OmniRig folder into the Rigs folder. - 22 -... - Page 25 Make the following changes to the default settings: Click on ‘OK’ to close the Omni-Rig Settings window. You can run the RS-HFIQ FINDER program on the software thumb drive in the UTILITIES folder if you don’t know which COM port the RS- HFIQ is on.
-
Page 26: Installing Extio_Si570.Dll
HDSDR are not actually part of the RS-HFIQ operational software. There only function is to enable transmit in HDSDR. If you click on in HDSDR you will get an error because there is no Si570 present. The RS-HFIQ uses the more advanced Si5351. - Page 27 Drag and Drop the ExtIO_Si570.DLL and libusb0.dll files from the thumb-drive EXTIO_SI570 folder into the HDSDR folder. - 25 -...
-
Page 28: Configuring The Hdsdr Software
CONFIGURING THE HDSDR SOFTWARE Double-click on the HDSDR icon to start the program. If the software is running click on at the bottom left part of the screen. Click Options > Misc Options > Autostart so that the SDR does not automatically run when the program is started. Click Options >... - Page 29 Click Options > Misc Options > set LO <-> Tune Offset, in the window that opens, enter 0 (zero) then click ‘OK’ Click Options > Misc Options > Tune fixed to ‘LO <-> Tune Offset’ Click Options > CAT to Radio (Omni-Rig) > sync Rig1 (inactive) - 27 -...
- Page 30 Click Options > TX > SDR TX Support, then click ‘Yes’ on the ‘are you sure?’ window. This will open the Sound Card Selection window: Depending on how many sound devices are present in your computer the numbers associated with a particular device might be different. Do not make selections based on the numbers, make selections based on the name.
- Page 31 Click ‘OK’ to close the window. Click to bring up the Sampling Rate window. Select 96000 for the input and 12000 for the output. Click in the ‘X’ in the upper right to close the window. Click Optione > TX > Enable TX Button for Omni-Rig 1. HDSDR is now fully configured and ready to operate.
-
Page 32: Basic Operation
BASIC OPERATION In this screenshot, the RS-HFIQ is tuned to 28,300 kHz, USB mode, and is connected to a signal generator which is generating a 28,301 kHz signal at -110 dBm. The upper half of the display shows the RF spectrum, everything that’s happening on the band. The maximum width is determined by the sampling rate of the sound card, 96 kHz in this case. - Page 33 Remember that the RS Remember that the RS-HFIQ can only tune from 3 to 30 MHz. Requests for frequencies outside HFIQ can only tune from 3 to 30 MHz. Requests for frequencies outside this range are ignored.
- Page 34 Mode Selection Select the operating mode by clicking on one of the mode buttons. The Quick Start guide is focused on operating in USB or LSB modes. For operating in CW you must enter a LO to Tuned Frequency offset that is equal to the CW pitch setting (700 Hz by default).
-
Page 35: Calibrating The S-Meter
CALIBRATING THE S CALIBRATING THE S-METER We can use the RS-HFIQ’s built-in test (BIT) oscillator to calibrate HDSDR’s S meter. The front in test (BIT) oscillator to calibrate HDSDR’s S meter. The front-end gain of the RS end gain of the RS-HFIQ changes from band to... - Page 36 62 in the ‘Correct Level [dBm] box then click the ‘Calculate’ button followed by ‘OK’ to exit. Return to the RS-HFIQ Control Panel and click on ‘BIT OFF’ to stop the test signal. HFIQ Control Panel and click on ‘BIT OFF’ to stop the test signal.
Need help?
Do you have a question about the RS-HFIQ and is the answer not in the manual?
Questions and answers