
Related Manuals for Trinity Amps TC15

Summary of Contents for Trinity Amps TC15
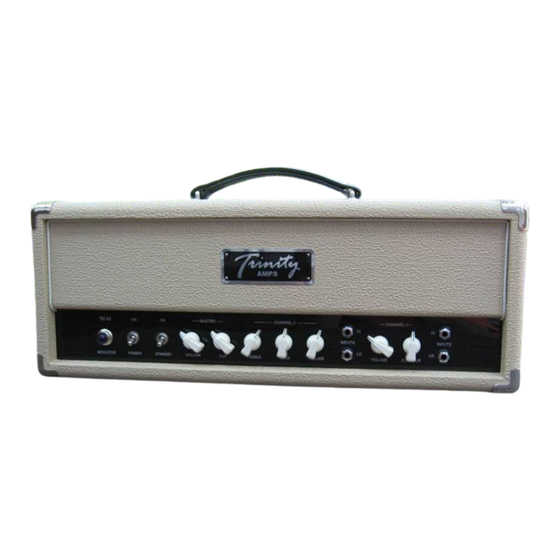
- Page 1 The Trinity Amps TC15 Amp Builder's Guide February 2021, Version 21.2 For the sole personal use of Trinity Amps Customers. Parts © Trinity Amps 2005 - 2021 www.trinityamps.com...
-
Page 3: Table Of Contents
Table of Contents Thank You! ............................... 5 Introduction ..............................7 Acknowledgements ............................7 WARNING ............................... 8 Version Control ..............................9 Builders Guide General Theory ....................... 10 Building an Amp ............................11 Introduction ..............................11 Switches and wire ............................11 Physical layout ............................... 11 Grounding .............................. - Page 4 Drain ............................... 49 Test ................................49 Close ................................ 49 Making a Voltage Measurement ......................... 50 Trinity TC15 Voltages (Black Turret Board) ..................52 WARNING ..............................53 Read this Information Carefully ......................53 Builders Guide General Troubleshooting .................... 53 TC15 Tone Tweaking ..........................53 Tube Substitutions ............................
-
Page 5: Thank You
Thank You! Thank you for purchasing your kit from Trinity Amps. We truly hope that you enjoy building it. If you have any questions please do not hesitate to contact us. We are always looking for feedback form our Customers on our products. We have checked the build instructions over thoroughly and are confident in our product. -
Page 7: Introduction
Introduction This guide has been prepared for builders of Trinity Amps Kits. It is always being improved and we would appreciate your feedback and comments to: stephen@trinityamps.com Accordingly, content and specifications are subject to change without notice. We do try to make it as accurate as possible, but it is sometimes hard to keep up with the changes. -
Page 8: Warning
While efforts are made to ensure accuracy of these circuits, no guarantee is provided, of any kind! USE AT YOUR OWN RISK: TRINITY AMPS EXPRESSLY DISCLAIMS ALL LIABILITY FOR INJURY OR PROPERTY DAMAGE RESULTING FROM THIS INFORMATION! ALL INFORMATION IS PROVIDED 'AS-IS' AND WITHOUT WARRANTY OF ANY KIND. -
Page 9: Version Control
Power Transformer Primary wiring. 13May19 Updated BOM 26Jun19 240V PT layout corrected for indicator lamp (O. Ziv) 11Feb20 Updated BOM 21.1 24Feb21 `Updated Version 21.2 8Mar21 Corrected Rectifier wiring colours Trinity Amps TC15 Builder’s Guide. Version 3.5 Page - 9... - Page 10 Trinity Amps TC15 Builder’s Guide. Version 3.5 Page - 10...
-
Page 11: Builders Guide General Theory
(1) Connect the power transformer center tap directly to the negative terminal of the first power supply filter capacitor (cap) then run a separate wire from the negative terminal to the star ground point. Trinity Amps TC15 Builder’s Guide. Version 3.5 Page - 11... -
Page 12: Insulated Jacks
1. 25 watt pencil tip soldering iron. (Minimum for ROHS) 2. 60/40 rosin core solder .030” dia (lead-free 97/3 tin/copper for ROHS turrets) 3. wire stripper 4. wire cutter 5. needle nose pliers Trinity Amps TC15 Builder’s Guide. Version 3.5 Page - 12... -
Page 13: Soldering
Note that there is a gap between pins 1 and 9. The pins on an 8-pin tube socket are numbered 1 to 8 in a clockwise direction when viewed from the bottom. Note that there is a gap between pins 1 and 8. Trinity Amps TC15 Builder’s Guide. Version 3.5 Page - 13... -
Page 14: Tube Designations
6L6GC. Sometimes these letters mean functionally nothing (design revisions) and sometimes they refer to different voltage capabilities of a given type. NORTH AMERICA EUROPE 12AX7 ECC83 6BQ5 EL84 6CA4 EZ81 Trinity Amps TC15 Builder’s Guide. Version 3.5 Page - 14... -
Page 15: Grounding Scheme
Wire up Impedance Switch and Output Jacks Wire input jacks and shielded cable. Check Wiring. Follow Start-Up procedure. Soon Follow Pictorial on Forum – Resource Section – Topic: “TC15 Pictorial Build” Trinity Amps TC15 Builder’s Guide. Version 3.5 Page - 15... -
Page 16: Install The Hardware
4 for power transformer (optionally remove Heyboer PT nuts as supplied); 2 for Output transformer; and 1 for mains ground bolt. 10-32 X 1- ” Mount chassis to cabinet. Use cage nuts in square holes pressed into chassis. Trinity Amps TC15 Builder’s Guide. Version 3.5 Page - 16... - Page 17 Trinity Amps TC15 Builder’s Guide. Version 3.5 Page - 17...
-
Page 18: Tube Sockets
2 tag terminal strip (not including 1 ground tag) for the two 68K grid stopper input resistors on V1; 2 tag terminal strip (not including 1 ground tag) for the two 68K grid stopper input resistors on V2 Trinity Amps TC15 Builder’s Guide. Version 3.5 Page - 18... -
Page 19: Ground Lugs
2 - #4 preamp chassis ground lugs using 1 #4 bolt & KEPS nut Impedance Selector Install the Impedance Selector paying particular attention to the leads orientation for the correct impedance selection. Refer to the diagram below for the connections. Trinity Amps TC15 Builder’s Guide. Version 3.5 Page - 19... -
Page 20: Output Jacks
Nuts are not required. Fuse Holder - Orient the Fuse holder socket so that the center lug points away from the IEC socket. Fasten in place with the nut and washer provided. Trinity Amps TC15 Builder’s Guide. Version 3.5 Page - 20... -
Page 21: Heater Wiring
5. Do one tube socket at a time. Complete the 12AX7s using the same process. Red on pins 4 & 5 tied together and black on pins 9. Don’t switch the heater wire polarity. Trinity Amps TC15 Builder’s Guide. Version 3.5 Page - 21... -
Page 22: Install Transformers
North American in Series mains voltages and for 240 mains. 110, 220, 230 mains voltages are also supported. See Appendix for connection diagrams. Trinity Amps Power Transformer 120 VAC Connection Trinity Amps TC15 Builder’s Guide. Version 3.5 Page - 22... - Page 23 North America Green [USA-plug round prong] Black [Small White [Large flat flat prong] prong] European 240V Green/White or Green/Yellow It makes no difference how the other two wires are matched. Trinity Amps TC15 Builder’s Guide. Version 3.5 Page - 23...
- Page 24 Power switch terminals. The other side of the IEC connector or ‘Neutral (N)’ gets routed to a tag on the terminal strip and then to the ‘Common’ point of the power transformer. Trinity Amps TC15 Builder’s Guide. Version 3.5 Page - 24...
-
Page 25: 120V Mains
‘Common’ terminal on the 5-Lug terminal strip. Twist all wires together and then solder the wires in place on the power switch lugs, indicator and terminal strip tags. Trinity Amps TC15 Builder’s Guide. Version 3.5 Page - 25... -
Page 26: 240V Mains
120V neon indicator light. Ensure you twist all wires together and then solder the wires in place on the power switch lugs, indicator and terminal strip tags. Trinity Amps TC15 Builder’s Guide. Version 3.5 Page - 26... -
Page 27: Wiring The Rectifier
ON in either ‘Up’ or ‘Down’ position. Install a 3-lug terminal strip beside the can cap clamp and then a 1K5, 5W power resistor between the two outside lug terminals. Follow the layout Trinity Amps TC15 Builder’s Guide. Version 3.5 Page - 27... - Page 28 The layout drawing shows dotted green and dotted red wires from PT as well as the ground wire from the capacitor bank on the board being grounded together. This is one star ground. Trinity Amps TC15 Builder’s Guide. Version 3.5 Page - 28...
-
Page 29: Test The Power Supply
6.3 VAC across pins 4 – 5 of the EL84 sockets (V5, V6) 6.3 VAC across pins 4,5 – 9 of the 12AX7 sockets (V1, V2, V3, V4) These should all correspond approximately to the label on the Transformer. Trinity Amps TC15 Builder’s Guide. Version 3.5 Page - 29... -
Page 30: Assemble The Turret Board
5. Assemble the Turret Board If you do not have a pre-built Trinity amps turret board, now is the time to build it. NOTE: Check to see if your board is labeled as an ROHS board or not. First, install jumper wires on the underside of the board. Follow the pictures below. - Page 31 Continuously check the location, the part, orientation and value of each component as you install it. When completed, check against the layout, and then check continuity between parts and jumpers. Trinity Amps TC15 Builder’s Guide. Version 3.5 Page - 31...
- Page 32 25uF ] 1K5 1/2W CC brown-green-red ] 2K2 1/2W CC red-red-red ] 25uF 50V ] .1uF 630V 25uF ] 330K 1W CF orange-orange-yellow .1uF ] 2M2 1W CF red-red-green 330K Trinity Amps TC15 Builder’s Guide. Version 3.5 Page - 32...
-
Page 33: Install The Turret Board
#6 lock nuts. Install the turret board on the spacers and tighten in place with #6 KEPS nuts. Trinity Amps TC15 Builder’s Guide. Version 3.5 Page - 33... -
Page 34: Connecting The Turret Board
After installing the turret board on it mounting stand-offs, strip about 1/2” / 10 mm off one end and push it into the top of the turret so it touches the component lead. Then solder it well in place at the turret end only. Trinity Amps TC15 Builder’s Guide. Version 3.5 Page - 34... - Page 35 Solder it well in place. Trim off any excess wire. Note: This procedure requires more soldering skill and may be more difficult to achieve than the previous methods. Trinity Amps TC15 Builder’s Guide. Version 3.5 Page - 35...
-
Page 36: Socket Mounted Resistors
Cut a piece of wire to fit between both tags. Strip ½” / 10 mm of each end, make a hook and hook it onto the tags. Now, solder in place at both ends. Trinity Amps TC15 Builder’s Guide. Version 3.5 Page - 36... -
Page 37: Connecting Controls - Potentiometers
Squeeze the hook with a pair of needle nose pliers so that it is mechanically tight to the pin and solder it well in place. Trim off any excess wire. Trinity Amps TC15 Builder’s Guide. Version 3.5 Page - 37... -
Page 38: Tc15 Tone Contour Wiring
6 for a 6 position switch. Confirm it is set correctly. There should be 5 clicks/6 positions when set correctly. Replace the nut & washer. Trinity Amps TC15 Builder’s Guide. Version 3.5 Page - 38... - Page 39 7 soldering at all the terminals. Connect a lead that will reach the 330K on board resistor that is connected to EF86 pin 6. Install the assembly onto the chassis Trinity Amps TC15 Builder’s Guide. Version 3.5 Page - 39...
-
Page 40: Master Volume Switch - Master Cut
Master Volume Switch – Master Cut The TC15 has an optional Master Volume (Pull to Engage. Push to Disengage). It also has a Master Cut Control. The wire from one 1K5 (V5) on board resistor goes to the wiper / centre lug of the Master Volume control and a .0047uF cut cap goes from the to the two left control lugs on the Master Cut control. - Page 41 Keep all Blue wires on one side, and Brown on the other. This will eliminate squeal. Refer to the Output Transformer schematic below and wire up the output impedance selector paying particular attention to the leads for the correct impedance. Trinity Amps TC15 Builder’s Guide. Version 3.5 Page - 41...
-
Page 42: Connecting The Impedance Selector
Referring to the Output Transformer schematic, wire up the Impedance Selector to the transformers and output jacks paying particular attention to the leads for the correct impedance. Refer to the diagram below for the connections. Trinity Amps TC15 Builder’s Guide. Version 3.5 Page - 42... - Page 43 Trinity Amps TC15 Builder’s Guide. Version 3.5 Page - 43...
-
Page 44: Output Jacks
The Tip connection is at the very end of the plug and is normally ‘positive’ polarity. This is sometimes referred to as the ‘Hot’ side. The other part of the plug is typically ground or ‘common’. Trinity Amps TC15 Builder’s Guide. Version 3.5 Page - 44... -
Page 45: Input - Jacks And Input Grid Resistors
Strip a 3” / 75mm solid wire and then bend 1” / 20mm at about 45 degrees. Install it through all 4 ground terminals closest to the front while feeding it into the lower, top- tip terminal. This is the Input Ground bus. Trinity Amps TC15 Builder’s Guide. Version 3.5 Page - 45... -
Page 46: Combo Chassis Cliff Jack Wiring
Important Note: Combo Chassis Cliff Jack Wiring is different on channel 2 simply because the channel 2 jacks are reversed in order to avoid the mounting screw. For channel 2, follow the Combo Chassis Cliff Jack Wiring layout below. Trinity Amps TC15 Builder’s Guide. Version 3.5 Page - 46... -
Page 47: Preparing Co-Axial Wire
Use RG-174U shielded wire from the input jacks to the tube. The co-axial shield / ground wires on the input jacks go to the pre-amp ground along with the turret board ground at the pre-amp end. Trinity Amps TC15 Builder’s Guide. Version 3.5 Page - 47... -
Page 48: Final Checkout
All readings should be less than 1 ohm, typically 0.5 ohms. Grounding is very important and often one connection is missed. Check thoroughly. Make sure the #8 Mains Ground at the chassis and #6 Power Ground are very tight. Trinity Amps TC15 Builder’s Guide. Version 3.5 Page - 48... -
Page 49: Power Up
For vacuum tube electronics we can usually ignore the high current mode. Put your test leads into the COM and V(ohm)mA jacks and leave them there. Trinity Amps TC15 Builder’s Guide. Version 3.5 Page - 49... -
Page 50: Making A Voltage Measurement
Check the B+ voltage at the first filter cap terminal before the 1.5K 5W filter resistor. Measure from the filter cap terminal with the positive or Red lead, to Chassis ground with negative or Black lead. Trinity Amps TC15 Builder’s Guide. Version 3.5 Page - 50... - Page 51 Hopefully, there are no problems but if you think there are e.g. hum, squeal etc., then move on to the troubleshooting section of this manual. Trinity Amps TC15 Builder’s Guide. Version 3.5 Page - 51...
-
Page 52: Trinity Tc15 Voltages (Black Turret Board)
TUBE Pin 1 Pin 2 Pin 3 Pin 4 Pin 5 Pin 6 Pin 7 Pin 8 Pin 9 (EF86) 1.46 1.46 (12AX7/ECC83) (12AX7/ECC83) V4 (PI) (12AX7/ECC83) (EL84) (EL84) (5AR4) Trinity Amps TC15 Builder’s Guide. Version 3.5 Page - 52... -
Page 53: Warning
While efforts are made to ensure accuracy of these circuits, no guarantee is provided, of any kind! USE AT YOUR OWN RISK: TRINITY AMPS EXPRESSLY DISCLAIMS ALL LIABILITY FOR INJURY OR PROPERTY DAMAGE RESULTING FROM THIS INFORMATION! ALL INFORMATION IS PROVIDED 'AS-IS' AND WITHOUT WARRANTY OF ANY KIND. - Page 54 • Replace the 1M volume pot with a 500k. The non-EF86 side of the DC30 and the AC30 use 500k volume pots, while the TC15 was designed with 1M to add to it's in-your-face-ness. The 500k gives another 20% of travel with a strat before breaking up. It's still plenty touch sensitive when you push into it, but you get some more headroom.
- Page 55 MV. The trick is to double the value of the grid reference (aka "grid leak") resistors and to use a dual-gang pot also of double the value of the original grid reference resistors. For a TC15 or other typical Vox/Matchless amp you could use a 500k dual-ganged pot with 470k resistors on the tube grids, effectively giving 242k, which isn't significantly higher than the original 220k.
- Page 56 Trinity Amps TC15 Builder’s Guide. Version 3.5 Page - 56...
-
Page 57: Tube Substitutions
6BQ5/EL84 (miniature pentode with pin out 9CV) 6267 7189 EF86 6BQ5 7189A EL84 6BQ5WA 7320 N709 6P15 E84L Z729 * means appropriate for parallel filament circuits # means may not work in all circuits Trinity Amps TC15 Builder’s Guide. Version 3.5 Page - 57... -
Page 58: How To Read Resistor Color Codes
They have a different temperature coefficient in order to provide the 1% tolerance. At 1%, most error is in the temperature coefficient - i.e. 20ppm. Trinity Amps TC15 Builder’s Guide. Version 3.5 Page - 58... -
Page 59: How To Read Capacitor Codes
Most kit builders don't need to go further but there is sometimes a tolerance code given by a single letter. So a 102K is a 1,000 pF with +/-10% tolerance Trinity Amps TC15 Builder’s Guide. Version 3.5 Page - 59... - Page 60 .002 2200 .0022 4700 .0047 5000 .005 10000 12000 .012 20000 22000 .022 100000 680000 Table 2 Letter tolerance code Letter symbol Tolerance of capacitor 0.05% P +100% Z +80% Trinity Amps TC15 Builder’s Guide. Version 3.5 Page - 60...
-
Page 61: Faq
Q: Where can I find more help and support? A: Sign up at the Trinity Amps Forum and check the “Resources” section or post a question in the Lightning Strikes, TC15 forums. Q: What does B+ stand for A: B+ stands for Battery Plus == B+ and came from the old days of tubes. B+ is measured at the intersection of the rectifier DC output and the first filter cap. - Page 62 TIP: More, larger format, colour pictures and the schematic & layout that are helpful in the build are posted on the Trinity Forum & TC15 forum. Right click on them to download if you want print in large, colour format.
- Page 63 Solid wire stays in place better once it's positioned and a bit easier to feed through holes. If they aren't well twisted make sure they are tight against the chassis. You can use 22 ga solid for heaters. It is rated for more than 5A anyway. Trinity Amps TC15 Builder’s Guide. Version 3.5 Page - 63...
-
Page 64: Cliff Jacks Explained
You should get continuity between the tip and chassis with nothing plugged in because of the shorting jack and the cross over wire. From 18W Forum – loverocker & ebe Trinity Amps TC15 Builder’s Guide. Version 3.5 Page - 64... -
Page 65: Tc15 - Bill Of Materials (Bom)
TC15 - BILL OF MATERIALS (BOM) DESCRIPTION CHECK TC15 KIT WITH TRANSFORMER SET, CHASSIS, PANEL TC15 RESISTORS METAL OXIDE RESISTORS 100 OHMS 2W 5% TOL WIREWOUND RESISTORS - THROUGH HOLE 150 OHMS 5% TOL CARBON COMPOSITION RESISTORS 1.2KOHMS 5% CARBON COMPOSITION RESISTORS 1.5K OHM 5% WIREWOUND RESISTORS - THROUGH HOLE 1.5K OHMS 5% TOL... - Page 66 MACHINE SCREW PHILLIPS PAN HEAD 6-32X3/8 L HEX NUT EXT TOOTH LOCKWASHER 6-32 INTERNAL TOOTH LOCK WASHER #6 CHROME STANDOFFS & SPACERS .375 STD SPACER TERMINALS TERMINALS LUG LOCKING MATTE TINNED#6 Trinity Amps TC15 Builder’s Guide. Version 3.5 Page - 66...
- Page 67 TRANSFORMER OUTPUT 8K/5K Some of the parts contained in this kit are subject to availability. Trinity Amps Inc. reserves the right to change or substitute any and all of the parts contained in this amplifier kit without notification. Part substitutions made by Trinity Amps are guaranteed not to affect the integrity or operation of your amplifier kit.
-
Page 68: Tc15 - Power Transformer Schematics
TC15 – POWER TRANSFORMER SCHEMATICS Trinity Amps TC15 Builder’s Guide. Version 3.5 Page - 68... - Page 69 Trinity Amps TC15 Builder’s Guide. Version 3.5 Page - 69...
-
Page 70: Trinity Amps Schematics And Layouts
Trinity Amps Schematics and Layouts Trinity Amps TC15 Builder’s Guide. Version 3.5 Page - 70...
Need help?
Do you have a question about the TC15 and is the answer not in the manual?
Questions and answers