Table of Contents
Advertisement
Covaris
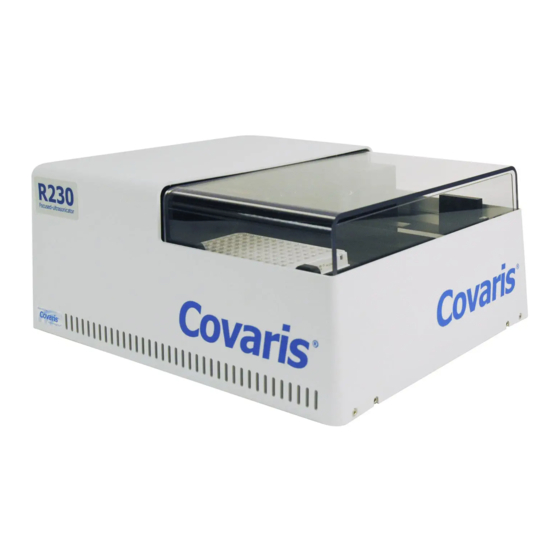
R230 Focused-ultrasonicator
Setup & Instruction Manual
Instrument and Software Developed for High-performance Sample Preparation
using Adaptive Focused Acoustics
(AFA
) Energy
®
®
For Research Only
Product Name: Revolution | Model Numbers: R230 | Software: SonoLab 10
R230 Setup & Instruction Manual
Part Number: 010480 Rev C | August 2020
Advertisement
Table of Contents

Summary of Contents for Covaris R230
- Page 1 Instrument and Software Developed for High-performance Sample Preparation using Adaptive Focused Acoustics (AFA ) Energy ® ® For Research Only Product Name: Revolution | Model Numbers: R230 | Software: SonoLab 10 R230 Setup & Instruction Manual Part Number: 010480 Rev C | August 2020...
- Page 2 Registered names and trademarks used in this document, even when not specifically marked as such, are not to be considered unprotected by law. WCS and AFA are either registered trademarks or trademarks of Covaris, Inc. in the United States and/or other countries. Teflon is a registered trademark of The DuPont Company.
- Page 3 • DO NOT run an acoustic treatment with the sample cover in the OPEN position or without a water bath - the acoustic system will not work. • If there is any indication that the Safety System is not functioning properly, DO NOT operate the equipment and contact Covaris immediately.
- Page 4 The customer is expected to perform basic diagnostics and component replacement via telephone support from Covaris personnel. If Covaris personnel are required to perform on-site repair, all travel related costs are paid by the customer. A limited warranty as specified may apply to certain components of the equipment.
-
Page 5: Table Of Contents
Table of Contents 1. Introduction ...................................... 6 1.1. Overview of the User Manual ............................6 1.2. The R230 Instrument and the Covaris Process ......................6 2. Unpacking and Setup ..................................7 2.1. Unpack and Identify Components & Accessories......................7 2.2. -
Page 6: Introduction
The Covaris Process uses adaptive focused acoustic energy to precisely control cavitation and acoustic streaming within the sample treatment vessel in a non-contact, isothermal fashion. Focused acoustic energy is generated and delivered to individual samples. The mechanical energy imparted on the sample results in a controlled series of compression and rarefaction events. -
Page 7: Unpacking And Setup
The following items are included in the packaging found with the instrument: • Electronics Box 1.0 (eBox) • On-Deck R230 Focused-ultrasonicator 1.0 (for placement on the liquid handler deck) • Water Conditioning System 3.0 (WCS 3.0) R230 Setup & Instruction Manual... -
Page 8: Install The On-Deck Module
2 shipping bolts circled. Be careful to remove only these 2 bolts. • Lower the On-Deck module so that it is again resting flat on the bench. R230 Setup & Instruction Manual Part Number: 010480 Rev C | August 2020... - Page 9 • Remove the 5 flat head cap screws, 2 from the right, and 3 from the left lower edge of the On-Deck cover. Do not remove the screws in the inverted “U” shaped cut-outs. Remove 5 screws • Lift the cover off and set aside. R230 Setup & Instruction Manual Part Number: 010480 Rev C | August 2020...
- Page 10 The front-to-back level is on the left side of the base plate, between the cable and hose connector panels. See image below. R230 Setup & Instruction Manual Part Number: 010480 Rev C | August 2020...
- Page 11 • Connect the right-angle connector of the male 44-pin d-sub cable to the female 44-pin connector on the On-Deck module. • Connect the right-angle connector of the coax cable to the BNC connector on the On-Deck module. R230 Setup & Instruction Manual Part Number: 010480 Rev C | August 2020...
- Page 12 WCS 3.0. CAUTION: When positioning the system, please keep the fan and rear panel vents free of obstructions that may block the flow of air. R230 Setup & Instruction Manual Part Number: 010480 Rev C | August 2020...
- Page 13 2.2.7. Complete the water connections. There are two hose kits included with the R230. The WCS Tubing Kit is used to connect the On-Deck to the WCS and to the Waste reservoir. The Reservoir Kit includes the Waste and Supply carboys and the two hoses which connect the WCS to the carboys.
- Page 14 • Connect the right angle end of the clear hose to the “SPILL WAY DRAIN” port of the On-Deck. To “SPILL WAY DRAIN” To “Waste” port of WCS of On-Deck Waste Carboy with Hose Connections R230 Setup & Instruction Manual Part Number: 010480 Rev C | August 2020...
- Page 15 The middle connection is used only during monthly maintenance procedures (see section 8.2.2 for details on monthly maintenance). No hoses should be connected to the maintenance connector while running the R230. 2.2.8. Complete the electrical connections from the On-Deck Module: •...
- Page 16 OFF at this time. 2.2.10. Complete electrical connections from the eBox and laptop computer. • Connect either eBox ethernet port to the ethernet port on the laptop computer. The R230 uses 4 fixed addresses (5, 7, 10, and 22) on the 192.168.0 subnet.
-
Page 17: Getting Started
Wait 30 seconds after powering on the WCS 3, to allow the WCS 3 to initialize. Locate the Sonolab 10 icon on the laptop’s Desktop. Double click on the icon. SonoLab will load and the user is prompted to home the R230 motion system. -
Page 18: System Shutdown
• With the desiccant bag removed, manually pour approximately 1 liter, or a bit more, of deionized water into the water bath to prevent flow errors when the WCS 3 is powered on for the first time. It is only necessary to do this the first time the R230 is started, when the water system is completely empty. -
Page 19: Afa Operation
A brief explanation of the treatment parameters is provided below. Peak Incident Power (PIP) This parameter measures the peak electrical power used to drive the ultrasound transducer. In the R230, the range of Peak Incident Power is 1.5 to 450 Watts. -
Page 20: Sonolab Software
- Temperature: the actual temperature of the water in the On-Deck bath. - Setpoint: the On-Deck bath temperature specified by the current selected method. - State: possible states, depending on what the R230 system is doing, includes: At initial startup, Idle. - Page 21 In the cases of Water Degassed and Temperature within limits, a yellow triangle indicates that degassing time or temperature targets have not yet been met. R230 Setup & Instruction Manual Part Number: 010480 Rev C | August 2020...
- Page 22 - UV Light: a green check indicates that the ultraviolet water sterilizer is on and functioning normally - API Connected: “No” is the default condition, indicating that the R230 is not under external automation control. “Yes” indicates that the R230 is under external control, but most functionality continues to be available, unless the external control is executing a treatment method.
- Page 23 Fill button, the Fill to Load button, or directly by the selected method. > Draining: the water bath is draining to the waste reservoir. R230 Setup & Instruction Manual Part Number: 010480 Rev C | August 2020...
- Page 24 • Other Controls: - Light is a control and an indicator. Clicking on the switch toggles the light and indication of the light status on and off. R230 Setup & Instruction Manual Part Number: 010480 Rev C | August 2020...
-
Page 25: The Schedule Screen
• Periodic Fill - SonoLab checks and adjusts the R230 water bath level at the start of each treatment method. However, if the R230 will be idle for long periods of time during the day, the Periodic Fill function can be configured to check the bath level periodically while the system is idle. - Page 26 - Click on the Method drop-down list and select the method to be run. - Water level will be set at the beginning of each method run. But, if the R230 may be idle for long periods of time, click the Enable Periodic Fill on/off switch so that On is highlighted in dark blue.
- Page 27 NOTE: if a method is running at the time the scheduler is set to switch the R230 to the OFF state, SonoLab ignores the scheduler and the R230 will not be switched to standby on that day.
-
Page 28: The History Screen
5.3. The History Screen The History screen provides graphic and textual display of information for every treatment method run on the R230 system. When SonoLab is started, the most recent 100 results are loaded and displayed in the scrolling list, showing the name of the method with the date and time the method ran. - Page 29 (15 x 20%). History files are found at C:\Users\Public\Public Documents\Covaris\SonoLab 10\History. Each treatment method’s history data are contained in a folder whose name is the same as the method with the date and time of the run appended. For example, the folder for a method named “300_bp”...
-
Page 30: The About Screen
5.4. The About Screen The About screen contains information about components contained in the R230 system, such as serial numbers, software, and firmware versions. The information on this screen can be provided to Covaris support personnel assisting with problem resolution. - Page 31 • Click on the ADMIN tab. The list of default SonoLab users, their roles, and assigned methods is displayed, along with the “USERS” and “GENERAL” tabs at the left side. R230 Setup & Instruction Manual Part Number: 010480 Rev C | August 2020...
- Page 32 • Can review the history screens for methods run by this editor. An Operator: • Can run methods assigned to them by an administrator. • Can review the history screens for methods run by this operator. R230 Setup & Instruction Manual Part Number: 010480 Rev C | August 2020...
- Page 33 • Enter a new Username, the user’s first and last names, and click on the “Assigned” button. By default, all treatment methods on the system will be assigned to the new user. R230 Setup & Instruction Manual Part Number: 010480 Rev C | August 2020...
- Page 34 • Click on the method(s) to be removed in the list at left. Multiple methods may be selected by clicking “Shift” or “Control” simultaneously. • Click the right arrow button. The methods to be removed are moved to the box at the right. R230 Setup & Instruction Manual Part Number: 010480 Rev C | August 2020...
- Page 35 The user enters their Username, new password, and then must enter it again to verify correct spelling. Clicking “OK” returns the user to the login screen where the user may now enter their new password and log in. R230 Setup & Instruction Manual Part Number: 010480 Rev C | August 2020...
-
Page 36: Creating & Editing Treatment Methods
2) Select the appropriate plate for the consumables used in this method from the “Plate Definition” drop-down list. 3) Click the + New button. The “Choose a Step Type” pop-up is displayed. R230 Setup & Instruction Manual Part Number: 010480 Rev C | August 2020... - Page 37 5) Click the + button inside the process bar to display the step type menu. 6) Choose Treatment to specify the four acoustic parameters: Duration, Peak Incident Power, Duty Factor, and Cycles per Burst. R230 Setup & Instruction Manual Part Number: 010480 Rev C | August 2020...
- Page 38 This parameter defines the amount of time for which the sample is under a treatment. The measurement of the Duration is in seconds. The maximum time for any treatment is 3600 seconds. Should a longer treatment be necessary, “Duplicate Steps” can be used to extend the treatment. R230 Setup & Instruction Manual Part Number: 010480 Rev C | August 2020...
- Page 39 Once the treatment parameters have been defined, click in the process bar to highlight it, then click in the treatment well graphic to define which plate positions will be treated. The R230 treats an entire column at a time. Therefore, clicking anywhere in a column causes the row to be selected.
- Page 40 • Clicking the “pen & paper” button of the prompt bar to display the text entry field for the prompt. • Enter the text of the prompt and click OK. See Figure below. Click to create or edit text of the prompt R230 Setup & Instruction Manual Part Number: 010480 Rev C | August 2020...
- Page 41 13) Enter a name for the treatment method and click Save. If the method name is the same as an existing method, the ‘Save button is disabled and the ‘Overwrite’ button is enabled. Clicking the ‘Overwrite’ button will result in the previous version being replaced. R230 Setup & Instruction Manual Part Number: 010480 Rev C | August 2020...
-
Page 42: Using The Repeat Function
• Click the + button inside the repeat bar to display the step type menu, and create two or more treatment or delay steps. See image below. R230 Setup & Instruction Manual Part Number: 010480 Rev C | August 2020... - Page 43 • Create a method as explained above, but select “Repeat” instead of “Process” for the step type. • Click the + button inside the Repeat bar and select Process. R230 Setup & Instruction Manual Part Number: 010480 Rev C | August 2020...
- Page 44 B, and so on until the entire plate is treated and then the treatment steps are repeated. • When all method parameters and steps have been defined, click on Save to save changes. R230 Setup & Instruction Manual Part Number: 010480 Rev C | August 2020...
-
Page 45: Scanning Treatments
• Click the add process button again. • Select Scan from the Step Type list. • Enter the desired treatment parameters as for a normal treatment step. R230 Setup & Instruction Manual Part Number: 010480 Rev C | August 2020... -
Page 46: Using Drag And Drop With Treatment Steps
Covaris • Click Save and give the method a name as with normal treatment methods. Contact Covaris Applications Support for assistance in specifying an appropriate scanning speed and treatment parameters. 6.4. Using Drag and Drop with Treatment Steps The order of treatment steps may be rearranged and Treatment steps may be moved in and out of Process steps and Repeat steps to optimize treatment or expedite experimenting with different orders of operations. - Page 47 When finished, specify the wells to be treated and save the method as described in section 6.1 above. Behavior of Repeat steps is described in detail in Section 6.2 above. R230 Setup & Instruction Manual Part Number: 010480 Rev C | August 2020...
-
Page 48: System Specifications
Temperature Alarms: Can be programmed from +6.0 °C to +40.0 °C Computer Notebook computer Operating System Microsoft Windows 10 Application Software Covaris SonoLab 10 Data Input: Keyboard, mouse R230 Setup & Instruction Manual Part Number: 010480 Rev C | August 2020... -
Page 49: Maintenance
(more than a week) idle time. 8.2.2 Recommendations for Monthly Maintenance The R230 Bleaching Protocol should be performed monthly as follows: Start SonoLab and open the ‘Water Control’ panel by clicking the ‘Water Control’ button on the right of the ‘Method’ screen. -
Page 50: Transducer
Service. Instructions for changing the filter are in Appendix A of this document. 8.5. Safety System Contact the Covaris Technical Support Department for more information. WARNING: Report any failure of the Safety System immediately to Covaris. DO NOT attempt to operate if the Safety System is malfunctioning. 8.6. Degassing System The degassing system is incorporated into the WCS 3.0 and operates automatically. -
Page 51: Troubleshooting
- Europe: Tel: 44 (0) 845 872 0100, during the hours of 9:00 a.m. to 5:00 p.m., Monday through Friday, Greenwich Mean Time • E-mail queries to techsupport@covaris.com applicationsupport@covaris.com R230 Setup & Instruction Manual Part Number: 010480 Rev C | August 2020... -
Page 52: Appendix A: Replace The Wcs 3.0 Particulate Filter
Appendix A: Replacing the WCS 3.0 Particulate Filter The WCS particulate filter is the only user serviceable component and should be changed annually at minimum. The part number of the particulate filter is 500175 and can be purchased from Covaris Customer Service. Changing the Filter •... - Page 53 & fitting from end of filter. • With both fittings removed, grasp filter and gently pull it from single retaining clip near the center of the filter. R230 Setup & Instruction Manual Part Number: 010480 Rev C | August 2020...
- Page 54 • Slide the side panel on (it is not necessary to remove the hoses to reinstall the side cover) and secure with the four button head screws. R230 Setup & Instruction Manual Part Number: 010480 Rev C | August 2020...
Need help?
Do you have a question about the R230 and is the answer not in the manual?
Questions and answers