Advertisement
Available languages
Available languages
Quick Links
Advertisement

Summary of Contents for Evolights Smooth Par IP65
- Page 1 Smooth Par IP65 USER MANUAL INSTRUKCJA OBSŁUGI...
-
Page 2: Product Specification
ENGLISH 1. Introduction Packaging: Thanks for your purchasing the AH043A All the lights have been checked and are in excellent operating condition Please check the shipping carton first, because there may be damage occurred during the shipment Then check the lights carefully and be sure that the lights is intact and works normally. -
Page 3: Menu Structure
2. Menu Structure... - Page 4 (1) DMX means the light is in the DMX mode Similarly, SLAVE means the light is in the SLAVE mode (2) The color of the point shows the condition of signal transmission Green represents the good condition, While red represents the signal is interrupted (3) The item shows the working temperature of the light.
- Page 5 2 Press "ENTER” button, and' Software" or “Fix times” Will be Showed Then press ENTER. and you can see three items as below: 1) Software - This item displays the Software information 2) Hardware - This item displays the Hardware information 3) Fix times - This item displays the working hours about the light AUTO-In this menu.
- Page 6 3. DMX Structure 3CH Mode Channel Value Function 0-255 0-255 Saturation 0-255 Value 6CH Mode Channel Value Function 0-255 0-255 Green 0-255 Blue 0-255 White 0-255 Amber 0-255 8CH Mode Channel Value Function 0-255 Master Dimmer 0-255 0-255 Green 0-255 Blue 0-255 White...
- Page 7 48-51 Orange 52-55 Pink 56-59 Violet 60-63 Aquamarine 64-67 Sky blue 68-71 Full white 72-75 Cool white 76-79 Warm white 80-83 White 3200 84-87 White 2500 88-91 Yellow 2 92-95 Straw 96-99 Orange 2 100-103 Light rose 104-107 Dark pink 108-111 Magenta 2 112-115...
- Page 8 0-255 Master Dimmer 0-255 0-255 Green 0-255 Blue 0-255 White 0-255 Amber 0-255 0-10 No function 11-20 R100%/Gup/B0%/W0% 21-30 Rdown/G100%/B0%/W0% 31-40 R0%/G100%/Bup/W0% 41-50 Rup/Gdown/B100%/W0% 51-60 Rup/G0%/B100%/W0% 61-70 R100%/G0%/Bdown/W0% 71-80 R100%/G0%/B0%/Wup 81-90 R100%/G0%/B0%/Wdown 91-100 R↑/G↓/B0%/W0% → R↓/ G↑/B0%/W0% 101-110 R↑/G0%/B↓/W0% → R↓/ G0%/B↑/W0% 111-120 R0%/G↑/B↓/W0% →...
- Page 9 51-60 Program 6 61-70 Program 7 71-80 Program 8 81-90 Program 9 91-100 Custom 1 101-110 Custom 2 111-120 Custom 3 121-130 Custom 4 131-140 Custom 5 141-150 Custom 6 151-160 Custom 7 161-170 Custom 8 171-180 Custom 9 181-190 Custom 10 191-255 Custom 11...
- Page 10 5. Copying edited program First, set one light, which involves the program you have edited in EDIT menu and want to upload, in Master mode, and Others in Slave mode Then connect all the lights With DMX cables Finally. Select the UPLOAD menu of the Master light and press ENTER All the programs edited in the Master light will be uploaded to the Slave lights 6.
-
Page 11: Mechanical Specification
The Smooth Par is fully operational in two different mounting positions, hanging upside-down from a ceiling or set on a flat level surface TO avoid internal damage to the unit, never mount the unit on its side as illustrated above ae sure this fixture is kept at least 0 5m away from any flammable materials (decoration etc.) And you'd better use and install the supplied safety cab e as a safety measure to prevent accidental damage and/or injury in the event the clamp fails (see next page) 7. - Page 12 Power In Power Out DMX In DMX Out TFT Display...
-
Page 13: Charakterystyka Produktu
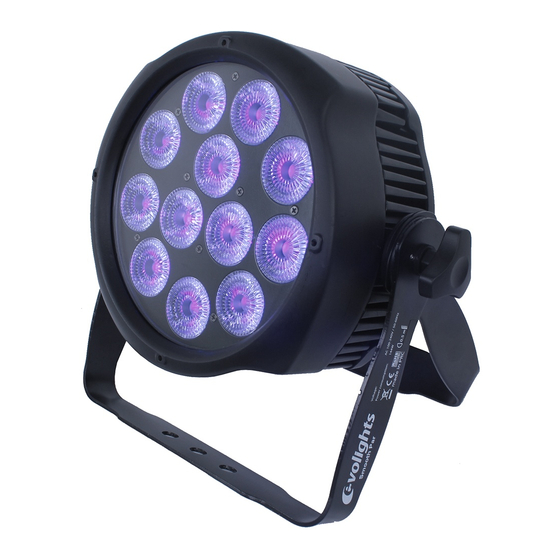
Wprowadzenie: Evolights Smooth Par to profesjonalny reflektor sceniczny wyposażony w 12 diod 10W RGBWA-UV LED. Płynny dimmer w zakresie 0-100%, bardzo dobre mieszanie kolorów oraz duża jasność promienia to główne cechy charakterystyczne dla tego oświetlacza. Obudowa Smooth Para posiada innowacyjny design i jest wykonana z aluminium, dzięki czemu nie wymaga on dodatkowego chłodzenia... - Page 14 WYMIARY I WAGA • Wymiary 280,3 x 142,6 x 288 mm • Waga 5kg • Oryginalne opakowanie oraz wypełnienie 3. Struktura menu i Funkcje wyświetlacza...
- Page 15 (1) DMX oznacza, że urządzenie jest w trybie DMX. SLAVE oznaczać będzie, że urządzenie jest w trybie SLAVE (2) Kolor tego wskaźnika pokazuje stan sygnału. Zielony oznacza, że urządzenie otrzymuje sygnał DMX, kiedy pojawia się kolor czerwony oznacza to, że sygnał jest przerwany. (3) Wskaźnik temperatury urządzenia, kiedy temperatura przekroczy próg maksymalny kolor liter zmieni się...
- Page 16 11) Dimmer ALL – możesz zmienić natężenie wszystkich kolorów w tym menu INFORMATION – w tym menu możesz sprawdzić wersję oprogramowania, sprzętu i czas pracy urządzenia. - Wciśnij „ENTER” i przyciskami „UP” i „DOWN” przesuwaj menu aż na wyświetlaczu pojawi się napis „INFORMATION”...
- Page 17 - Możesz edytować sceny regulując wartość natężenia kolorów RED (0-255), GREEN (0-255), BLUE (0- 255), WHITE (0-255), AMBER (0-255), PURPLE (0-255), oraz wartości FADE (0-31), FLASH (0-50), STROBE (0-31), oraz TIME (0-100). Aby zapisać zmiany w edycji wciśnij i przytrzymaj przycisk ENTER przez 5 sekund.
- Page 18 Kanał Wartość Funkcja 0-255 Master Dimmer 0-255 Czerwony 0-255 Zielony 0-255 Niebieski 0-255 Biały 0-255 Amber 0-255 0-19 Brak funkcji 20-23 24-27 Green 28-31 Blue 32-35 Yellow 36-39 Cyan 40-43 Magenta 44-47 White 48-51 Orange 52-55 Pink 56-59 Violet 60-63 Aquamarine 64-67 Sky blue...
- Page 19 184-187 Bright blue 188-191 Alice blue 192-195 Rose indigo 196-199 Urban blue 200-203 Cool blue 204-207 Light salmon 208-211 Mayan sun 212-215 Cherry rose 216-219 Flesh pink 220-223 Skeleton exotic sangria 224-255 Amber 0-255 Tryb automatyczny 0-255 Stroboskop 0-20Hz Tryb 13CH Kanał...
- Page 20 221-225 White 5 226-230 White 6 231-235 White 7 236-240 White 8 241-245 White 9 246-250 White 10 251-255 White 11 0-255 Szybkość w momencie uruchomienia kanału 6. 0-15 Brak funkcji 16-255 Stroboskop 0-20Hz Brak funkcji 9-10 Program 1 11-20 Program 2 21-30 Program 3...
- Page 21 120-129 ID12 218 ID29 235 ID46 252 ID63 130-139 ID13 219 ID30 236 ID47 253 ID64 140-149 ID14 220 ID31 237 ID48 254 ID65 150-159 ID15 221 ID32 238 ID49 255 ID66 160-169 ID16 222 ID33 239 ID50 5. Adresowanie DMX z adresem ID •...
- Page 22 Podczas instalacji urządzenia należy upewnić się, że punkt montażowy jest w stanie wytrzymać obciążenie równe dziesięciokrotności wagi bez żadnych deformacji. Instalacja musi być zabezpieczona przez dodatkową linkę bezpieczeństwa. Nigdy nie stój bezpośrednio pod miejscem montażu. Instalacja wymaga doświadczenia, umiejętności kalkulacji obciążenia i dopasowania odpowiednich zabezpieczeń...
- Page 23 Wejście zasilania Wyjście zasilania Wejście DMX Wyjście DMX Wyświetlacz TFT...
Need help?
Do you have a question about the Smooth Par IP65 and is the answer not in the manual?
Questions and answers