Advertisement
Available languages
Available languages
Quick Links
Advertisement

Summary of Contents for Stengel EBA K4 WE
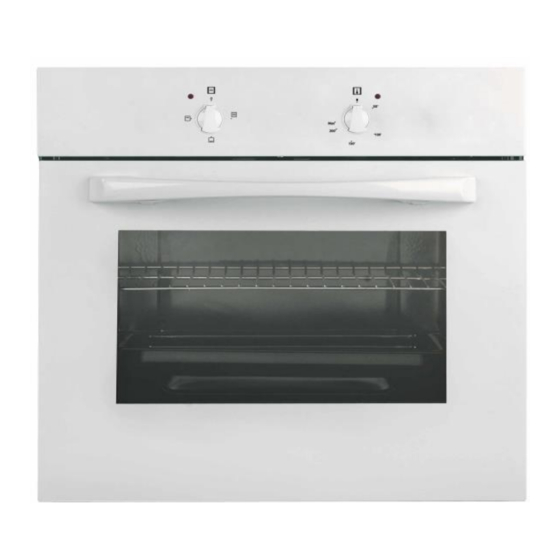
- Page 1 EBA K4 WE...
- Page 2 INHALTSVERZEICHNIS .Inhaltsverzeichnis 1.0 Warnhinweise 1.0 Warnhinweise 2.0 Erscheinungsbild und Grösse des Produkts 3.0 Vorbereitungen für Installation und Gebrauch 2.0 Erscheinungsbild und Grösse des Produkts 3.1 Der Richtige Platz für Ihren Ofen 3.0 Vorbereitungen für Installation und Gebrauch 3.2 Einbauofen installieren 3.3 Verkabelung und Sicherheit Einbaubackofen 3.1 Der Richtige Platz für Ihren Ofen 3.4 Verkabelung und Sicherheit Kombinierter Einbaubackofen...
- Page 3 1. WARNHINWEISE LESEN SIE DIESE ANLEITUNG VOLLSTÄNDIG UND SORGFÄLTIG DURCH, BEVOR SIE IHR GERÄT IN BETRIEB NEHMEN, UND HALTEN SIE ES STETS ZUR VERFÜGUNG WENN NÖTIG. DIESES HANDBUCH WURDE FÜR VERSCHIEDENE MODELLE EINER REIHE VERFASST. ES KANN SEIN, DASS IHR GERÄT ÜBER EINIGE EIGENSCHAFTEN, DIE IN DIESEM HANDBUCH ERLÄUTERT WURDEN NICHT VERFÜGT.
- Page 4 1.WARNHINWEISE des Backraums berühren. - Griffe Während der Verwendung können heiß werden. - Verwenden Sie keine aggressiven oder scheuernden Reinigungsmittel oder Metallschaber, um die Scheibe in der Backraumtür zu reinigen. Diese können die Oberfläche zerkratzen, was zum Bersten der Glasscheibe führen kann. - Verwenden Sie keine Dampfreiniger zur Reinigung des Gerätes.
- Page 5 1.WARNHINWEISE - Stellen Sie sicher, dass das Netzkabel während der Installation nicht eingeklemmt ist. Wird das Netzkabel beschädigt, muss es vom Hersteller, dem Vertrieb oder einer ähnlich qualifizierten Person ersetzt werden, um eine Gefährdung zu vermeiden. - Lassen Sie Kinder niemals auf die Backraumtür klettern oder darauf sitzen, wenn diese offen ist.
- Page 6 1.WARNHINWEISE - Stellen Sie niemals etwas auf die Backrohrtür oder den Auszug, wenn diese offen sind. Dadurch könnte das Gerät kippen oder die Klappe beschädigt werden. - Geben Sie keine schweren Gegenstände oder entzündliche, brennbare Objekte (Nylon, Plastikbeutel, Papier, Stoff etc.) in die untere Ausziehlade. Dazu gehören Kochgeschirr mit Zubehör aus Kunststoff (z.B.
- Page 7 TEIL 2: ERSCHEINUNGSBILD UND GRÖSSE DES PRODUKTS 7- Grillrost 8- Einschübe 9- Ofenbeleuchtung 10- Turbomotor (hinter der Platte) 11- Luftauslässe...
- Page 9 Arbeitsplatte mind. Einbaukochfeld mind. 25mm 50mm Einbauherd Öffnen Sie die Backofentür und setzen Sie zwei Wenn der Herd unter einem Kochfeld eingebaut Schrauben in die am Rahmen befindlichen wird, sollte der Mindestabstand zwischen dem Löcher ein. Öffnen Sie die Backofentür und Kochfeld und der Oberseite des Herdes 50mm setzen Sie zwei Schrauben in die am Rahmen betragen;...
- Page 10 3.3 VERKABELUNG UND SICHERHEIT EINBAUBACKOFEN keinerlei...
- Page 11 3.4 VERKABELUNG UND SICHERHEIT KOMBINIERTER EINBAUBACKOFEN ew T Abbildung 6 Fett oder Öl oder...
- Page 12 Ofenfunktion Ofentemperatur- Einstellknopf Einstellknopf Ofentemperatur-Leuchte...
- Page 13 4.2 BACKOFEN VERWENDEN Abbildung 10 Abbildung 11...
- Page 14 Tabelle 1 Unterhitze/Oberhitze-Funktion:Ofenthermostat, Warnleuchten sowie unteres und oberes Heizelement schalten sich ein. Oberhitze Funktion:Das obere Heizelement des Ofens wird eingeschaltet. Unterhitze Funktion: Das untere Heizelement des Ofens wird eingeschaltet. Grill Funktion:Ofenthermostat, Warnleuchten, Lüfter und Grill schalten sich ein. Die Verfügbarkeit der beschriebenen Funktionen ist vom Produktmodell abhängig.
- Page 15 4.3 OFENFUNKTION-EINSTELLKNOPF VERWENDEN: Je nach Modell sind eventuell nicht alle der nachstehend erklärten Funktionen verfügbar.
- Page 17 IM OFEN GENUTZTE ZUBEHÖRTEILE falls in der Lieferumfang enthalten 5. Einschub 4. Einschub 3. Einschub 2. Einschub 1. Einschub WARNUNG - Platzieren Sie das Gitter korrekt in irgendein entsprechendes Regal im Garraum und schieben Sie es bis zum Ende.
- Page 18 aggressive Reiniger, aggressive Bitte lassen Sie Wartungsarbeiten nur von einem autorisierten Kundendienstmitarbeiter durchführen.
- Page 19 6.1 BEVOR SIE SICH AN DEN KUNDENDIENST WENDEN 6.2 HINWEISE ZUM TRANSPORT...
- Page 20 Marke EBA K4 WE Modell Ofentyp Elektro Gewicht 29 (+/-2) Energieeffizienzindex – konventionell 103,8 Energieeffizienzindex – Umluft Energieklasse 0,85 Energieverbrauch (Elektrizität) – konventionell kWh/Zyklus Energieverbrauch (Elektrizität) – Umluft kWh/Zyklus Anzahl Kavitäten Heizquelle Elektro Volumen Dieser Ofen stimmt mit EN 60350-1 überein...
- Page 21 Konformitätserklärung Wir erklären, dass unsere Produkte die geltenden europäischen Richtlinien, Entscheidungen und Regularien sowie die in den referenzierten Standards gelisteten Anforderungen erfüllen. Entsorgung des Gerätes Altgeräte dürfen nicht in den Hausmüll! Sollte das Gerät einmal nicht mehr benutzt werden können, so ist jeder Verbraucher gesetzlich verpflichtet, Altgeräte getrennt vom Hausmüll z.B bei einer Sammelstelle seiner Gemeinde / seines Stadtteils abzugeben.
- Page 22 BUILT-IN OVEN USER'S MANUAL EBA K4 WE...
- Page 23 Dear Customer, We take offering quality products more than your expactation as goal, offers you the products produced in modern facilities carefully and particularly tested for quality. Your manual is prepared in order to help you to use your appliance that is manufactured by the most recent technology, with confidence and maximum efficiency.
- Page 24 Contents 1- Presentation and size of product 2- Warnings 3- Preparation for installation and use 4- Using the oven 5- Cleaning and maintenance of your product 6- Service and Transport...
- Page 25 PART 1: PRESENTATION AND SIZE OF PRODUCT LIST OF COMPONENTS : 1- Control panel 8- Wire Grill 2- Handle 9- Racks 3- Oven Door 10- Oven Light 4- Child Lock 11- Turbo Heating Element(behind the plate) 5- Tray 12- Fan (behind the plate) 6- Lower Heating Element (behind the plate) 13- Air Outlet Shutters 7- Upper Heating Element (behind the plate)
- Page 26 PART 2 SAFETY WARNINGS READ THESE INSTRUCTIONS CAREFULLY AND COMPLETELY BEFORE USING YOUR APPLIANCE, AND KEEP IT IN A CONVENIENT PLACE FOR REFERENCE WHEN NECESSARY. THIS MANUAL IS PREPARED FOR MORE THAN ONE MODEL IN COMMON. YOUR APPLIANCE MAY NOT HAVE SOME OF THE FEATURES THAT ARE EXPLAINED IN THIS MANUAL. PAY ATTENTION TO THE EXPRESSIONS THAT HAVE FIGURES, WHILE YOU ARE READING THE OPERATING MANUAL.
- Page 27 - During use, the appliance becomes hot. Care should be taken to avoid touching heating elements inside the oven. - During use, handles held for short periods in normal use can get hot. - Do not use harsh abrasive cleaners or sharp metal scrapers to clean the oven door glass and other surface since they can scratch the surface, which may result in shattering of the glass or...
- Page 28 - Ensure that the supply cord is not wedged during the installation. If the supply cord is damaged, it must be replaced by the manufacturer, its service agent or similarly qualified persons in order to prevent a hazard. - While the oven door is open, do not let children climb on the door or sit on it. Installation Warnings - Do not operate the appliance before it is fully installed.
- Page 29 PART 3: PREPARATION FOR INSTALLATION AND USE Manufactured with best quality parts and materials, this modern, functional and practical oven will meet your needs in all respects. Make sure to read the manual to obtain successful results and not to experience any problems in the future. The information given below contain rules that are necessary for correct positioning and service operations.
- Page 30 3.2. INSTALLATION OF BUILT-IN OVEN min. 10 mm min. 5 mm min. 5 mm Worktop min. Built-in min. 25 mm 50 mm Built-in oven Insert the oven into the cabinet by pushing it If the oven is installed under a hob, the forward.
- Page 31 3.3. WIRING AND SAFETY OF BUILT_IN OVEN The instructions given below must be followed without fail during wiring : The earthing cable must be connected via the screw with the earthing mark. Supply cable connection must be as shown in Figure 6. If there is no earthed outlet conforming to regulations in the installation environment, call the Authorized Service immediately.
- Page 32 PART 4: USING THE OVEN 4.1 CONTROL PANELS Built_in Oven Oven Function Control Knob Oven Thermostat Knob Oven Thermostat Light Oven Function Control Knob: To select the desired cooking function, turn the knob to the related symbol(Figure 11). the details of the oven functions have been explained in next part.
- Page 33 4.2. USING THE OVEN FUNCTION CONTROL BUTTON * The functions of your oven may be different due to the model of your product.
- Page 34 ENERGY SAVING During use of electrical cookers , it is required to use saucepans having flat bases. Choose a cookware of proper size. Using a lid will reduce cooking times. Minimize the amount of liquid or fat to reduce cooking times. When liquid starts boling ,reduce the temperature setting.
- Page 36 4.8. ACCESSORIES USED IN THE OVEN It is recommended that you use the containers indicated on the table depending on the food you will cook in your oven, you can also use glass containers, cake cutters, special oven trays suiatble for use in your oven, available in the market. Pay attention to the information given by the mufacturer firm concerning this issue.
- Page 37 Removal of catalitic panel Remove G screws on each catalitic enamel coated panel. Telescopic rails Installation of the Shelves 5. Rack 4. Rack 3. Rack 2. Rack 1. Rack WARNING- Fit the grid correctly into any correspondent rack in the oven cavity and push it to the end.
- Page 38 PART 5: CLEANING AND MAINTENANCE OF YOUR OVEN 5.1. CLEANING Before starting to clean your oven, be sure that all control buttons are off and your appliance is cooled off. Unplug the appliance. Do not use cleaning materials containing particles that might scratch the enamelled and painted parts of your oven.
- Page 39 5.2. MAINTENANCE Replacing the Oven Light The change of oven lamp must be done by authorized technician. The rating of the bulb should be 230V, 25Watt, Type E14,T300 before changing the lamp,the oven should be plugged off and it should be cool. The lamp design is specific for the use in household cooking appliances and it is not suitable for household room illumination.
- Page 40 PART 6: SERVICE AND TRANSPORT 6.1. REQUIREMENTS BEFORE CONTAINING TO SERVICE If the oven does not operate : The oven may be plugged off, there has been a black out. On models fitted with a timer, time may not be regulated. If the oven does not heat : The heat may be not adjusted with oven’s heater control switch.
- Page 41 Disposal of the device Old devices cannot be placed in the household waste! If the device can no longer be used, every consumer is legally obliged to hand in devices separately from household waste e.g. at a collection site of their local authority / borough. This ensures that the devices are properly recycled and negative effects on the environment are avoided.
- Page 42 NOTICE D'INSTALLATION ET D'UTILISATION DU FOUR ENCASTRABLE EBA K4 WE...
- Page 43 Chère cliente, cher client, Notre but est de vous offrir des produits de qualité qui répondent à vos attentes, fabriqués dans des usines modernes et dont la qualité a soigneusement été testée. Ce manuel contient toutes les informations nécessaires pour utiliser cet four conçu avec une technologie de pointe, en toute confiance et efficacité.
- Page 44 Table des matières 1-Présentation et dimensions du four 2-Avertissements 3-Préparation pour l'installation et l'utilisation 4-Utilisation du four 5-Nettoyage et entretien du four 6-Service après-vente et transport...
- Page 45 PARTIE 1 : PRÉSENTATION ET DIMENSIONS DU FOUR Figure 1 LISTE DES ELEMENTS DU FOUR : 1- Panneau de commande 8- Grille 2- Poignée 9- Supports 3- Porte du four Elément de chauffage chaleur 4- Verrouillage de la porte Ventilateur (derrière la tôle) Lèche frite Sortie air pulsé...
- Page 46 PARTIE 2 : CONSIGNES DE SÉCURITÉ LISEZ ATTENTIVEMENT ET ENTIEREMENT CETTE NOTICE AVANT D’UTILISER VOTRE APPAREIL DE CUISSON, ET CONSERVEZ-LA AFIN DE POUVOIR LA CONSULTER LORSQUE CE SERA NECESSAIRE. Cette notice est conçue pour plusieurs modèles. Votre appareil de cuisson n’est peut-être pas équipé de toutes les caractéristiques décrites dans cette notice.
- Page 47 • N'essayez pas de soulever ou de déplacer l'appareil de cuisson en tirant sur la poignée du four. MISE EN GARDE : L’appareil et ses parties accessibles peuvent devenir très chauds durant l’utilisation. Attention à ne pas toucher les éléments chauffants. Les enfants de moins de 8 ans doivent être maintenus à...
- Page 48 AVERTISSEMENT: Si votre appareil de cuisson est équipé d'un plan de cuisson en verre (vitro ou induction) et si la surface est fissurée, mettez les manettes sur "0" pour éviter un éventuel choc électrique. De même, si des fissures apparaissent sur les plaques électriques, il est impératif d’arrêter immédiatement l’alimentation électrique afin de prévenir toute électrocution.
- Page 49 éléments de votre appareil de cuisson. Ne pas utiliser de produits d'entretien abrasifs ou de grattoirs métalliques durs pour nettoyer la porte en verre du four, ce qui pourrait érafler la surface et entraîner l’éclatement du verre. • N'utilisez pas de nettoyeurs à vapeur pour nettoyer votre appareil de cuisson. •...
- Page 50 Lors de l'utilisation • Lors de la première mise en marche de votre appareil de cuisson (au niveau du four), il se produira une certaine odeur caractéristique des matériaux d'isolation et des éléments chauffants. Pour cette raison, avant d'utiliser votre four, faites-le fonctionner à vide à sa température maximale pendant 45 minutes.
- Page 51 PARTIE 3 : PRÉPARATION POUR L'INSTALLATION ET L'UTILISATION Ce four moderne, fonctionnel et pratique a été conçu avec des matériaux de première qualité, il saura vous satisfaire au mieux. Lisez cette notice où vous trouverez tous les conseils pratiques pour obtenir d'excellents résultas et n'avoir aucun problème dans le futur. Les informations ci-dessous sont nécessaires pour l'installation et les opérations de service.
- Page 52 3.2 INSTALLATION DU FOUR ENCASTRABLE Plan de travail min. Plaque de min. 25 mm cuisson 50 mm Four encastrable Ouvrez la porte du four et fixez 2 vis dans les Si le four est installé sous une table de cuisson, la orifices situés sur le cadre du four.
- Page 53 3.3. BRANCHEMENT ET SECURITE DU FOUR ENCASTRABLE Vous devez suivre les instructions suivantes pendant le branchement : Le câble de terre (jaune/vert) doit être branché sur la vis qui a le symbole terre. Le branchement du câble d'alimentation doit être effectué selon la Figure n°3. S'il n'y a aucune prise de terre conforme aux normes en vigueur sur votre installation électrique existante, contactez votre électricien.
- Page 54 3.4. RECOMMANDATIONS GÉNÉRALES ET PRÉCAUTIONS Votre four a été conçu en respectant les normes de sécurité des appareils électriques. Les opérations d'entretien et de réparation doivent être effectuées par des techniciens qualifiés. Les opérations d'installation et de réparation qui ne respecteraient pas ces consignes peuvent être dangereuses.
- Page 55 PARTIE 4 : UTILISATION DU FOUR 4.1.1 Panneaux de contrôle Manette fonctions du four Manette du thermostat Voyant du thermostat 4.1.2 Utilisation du four Bouton de contrôle de la fonction du four: Pour sélectionner les fonctions du four. Explication dans la partie suivante, tableau 1. Vous devez régler le bouton de sélection de fonction et le bouton du thermostat sur une température de votre choix.
- Page 56 Fonctions du four Fonction de cuisson statique Le thermostat et les voyants d'avertissement du four seront allumés, et les éléments de chauffage inférieur et supérieur commenceront à fonctionner. La fonction de cuisson statique émet de la chaleur, ce qui assure ainsi une cuisson uniforme des aliments de niveaux inférieur et supérieur.
- Page 58 Accessoires du four Votre four est livré (suivant modèle) avec des plaques, lèchefrites, une grille et une broche pour rôtir la volaille. Vous pouvez par ailleurs utiliser des plats en verre, des moules à gâteaux, des plaques à four spéciales adaptées à la cuisson au four, que vous trouverez dans le commerce.
- Page 59 PARTIE 5 : NETTOYAGE ET ENTRETIEN DE VOTRE FOUR 5.1 Nettoyage Assurez-vous que toutes les manettes de commande soient éteintes et que l'appareil est froid avant d'effectuer le nettoyage. Important : débranchez toujours la prise électrique avant de commencer le nettoyage. Contrôlez si les produits de nettoyage sont approuvés et recommandés par le fabricant avant de les utiliser.
- Page 60 PARTIE 6 : SERVICE APRES VENTE ET TRANSPORT 6.1 Avant de contacter le Service après vente Si le four ne fonctionne pas : - Vérifiez que le four est bien branché - Vérifiez qu'il n'y a pas de coupure de courant. - Pour les modèles équipés d'un minuteur, celui-ci n'est pas sur la position «...
- Page 61 Déclaration de conformité Nous déclarons que nos produits sont conformes aux Directives, Décisions et Règlementations européennes en vigueur et aux exigences visées dans les normes citées en référence. Mise au rebut de l'appareil Les appareils usagés ne doivent être traités comme des ordures ménagères ! Chaque consommateur est légalement tenu d'éliminer les appa- reils non utilisables indépendamment des ordures ménagères,...
Need help?
Do you have a question about the EBA K4 WE and is the answer not in the manual?
Questions and answers