Advertisement
Quick Links
Exploring XBees and XCTU
Available online at:
http://sfe.io/t353
Contents
Introduction
Selecting an Explorer
Drivers and Assembly
Starting With X-CTU
Configuring Networks
Troubleshooting
Resources and Going Further
Introduction
Heads up! Originally, this tutorial was written to configure an XBee Series 1 to communicate in transparency mode. However, this can
apply to the XBee Series 3 module as long as you configure the firmware to the legacy 802.15.4 protocol. For more information, read
through this guide!
Is your project being dragged down by wires? Looking for an easy transition to wireless communication? If you want reliable, low-cost, bi-
directional communication at moderate speeds,
XBees are hugely popular wireless transceivers for a number of reasons. They're flexible -- they send and receive data over a
which means they're compatible with both computers and microcontrollers (like Arduino). And they're highly configurable -- you can have
meshed networks with dozens of XBees, or just a pair swapping data. You can use them to remotely control your robot, or arrange them
all over your house to monitor temperatures or lighting conditions in every room.
Covered In This Tutorial
The pair of XBees alone won't get you very far. In most cases you'll want a separate module to interface with the XBee. You can use an
XBee Shield
to connect an XBee to your Arduino. Or you can use an
a
learn.sparkfun.com tutorial
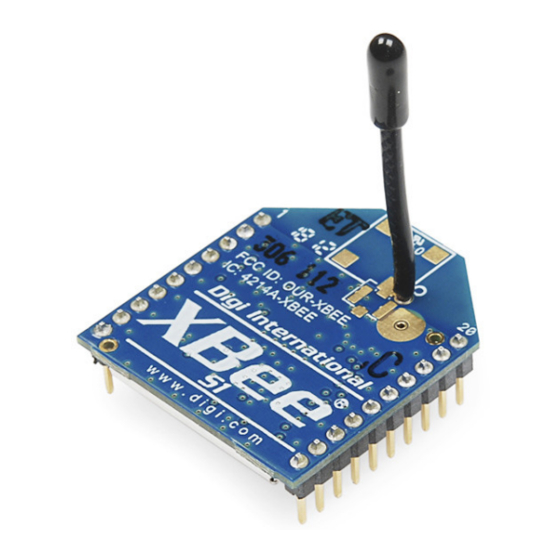
XBee
may be the solution for you!
XBee Explorer
Page 1 of 24
to connect an XBee to your computer.
serial
port,
Advertisement

Related Manuals for XBee S1

Summary of Contents for XBee S1
- Page 1 Covered In This Tutorial The pair of XBees alone won't get you very far. In most cases you'll want a separate module to interface with the XBee. You can use an XBee Shield to connect an XBee to your Arduino.
- Page 2 The focus of this tutorial is to explain how to use an XBee Explorer with an XBee. There are a variety of Explorer boards, all designed to achieve the same purpose: to create a communication gateway between your computer and the XBee.
- Page 3 Then reinsert the module back carefully into the sockets. Otherwise, you can perform a hardware reset by toggling the XBee 3's reset pin. To automate this, during startup, you can solder a wire between the reset pin and the 3.3V I/O pin of a microcontroller Toggling the reset pin with a minimum of 50ns-100ns will reset the XBee Series 3.
- Page 4 That's what translates data between your computer and the XBee. There's also a reset button, and a voltage regulator to supply the XBee with plenty of power. In addition, there are four LEDs that'll help if you ever need to debug your XBee: RX, TX, RSSI (signal-strength indicator), and a power indicator.
- Page 5 $1.50 Favorited Favorite Wish List XBee Explorer USB Dongle XBee Explorer Dongle is an extension of the Explorer. In fact, the only real difference between this and its predecessor is the USB connector. The Dongle can be connected directly to your laptop or PC USB port.
- Page 6 LEDs, reset button, break-out pins, and a voltage regulator. One additional feature that the Serial Explorer has is an On/Off switch on board. This enables the user to turn on or off the power supply to the XBee module. One additional feature available on the Serial Explorer are two jumpers available near the DB9 connector. These allow the user to swap...
- Page 7 The Serial Explorer does require an external power supply. It has a barrel jack connector which will work with our 12V, 9V, or 5V wall adapters. Make sure the selected power supply can source enough current for the XBee you are using. Wall Adapter Power Supply - 9VDC 650mA...
- Page 8 0.1"-pitch pins inside the XBee headers. This will allow you to plug the board into a breadboard, so you can wire other components up to the XBee. Each XBee pin is labeled on the bottom side of the board. You can also check out the schematic for help locating a specific pin.
- Page 9 Just make sure you don't solder anything into the top side of the board -- or you may be unable to plug the XBee in! Tip: We won't cover it in this tutorial, but those "DIO#" pins can be configured as either inputs or outputs. That means you can use an XBee to directly drive LEDs or motors, and read analog sensors or buttons.
- Page 10 "USB Serial Port" and Mac users should look for something like "usbserial-XXXXXXXX", if you're using a USB XBee board. If you're using a Serial Explorer instead, pick the "Communications Port" option. If the Serial Explorer is not showing up, make sure the switch onboard is set to “On”!
- Page 11 Configuring XBee Series 3's to Legacy Series 1 Firmware If you are working with an XBee Series 3, you will have a different configuration setting. To follow along in this tutorial, click on the update firmware button. If you are using the XBee Series 1, simply move to the next step to configure the XBees.
- Page 12 A window will pop up indicating the types of firmware available to flash. By default, it will be listed as the Digi XBee2 Zigbee 3.0 TH function protocol. You can select the legacy XBee Series 1 or legacy XBee Series 2 firmware. For the scope of this tutorial, we will be using the Digi XBee3 802.15.4 TH function set.
- Page 13 XBees connected to the same computer as well, just make sure you select the correct port number when you're adding the second XBee. If you add a second XBee to the same computer, a second entry will be added to the "Radio Modules" list. Selecting either of those Page 13 of 24...
- Page 14 Note that there are two XBees in the list on the left. The configuration values shown are for the highlighted XBee. If you're ever unsure which XBee is which, try to match up the MAC numbers. These numbers are printed on a sticker on the bottom side of your XBee, and they're also listed in XCTU.
- Page 15 ASCII value). Now click into the other XBee's console. As long as it was open, you should see that same character, but red. Try typing a different character into the second XBee's console, and you should see it work the other way.
- Page 16 Transparent Mode API Mode I/O Line Passing For simplicity, we will be using a pair of XBee Series 1 (or XBee Series 3 configured with the 802.15.4 protocol) set in transparent mode to replace a wired serial UART connection. Transparent Mode As we've mentioned, XBees are awesome because they're highly -- and easily -- configurable.
- Page 17 For example, if XBee 1 has a MY address of 0x1234, and XBee 2 has an equivalent destination address of 0x1234, then XBee 2 can send data to XBee 1. But if XBee 2 has a MY address of 0x5201, and XBee 1 has a destination address of 0x5200, then XBee 1 cannot send data to XBee 2.
- Page 18 XBee 1's config tab after writing the changes. Now, just like last time, you can try to send data from one XBee to the other via the console. As long as the addresses and PAN ID's match up, you should have the same success as last time.
- Page 19 -- A trick to resetting your XBee (if you don't have a reset button). Can't Find Device Are you having a hard time "finding" an XBee? If you're "Add Device" process is being followed by a window like this: There are two options we recommend: discovery or recovery.
- Page 20 Most of the cases where your XBee is hiding it's because the baud rate has been altered. A quick fix for this is to select all possible baud rates in the discovery window, then click Finish. The discovery process works a lot like the add process except it tests out every selection you make in this window -- that means it will take a little longer to finish.
- Page 21 During recovery, if XCTU can find your XBee it will. It'll also update the firmware, and set you back to the default settings. If you know what got your XBee bricked in the first place...maybe don't do that again.
- Page 22 If not give it another try...it takes some practice. Resources and Going Further That should be enough to get you started. If you're looking for more XBee and XBee Shield info, check out these resources: Markdown version of this tutorial...
- Page 23 -- For more advanced users, if you really want to take advantage of the XBee's unique abilities, check out this guide. With XBee and the XBee Explorer you have most of the tools you'll need to take your project to the airwaves. If you're looking to add Arduino to the mix, we recommend using an...
- Page 24 Swarming to Space on the Wings of XBee, RPi November 9, 2017 Favorited Favorite Enginursday: Prototype Capacitive Touch Dance Floor with a Teensy and XBees August 30, 2018 Favorited Favorite learn.sparkfun.com CC BY-SA 3.0 | SparkFun Electronics | Niwot, Colorado...
Need help?
Do you have a question about the S1 and is the answer not in the manual?
Questions and answers