Table of Contents
Advertisement
Quick Links
Advertisement
Table of Contents
Troubleshooting

Summary of Contents for Fisher Bioblock Scientific Wheaton Biostir
- Page 2 WARRANTY Wheaton Science Products warrants this product to be free from defects in material and workmanship for a period of two (2) years from the date of shipment. Belts in the four place Biostir and Micro-Stir are warranted for one (1) year from the date of shipment.
- Page 3 GENERAL SAFETY INSTRUCTIONS NOTE: EVEN THE SAFEST EQUIPMENT CAN CAUSE INJURY IF THE USER IS CARELESS. 1. KNOW YOUR INSTRUMENT - Read the operating manual carefully. Learn the equipment's application and limitations. 2. GROUND ALL EQUIPMENT - If electrical, this instrument is equipped with a grounding type plug.
- Page 4 SAFETY SYMBOLS USED IN THIS MANUAL A Warning symbol indicates attention to an operation, which can cause operator injury, improper function of or damage to the equipment and possible problems with the process. A Danger symbol indicates attention to an operation, which could cause electrocution or severe injury or death.
-
Page 5: Table Of Contents
TABLE OF CONTENTS ® Biostir SPECIFICATIONS INTRODUCTION SAFETY CONSIDERATIONS MAJOR COMPONENT IDENTIFICATION INITIAL INSPECTION INSTALLATION INPUT POWER REQUIREMENTS POWER CORD SET UNIT SETUP AND OPERATION KEYPAD AND DISPLAY VESSEL PLACEMENT BASIC CONSTANT SPEED STIRRING CYCLE STIRRING TWO SPEED STIRRING COMBINATION CYCLE AND TWO SPEED STIRRING STIRRER STATE IN CASE OF POWER INTERRUPTION DRY CONTACT RELAY FUNCTIONS REMOTE CONTROL OPERATION... - Page 6 SPECIFICATIONS – BIOSTIR OPERATING VOLTAGE: 200-240 VAC 50/60 Hz POWER CONSUMPTION: 15 Watts FUSES: (2) 5 X 20mm 1.25AT 250V POLLUTION DEGREE: Class 2 ENVIRONMENTAL: Operating temperature: 15 °C to 40 °C Humidity: 80% up to 31°C. 50% at 40°C. Altitude limit 2000 meters OVERALL DIMENSIONS:...
-
Page 7: Introduction
INTRODUCTION The latest line of Wheaton Biostir magnetic stirrers answers the call to many modern laboratory needs. Features include wide speed ranges, increased torque, easy user interface, and remote control options allow the Biostir to cover a wide range of applications. A new addition of interval and two speed stirring modes adds to the versatility of the unit. -
Page 8: Major Component Identification
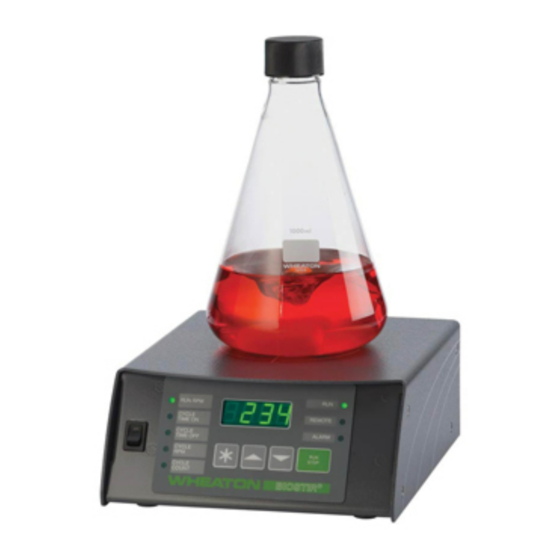
MAJOR COMPONENT IDENTIFICATION FRONT OF UNIT 1. Display –When the unit is running, the display shows the current operating status of the unit, including operating speeds and cycle times. While the unit is idle, the display shows entered data from the keypad and remote communications status. -
Page 9: Initial Inspection
INITIAL INSPECTION When you receive your new Biostir , inspect it for any obvious damage that may have occurred during shipment. If any damage is found, notify the carrier at once. Warranty information is shown in the front of this manual. Check to confirm that there are no broken switches, displays or missing parts, and that the unit is not dented or scratched. -
Page 10: Unit Setup And Operation
UNIT SETUP AND OPERATION The Biostir slow speed stirrer can be configured in several different modes to allow for simple constant speed stirring, to advanced interval and two speed stirring for the most demanding applications. Keypad and Display The Biostir keypad and display provide useful information to the setup and performance of the unit. -
Page 11: Vessel Placement
Vessel Placement Make sure the vessel is centered on the “target” area on the top of the stirrer. A vessel that is not centered may cause uneven stirring, resulting in less than optimum results. 2004 Wheaton Science Products P/N 50083244 Specifications subject to change without prior notice... -
Page 12: Basic Constant Speed Stirring
Basic Constant Speed Stirring The Biostir is capable of basic stirring as well as advanced stirring modes for demanding applications. To run in basic constant-speed stirring mode, set the unit as follows: IF THE UNIT IS RUNNING, OR AUTOMATICALLY STARTS WHEN POWER IS APPLIED: •... - Page 13 • Press the ∗ key until the CYCLE TIME ON light turns on. • Use the DOWN arrow key to make sure the CYCLE TIME ON is set to ZERO. • Press the ∗ key until the RUN RPM light turns on again. ...
- Page 14 • Press RUN / STOP to start the unit running at the set constant speed. The RUN light will blink while the unit is ramping to the set speed. The RUN light will light constant once the set speed is achieved, indicating the unit is working properly.
-
Page 15: Cycle Stirring
Cycle Stirring ® The Biostir can be set to run in cycle stirring mode, where the unit will run a set number of alternating stirring and idle times. This type of stirring may be especially helpful in cell culture applications during initial seeding where cells need a set idle time during the stirrer / growth cycle. - Page 16 • Press the ∗ key until the CYCLE TIME ON light turns on. • Use the UP and DOWN arrow keys to set the cycle ON time (B) in hours and minutes (hh.mm). The example below shows the setting at 1hr and 10 min. •...
- Page 17 • Use the UP and DOWN arrow keys to set the cycle idle time (C) in hours and minutes (hh.mm). The example below shows the setting at 1hr and 45 min. • Press the ∗ key until the CYCLE RPM light turns on. •...
-
Page 18: Two Speed Stirring
• Press RUN/STOP to start the unit. The RUN LED will blink until the unit attains full set speed. • During the CYCLE ON time, the CYCLE ON light and the CYCLE RPM light will alternately blink, and display the remaining CYCLE ON time, and the set CYCLE RUN speed. - Page 19 IF THE UNIT IS RUNNING, OR AUTOMATICALLY STARTS WHEN POWER IS APPLIED: • Press the RUN / STOP Key. • Press the ∗ key until the RUN RPM light turns on. • Use the UP and DOWN arrow keys to set the FINAL running speed (C) of the unit.
-
Page 20: Combination Cycle And Two Speed Stirring
• Press the ∗ key until the CYCLE RPM light turns on. • Use the UP and DOWN arrow keys to set the INITIAL running speed of the unit (A). • Press RUN / STOP to start the unit running in two speed stirring mode. The RUN light will BLINK until the unit reaches full set speed. - Page 21 A stirring cycle consists of one running period and one idle period as shown above. IF THE UNIT IS RUNNING, OR AUTOMATICALLY STARTS WHEN POWER IS APPLIED: • Press the RUN / STOP Key. • Press the ∗ key until the RUN RPM light turns on. •...
- Page 22 • Press the ∗ key until the CYCLE RPM light turns on. • Use the UP and DOWN arrow keys to set the INITIAL running speed (A) of the unit. • Press the ∗ key until the CYCLE COUNT light turns on. •...
-
Page 23: Stirrer State In Case Of Power Interruption
Stirrer State In Case of Power Interruption ® The internal electronics of the Biostir are able to store certain operational settings of the unit in RAM that will not be erased when power is lost to the unit. The RUN RPM value is preserved, while all other set values are lost, such as cycle run time, cycle off time, cycle RPM and cycle count. -
Page 24: Remote Control Operation
REMOTE CONTROL OPERATIONS The optional remote control box is plugged into the unit via the rear RS485 port. The remote control can then be placed in a more convenient location away from the main unit. The remote control front panel has the identical appearance and functions as the front panel on the main unit. -
Page 25: Maintenance And Troubleshooting
MAINTENANCE AND TROUBLESHOOTING FOR QUALIFIED PERSONNEL ONLY! DANGER! NEVER ATTEMPT TO PERFORM REPAIRS IF THIS INSTRUMENT IS PLUGGED IN! IN ORDER TO AVOID SERIOUS ELECTRIC SHOCK OR ELECTROCUTION, THIS INSTRUMENT MUST BE DISCONNECTED FROM THE SOURCE OF AC POWER BEFORE REPAIRS ARE INITIATED. As with any piece of laboratory equipment, periodic inspection for worn and or damaged parts should be performed on a regular basis in order to maintain optimum performance. -
Page 26: Four Place Belt Replacement And Tensioning
Four Place Belt Replacement and Tensioning 1. Disconnect unit from the AC power source. Perform all repairs on a clean, flat surface covered with a protective cloth or pad. 2. Remove the screws that hold the lid, and carefully slide the lid off the base. 3. -
Page 27: Motor Replacement
Motor Replacement (See figures B, C, and D) DANGER! BE CERTAIN UNIT IS DISCONNECTED FROM THE AC POWER SOURCE. 1. Disconnect unit from the AC power source. Perform all repairs on a clean, flat surface covered with a protective cloth or pad. 2. -
Page 28: Display Board Replacement
Display Board Replacement DANGER! BE CERTAIN UNIT IS DISCONNECTED FROM THE AC POWER SOURCE. 1. Disconnect unit from the AC power source. Perform all repairs on a clean, flat surface covered with a protective cloth or pad. 2. Remove the screws that hold the lid, and carefully slide the lid off the base. 3. -
Page 29: Troubleshooting
Troubleshooting Unit will not operate: Cause: On/off power switch in “off” position, or unit unplugged. Remedy: Turn on the power switch on the rear of the unit or plug into receptacle. Cause: Fuse blown. Remedy: Replace fuse with proper size and type. (see fuse replacement) Cause: Supply voltage low or at zero. - Page 30 FIGURE A – FUSE REPLACEMENT 2004 Wheaton Science Products P/N 50083244 Specifications subject to change without prior notice...
- Page 31 FIGURE B – WHEATON BIOSTIR® -230V SINGLE PLACE PARTS LIST Item Qty Part No. Description 50083166 CABINET BASE, STIRRERS, SINGLE PL. 50083145 MAGNET PLATE, STIRRERS, SINGLE PL. I051325 SHOCK MOUNT 50083167 SHAFT ADAPTER, BIOSTIR 1PL I050556 MAGNET 1/2" X 3"...
- Page 33 FIGURE C – WHEATON BIOSTIR® -230V FOUR PLACE PARTS LIST Item Qty Part No. Description 50083192 CABINET BASE, STIRRERS, FOUR PL. 50083193 MAGNET PLATE, STIRRERS, FOUR PL. 50083194 ADJUSTMENT PLATE, STIRRERS, FOUR PL. Wi056146 MOTOR, BRUSHLESS, 50W I050717 BEARING BLOCK I052149 WASHER,NYL,.375 X .255 X .062...
- Page 36 FIGURE E – WHEATON STIRRER REMOTE CONTROL UNIT Item Qty Part No. Description 50083234 CABINET BASE, REMOTE, STIRRERS 50083235 CABINET TOP, REMOTE, STIRRERS 50083236 KEYPAD, STIRRERS, BLANK Wi056153 PCBA, DISPLAY, STIRRERS 50083231 TEXT CARD SET, STIRRERS, ENGLISH 50083237 WIRE HARNESS, STIRRERS, REMOTE 50083240 CONN., .100, 1X14, 1-104257-3, AMP 50083239 STRAIN RELIEF, #1147, HEYCO 50029504 FOOT, GREY, SMITH#2178...
Need help?
Do you have a question about the Wheaton Biostir and is the answer not in the manual?
Questions and answers