
Related Manuals for Star Wars FIRST GAME CHANGERS TETRIX

Summary of Contents for Star Wars FIRST GAME CHANGERS TETRIX
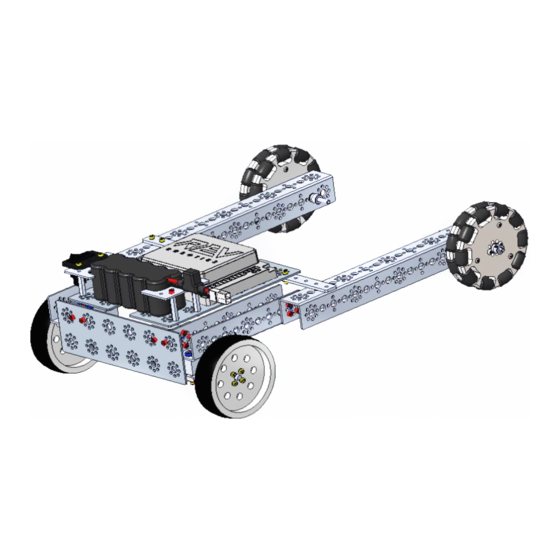
- Page 1 FIRST ® GAME CHANGERS powered by Star Wars: Force for Change 2020-2021 FIRST Tech Challenge ® Basic ‘Bot Guide for TETRIX Part 1...
- Page 2 Tech Challenge Basic ‘Bot Guide for TETRIX- Part 1 ® 2 | FIRST Sponsor Thank You ® Thank you to our generous sponsors for your continued support of the FIRST Tech Challenge! Revision 1: 7.17.2020...
-
Page 3: Table Of Contents
Tech Challenge Basic ‘Bot Guide for TETRIX- Part 1 ® FIRST Revision History Revision Date Description 7/17/2020 Initial Release Contents Contents ................................3 Introduction ................................ 5 ® What is FIRST Tech Challenge? ........................5 FIRST Core Values ............................5 ® Gracious Professionalism .......................... - Page 4 Tech Challenge Basic ‘Bot Guide for TETRIX- Part 1 ® 4 | FIRST Step 3: Add the Omni Wheel Assemblies to the Frame Chassis ..............24 Control Hub ..............................26 Step 1: Add the REV Robotics Control Hub ....................26 Step 2: Add the Left Drive Motor Power Cable .....................
-
Page 5: Introduction
Tech Challenge Basic ‘Bot Guide for TETRIX- Part 1 ® FIRST Introduction ® What is FIRST Tech Challenge? ® FIRST Tech Challenge is a student-centered program that focuses on giving students a unique and stimulating experience. Each year, teams engage in a new game where they design, build, test, and program ®... -
Page 6: Introduction To This Guide
Tech Challenge Basic ‘Bot Guide for TETRIX- Part 1 ® 6 | FIRST Introduction to this Guide About this Guide The Basic ‘Bot Guide was created as a resource for teams looking for a step-by-step instructional guide to learn how to build a basic chassis and structure of the robot. There are multiple versions of this guide, previously called the “Push Bot Guide”, this version the Basic ‘Bot Guide for TETRIX Part 1 has been created to use the new and differing parts in the 2020-2021 season’s TETRIX kit of parts. -
Page 7: Frame
Tech Challenge Basic ‘Bot Guide for TETRIX- Part 1 ® FIRST Frame Step 1: Build the left rail Parts Needed: 39067 - 160 mm channel (1) 39068 - 288 mm channel (1) 39098 - 5/16" socket head cap screw (4) 39094 - keps nut (4) Figure 1- Unassembled view Figure 2- Assembled view... -
Page 8: Step 2: Build The Right Rail
Tech Challenge Basic ‘Bot Guide for TETRIX- Part 1 ® 8 | FIRST Parts Needed: Step 2: Build the right rail 39068 - 288 mm channel (1) 39067 - 160 mm channel (1) 39098 - 5/16" socket head cap screws 39094 - keps nuts (4) Figure 3- Unassembled view Figure 4- Assembled View... -
Page 9: Step 3: Connect The Left And Right Rails
Tech Challenge Basic ‘Bot Guide for TETRIX- Part 1 ® FIRST Parts Needed: 39070 - 288 mm flat bar (1) Step 3: Connect the left and right rails 39097 - 1/2" socket head cap screws (4) 39094 - keps nuts (4) Figure 5- Unassembled view Figure 6- Assembled View “Doing your best work while treating others with respect and kindness - It’s what makes FIRST, first.”... -
Page 10: Step 4: Add Structural Support Brackets
Tech Challenge Basic ‘Bot Guide for TETRIX- Part 1 ® 10 | FIRST Step 4: Add Structural Support Brackets Parts Needed: 39281 - inside corner bracket (2) 39098 - 5/16" socket head cap screws (6) 39094 - keps nuts (6) Figure 7- Unassembled view Figure 8- Assembled view Revision 1: 7.17.2020... -
Page 11: Step 5: Add The Structural Support Plate
Tech Challenge Basic ‘Bot Guide for TETRIX- Part 1 | 11 ® FIRST Parts Needed: 39073 - flat building plate (1) Step 5: Add the Structural Support Plate 39098 - 5/16" socket head cap screws (4) 39094 - keps nuts (4) Figure 9- Unassembled view Figure 10- Assembled view Helpful Hints... -
Page 12: Step 6: Build Left Electronics Plate
Tech Challenge Basic ‘Bot Guide for TETRIX- Part 1 ® 12 | FIRST Step 6: Build Left Electronics Plate Parts Needed: 39073 - flat building plate (1) 39107 - 32 mm stand-off post (2) 39098 - 5/16" socket head cap screws (2) (red) 39097 - 1/2”... -
Page 13: Step 7: Attach Left Electronics Plate To Frame
Tech Challenge Basic ‘Bot Guide for TETRIX- Part 1 | 13 ® FIRST Step 7: Attach Left Electronics Plate to Frame Parts Needed: 39097 - 1/2" socket head cap screws (2) 39094 - keps nuts (2) Figure 13- Unassembled view Figure 14- Assembled view Helpful Hint •... -
Page 14: Step 8: Build Right Electronics Plate
Tech Challenge Basic ‘Bot Guide for TETRIX- Part 1 ® 14 | FIRST Step 8: Build Right Electronics Plate Parts Needed: 39073 - flat building plate (1) 39107 - 32 mm stand-off post (2) 39098 - 5/16" socket head cap screws 38009 - battery clip (1) [inside the electronics kit] Figure 15- Unassembled view Figure 16- Assembled view... -
Page 15: Step 9: Attach Right Electronics Plate To Frame
Tech Challenge Basic ‘Bot Guide for TETRIX- Part 1 | 15 ® FIRST Step 9: Attach Right Electronics Plate to Frame Parts Needed: 39097 - 1/2” socket head cap screws (2) 39094 - keps nuts (2) Figure 17- Unassembled view Figure 18- Assembled view Helpful Hint •... -
Page 16: Drive Motors And Drive Wheels
Tech Challenge Basic ‘Bot Guide for TETRIX- Part 1 ® 16 | FIRST Drive Motors and Drive Wheels Parts Needed: Step 1: Add Drive Wheel Motor Mounts 39089 - motor mounts (2) with included bolts (4) and included nuts (4) Figure 19- Unassembled View Figure 20- Assembled View from below the robot Figure 21- Assembled view from above the robot... -
Page 17: Step 2: Add Drive Motors
Tech Challenge Basic ‘Bot Guide for TETRIX- Part 1 | 17 ® FIRST Parts Needed: Step 2: Add Drive Motors 44260 - TorqueNADO Motor (2) with included wire wraps (2) Figure 22- Unassembled view Figure 23- Assembled View “Doing your best work while treating others with respect and kindness - It’s what makes FIRST, first.” ®... -
Page 18: Step 3: Secure Drive Motors
Tech Challenge Basic ‘Bot Guide for TETRIX- Part 1 ® 18 | FIRST Step 3: Secure Drive Motors Tighten the motor mount bolt, so the motor will not rotate Figure 24- Real view Figure 25-Left rail motor view highlighting the axle mounted away from frame Revision 1: 7.17.2020... -
Page 19: Step 4: Secure Drive Motor Wires
Tech Challenge Basic ‘Bot Guide for TETRIX- Part 1 | 19 ® FIRST Step 4: Secure Drive Motor Wires Figure 26- Secured drive motor wires Helpful Hint • Use the plastic-coated wire tie that holds the loops of motor wire together to secure the wires to the electronics plate “Doing your best work while treating others with respect and kindness - It’s what makes FIRST, first.”... -
Page 20: Step 5: Add Motor Hubs
Tech Challenge Basic ‘Bot Guide for TETRIX- Part 1 ® 20 | FIRST Parts Needed: Step 5: Add Motor Hubs 39079 - motor shaft hubs (2) with included set screws (2) Figure 27- Unassembled view Figure 28- Assembled view Helpful Hints •... -
Page 21: Step 6: Add Drive Wheels
Tech Challenge Basic ‘Bot Guide for TETRIX- Part 1 | 21 ® FIRST Parts Needed: Step 6: Add Drive Wheels 39055 - 4-inch wheels (2) 39097 - 1/2” socket head cap screws (8) Figure 29- unassembled view Figure 30- Assembled view “Doing your best work while treating others with respect and kindness - It’s what makes FIRST, first.”... -
Page 22: Caster Wheels
Tech Challenge Basic ‘Bot Guide for TETRIX- Part 1 ® 22 | FIRST Caster Wheels Parts Needed: Step 1: Build the Omni Wheel Assembly x2 36466 - 4" omni wheel halves (2); with included joining ring (1) and included screws (4) Figure 31-Unassembled view of one wheel assembly (Make two of these) Figure 32- Assembled view 1 Figure 33- Assembled view 2... -
Page 23: Step 2: Add Bronze Bushings To The Omni Wheel Assemblies
Tech Challenge Basic ‘Bot Guide for TETRIX- Part 1 | 23 ® FIRST Parts Needed: Step 2: Add Bronze Bushings to the Omni Wheel Assemblies 39091- 11 mm bronze bushings (4) Wheel assemblies from previous step Figure 34- Unassembled view from a single wheel assembly (Make two of these) Figure 35- Assembled view Helpful Hints •... -
Page 24: Step 3: Add The Omni Wheel Assemblies To The Frame Chassis
Tech Challenge Basic ‘Bot Guide for TETRIX- Part 1 ® 24 | FIRST Parts Needed: Step 3: Add the Omni Wheel Assemblies to the Frame Chassis 39100 - 1/8" axle spacers (6) 39092 - axle set collars (4) 39091 - 11 mm bronze bushings (4) REV-41-1361 –... - Page 25 Tech Challenge Basic ‘Bot Guide for TETRIX- Part 1 | 25 ® FIRST Figure 38- Both wheels fully assembled from above “Doing your best work while treating others with respect and kindness - It’s what makes FIRST, first.” ® Gracious Professionalism...
-
Page 26: Control Hub
Tech Challenge Basic ‘Bot Guide for TETRIX- Part 1 ® 26 | FIRST Control Hub Parts Needed: Step 1: Add the REV Robotics Control Hub REV-31-1595 control hub (1) REV-41-1360 screws (2) REV-41-1361 M3 Nyloc nuts (2) Figure 39- Unassembled view Revision 1: 7.17.2020... - Page 27 Tech Challenge Basic ‘Bot Guide for TETRIX- Part 1 | 27 ® FIRST Figure 40- Assembled view 1 Figure 41- Assembled view 2 “Doing your best work while treating others with respect and kindness - It’s what makes FIRST, first.” ®...
-
Page 28: Step 2: Add The Left Drive Motor Power Cable
Tech Challenge Basic ‘Bot Guide for TETRIX- Part 1 ® 28 | FIRST Parts Needed: Step 2: Add the Left Drive Motor Power Cable REV-31-1381 JST to Anderson Power Pole Cable (1) Figure 42- Top view Revision 1: 7.17.2020... -
Page 29: Step 3: Add The Right Drive Motor Power Cable
Tech Challenge Basic ‘Bot Guide for TETRIX- Part 1 | 29 ® FIRST Parts Needed: Step 3: Add the Right Drive Motor Power Cable REV-31-1381 JST to Anderson Power Pole Cable (1) “Doing your best work while treating others with respect and kindness - It’s what makes FIRST, first.” ®... -
Page 30: Power Switch
Tech Challenge Basic ‘Bot Guide for TETRIX- Part 1 ® 30 | FIRST Power Switch Parts Needed: Step 1: Add the Switch REV-31-137 Switch Figure 43- Unassembled view (The wires attached to the switch are not shown in this image) Figure 44- Assembled view (The wires attached to the switch are not shown in this image) Revision 1: 7.17.2020... -
Page 31: Step 2: Connect The Switch To The Motor And Sensor Controller
Tech Challenge Basic ‘Bot Guide for TETRIX- Part 1 | 31 ® FIRST Step 2: Connect the Switch to the Motor and Sensor Controller Parts Needed: XT30 Extension Cable “Doing your best work while treating others with respect and kindness - It’s what makes FIRST, first.” ®... -
Page 32: Battery
Tech Challenge Basic ‘Bot Guide for TETRIX- Part 1 ® 32 | FIRST Battery Parts Needed: Step 1: Adding the Battery 39057- Battery Figure 45- Unassembled view Figure 46- Assembled view Revision 1: 7.17.2020... -
Page 33: Step 2: Connect The Battery To The Switch
Tech Challenge Basic ‘Bot Guide for TETRIX- Part 1 | 33 ® FIRST Step 2: Connect the Battery to the Switch Figure 47- Top view Helpful Hints • It is recommended that the battery be secured in the holder using a zip tie or some other mechanism to prevent it from being separated from the robot during competition. -
Page 34: Final Steps
Tech Challenge Basic ‘Bot Guide for TETRIX- Part 1 ® 34 | FIRST Final Steps What’s Next? • You have now constructed the frame of your Basic ‘Bot, however, programming will be needed to make the robot functional. • Testing should be done to determine whether anything needs to be changed or optimized for the season’s game rules. -
Page 35: Appendix A - Resources
Tech Challenge Basic ‘Bot Guide for TETRIX- Part 1 | 35 ® FIRST Appendix A – Resources Game Forum Q&A https://ftcforum.firstinspires.org/ Anyone may view questions and answers within the FIRST ® Tech Challenge game Q&A forum without a password. To submit a new question, you must have a unique Q&A system username and password for your team.
Need help?
Do you have a question about the FIRST GAME CHANGERS TETRIX and is the answer not in the manual?
Questions and answers