Advertisement
Quick Links
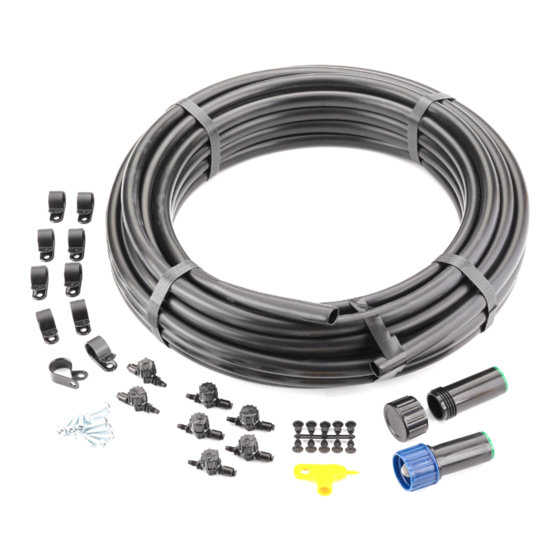
Fence-Mount Sprinkler Kit
This sprinkler system lets you water your garden along a fence or wall. When the hose is
mounted and the sprayers inserted where needed, your fence sprinkler will accommodate the
specifi c watering needs of your garden.
Your kit contains the following parts:
1
• 50' of
/
" header hose
2
• seven adjustable sprayers (two 90° and
five 180°)
• one compression end
• one hose connector with a filter washer
Planning Your Layout
Step 1: Warm the Hose
Uncoil your hose in a sunny spot and let it warm up for about 30 minutes. This will make your
hose more fl exible and easier to work with.
Step 2: Sprinkler Hose Layout
Lay out the full length of the (warm) hose along the length of fence/wall where you want to
mount it. Decide exactly where it will be mounted. If you have plants in your garden that should
not get water on their leaves, set the hose close to ground level so only the soil gets sprayed.
If there is clearance behind the sprayers (e.g., on a chain-link fence, or between boards on a
staggered board fence), you can mount the hose lower to the ground, where it is less obtrusive,
and tip the sprayers back to maintain the range of spray. Figure 1 shows a typical installation.
Figure 1: Typical hose layout.
If you are weaving the hose through a chain-link fence, you will have to keep the weave distance
at least several links apart in order to prevent crimping the hose. Also, keep in mind that the
sprinkler hose will need to be on the inside of the fence at the locations where the sprayers will
be placed.
• a hole punch
• 10 hole plugs
• 10 mounting clips (with screws)
1
XB820
Advertisement

Summary of Contents for Lee Valley Tools XB820
- Page 1 Fence-Mount Sprinkler Kit XB820 This sprinkler system lets you water your garden along a fence or wall. When the hose is mounted and the sprayers inserted where needed, your fence sprinkler will accommodate the specifi c watering needs of your garden.
- Page 2 Notes: Crimp 1. Make sure that one end of the sprinkler hose is within comfortable reach of the end of your garden hose or faucet. 2. Do not bend the sprinkler hose too tightly around corners; doing so will crimp Minimum Radius the hose.
-
Page 3: Installation
Notes: 1. The 90° and 180° sprayers look virtually identical. The only visual difference is in the small opening in the cap. The 180° sprayers have a wider opening. 2. The 180° sprayers put out a finer spray than the 90° sprayers, so their spray is slightly more susceptible to being carried by the wind. - Page 4 Slip a clip around the hose and, while holding the hose in the desired place, screw the clip in place. Sprayers on inside of fence. Clips may be wired in place. Maximum 3 ft (1 m) between clips. Figure 7: Suggestions for securing the sprinkler hose. Although you do not need to use the clips, the important thing to ensure is that the hose is held at the desired height and is not free to rotate;...
- Page 5 Step 5: Sprayer Insertion Press the threaded portion of the sprayer into the hole, keeping the sprayer in an upright position. Turn the sprayer clockwise. Once the sprayer catches, you can then simply screw the head in until it feels tight. Do not keep turning once it has been fully inserted into the hose or the attachment will be weakened.
-
Page 6: Adding To The System
XB821 50' Hose with Connectors XB823 90° Sprayers, pkg. of 2 XB825 180° Sprayers, pkg. of 5 XB827 Hole Plugs, pkg. of 10 Lee Valley Tools Ltd. Ottawa ON K2H 1C2 Canada leevalley.com © Lee Valley Tools Ltd. 2018 442 INS-138_D...
Need help?
Do you have a question about the XB820 and is the answer not in the manual?
Questions and answers