Advertisement
Quick Links
Advertisement

Subscribe to Our Youtube Channel
Related Manuals for Studio Designs Vision Craft Station 10053


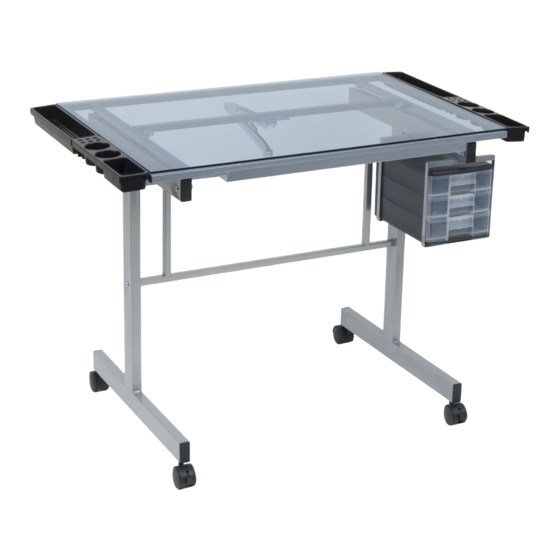
Summary of Contents for Studio Designs Vision Craft Station 10053
- Page 1 Rev. 01.21.2014...
- Page 6 INCHES MILLIMETERS 100 110...
- Page 7 1. Screw two Locking Casters (14) into holes in Legs (1). 2. Screw two Non-Locking Casters (15a) into holes in Legs (1). 3. For use on uneven floors and for increased stability, install Leg Levelers (15b) instead of Casters (14 &15a). 4.
- Page 8 1. Attach eight Brackets (16) to Top Frame (2) using eight Phillips Screws (28). 2. Attach Paint Trays (8) and Pencil Trays (9) to Brackets. 3. Attach Pencil Ledge (5) to Frame using three Phillips Screws (28). 1. Attachez huit Supports (16) au Bâti Supérieure (2) à l’aide des huit Vis Cruciformes (28). 2.
- Page 9 1. Place Top Frame (2) onto Legs and attach using Washers (21), Nuts (20) and Allen Bolts (23). 2. Attach Lift Mechanism (7) to Bottom Frame (3) using two Phillips Bolts (26) and two Flanged Nuts (19). 3. Attach Lift Mechanism (7) to Top Frame (2) using two Allen Bolts (24). 4.
- Page 10 1. Attach Top Drawer Frame (10) to Center Drawer Frame (11). 2. Attach Center Drawer Frame (11) to Bottom Drawer Frame (12). 3. Slide three Drawers (13) into Drawer Frame. 1. Attachez la Bâti Supérieure du Tiroir (10) à la Bâti Centrale du Tiroir (11). 2.
- Page 11 25 lbs. / 11,34 kg. 1. Attach Drawer Assembly to Drawer Brackets using four Phillips Screws (28). 2. Carefully place Glass Top (4) onto Top Frame and attach using two Allen Bolts (25) Please use care and good judgement when placing objects on top and shelves. DO NOT exceed the weight limits shown.
Need help?
Do you have a question about the Vision Craft Station 10053 and is the answer not in the manual?
Questions and answers