Advertisement
www.electrosmash.com/pedalSHIELD-MEGA
How to Build pedalSHIELD MEGA.
This is a 5 steps guide to assembly pedalSHIELD MEGA. With all the materials on hand it takes around 2-3
hours to build it successfully. Take your time, play your favourite background music and enjoy the fine art
of building electronics.
Step 0 – Prepare the Materials.
You would need a soldering iron, lead and cutting pliers. Additionally cutter, scissors and pliers are
convenient. The PCB has solder mask and plated holes, so it is easy to solder with any 15-30W solder
iron.
Keep in short hand the PCB plan and the Bill of Materials:
Advertisement
Table of Contents

Summary of Contents for Arduino pedalSHIELD MEGA
- Page 1 How to Build pedalSHIELD MEGA. This is a 5 steps guide to assembly pedalSHIELD MEGA. With all the materials on hand it takes around 2-3 hours to build it successfully. Take your time, play your favourite background music and enjoy the fine art of building electronics.
- Page 2 www.electrosmash.com/pedalSHIELD-MEGA STEP1 – Soldering Resistors. There are 13 resistors to be placed: 4.7KΩ resistors (7 units): R3, R4, R6, R9, R10, R12, R13. 100KΩ resistors (3 units): R5, R7, R8. 1M resistors (2 units): R1, R2. 1.2M resistor: R11. Tips before soldering: Bend the resistor leads as close to the body as possible, fit them in the footprint and once soldered cut the excess of lead as short as...
- Page 3 www.electrosmash.com/pedalSHIELD-MEGA STEP 2 – Soldering the Capacitors. There are 9 film/ceramic and 7 electrolytic caps. Soldering the caps from small to big: 6.8nF capacitors (5 units): C2, C5, C7, C8, C9. 100nF capacitors (2 units): C1, C11. 270pF capacitor: C4. ...
- Page 4 Solder each segment like the picture on the left Make sure that the smaller segments of pin headers are straight and aligned with the Arduino MEGA board. A good idea is to solder only the 1 pin of each segment, plug the shield on top of the Arduino,...
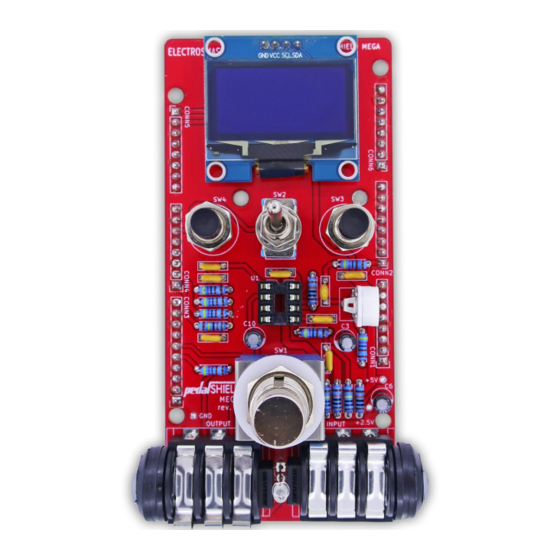
- Page 5 www.electrosmash.com/pedalSHIELD-MEGA STEP 3 – BIG Components. The big components are the last to be soldered: The OLED 1.3” Display 2 Push-Buttons 1 Toggle Switch 3PDT True Bypass foot-switch 2 Audio jacks 3mm LED Tips before soldering: ALL the big components tent to tilt when are soldered, make sure they are straight.
- Page 6 www.electrosmash.com/pedalSHIELD-MEGA STEP4 – Checking Out the Job Done. After this 4 stages you will have a mounted board exactly like the one shown below: Double check your PCB with the model component by component. Before power it up, check this 3 ticks: ☑...
Need help?
Do you have a question about the pedalSHIELD MEGA and is the answer not in the manual?
Questions and answers