
Related Manuals for 1010music Bitbox mk2 1.0.8


Summary of Contents for 1010music Bitbox mk2 1.0.8
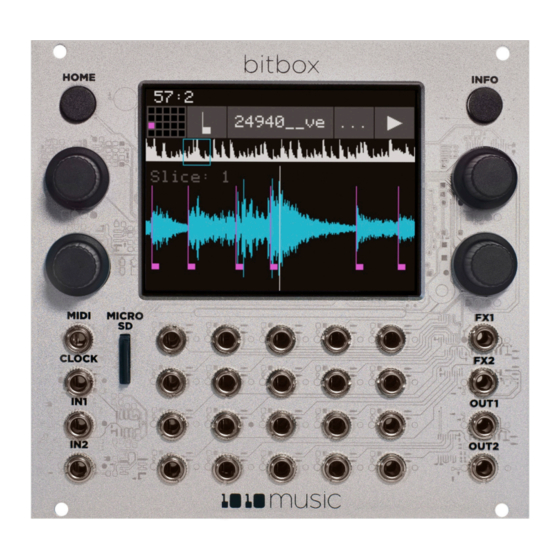
- Page 1 Bitbox mk2 1.0.8 User Manual Bitbox mk2 1.0.8 User Manual Copyright 1010music LLC 2020 Page 1 of 82...
-
Page 2: Table Of Contents
Bitbox mk2 1.0.8 User Manual Table of Contents INTRODUCTION GENERAL WORKFLOW FRONT PANEL AND CONTROLS OVERVIEW Pads Screen Overview SETUP BITBOX MK2 Choose an Orientation Rack Installation Connect an Output Connect an Input Tools Working in Flipped Mode Test Your Setup... - Page 3 Bitbox mk2 1.0.8 User Manual Tips for Synchronizing Clips: Set Up a Slicer Cell To Use Auto Scan to Create Slices: To Use Slice to Grid: To Manually Create or Remove Slices: To Use Slices to Synchronize Playback of Clip Pads:...
- Page 4 Bitbox MK2 1.0.8 User Manual WORK WITH KEYS To Play a Sample With the Traditional Keyboard: To Play a Sample, Clip or Granular Mode Pad With the Grid Keyboard: 51 To Play Slicer Mode Pads With Keys: To Select a Scale on the Grid Keyboard:...
- Page 5 Bitbox MK2 1.0.8 User Manual USE MIDI AND CV WITH BITBOX MK2 Pitch Shift Samples to Play Different Notes Using MIDI to Play Samples Chromatically To Use MIDI to Play the Currently Selected Pad Chromatically: To Use MIDI to Always Play a Specific Pad Chromatically:...
- Page 6 Bitbox MK2 1.0.8 User Manual PROCESSOR MANAGEMENT TIPS UPDATE AND SWAP FIRMWARE Switch to a New MicroSD Card While Operating Bitbox mk2 Backup Your Presets and WAV Files Install New Firmware TECHNICAL SPECS Module Specs Pin Mapping for Mini TRS Jack to MIDI 5 Pin DIN Connectors...
-
Page 7: Introduction
Bitbox MK2 1.0.8 User Manual INTRODUCTION Welcome to bitbox mk2. Bitbox mk2 puts powerful digital sampling and mangling for Eurorack at your fingertips. With this module, you can capture samples one at a time, automate creation of a multi-sample pack, or port over samples from your computer. -
Page 8: General Workflow
Bitbox MK2 1.0.8 User Manual GENERAL WORKFLOW The bitbox mk2 module allows you to record and playback samples in creative ways. When working with bitbox mk2, you create presets that store the selection of samples and parameters that you want to use together. - Page 9 Bitbox MK2 1.0.8 User Manual To further refine your sound, you use the FX screen to apply delay and reverb, and then use the Mix screen to adjust level and pan per pad. FX Screen Mix Screen To save your work, you will save the Preset. The preset stores all of the pad settings, FX settings and Mix settings.
- Page 10 Bitbox MK2 1.0.8 User Manual Pads Waveform Pad Parameters Modulation "New Rec" Parameters "Load" Load and Record Presets "Pads" Keys Grid "FX" FX Parameters Menu Mute = Push INFO = Push HOME Tools "Option" = Touch On Screen User Interface Flow Diagram...
-
Page 11: Front Panel And Controls Overview
Bitbox MK2 1.0.8 User Manual FRONT PANEL AND CONTROLS OVERVIEW The front panel of bitbox mk2 contains a touch screen, control knobs, HOME and INFO buttons, a MIDI input jack, a clock input jack, 2 audio input jacks, 20 CV input jacks and 4 audio output jacks as shown in Front Panel Overview. -
Page 12: Pads Screen Overview
Bitbox MK2 1.0.8 User Manual Below the screen and knobs there are a series of mini jacks that are used for MIDI and control voltage input and output. The MIDI input jack allows you to trigger pads and modulate signals. You can also use the MIDI clock to synchronize playback. The CLOCK input is used to sync with a CV clock signal. -
Page 13: Setup Bitbox Mk2
If the touch screen doesn’t respond right away, turn Ribbon Cable off the rack and confirm the cable orientation. 1010music Orientation on Module Copyright 1010music LLC 2020 Page 13 of 82... -
Page 14: Connect An Output
Bitbox MK2 1.0.8 User Manual modules do contain some buffering to prevent burning out the module but that only buffers for so long. Don’t power up yet. Next make sure the microSD card that came with the module is inserted into the MICRO SD slot. Most modules come with the microSD card already inserted. -
Page 15: Tools
Bitbox MK2 1.0.8 User Manual You can also use control voltage (CV) signals with bitbox. If you prefer this method, connect some CV signals from other modules or devices to one or two CV Trigger jacks in the array of jacks below the touch screen. Connect one input in the right column of CV Trigger jacks, and another input in one of the first four columns. - Page 16 Bitbox MK2 1.0.8 User Manual Page Parameter Description RecToPlay If you have RecToPlay set to ON, bitbox mk2 will automatically start to play the new sample when recording ends if the Length parameter was set to a value other than Custom for recording.
-
Page 17: Working In Flipped Mode
Bitbox MK2 1.0.8 User Manual Working in Flipped Mode When the value for Flip UI is set to ON, the user interface on the touch screen will be inverted. Use this setting when the module is installed in a rack with the touchscreen on the bottom. -
Page 18: Test Your Setup
Bitbox MK2 1.0.8 User Manual Test Your Setup Before we start creating our own presets, let’s make sure the module is setup properly by playing back some content from a preset that comes with the module and triggering playback through external inputs. - Page 19 Bitbox MK2 1.0.8 User Manual Note: ► The MIDI input is compatible with both Type A and Type B mini TRS connections. Be sure to use a TRS cable and not a TS cable. Read the blog post Mini TRS...
-
Page 20: Create A New Preset And Configure Pads
Bitbox MK2 1.0.8 User Manual CREATE A NEW PRESET AND CONFIGURE PADS Let’s get you working with bitbox mk2 by creating a new preset and configuring the different pad modes. This section will also cover managing and recording WAV files. -
Page 21: Assign Wav Files To Pads And Control Playback Options
Bitbox MK2 1.0.8 User Manual Assign WAV Files to Pads and Control Playback Options Now you will choose assign WAV files to pads and select a mode for each pad. The main screen has a 4x4 grid of 16 light gray pads. A WAV file can be assigned to each of these pads, and each pad is assigned a pad mode. -
Page 22: To Load A Wav File Into A Pad
Bitbox MK2 1.0.8 User Manual Note: ► Bitbox mk2 can support playback of up to 24 total voices across all pads at one time. Additionally, there is a limit for each pad mode as identified in the table above. See Maximum Number of Voices Supported below for more information. -
Page 23: To Configure Basic Cell Parameters
Bitbox MK2 1.0.8 User Manual You will now be on the Waveform screen. There are a number of important features on the Waveform screen. The grid icon in the top left of the screen provides a graphical representation of which pad in the grid you are configuring. You can touch it to select a different pad. - Page 24 Bitbox MK2 1.0.8 User Manual Output Option Description Out1, Out 2, FX1, The output of this pad is sent to selected output in mono. If the source is stereo, the left and right channels are added together into a mono output.
- Page 25 Bitbox MK2 1.0.8 User Manual Parameter Description Range of Values Target? Attack The time it takes for the sound to 0.0 to 100.0% The attack percentage is a reach its loudest level logarithmic scale between 0 and 9 seconds. Decay How long it takes for the sound to go 0.0 to 100.0% The decay percentage is a...
-
Page 26: To Assign A Cell To An Exclusive Playback Or Choke Group
Bitbox MK2 1.0.8 User Manual Several of the pad parameters have three black boxes below them. These pads are potential modulation targets, and these boxes are used to control the modulation parameters. We will discuss modulation later. To Assign a Cell to an Exclusive Playback or Choke Group: At the top of the ADSR parameters page, the menu option to the right of the grid icon allows you to control exclusive grouping or choking of pads. - Page 27 Bitbox MK2 1.0.8 User Manual Follow the steps in the previous section to create a sample pad. An example of a good WAV file to use for a sample pad is \Soundopolis\Humans\Cartoon_Voice_003.wav. Touch the Misc and Pos tabs on the Cell Parameters screen to view the Sample specific parameters.
- Page 28 Bitbox MK2 1.0.8 User Manual Parameter Description Range of Values Target? Root Note The base sample will play for the note specified None, C#-1 through G9 here. The sample will be pitch shifted up or down one semi-tone for each note away from the root note.
-
Page 29: Set Up A Multi-Sample Cell
Bitbox MK2 1.0.8 User Manual Set Up a Multi-Sample Cell Multi-sampling is a useful tool for improving the sound quality when playing samples pitch shifted, and when you want to map a number of different WAV files to different keys on the keyboard. - Page 30 Bitbox MK2 1.0.8 User Manual You can also use multi-sampling to map multiple waves across the keyboard. This can be useful if you have a folder full of drum sounds that you want to trigger with a keyboard. If you follow the steps above and load a folder where the files do not have root note mappings, it will load the files in alphabetical order, map the first file to note C2, and then each subsequent file to the next note above that.
-
Page 31: Work With A Clip Cell
Bitbox MK2 1.0.8 User Manual Work with a Clip Cell Use Clip Mode for WAV files where you want to use synchronized loops and quantized playback for the entire WAV file. Clip Mode works well with drum loops between one and eight measures long, but there is no hard limit to the length. -
Page 32: Tips For Synchronizing Clips
Bitbox MK2 1.0.8 User Manual Let’s talk some more about Quant Size and Sync. When a Quant Size other than None is selected, the playback of the wave file will be delayed until the next selected unit of music as specified in Quant Size. This will ensure that your playback “snaps to the grid”... -
Page 33: Set Up A Slicer Cell
Bitbox MK2 1.0.8 User Manual Set Up a Slicer Cell Slicer Mode is useful when a single WAV file has multiple sections that you want to trigger independently. For example, if you have a drum riff you may want to trigger different drum hits within the drum riff independently. - Page 34 Bitbox MK2 1.0.8 User Manual Parameter Description Range of Values Target? Sync The Sync feature prevents timing drift that OFF – playback will occur at the can occur when the length and BPM of a clip original rate. Looping will happen does not align exactly with the tempo of as soon as the sample ends.
-
Page 35: To Use Auto Scan To Create Slices
Bitbox MK2 1.0.8 User Manual scan or slice to grid. When you use auto scan, bitbox mk2 uses an internal algorithm to decide where to place the splits. You can control the sensitivity of the algorithm. When you use slice to grid, you define a fixed number of slices and bitbox mk2 will create splits that evenly divide the WAV file into the specified number of slices. -
Page 36: To Use Slices To Synchronize Playback Of Clip Pads
Bitbox MK2 1.0.8 User Manual To Use Slices to Synchronize Playback of Clip Pads: You can use slices in a clip pad to synchronize playback of the beats in the clip. When the value of the Sync parameter for a clip pad is set to Slice, bitbox mk2 will use the location of the slices in the WAV file as the location of the “beats”... -
Page 37: Save And Load Parameters In Wav Files
Bitbox MK2 1.0.8 User Manual If you want to get use granular mode to generate tonal content, use a very low Speed, a high Grain Count, small Grain Size, and small Spread. To start with something that is close to the original wav file, set the Spread to 0, Speed to 100%, Grain Size to 1024 and Grain Count to 2. -
Page 38: To Save The Values You Have Configured For A Pad Back To The Wav File
Bitbox MK2 1.0.8 User Manual These parameters are saved in a format that is commonly used by other music products. This means you can set these values in the other product and then use them in bitbox mk2, and the reverse. -
Page 39: Record A New Wav File
Bitbox MK2 1.0.8 User Manual Record a New WAV File Bitbox mk2 comes with hundreds of WAV files loaded on the microSD card. You can also record new WAV files to create your own custom sound. To Record a WAV File: Start by plugging an audio signal source into the IN1 and IN2 jacks. - Page 40 Bitbox MK2 1.0.8 User Manual Parameter Description Range of Values Length This parameter allows you to specify a Custom, 1/4, 1/2, 1 bar, 2 bars, 4 bars, 8 bars, length of time that you want to record, in 16 bars, 32 bars, 64 bars, 128 bars terms of notes and bars.
-
Page 41: If You Are Recording Wavs For The Current Preset
Bitbox MK2 1.0.8 User Manual Touch the Rec button at the top of the screen. Bitbox mk2 will start recording. If you are using threshold recording, the recording will start once the input level meets the threshold level specified. If you selected a time value for Length, recording will stop after the selected length of time. - Page 42 Bitbox MK2 1.0.8 User Manual Note: ► If you record into a loaded pad, the original WAV file remains intact on the microSD card and a new WAV file is created. ► Bitbox mk2 streams the recording directly to your microSD card. The length of your recording is limited to the space available on the microSD card.
-
Page 43: Record A Multi-Sample Pack
Bitbox MK2 1.0.8 User Manual Record a Multi-sample Pack Bitbox mk2’s Auto-Sample feature makes it easy to create a multi-sample pack if the source you are recording can be triggered by CV. You can also create a multi-sample pack manually if needed. - Page 44 Bitbox MK2 1.0.8 User Manual At the top of the Load and Record screen, look at the button to the right of the grid icon. It should say either 1x or Mx depending on how you got to this screen. If it says 1x, you are set up to record a single file. Touch the 1x button and the Mode Selector menu will drop down.
-
Page 45: To Manually Record A Multi-Sample Pack Onto Bitbox Mk2
Bitbox MK2 1.0.8 User Manual Touch the Rec button at the top of the screen and sit back and let the auto- sampler do its work. Bitbox mk2 will display which note it is currently recording. When recording is complete, the files will be saved on the microSD card in a folder named with the filename you selected. -
Page 46: Trim Wav Files
Bitbox MK2 1.0.8 User Manual Pack up the target preset (MySong in our example) to copy the multi-sample files into a sub-folder under the target preset’s folder. In this case, you would end up with the following folder: \Presets\MySong\MyBank Now you are free to delete or move the original MyBank preset if desired, or leave it there for future re-use. -
Page 47: Manage Wav Files
Bitbox MK2 1.0.8 User Manual Manage WAV Files Bitbox mk2 comes with hundreds of WAV files bundled with the firmware. You can load WAV files into pads in order to add them to a preset. We talked about how to configure pads previously in this document. -
Page 48: To Delete, Save As Or Rename A Wav File
Bitbox MK2 1.0.8 User Manual To Delete, Save As or Rename a WAV File: When you use bitbox mk2 to delete a WAV file, that file is removed from the microSD card. This file will no longer be available for use by presets. This means that any presets that previously used this WAV file will no longer include this WAV file. -
Page 49: Save Copies Of Wav Files With A Preset
Bitbox MK2 1.0.8 User Manual To Remove a WAV File from a Pad: To remove a WAV file from a pad without deleting the file: Go to the Pads screen and turn the lower right knob to access the clipboard menu. -
Page 50: Work With Keys
Bitbox MK2 1.0.8 User Manual WORK WITH KEYS The Keys screens provide two alternative ways for you to play WAV files that have been loaded into pads. When you select a sample or clip pad to play with Keys, bitbox mk2 will play the WAV file for that pad pitch shifted based on the triggered note. -
Page 51: To Play A Sample, Clip Or Granular Mode Pad With The Grid Keyboard
Bitbox MK2 1.0.8 User Manual To Play a Sample, Clip or Granular Mode Pad With the Grid Keyboard: Go to the Pads screen and select a pad that has a tonal sound. Push INFO twice to display the Pad Parameters screen. - Page 52 Bitbox MK2 1.0.8 User Manual Parameter Value Explanation Launch Trigger This will cause the WAV slice to play from beginning to end Mode when a trigger is received. Other values will work, but let’s use this for the example. Loop Mode We will turn off looping for this example.
-
Page 53: To Select A Scale On The Grid Keyboard
Bitbox MK2 1.0.8 User Manual Note: ► On the traditional keyboard, the last slice will be played for all notes above the last slice. Nothing will play for notes below C2. ► If you use the Grid-based keyboard with a slicer pad, the slices are mapped to the notes available in the selected scale. -
Page 54: Apply Effects
Bitbox MK2 1.0.8 User Manual APPLY EFFECTS Bitbox mk2 has two effects that can be applied to as many pads as you want. You apply an effect by selecting the send amount for the pad for each of the desired effects (Delay and Reverb) and then configuring the parameters for each effect. - Page 55 Bitbox MK2 1.0.8 User Manual Effect Parameter Settings Mod Target? Delay Delay Determines the delay length. When Beat Sync is On, delay is specified in musical intervals: 1/64, 1/32, 1/16, 1/8T, 1/16D, 1/8, 1/4T, 1/8D, 1/4, 1/2T, 1/2, 1 bar When Beat Sync is Off, delay is specified as a percentage from 0% to 100%.
-
Page 56: Adjust The Mix
Bitbox MK2 1.0.8 User Manual ADJUST THE MIX On the Mix screen you can independently adjust the volume and pan of each pad. The number on the pad represents the dB level of the audio output. The bar at the bottom of the grid pad represents the pan position for the pad. -
Page 57: Manage Presets
Bitbox MK2 1.0.8 User Manual MANAGE PRESETS Bitbox mk2 stores a set of pad configurations and mixer settings as a preset. You can save as many presets as you want, as long as there is room for the files on your microSD card. -
Page 58: To Save Changes To A Preset
Bitbox MK2 1.0.8 User Manual All presets have a file named preset.xml under the folder that has the name of the preset. This file contains all of the settings for this preset. We covered how to create a new preset in Starting a New Preset above. -
Page 59: To Pack A Preset
Bitbox MK2 1.0.8 User Manual To Pack a Preset: After you spend time carefully creating a preset, you don’t want to worry about it getting broken if you make changes to that WAV file or re-organize your sample library. You may also want to gather up all of the files used in a preset so you can move it to another microSD card or archive it on your computer. -
Page 60: To Rename A Preset
Bitbox MK2 1.0.8 User Manual To Rename a Preset: Press the HOME button repeatedly until you see the Menu screen, then touch Presets to display the Preset Management screen. Use the control knobs to scroll through the list of presets. The blue highlight indicates the currently selected preset. -
Page 61: Work With Preset Files On The Microsd Card
Any new recordings you make will be stored in the preset sub folder. Bitbox mk2 can open presets from other 1010music samplers, but when you save them, you might lose the settings related to features not supported by this module. For example, if you open a blackbox preset on bitbox mk2 and then save it, you will lose the sequencer information from the preset. -
Page 62: When Will My Legacy Bitbox Mk1 Presets And Wav Files Get Cleaned Out Of The Root Folder
Bitbox MK2 1.0.8 User Manual When will my legacy bitbox mk1 presets and WAV files get cleaned out of the root folder? We won’t move them automatically. We recommend that you pack up all of your presets one by one, which will copy all of the files used by the presets into their respective folders. -
Page 63: Use Midi And Cv With Bitbox Mk2
Bitbox MK2 1.0.8 User Manual USE MIDI AND CV WITH BITBOX MK2 You can use control voltage (CV) and MIDI signals with bitbox mk2 to further control your music. Both MIDI and CV can be used to: ■ Trigger pad hits ■... -
Page 64: To Use Midi To Always Play A Specific Pad Chromatically
Bitbox MK2 1.0.8 User Manual Push HOME to go back to the Pads screen, and select a loaded pad. This will be easiest to hear if you choose a WAV file that has a tone (not a drum hit). Start playing notes on the MIDI controller and the selected pad will be played pitch shifted. -
Page 65: To Use Cv To Play Samples Chromatically
Bitbox MK2 1.0.8 User Manual Note: ► If you have the same channel assigned to both a specific pad and to the MIDI Keys setting, the assigned pad and the currently selected will both respond to the MIDI input. ► You can have more than one pad mapped to a specific MIDI channel. In this case, bitbox mk2 will play all mapped pads when a note is received on that channel. -
Page 66: Modulate Pad And Effect Parameters
Bitbox MK2 1.0.8 User Manual Modulate Pad and Effect Parameters Bitbox mk2 allows you to modify the values of pad and effect parameters in real time using external signals. For example, you can use MIDI Velocity to control the Level of a pad, or EXT1 to adjust the filter. - Page 67 Bitbox MK2 1.0.8 User Manual Modulation Description Source none No modulation source will be used. EXT1 to EXT8 External Control Voltage connected to one of the numbered EXT ports as shown in the image on the right. IN1 and IN2...
-
Page 68: To Use Midi Cc In Learn Mode To Modulate Parameters
Bitbox MK2 1.0.8 User Manual NOTE: ► EXT1 through EXT8 can be used as modulation sources when these pads are triggered via CV. Modulation will not be applied for these modulation sources when MIDI is used to trigger them. ► The Modulation sources other than MIDI CC only impact the pad if the modulation signal is received on the MIDI In channel for this pad. -
Page 69: Control Slice Playback
Bitbox MK2 1.0.8 User Manual Control Slice Playback There are few different ways to use CV and MIDI signals to control the playback of slicer pads. You can use MIDI to map each slice to a MIDI Note. You similarly map each slice to a CV voltage range. -
Page 70: To Use A Cv Signal To Select Specific Slices
Bitbox MK2 1.0.8 User Manual The steps above show a simple example of using MIDI alone to trigger different slices within one pad. You can use this with Loop Mode ON with Launch Modes of Gate or Toggle to achieve different effects. -
Page 71: To Control The Slice Sequence With A Midi Or Cv Signal
Bitbox MK2 1.0.8 User Manual Press INFO until you see the Waveform screen. Trigger playback of this pad by pressing the triangular Play button in the top right corner of the screen while varying the voltage sent to the selected port. Each time you press play, the Trig modulation will play the slice mapped to the current CV value. - Page 72 Bitbox MK2 1.0.8 User Manual Slice Seq will not work unless we choose a modulation signal to work with it. Touch one of the three black boxes below the Slice Seq parameter to bring up the Modulation Parameters screen. Choose a value for Source. For demonstration purposes we suggest you choose TRIG and touch the pad or push the Play button to trigger playback.
-
Page 73: Synchronize With An External Clock
Bitbox MK2 1.0.8 User Manual Synchronize with an External Clock There are three different musical clocks that you can use with bitbox mk2: Name Description Priority Clock In Bitbox mk2 gets the CV Clock signal from an input to the Clock jack on the front panel of the module. -
Page 74: Reset The Clock
Bitbox MK2 1.0.8 User Manual Reset the Clock You can use the following methods to reset the clock counter back to 0:0: ■ Stop the CV clock input for a few seconds ■ Send a Clock Start signal over MIDI ■... -
Page 75: Sharing Of Midi Input Channels
Bitbox MK2 1.0.8 User Manual Sharing of MIDI Input Channels How do all of these MIDI Input channel assignments work together? Basically, they all work together, with one big exception for Omni settings. Any channel that is assigned to anything else will no longer be included in the list of channels responded to by a parameter with the Omni setting. -
Page 76: Create Preset Templates For Re-Use
Bitbox MK2 1.0.8 User Manual CREATE PRESET TEMPLATES FOR RE-USE Preset template support was added to help users who like to set up their presets a certain way each time, and those who want to configure different presets in preparation for a live performance. -
Page 77: Processor Management Tips
Bitbox MK2 1.0.8 User Manual PROCESSOR MANAGEMENT TIPS If you have experienced drop outs or crackling sounds with bitbox mk2, you have probably pushed the processor to its limits. Bitbox mk2 does not limit what you can do based on anticipated processor load. We have tried to balance the design of the system to optimize what you can do without over-driving the processor while still giving you room to make creative choices. -
Page 78: Update And Swap Firmware
You can find the latest firmware images on the forum at https://forum.1010music.com. You must be a registered user of the forum to access the download files. Forum registration is free. - Page 79 Bitbox MK2 1.0.8 User Manual Turn off power to the Eurorack. Place the microSD card in your module. While powering up the unit, hold the INFO button. When you see the message about upgrading the firmware, you can let go.
-
Page 80: Technical Specs
MIDI connector and the labels of the connection components of a mini TRS jack. 1010music bitbox mk2 is compatible with both TRS Type A and TRS Type B configurations. The included MIDI adapter uses the following PIN mapping. -
Page 81: On-Board Memory
Bitbox MK2 1.0.8 User Manual On-Board Memory Bitbox mk2 has 64MB of on-board RAM. However, this is a cache--not a hard limit to what can be loaded at once. Maximum Sample Length Bitbox mk2 streams longer samples from the microSD card, so the maximum length is a function of the maximum file size for a sample. -
Page 82: Stay Up To Date
1010music.com/mk2docs. Connect with Other Bitbox mk2 Users There is a very active community of users of 1010music modules at https://forum.1010music.com. If you have a question about the module that isn’t answered in this manual, this is your best source for help. We actively monitor the wish list sub-forums for ideas for future versions of our products.
Need help?
Do you have a question about the Bitbox mk2 1.0.8 and is the answer not in the manual?
Questions and answers