IBC AHU Series Installation & Operating Manual
Air handling appliances
Hide thumbs
Also See for AHU Series:
- Installation and operating manual (63 pages) ,
- Quick reference installation manual (2 pages)
Table of Contents
Advertisement
Advertisement
Table of Contents

Related Manuals for IBC AHU Series


Summary of Contents for IBC AHU Series
- Page 1 INSTALLATION & OPERATING MANUAL Air Handling appliances AHU 800 AHU1200 AHU 1600...
-
Page 3: Table Of Contents
Contents Safety information Specifications Heating capacity Cabinet and air supply dimensions Dimensions for the AHU 800 model Dimensions for the AHU 1200 model Dimensions for the AHU 1600 model Thermostat connections 1.0 Introduction 1.1 Standard features and benefits 1.2 Conformity 2.0 Installation 2.1 Locating the appliance 2.1.1 Conditioned space... - Page 4 Built-in diagnostics feature 3.6 Operating the appliance with a mobile app 3.6.1 Loading IBCconnect 3.6.2 Using the app to connect to IBC's AHU WiFi 3.6.3 Programming the air handling unit using the app 3.6.4 Using the app to view the AHU's information 3.7 Configuring settings and parameters via a USB text file...
- Page 5 5.3 Fault Codes Air handling appliance - parts diagram...
- Page 6 This page is intentionally left blank.
-
Page 7: Safety Information
Safety information Safety information Manual safety markings Danger Warning Points out an immediate hazardous Points out a potential hazardous situation that must be avoided to situation that must be avoided to prevent serious injury or death. prevent serious injury or death. Caution Note Points out a potential hazardous... - Page 8 The air handler must be installed so that electrical components are not exposed to water during operation. Note All wiring on IBC air handlers must adhere to the National Electrical Code and/or local regulations. Note All appliances conform to CSA C22.2 NO. 236-15 and UL 1995 Stds. Water coil conforms to NSF / ANSI Std.
-
Page 9: Specifications
Specifications Specifications Specification AHU 800 AHU 1200 AHU 1600 Max. water temperature (°F/C°) 195 / 90 Coil performance at 180°F (Btu/hr) 66,800 80,600 99,300 Water pipe connections (inches) ¾ MPT External static pressure (" wc) 0.50 Max. operating water pressure (PSI) Width (inches) 17.5 24.5... -
Page 10: Heating Capacity
Section: Specifications Heating capacity AHU 800 - Heating Capacity (Entering Dry Bulb Temperature 70°F) @ 800 CFM Entering Water Temperature 3 GPM 4 GPM 5 GPM 195°F (90°C) 68.6 MBH 73.2 MBH 76.2 MBH 190°F (88°C) 65.7 MBH 70.2 MBH 73 MBH 180°F (82°C) 60 MBH... -
Page 11: Cabinet And Air Supply Dimensions
Cabinet and air supply dimensions AHU 1600 - Heating Capacity (Entering Dry Bulb Temperature 70°F) @ 1600 CFM Entering Water Temperature 3 GPM 4 GPM 5 GPM 195°F (90°C) 96.9 MBH 106.7 MBH 113.2 MBH 190°F (88°C) 92.9 MBH 102.3 MBH 108.6 MBH 180°F (82°C) 84.9 MBH... - Page 12 Section: Specifications Figure 3 Top supply air opening Figure 4 Bottom return air opening Figure 5 Left side return air opening Figure 6 Right side return air opening...
-
Page 13: Dimensions For The Ahu 1200 Model
Dimensions for the AHU 1200 model Dimensions for the AHU 1200 model Figure 7 Supply and return air, boiler supply and return Figure 8 Frontal view Figure 9 Top view Figure 10 Bottom view... -
Page 14: Dimensions For The Ahu 1600 Model
Section: Specifications Figure 11 Left side return air opening Figure 12 Right side return air opening Dimensions for the AHU 1600 model Figure 13 Supply and return air, boiler supply and Figure 14 Frontal view return... - Page 15 Dimensions for the AHU 1600 model Figure 15 Top view Figure 16 Bottom view Figure 17 Left side return air opening Figure 18 Right side return air opening...
-
Page 16: Thermostat Connections
Section: Specifications Thermostat connections Three types of thermostats are compatible with the appliance: conventional, power stealing, and OpenTherm. Low Voltage Terminal Description Notes 24V power Power to the low voltage thermostat. Heating Stage 1 Thermostat connects R to W1 for first stage heating. Note: A jumper between W1 and W2 will initiate W2 speed. - Page 17 De-humidifer De-humidifier 24VAC powered De-humidifier Closes to activate the de- humidifier. OpenTherm OpenTherm Master To X-13 (1-2) on boiler (IBC The air handling appliance SFC/SFB series) (master) communicates to (controls) the boiler (subordinate). OpenTherm Slave From OpenTherm thermostat The thermostat (master) controls the air handling appliance (subordinate).
- Page 18 This page is intentionally left blank.
-
Page 19: Introduction
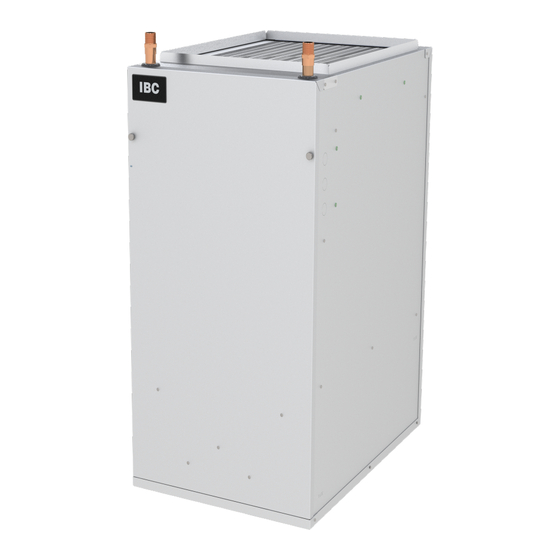
1.0 Introduction The IBC air handling appliance is designed for ducted heating and cooling. The appliance provides up to four mounting options for flexibility and ease of installation. Return air duct connections can be connected left, right, and bottom to suit the appliance's mounting position. For information on mounting... -
Page 20: Conformity
Included - sensors for supply air, return air, supply water, return water, humidifier, de- humidifier, and frost protection Not included - (optional) outdoor sensor (IBC Part # 240-025), air conditioning coil supply, air sensor kit Maximum return air temperature 122°F (50°C) 1.2 Conformity... -
Page 21: Installation
2.0 Installation Inspect shipment carefully for signs of damage. All equipment is carefully inspected and packed. IBC’s responsibility ceases upon delivery of the air handling appliance to the carrier. Any claims for damage or shortage must be filed immediately against the carrier. No claims for variances or shortages will be allowed by the manufacturer. -
Page 22: Closet
Section: Installation 2.1.5 Closet The appliance is approved for installation in a closet. Figure 19 View from top of air handling Figure 20 Front view of air handling appliance in a appliance and duct in a closet closet with ducting on the left Clearance to Orientation Clearance for servicing... -
Page 23: Serviceability
2.1.7 Serviceability 2.1.7 Serviceability Install the appliance so that the front access panel is readily accessible for servicing. The front panel must be removed for access to the filter for replacement and access to the control board for wiring and setup. -
Page 24: Positioning The Air Handling Unit
Section: Installation If installing the appliance with the air supply opening on the right, you will need to reposition the air filter brackets. For instructions, see Repositioning the air filter brackets on page 2.2.2 Positioning the air handling unit You can install the appliance so the air flows in a vertical up-flow or down-flow direction, or in a horizontal left or right direction. -
Page 25: Mounting An Appliance On The Wall
2.2.4 Mounting an appliance on the wall Figure 27 : Air conditioning/heat pump cased coil Figure 28 : Heat pump cased coil on the bottom of mounted on top of the appliance - upflow the appliance on the return side - upflow 2.2.4 Mounting an appliance on the wall Mount the appliance with a pair of field-supplied wall brackets. -
Page 26: Repositioning The Air Filter Brackets
Section: Installation 2.2.5 Repositioning the air filter brackets All appliances are delivered with the filter positioned for an appliance installed with a left or bottom return air supply opening. If you install the appliance with a right return air supply orientation for ducting, you will need to reposition the air filter brackets in the opposite position. - Page 27 2.2.5 Repositioning the air filter brackets Remove the wing nuts from the lower right Reposition the top and bottom bracket. brackets on the opposite side. Slide the filter into the repositioned brackets.
-
Page 28: Duct Work
Section: Installation 2.3 Duct work Ducting design and installation should adhere to SMACNA and/or ASHRAE guidelines. Install the ducting system to NFPA 90B (latest edition). Adhere to the following: Size the supply air plenum duct fitting to the size of the appliance's supply air opening, and extend for 3' above the appliance. -
Page 29: Ducting Installed In Conditioned Space
2.3.2 Ducting installed in conditioned space Supply / Return Air Trunk Size CFM at .3"wc external static pressure (galvanized duct) Round Rectangular CFM range 8" 8 x 6 160-190 8 x 7 190-230 9" 8 x 8 230-275 10" 10 x 8 275-360 11"... -
Page 30: Connecting The Appliance To The Boiler
Section: Installation Figure 30 Shears' opening 2.4 Connecting the appliance to the boiler Generally it’s best to place the appliance as close as practical to the boiler. If placing the appliance away from the boiler, ensure the piping system is designed to allow the easy removal of air from the boiler piping and easy flushing of the system. - Page 31 2.4.1 Sizing pumps Integral pump Check valve (field supplied) Fill station or glycol feeder (field supplied) Figure 31 Basic installation: boiler / water heater with pump Air Handler Coil Head Loss - AHU 800 Flow rate (gpm) Fluid pressure drop (ft/water) Table 8 Air handler coil head loss at 180°F (82°C) - AHU 800...
-
Page 32: Using Propylene Glycol
10 feet between the appliance and the tankless water heater using ¾" copper piping. The table below provides pipe sizing specifications for IBC's tankless water heater. Refer to other manufacturers' manuals for correct sizing of pipes. - Page 33 2.5 Connecting the appliance to a tankless water heater Connection to the space heating circuit through a drinkable water system as shown may be prohibited by local code. Non-ferrous pump (sized for combined head loss of boiler/water heater, air handler - interconnecting piping) Check valve (may be built into pump) Potable water expansion tank...
-
Page 34: Electrical Connections
Section: Installation 2.6 Electrical connections All electrical wiring to the boiler (including grounding) must conform to local electrical codes and/or the National Electrical Code, ANS/NFPA No. 70 – latest edition, or the Canadian Electrical Code, C22.1 - Part 1. In addition, you should refer to the boiler's installation manual. The control board diagram below shows the various wiring connections such as the thermostat, accessories, heat pump, and external pump. -
Page 35: Wiring Of The External Pump And 120Vac Line
2.6.1 Wiring of the external pump and 120VAC line 2.6.1 Wiring of the external pump and 120VAC line You will need to use a 3 mm flat-bladed screwdriver to wire the external pump and the 120VAC line. Insert a wire into the connector (at the front of the block). Inserting a screwdriver into the connector releases the wire. - Page 36 Section: Installation An internal time delay is preset, enabling the W2 blower speed after a preset period of time. A jumper between W1 and W2 will initialize this speed without the time delay. Figure 36 Single-stage heating, on-demand heat source...
- Page 37 2.6.2 Connecting line voltage - examples for different scenarios An internal time delay is preset enabling the W2 blower speed after a preset period of time. A jumper between W1 and W2 will initialize this speed without the time delay. Optional Figure 37 Single-stage heating with fan control, on-demand heat source...
- Page 38 Section: Installation An internal time delay is preset enabling the W2 blower speed after a preset time period. A jumper between W1 and W2 will initialize this speed without the time delay. Optional Figure 38 Single-stage heating, single-stage cooling, fan control, on-demand heat source...
- Page 39 2.6.2 Connecting line voltage - examples for different scenarios An internal time delay is preset enabling the W2 blower speed after a preset duration of time. A jumper between W1 and W2 will initialize this speed without the time delay. Optional Not used Reversing valve (O or B) is selectable via the blower control interface.
- Page 40 Section: Installation Required if boiler does not have an integral pump. Dry contact from air handler to boiler / enables call for heating Figure 40 Single-stage heating from boiler, primary/secondary piping...
- Page 41 2.6.2 Connecting line voltage - examples for different scenarios Required if boiler does not have an integral pump. Dry contact from air handler to boiler / enables call for heat Figure 41 Single-stage heating with fan control, boiler with primary/secondary piping...
- Page 42 Section: Installation Required if boiler does not have an integral pump. Dry contact from air handler to boiler / enables call for heat. Figure 42 Single-stage heating, single-stage cooling, boiler with primary/secondary piping...
- Page 43 2.6.2 Connecting line voltage - examples for different scenarios Required if boiler does not have an integral pump. Dry contact from air handler to boiler / enables call for heat. Timer must close TT to create a boiler-on command in the HP mode. This time delay is initialized after establishing a W1 signal.
- Page 44 Section: Installation Required if boiler does not have an integral pump. Dry contact from air handler to boiler / enables call for heat. Reversing valve (O or B) is selectable via the blower control interface W1 = heat pump, W2 = energize TT for boiler - removes heat pump Not used Figure 44 Single-stage heat pump with boiler backup, primary/secondary piping (2-stage thermostat)
- Page 45 2.6.2 Connecting line voltage - examples for different scenarios Required if boiler does not have an integral pump. Dry contact from air handler to boiler / enables call for heat W1 = boiler + low fan, W2 = boiler + high fan Not used Figure 45 Two-stage cooling with boiler heating (2-stage thermostat)
- Page 46 Section: Installation Required if boiler does not have an integral pump Dry contact from air handler to boiler / enables call for heat W1 = boiler + low fan, W2 = boiler + high fan Not used Figure 46 Single-stage cooling with boiler heating (2-stage thermostat)
-
Page 47: Operation
3.0 Operation Once installation of the appliance is completed, and before operating the appliance, review the following guidelines: Checklists for electrical conditions, ducting and water connections Default settings Default fan speed settings Sequence of operation LED status indicators. Operating the appliance with a mobile app Using the app to view the appliance's settings 3.1 Checklist for electrical conditions, ducting and water connections... -
Page 48: Default Settings
Section: Operation Checking boiler / water heater settings Check □ Ensure the water temperature to the heating coil is sufficient to meet the heating demands of the space. 3.2 Default settings The following table shows the factory-default settings. Default - Basic Settings Heating Mode 1 stage Cooling Mode... -
Page 49: Sequence Of Operation
3.4 Sequence of operation 3.4 Sequence of operation 3.4.1 Heating Mode Upon a call for heat from the thermostat: R to W1 or W2 is energized. The External Pump relay is closed, energizing the external pump if connected (required when connecting the air handling appliance to a tankless water heater or SL series boiler). -
Page 50: Humidification Mode
Section: Operation When heating demand is satisfied: The air handling appliance opens the compressor S1 and /or S2 contacts. The fan continues to operate for 45 seconds. 3.4.4 Humidification Mode Upon a call for humidification from the thermostat: G to W is energized. The humidifier's contacts (24V output) will close. -
Page 51: Led Status Indicators
3.5 LED status indicators 3.5 LED status indicators The appliance displays four LED indicators, each representing an operating status. POWER (Green background) FAULT (Red HEAT (Green COOL(Green background) background) background) State LED(s) Description Standby FAULT HEAT COOL Each LED blinks on and off in a “chasing”... -
Page 52: Operating The Appliance With A Mobile App
All air handlers come configured with default factory settings. IBC's free mobile app "IBCconnect" (Android or iOS app) enables users to monitor and adjust default settings in a single air handling appliance. This app is compatible only with Android and iOS devices and with the IBC air handler. Note Alternatively, it's possible to change settings using a USB stick with a custom configuration text file. -
Page 53: Using The App To Connect To Ibc's Ahu Wifi
IBCconnect app and the IBC air handler. IBC's AHU has a WiFi access point built into it. Your device needs to be connected to IBC's AHU WiFi point before the app can be used to control or monitor IBC's air handler. This is done through the app's WiFi network settings. - Page 54 Section: Operation If there are multiple IBC-AHUs in the area, the appliance with the strongest signal will likely be the controller you want to connect to. 2. Select IBC-AHU-xxxxx. 3. The first time you connect, enter 1234567890 when prompted for a password.
-
Page 55: Programming The Air Handling Unit Using The App
3.6.3 Programming the air handling unit using the app The IBC factory pre-programs the name of the model (AHU 800, AHU 1200 or AHU 1600) in the appliance. However, you will need to use the app to set the heating and cooling mode and to change... - Page 56 Section: Operation To set the mode using the app: IBCconnect 1. Tap (menu icon), and select Basic Settings. 2. Set the Heat Mode and Cool Mode. 3. To make adjustments to settings, tap (menu), and then select Advanced Settings. We recommend setting "Tankless" to "On" in most applications for optimal performance.
-
Page 57: Using The App To View The Ahu's Information
5. To check the model and mode, go to (menu) and select About. 3.6.4 Using the app to view the AHU's information Once the device is connected to IBC's AHU WiFi, the following screens will display: Figure 47 : Android mobile showing message device is... - Page 58 Section: Operation Note If you want to connect to another air handling appliance, on the landing page tap the WiFi SETTINGS button, and choose the required AHU WiFi connection. To return to the landing page, exit the app, and then reopen it. 1.
-
Page 59: Configuring Settings And Parameters Via A Usb Text File
Note: If device is not maintaining a connection with IBC's AHU WiFi If the IBCconnect app is unable to maintain a connection to the IBC AHU WiFi, the IBCConnect app footer will show an "X" icon above WiFi. It is likely the device is attempting to perform uploads in the background. - Page 60 This page is intentionally left blank.
-
Page 61: Service And Maintenance
4.0 Service and maintenance The IBC air handling appliance is designed for durability and easy access to the main components: control board, fan assembly, hot water coil assembly, and filter. Over time, components such as sensors may require replacing and servicing. Note that failure to use the correct procedures or parts could result in unsafe operation. - Page 62 Section: Service and maintenance Remove the two Molex plugs from the Detach the cable and grommet. control board. Slide out the fan assembly. Note When you install the replacement fan assembly: Ensure that you install the fan assembly, so that the fan cables can reach the control board, that is, the cables are positioned towards the front left of the fan...
-
Page 63: Replacing The Hot Water Coil Appliance
4.2.2 Replacing the hot water coil appliance 4.2.2 Replacing the hot water coil appliance Remove the two screws from the front cover, and Carefully unclip the three set aside. cables, and lean them away from the hot water coil. Remove the nuts and bolts. Slide out the fan coil. -
Page 64: Replacing The Control Board
Section: Service and maintenance 4.3 Replacing the control board After you replace the control board in the appliance, you will need to program some settings using app. IBCconnect To replace the control board: 1. Unplug all the connectors from the control board. 2. - Page 65 4.3 Replacing the control board 6. Plug in all connectors (temperature sensor from the coil, connector for the transformer, connector for fan power, connector for fan control, connector to the door switch, and the ground wire connector). Now you must use the air handler app ( to program the model name, mode, and IBCconnect change default settings (if desired).
-
Page 66: Temperature Sensors
Section: Service and maintenance d. Select (SAVE). After saving, the AHU controller will restart. e. Close the app, and then open it again. For information on setting the cooling and heating mode and other settings, see Programming the air handling unit using the app on page 4.4 Temperature sensors The resistance of the temperature sensors varies inversely with temperature. - Page 67 4.4 Temperature sensors Resist. Resist. Temp. °F/°C Temp. °F/°C Ω – Ohm Ω – Ohm 0 / -18 85,362 100 / 38 5,828 5 / -15 72,918 105 / 41 5,210 10 / -12 62,465 110 / 43 4,665 15 / -9 53,658 115 / 46 4,184...
- Page 68 This page is intentionally left blank.
-
Page 69: Troubleshooting
5.0 Troubleshooting This section includes a table of warning and error messages that may appear on the appliance as well faults that may appear on the air handling appliance app. A problem that does not prevent the operation of the air handler is declared as a "warning". A problem that prevents the appliance from operating is declared as an "error"... - Page 70 Section: Find troubleshooting for IBC Technologies' air handling appliances. Fault Code/Error Message Description Possible Fix Dehumidifier Temperature Sensor Sensor not connected or Check the sensor. For resistance faulty. reading, see Table 13. Outdoor Temperature Sensor Sensor not connected or Check the sensor. For resistance faulty.
- Page 71 5.0 Troubleshooting Fault Code/Error Message Description Possible Fix RTOS Fault 2 Software fault Contact IBC Technical Support for software upgrade. Table 14 Warnings and error messages shown on the air handler unit app...
- Page 72 Section: Find troubleshooting for IBC Technologies' air handling appliances. Air handling appliance - parts diagram...
- Page 73 Air handling appliance - parts diagram Item Number P-Kit Number Description P-1000 Door assembly - AHU 800 P- 1019 Door assembly - AHU 1200 P-1022 Door assembly - AHU 1600 P-1001 Air filter size 25 x 16 x 1 - AHU 800 Air filter size 25 x 20 x 1 - AHU 1200, - AHU 1200 P-1008 Door switch, SPST-NO.
- Page 74 Revision history R0 (June 2019) Initial release. R1 (July 2019) Updated wiring diagrams and made minor edits. R2 (October 2019) Updated wiring diagrams, added LED status indicators, and information on using a text file to modify settings in multiple air handlers. R3 (November) Added table of basic default settings and other minor changes.
- Page 75 856-735-5584 Toll Free: 1-844-HEAT-IBC/ 1-844-432-8422 www.ibcboiler.com Information in this document is subject to change without notice. IBC assumes no responsibility for changes made to the manual due to clerical errors, to regulation changes, or to product development. March, 2021 120-324E-R4 ©...
Need help?
Do you have a question about the AHU Series and is the answer not in the manual?
Questions and answers